Bicycle tire tubes are the most prolific piece of trash that is generated by the bicycling industry. Luckily it’s nowhere near the poundage of old car tire waste out there. Still because it’s the thing most often replaced on a bike, people have found several clever ways to use punctured tubes instead of putting them in the landfill.
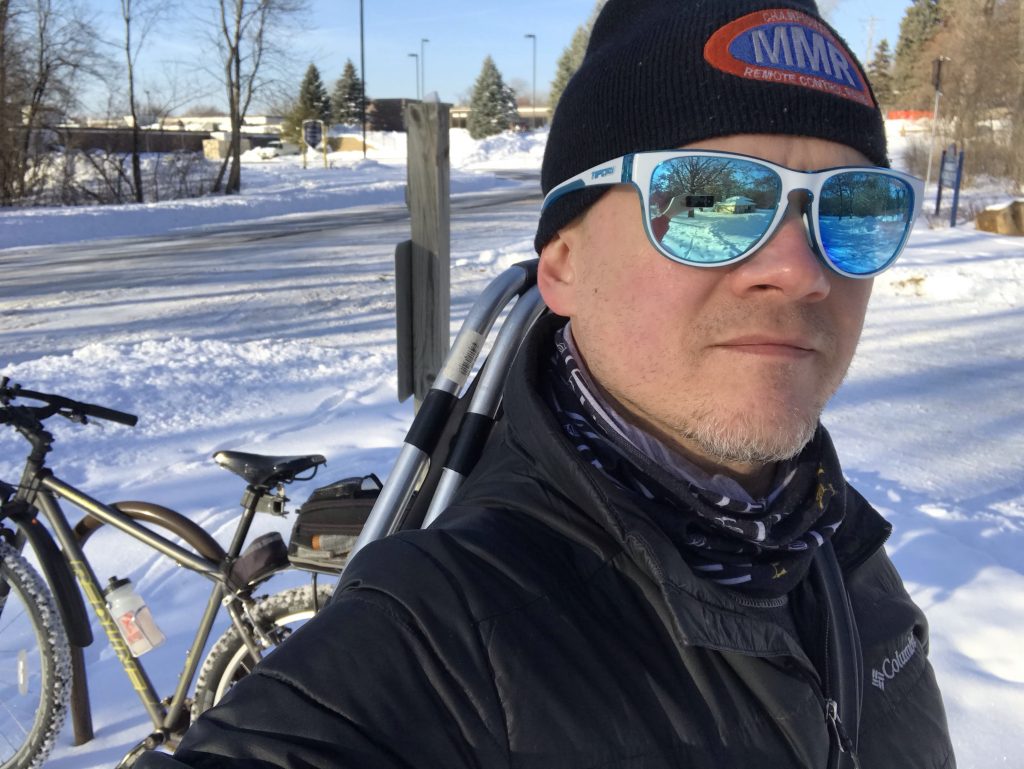
I like to keep one in my bike trunk bag for carrying things. I use the tube as a shoulder belt to strap things to my back. I’ve used them to carry a shovel, a pole saw, and most recently: snowshoes.
I used one in January to go snowshoeing at my local nature center:
WP Strava ERROR 403 Forbidden - See full error by adding
define( 'WPSTRAVA_DEBUG', true );
to wp-config.php
Rigging With Bike Tubes
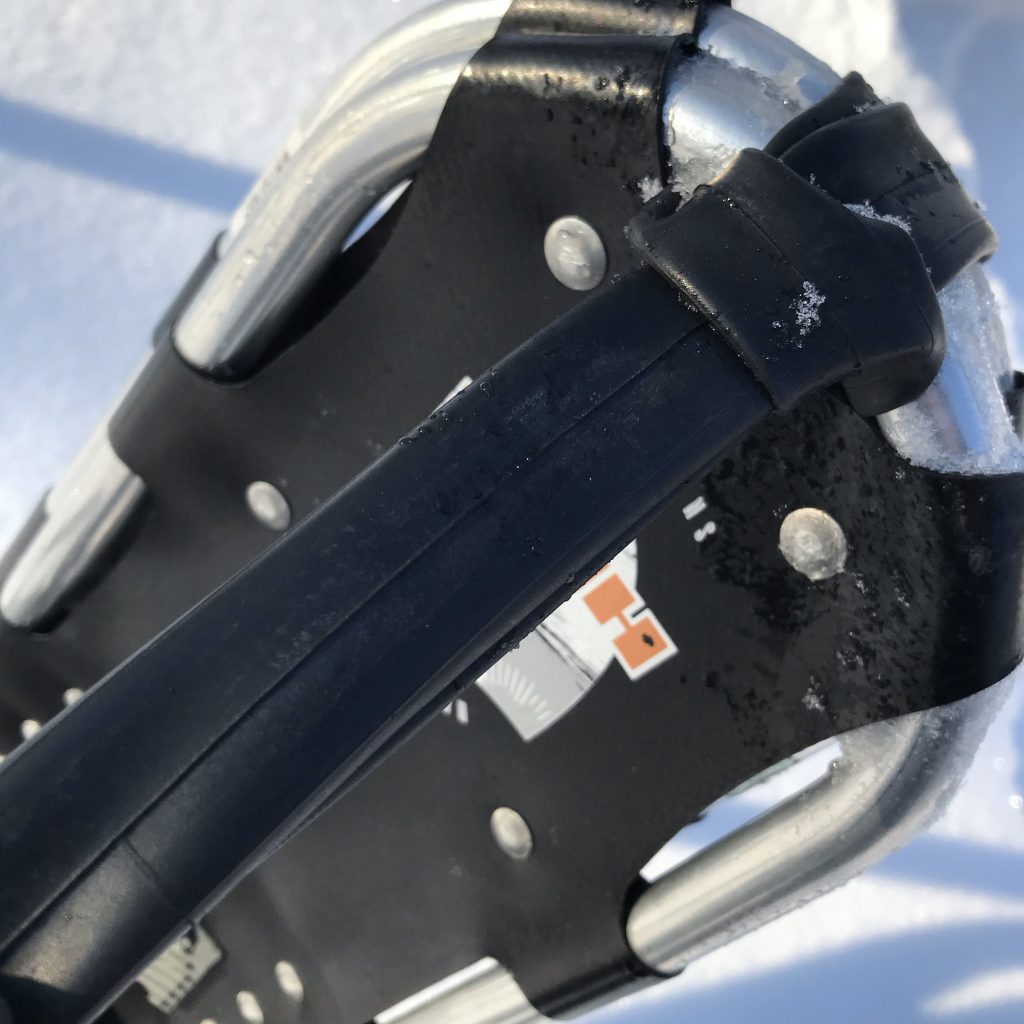
Fastening one end of any object is simple, go around the object(s) and loop the tube back through itself to to create a cow hitch.
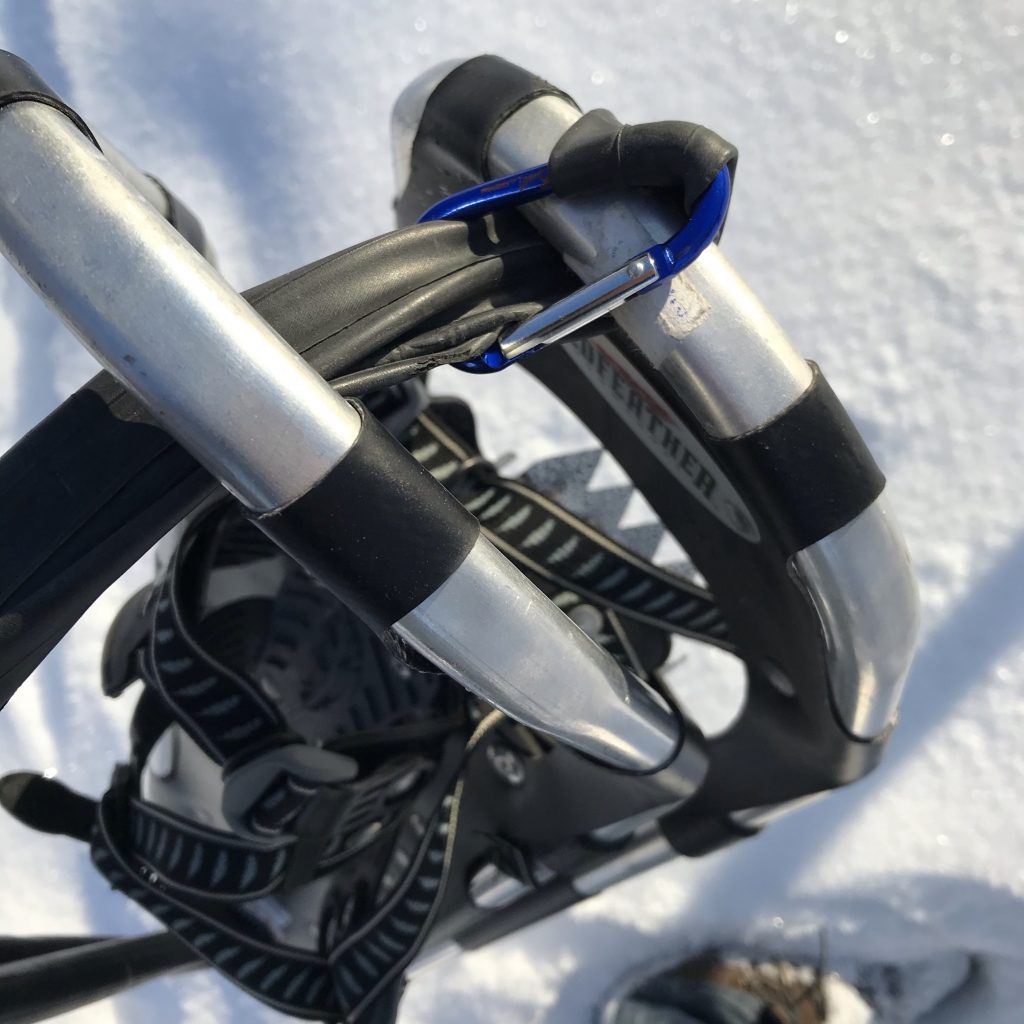
You can only create a cow hitch on one end. On the other end I use a cheap carabiner (that I also keep in my trunk bag) as a link to fasten it similarly.
Then I sling it over my shoulder and head on my way. I keep a couple different sized punctured bike tubes in the garage. You’ll find that some are too loose and others are too tight, depending on what you’re trying to carry. Experiment with sizes and then put the most versatile one in your trunk bag for ad-hoc trips.
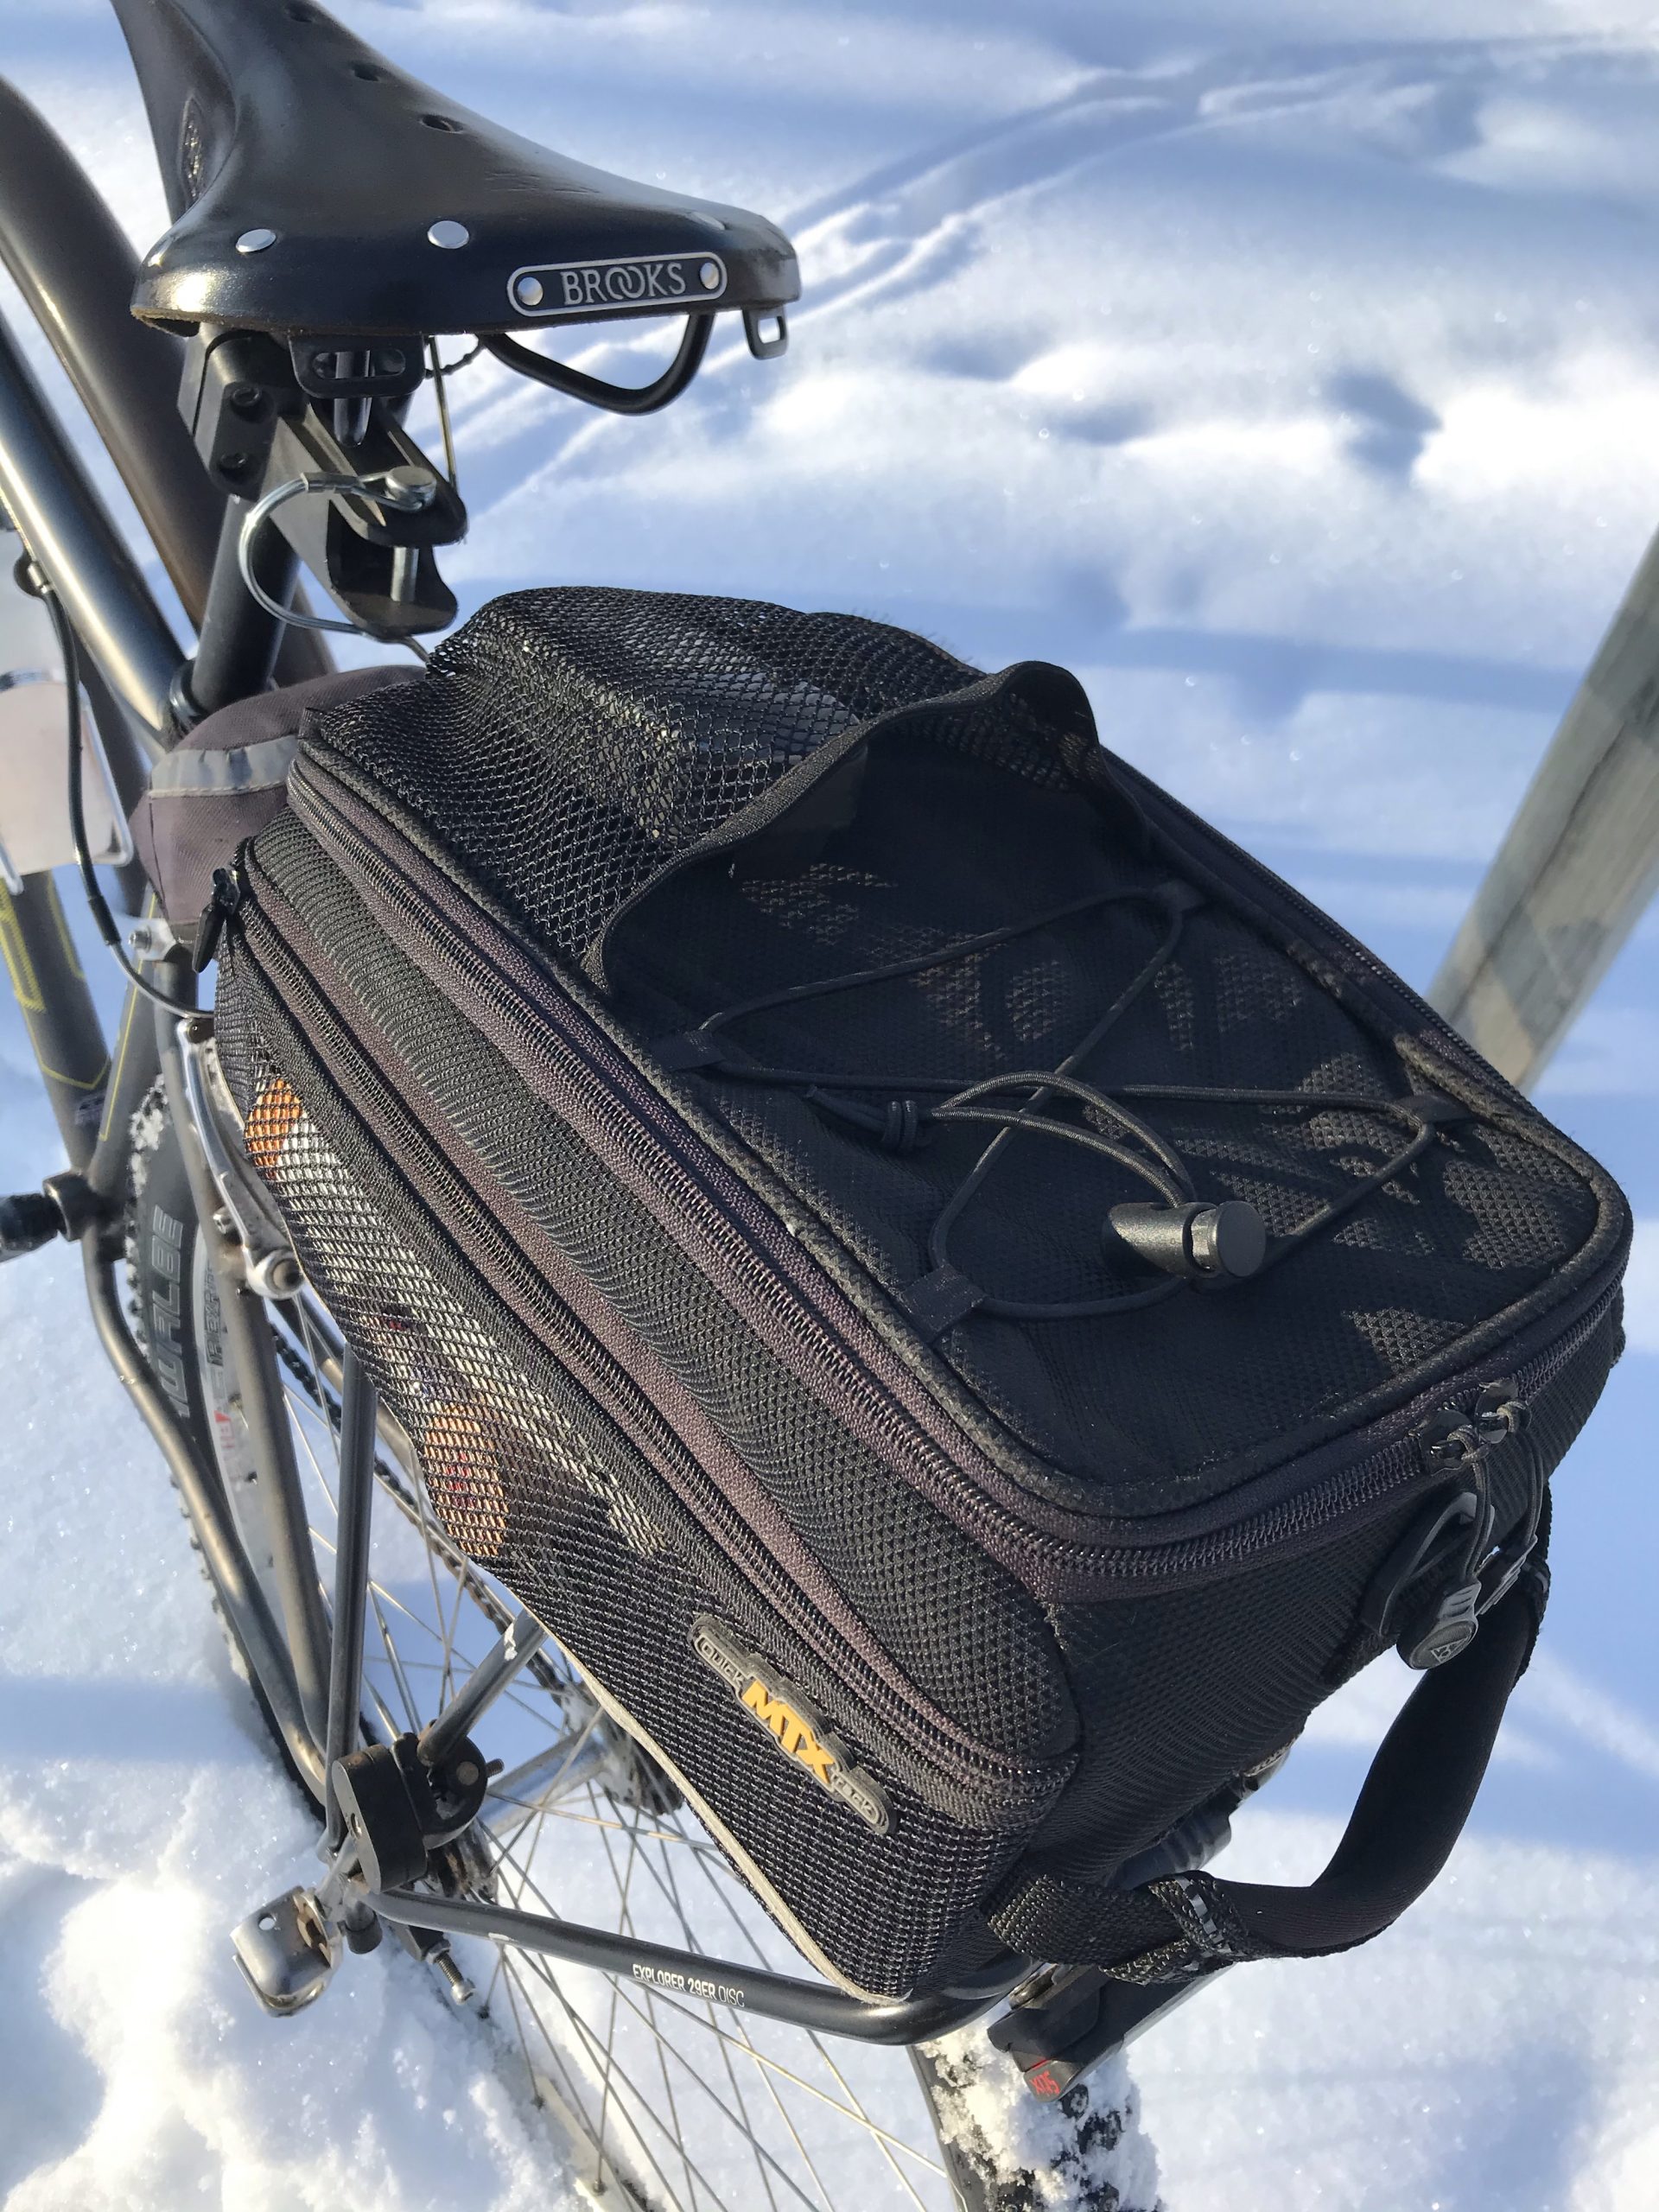
My only complaint about this trunk bag is the Made in China tag. Not because of the country of origin, but because of its placement. From day one of owning this bag, it was perfectly in the way of the zipper. You can see that mine has been “run over” by the zipper a number of times.
Despite the stupid tag, this thing has several useful compartments. Mesh zippered pockets on the sides where I keep sunscreen, lip balm, zip ties, and rain covers for shoes.
There’s a mesh pocket and elastic cords on the top for anything you want to have quick access to – or if you want to strap something down that is bigger than the bag.
Inside it’s one big compartment, but on the lid there’s another pocket inside. I keep a set of repair tools with a patch kit, and a couple maps of the local trail system.
It securely locks into place with the trademark Topeak QuickTrack system, so I never worry about it flying off.
Case Study: RC Trunk
I write about radio control (RC) related stuff over at MeatballRacing.com and recently I found a YouTube channel called Berm Peak that also shares my enthusiasm for both bicycles and RC.
In this video he reviews a different Topeak trunk bag that has fold-out panniers.
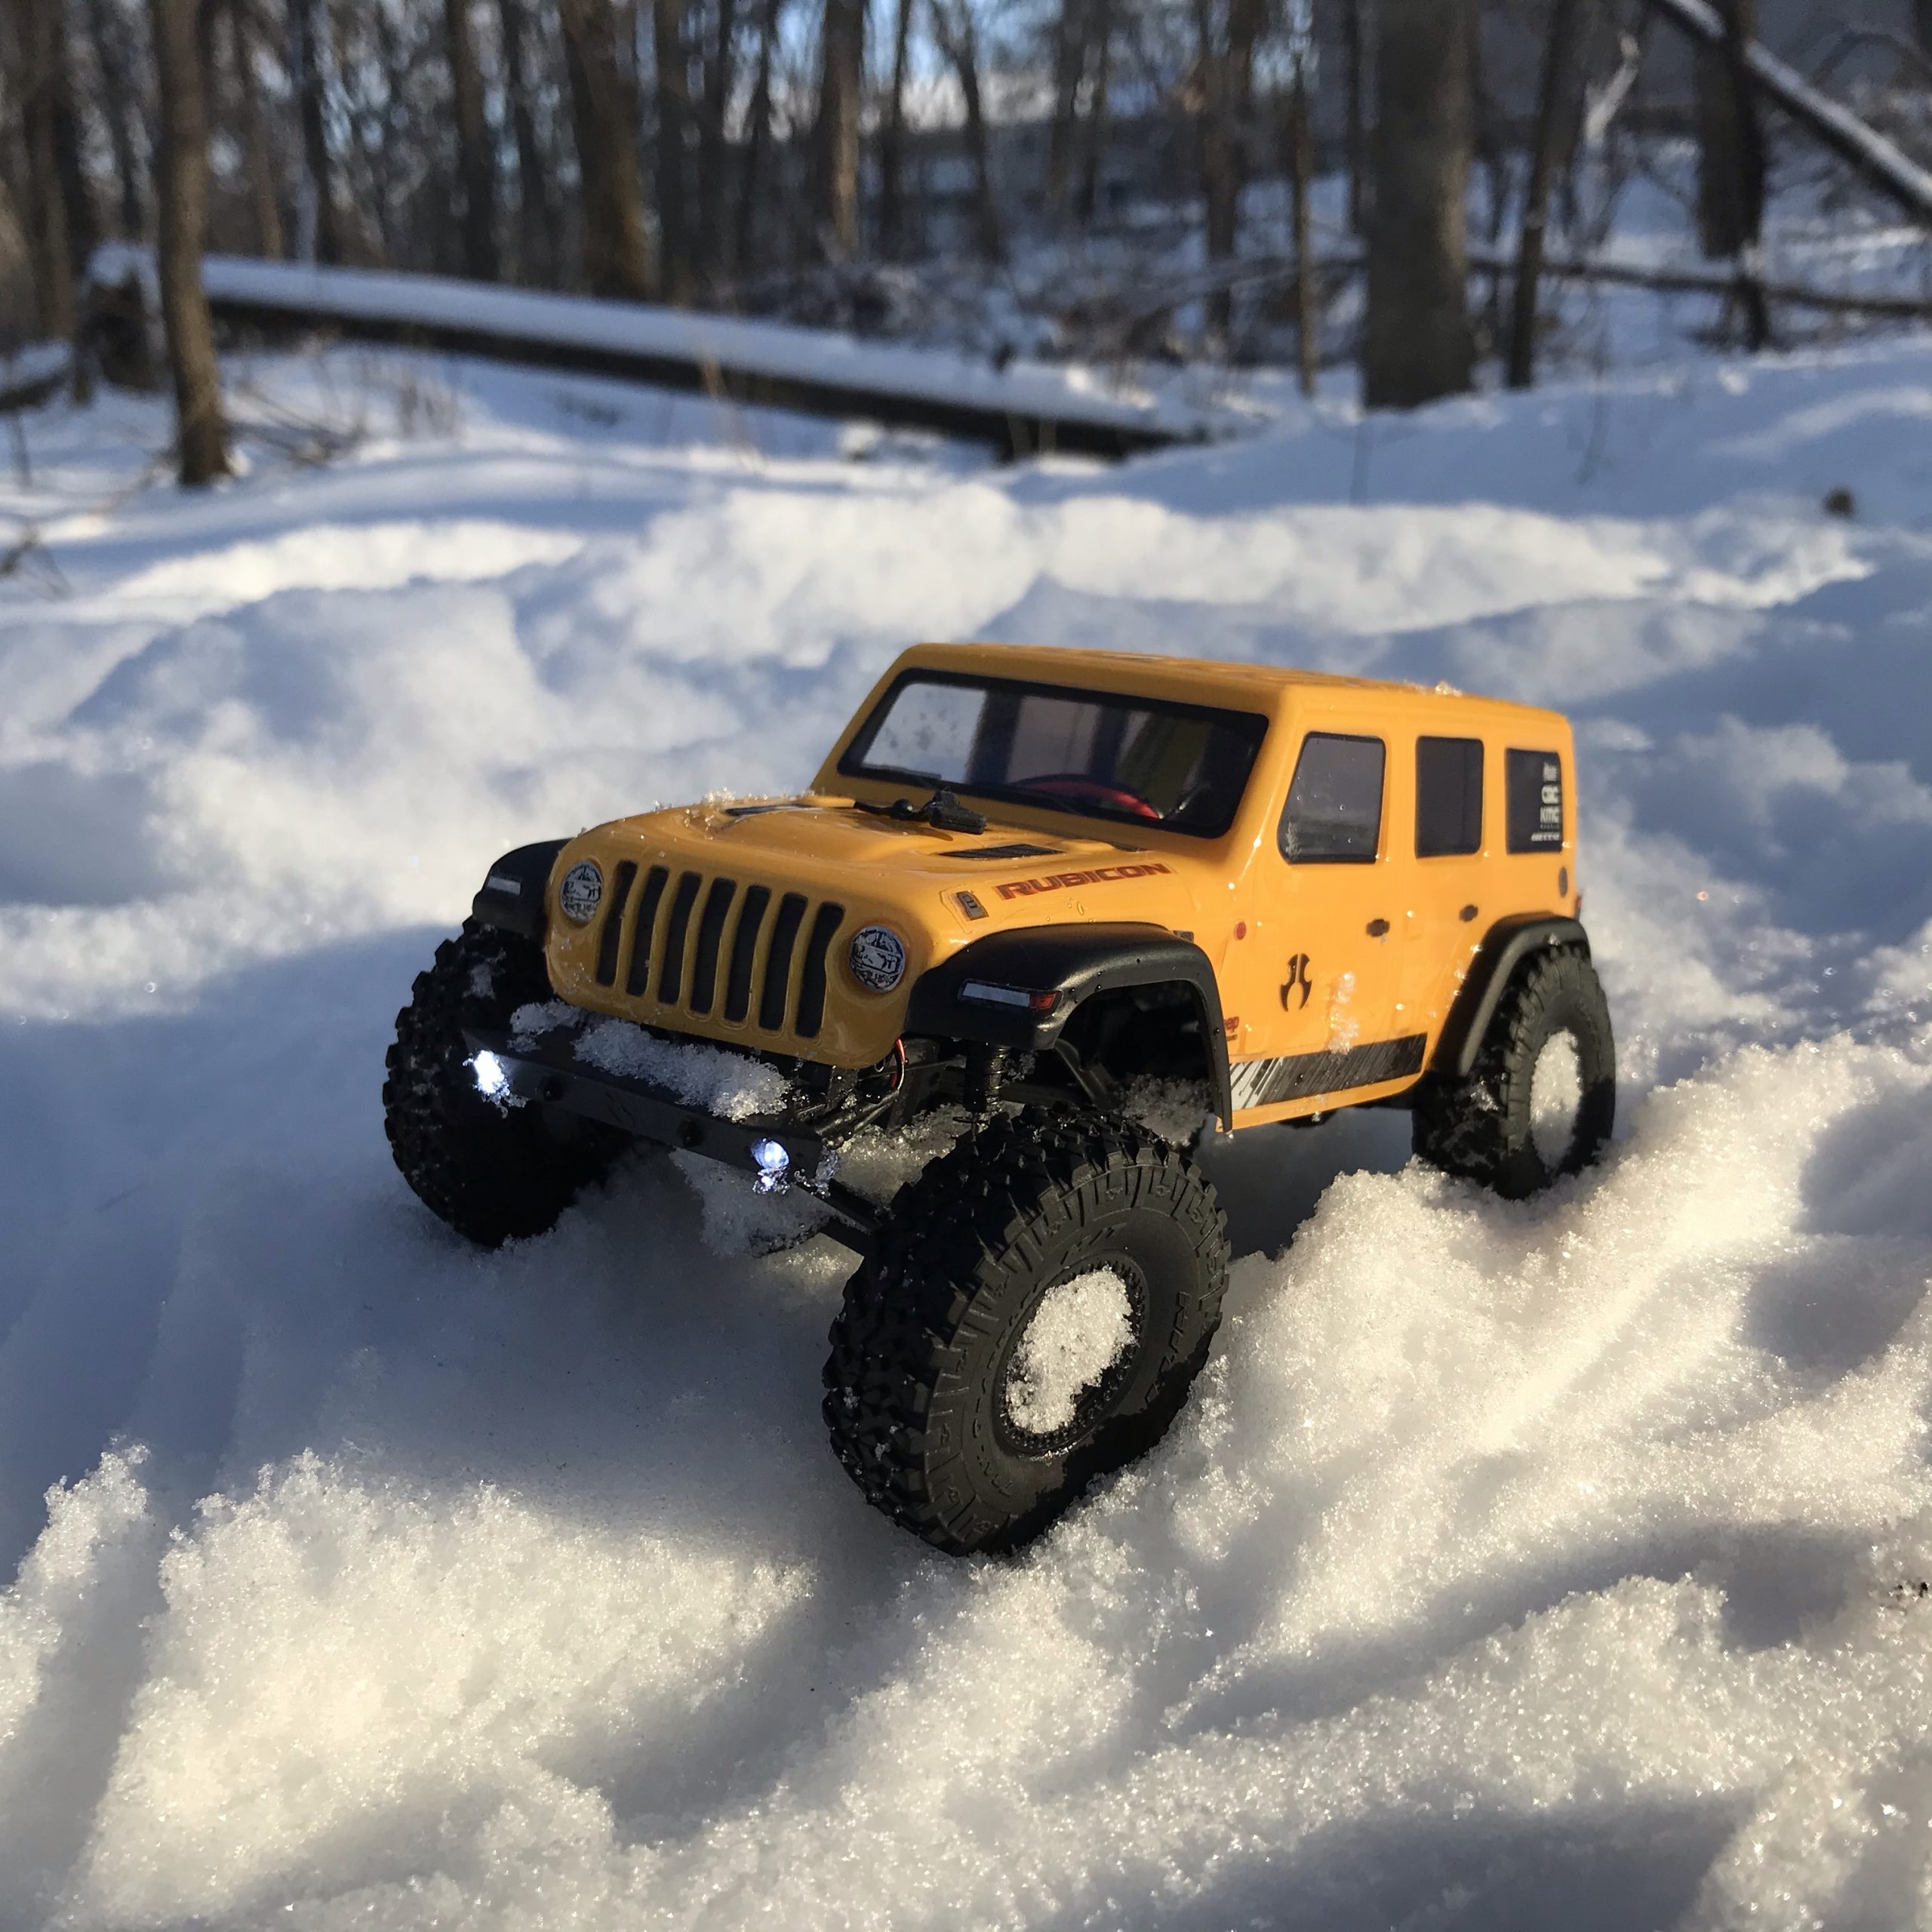
He put in a 1:24-scale crawler, which is a perfect fit for these bags. Similarly, I put in my Jeep, the controller, some sunglasses and headed to the local nature center to do some crawling.
WP Strava ERROR 403 Forbidden - See full error by adding
define( 'WPSTRAVA_DEBUG', true );
to wp-config.php
When when I got there, I switched to snowshoes for a hike.
WP Strava ERROR 403 Forbidden - See full error by adding
define( 'WPSTRAVA_DEBUG', true );
to wp-config.php
I can’t fit the showshoes in the trunk bag, but I have a carrying solution for those I’ll share later.
I hiked to a good spot and played in the snow.
The trunk bag is indeed super versatile – I feel like every year I come up with another useful way to use it.
Configuring E911 support with Skyetel is simple on their side, as it should be. But because it’s an emergency service, I wanted to do a separate post to underscore the importance on making sure it works.
From your Incredible PBX Admin website control panel, navigate to Connectivity -> Outbound Routes.
Skyetel requires that your outbound caller ID is the 11-digit number of your phone. I updated my other Skyetel setup post to reflect this change – it was previously using a 10-digit number.
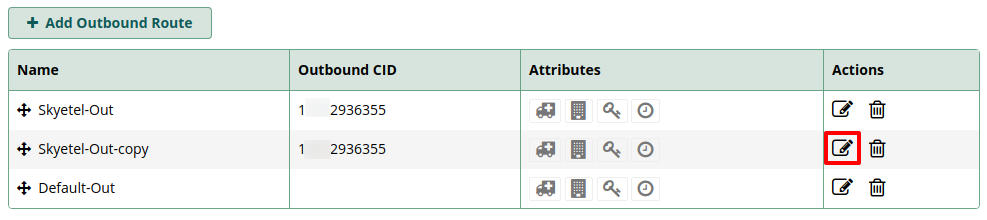
Edit your main Skyetel route and click Duplicate:
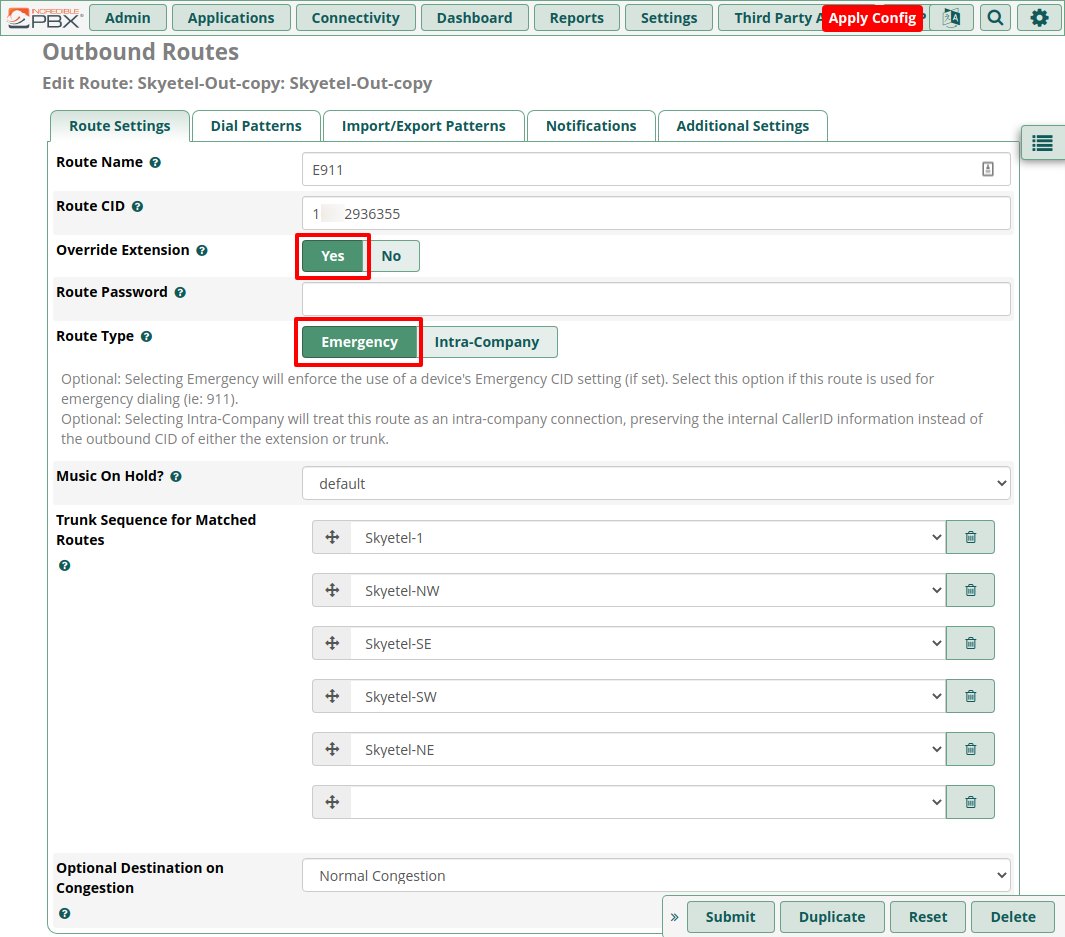
Then you’ll have a copy of your main route that you can edit:
Per the IncrediblePBX E911 Wiki page, set the name to E911 and set Override Extension to Yes. The other change I made was to mark it as an emergency route:
You can see by the help text that it forces the caller ID (CID) to be a specific number (if set). I don’t have any other numbers besides the one I ported from Google Voice, but you’ll be able to see later how it clearly indicates this extension is set up for emergency calling.
Then go to the Dial Patterns tab and remove all of the pre-existing dialplans by clicking the trashcan icons:
Click the Dial patterns wizards button to generate new dialing plans:
Unselect all options except “US Emergency” and then click Generate Routes. You’ll have all of the appropriate 911 and 933 (testing) dialplans added, plus some extras to make sure all bases are covered. There’s a sad story behind Kari’s Law and why these extra dialplans are ultimately unnecessary, but I’ll keep them just in case.
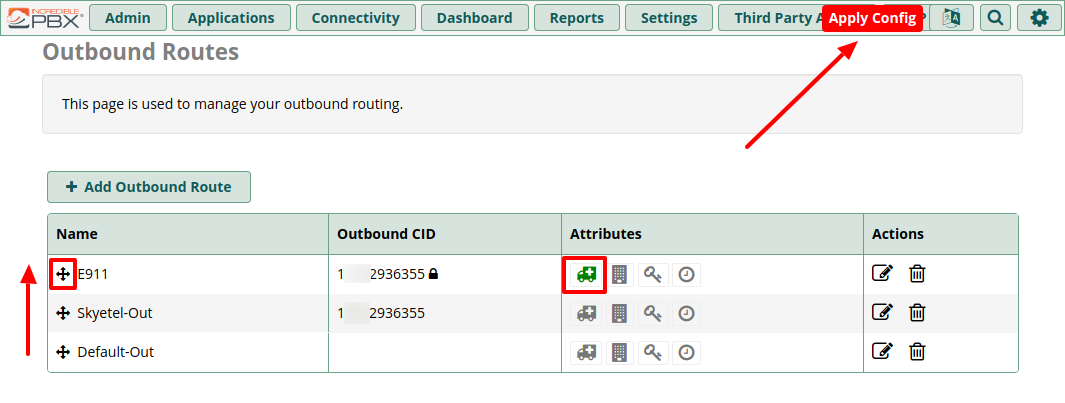
Once those are added click Submit at the bottom and you’ll be brought back to the Outbound Routes list where you can see the emergency icon lit up:
Move your E911 Route up to the top of the list by dragging it by the crosshair icon. Then click “Apply Config” to save all your changes and reload the dialplan.
Skyetel Settings
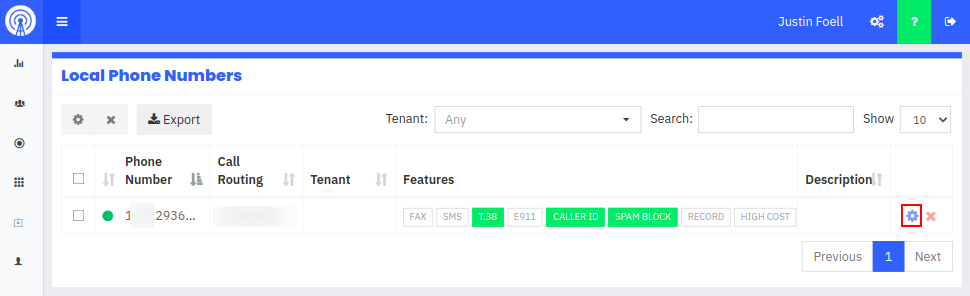
Over at the Skyetel dashboard, it’s as easy as following their support document. I’ve included screenshots here as additional examples. Head to Phone Numbers -> Local Numbers and click the gear icon on the number you want to edit.
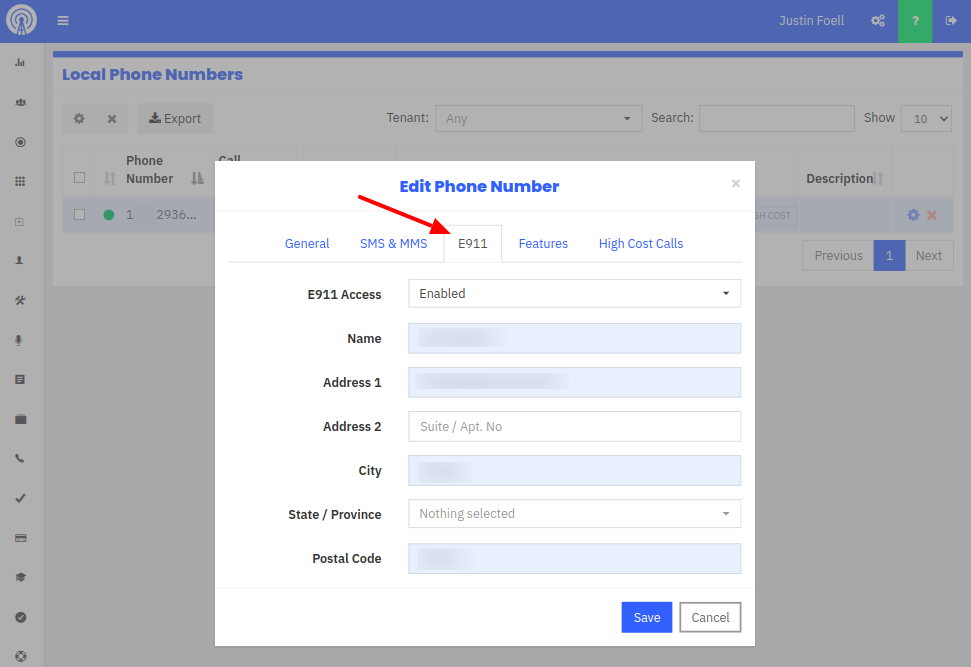
Once editing your number, go to the E911 tab and set it to Enabled. Fill out your name and address so Skyetel can route you to the correct emergency service provider.
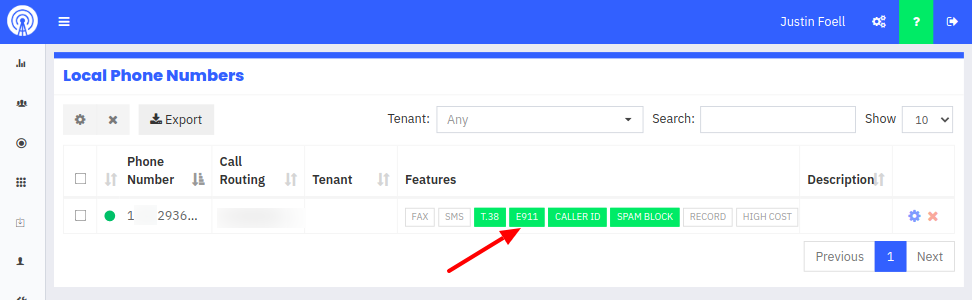
Once it’s enabled, the E911 indicator will be bright green:
Enabling E911 will add $1.50/mo to your bill. But for $2.50 per month ($1 for the local number, $1.50 for E911), it’s way cheaper than having a land line. I like that anyone in the house can dial 911, especially kids.
Testing
Testing 911 dialing seems like a nerve-wracking thing to do. Luckily Skyetel understands your anxiety and has set up a test number of 933 that you can dial to make sure everything is set up correctly.
When you dial 933, if everything is set up correctly an automated Skyetel message will tell you it’s working. It will also read back your configured caller ID and address to verify.
One minor hiccup I noticed is that my call didn’t go through until after a 15 second delay. If it were an actual emergency I would be panicking during this time.
The problem was at my RTP-300. You can dial a pound (#) to commit to the dialed number immediately – I like this for dialing my 702 extension. If I want to dial that extension, I dial 702# – because I might otherwise be trying to call a friend in the Las Vegas 702 area code.
I inspected the dialplan for the two lines of my RTP-300:
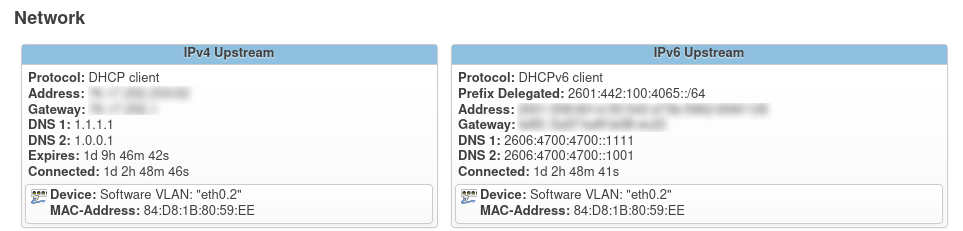
Pro-tip: Notice I’m using the cloudflare DNS servers rather than the ISP-provided ones. The Comcast DNS servers have gone down on me before and their performance is generally lacking.
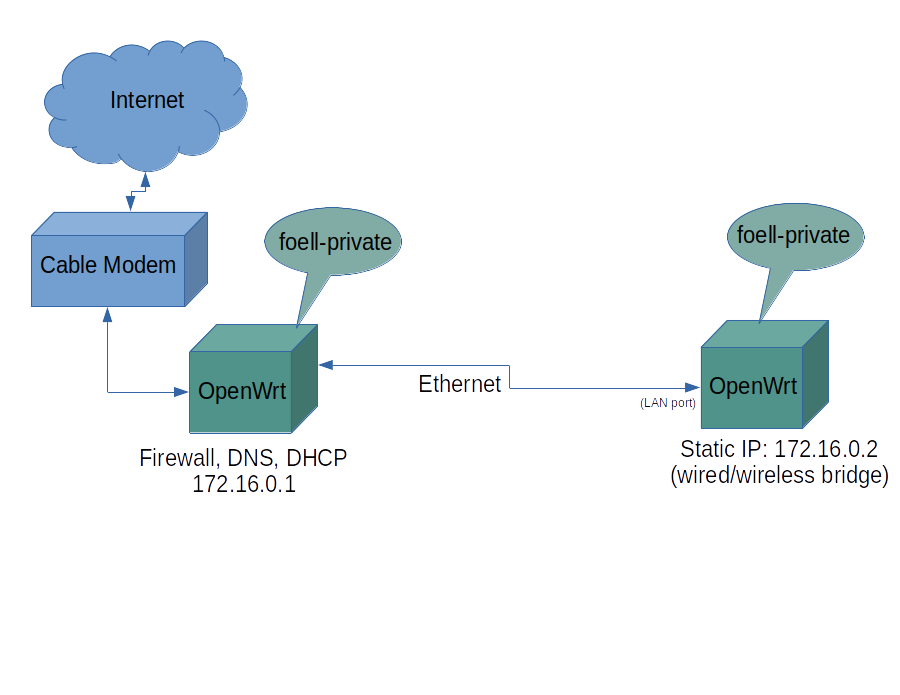
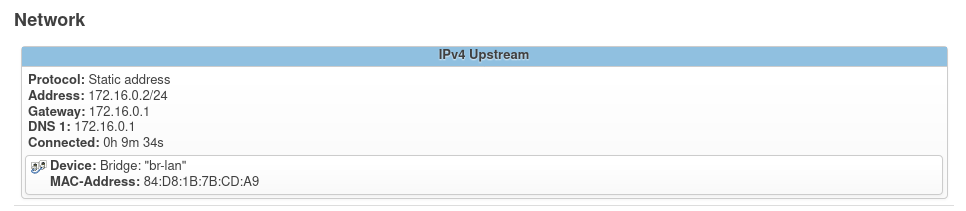
My concern was if the bridged router can’t contact IPv6 addresses, the same is probably true for the devices that are connecting through it.
I found the solution in this thread on the OpenWrt forums. While it’s easy to statically assign an IPv4 address, along with a default gateway and DNS server – for IPv6 it’s easiest to set up another lan interface specifically for IPv6 that gets it’s IPv6 address (and routes) automatically from the upstream router – rather than assigning it statically.
The TL;DR version of this post is to add this to your network config:
Configuring IPv6 Bridging through the Web Interface
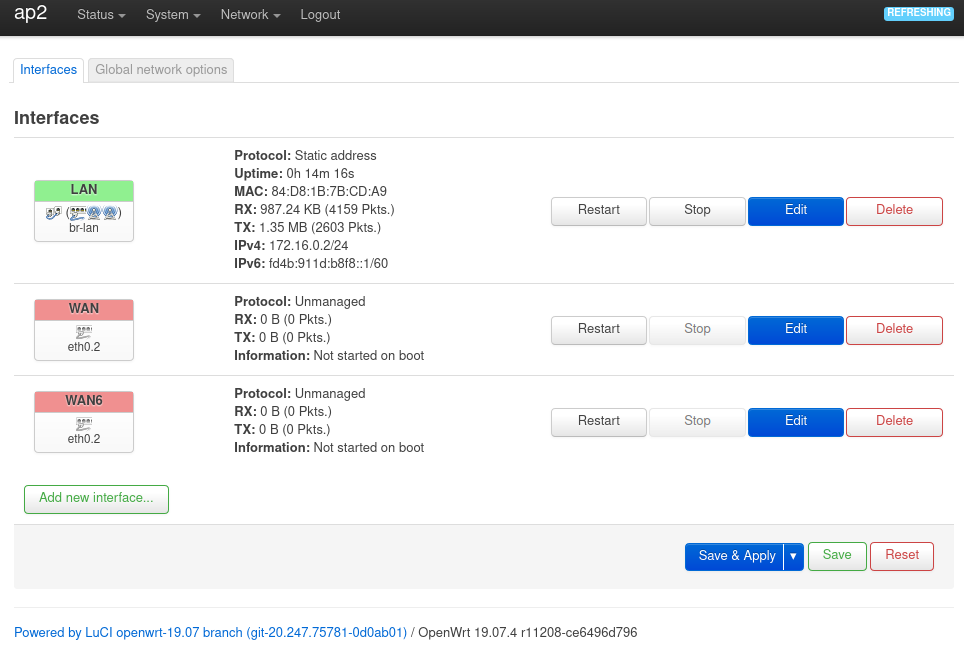
To do the same thing above via LuCI – the OpenWrt web interface, here’s how. Initially on the Network -> Interfaces page, ou can see my IPv4 lan with the wan ports disabled:
Click “Add new interface…”
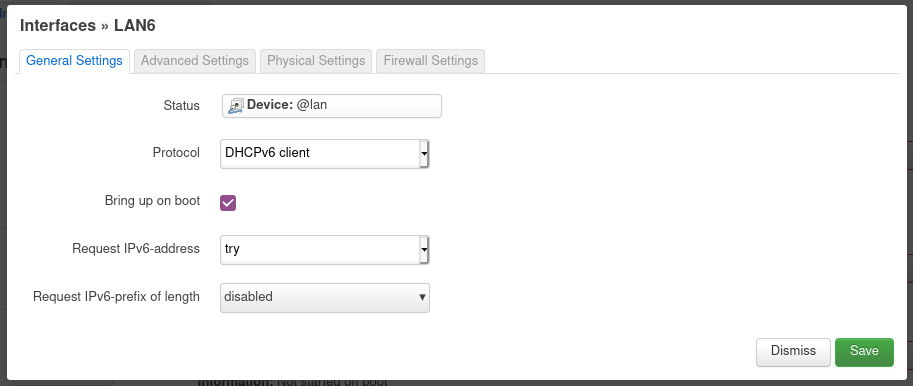
Name it “lan6” and choose the DHCPv6 client protocol. For the interface, select the @lan alias. Then click Create Interface. You’ll be brought to a second screen.
All I had to do on this page was change the “Request IPv6-prefix” value to disabled. No need to change anything on the other tabs – the defaults are fine.
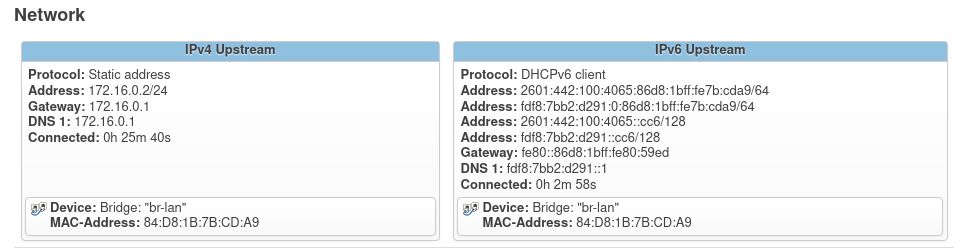
Now the Status -> Overview page on my bridged router looks like this:
Now I can ping IPv6 addresses from the command line on my bridged router:
root@ap2:~# ping -c 2 ipv6.google.com
PING ipv6.google.com (2607:f8b0:4009:807::200e): 56 data bytes
64 bytes from 2607:f8b0:4009:807::200e: seq=0 ttl=115 time=17.884 ms
64 bytes from 2607:f8b0:4009:807::200e: seq=1 ttl=115 time=17.351 ms

--- ipv6.google.com ping statistics ---
2 packets transmitted, 2 packets received, 0% packet loss
round-trip min/avg/max = 17.351/17.617/17.884 ms
One of my 2021 goals is to better understand IPv6 concepts (at least as well as I can understand IPv4). If there’s any *nix configurations I find helpful along the way, I’ll post ’em here.