After setting up my new OpenWrt router, it is time to get my local phone number that I ported from Google Voice to Skyetel working.
Most of the configuration follows this Nerdvittles Skyetel post, but I include some specifics and screenshots for my configuration using OpenWrt, IncrediblePBX on Raspberry Pi, and a Linksys RTP-300 analog telephone adapter.
Firewall Setup
On my OpenWrt router that acts as a gateway, I added a firewall port forward for UDP Port 5060 to my Asterisk server (Raspberry Pi).

I didn’t need to run any of the Skyetel add-ip customizations from the original article. On my Raspberry Pi those settings were already there. You can check to see if the firewall settings for the Skyetel IPs are already present by running:
# iptables -nL | grep 52.41.52.34
ACCEPT     all  --  52.41.52.34          0.0.0.0/0
If you see the ACCEPT all row, then you’re good to go. If you don’t get any output, you’ll need to run the commands from the Nerdvittles Skyetel post.
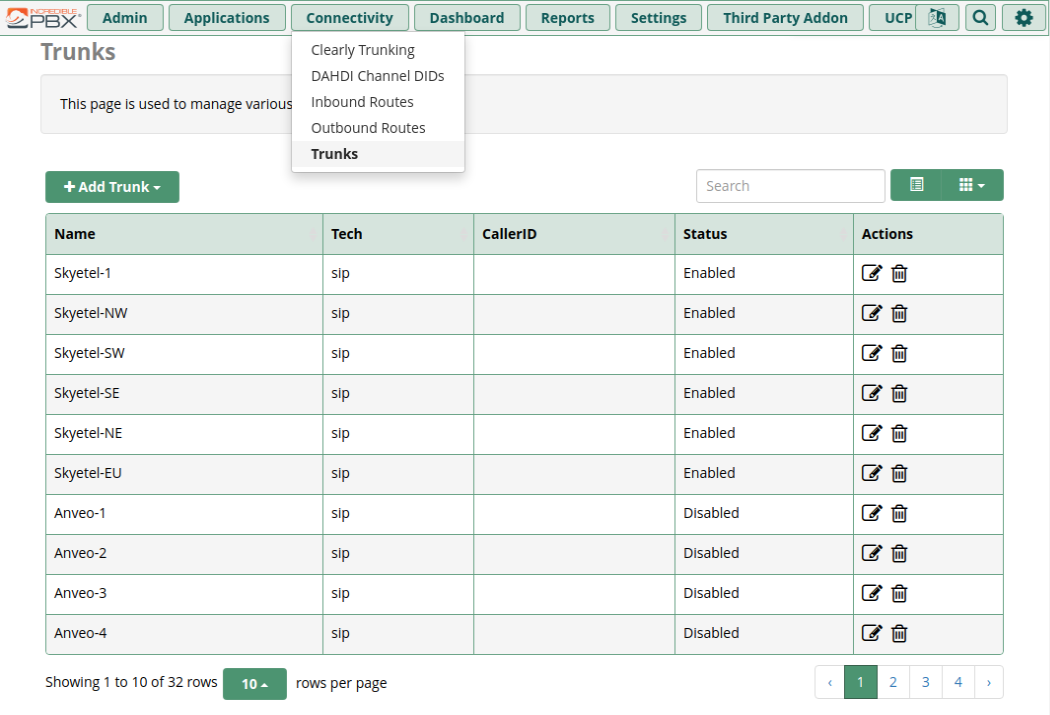
Trunk Setup
I also didn’t need to run any of the Skytel Trunk Setup scripts, as I already had the six Skyetel trunks configured and enabled.
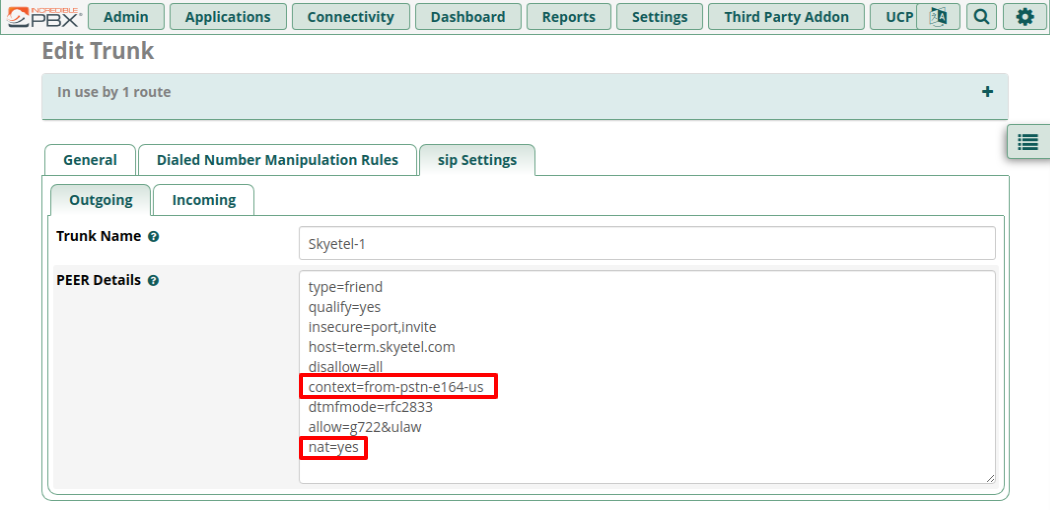
I also didn’t need to change the context configuration from from-trunk to from-pstn-e164-us (for a normal 10-digit US phone setup). It was already there 💪 Also, nat=yes was already set, so no need to add that either.
Inbound Routing
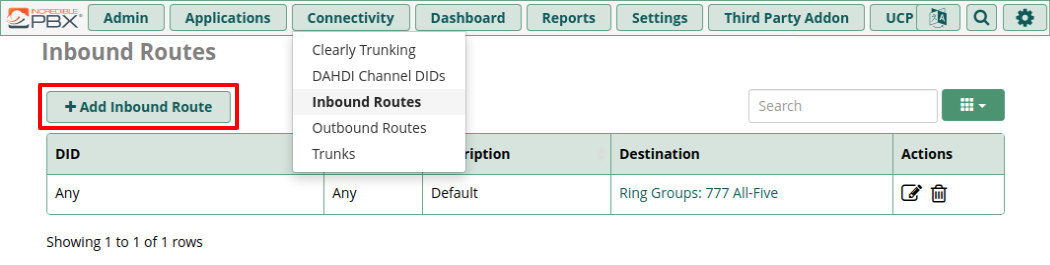
Next we’ll configure the routing of incoming calls from Skyetel to your Asterisk extensions. I use the first two extensions (701 & 702) that come pre-configured in Incredible PBX with my Linksys RTP-300. To add routes, go to Connectivity -> Inbound Routes and click Add Inbound Route.
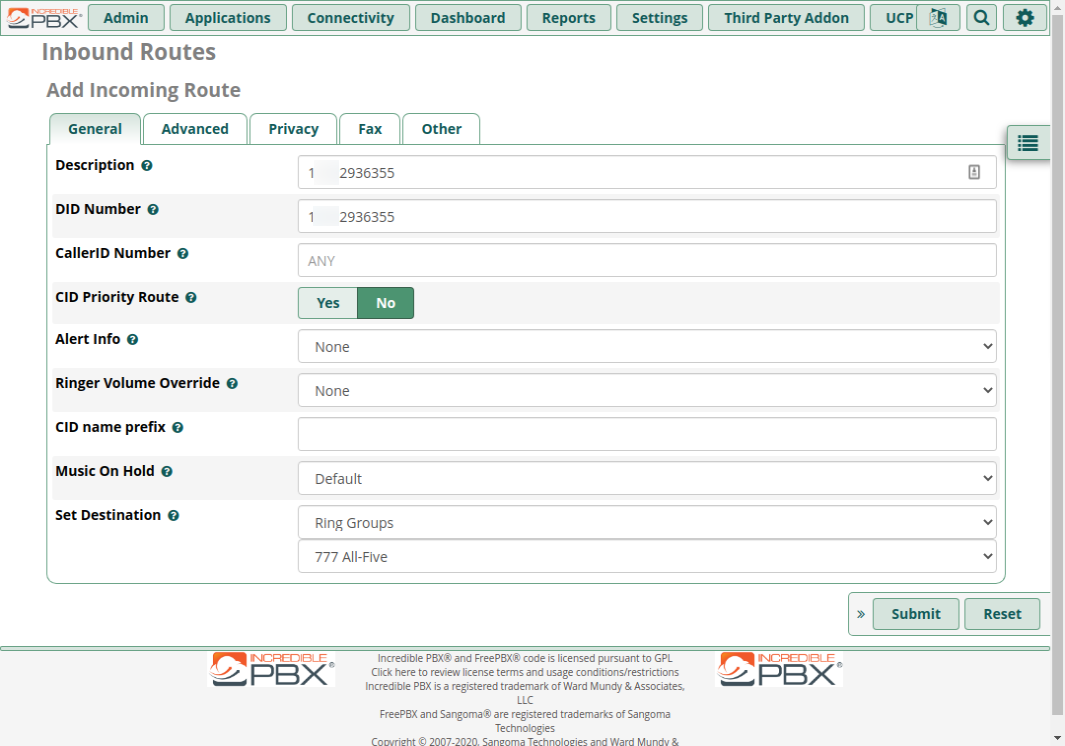
For the DID and Description I added my full 11-digit number: 1 and the other 10-digits. I also set the destination to the “777 All-Five” ring group. It’s a default ring group setup to ring all extensions (701 to 705) all at once.
Once you click Submit there will be an “Apply Config” notification.
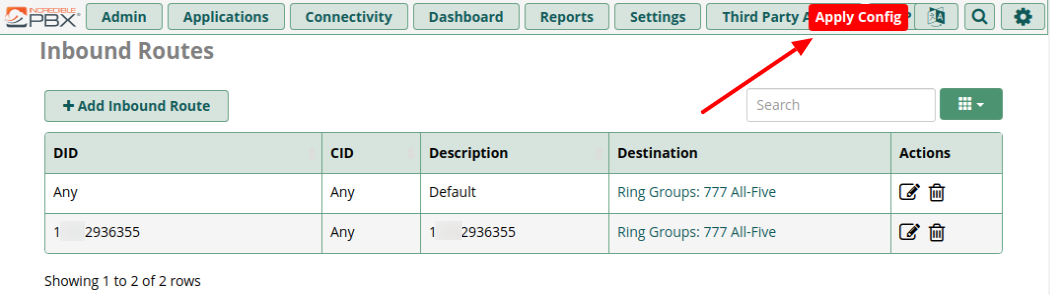
Click it to apply your new route and reload the dial plan.
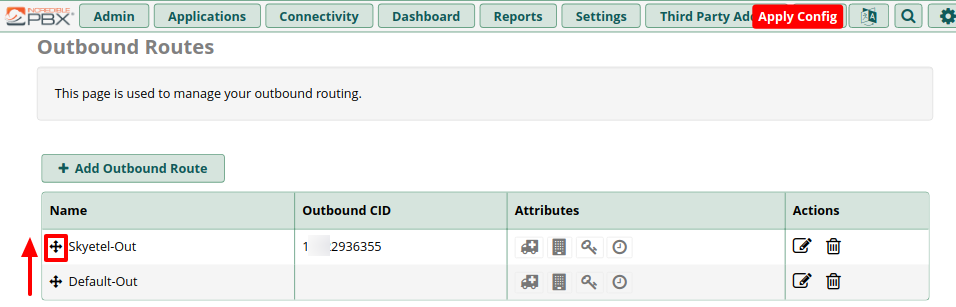
Outbound Routes
The default Incredible PBX config already had default route. Click edit to view it:
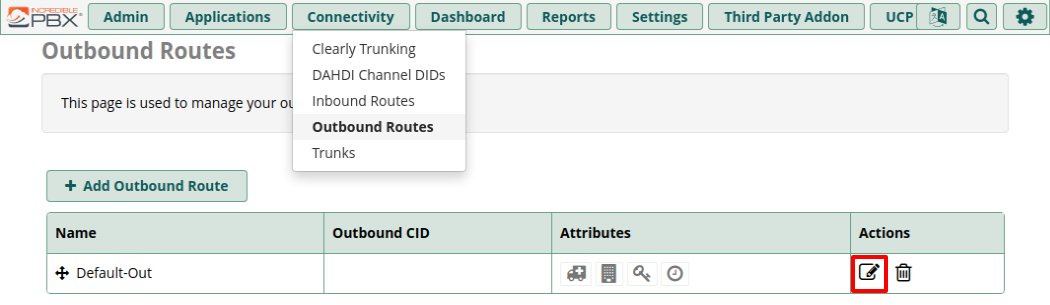
As you can see it already has some Skyetel trunks pre-configured. Go ahead and click Duplicate to make a copy of this route we can change.
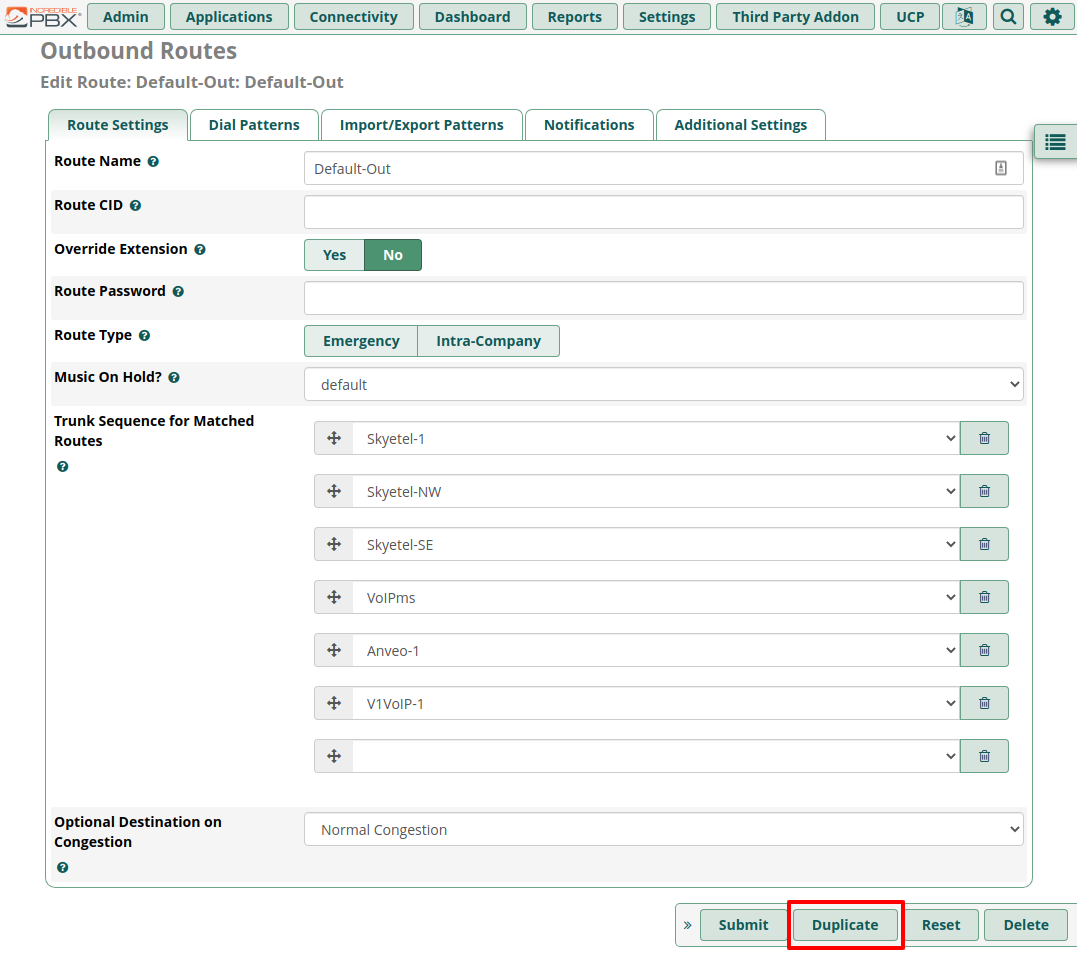
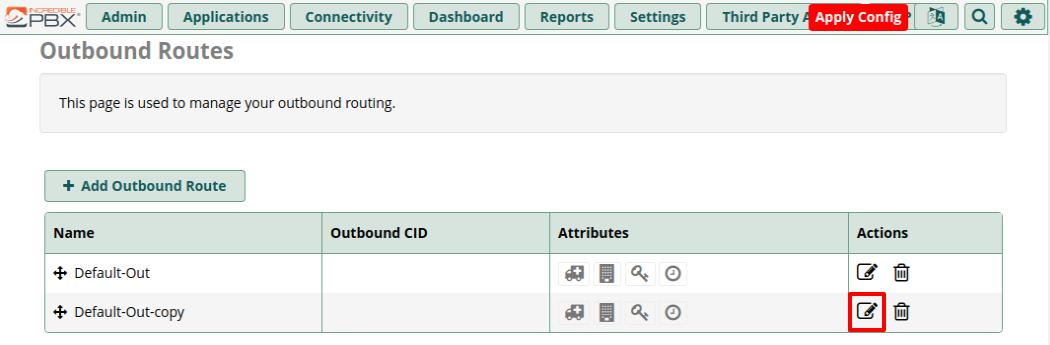
This will create a copy that we’ll edit.
Rename the route, add your 11-digit phone number, and add the additional Skyetel trunks, removing any extras.
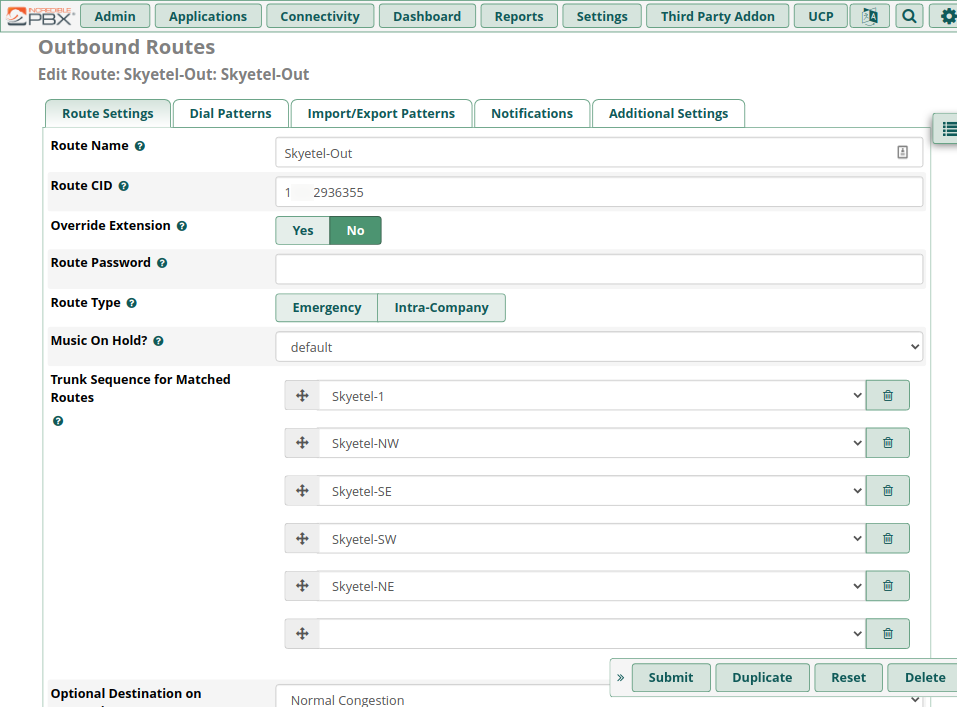
After submitting the new route, use the crosshair icon to move the Skyetel route to the top, then click Apply Config.
I didn’t need to do any configuration of SIP Settings in Asterisk, my defaults all looked good.
Skyetel Configuration
Skyetel configuration is normally pretty simple, but for my configuration I want to combine my Dynamic DNS setup with the inbound SIP IP. But it turns out that Skyetel doesn’t work that way. Instead they support a script that will periodically call out from your asterisk server and update the endpoint IP at Skyetel if it’s changed https://bitbucket.org/skyetel/ip-endpoint-group-update/
In order to use the script, you must first create a set of API keys on the Skyetel dashboard by clicking the gear icon by your login name.
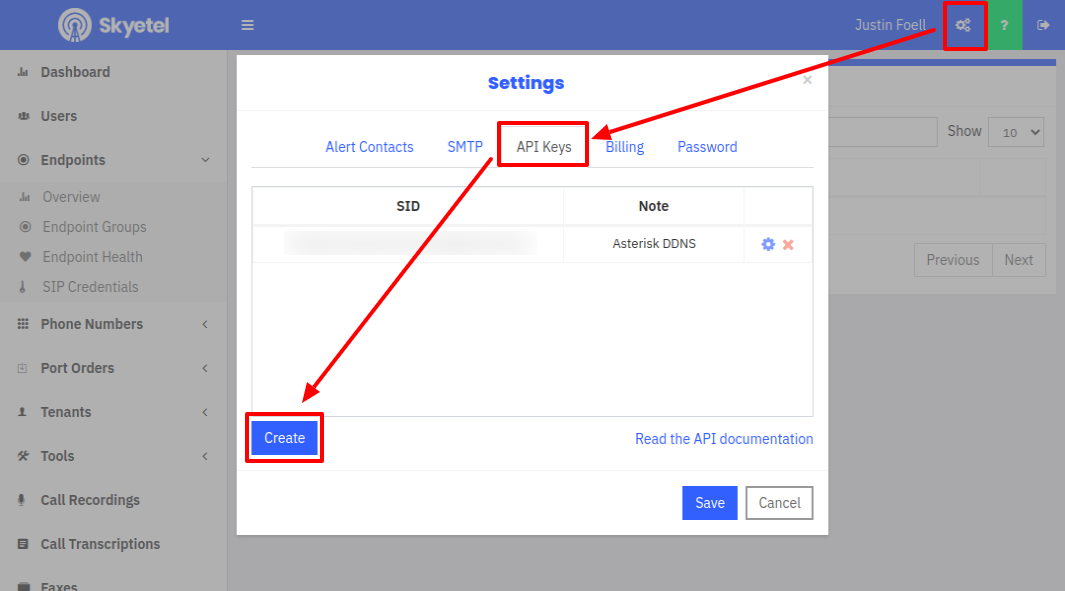
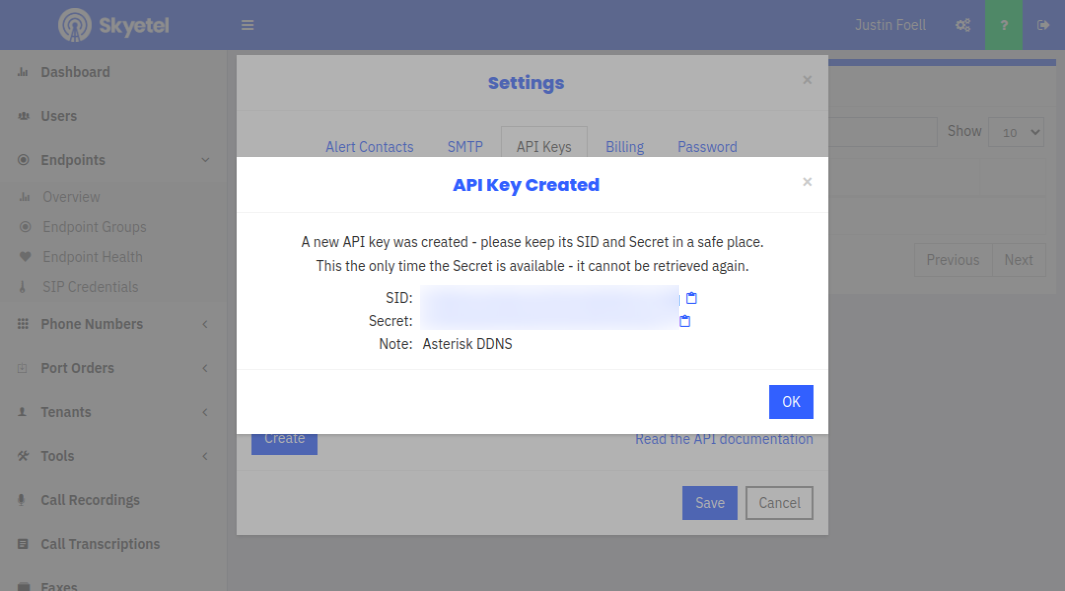
Go to the API keys tab and click Create. Save the keys somewhere safe, they won’t be displayed a second time.
Then head back to your Raspberry Pi to install the script. You’ll need git to install the script. Additionally, I also needed jq on my Raspberry Pi:
# apt --assume-yes install git jqThen clone the repository:
# git clone https://bitbucket.org/skyetel/ip-endpoint-group-update.gitcd into the ip-endpoint-group-update directory, and then run the script. I used the defaults for port and transport by simply pressing <Enter>. Enter your API keys that you created on the Skyetel dashboard. I hadn’t yet set up an Endpoint Group in my Skyetel dash, so I entered “x” to do it from the script.
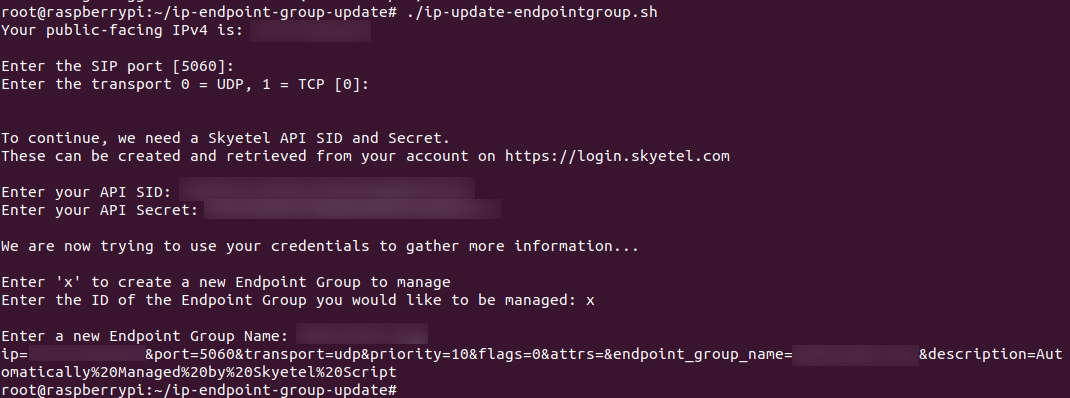
The script automatically installs itself into /usr/local/bin/ip-update-endpointgroup.sh and creates a cron to run it every twenty minutes at /etc/cron.d/ip-update-endpointgroup.cron
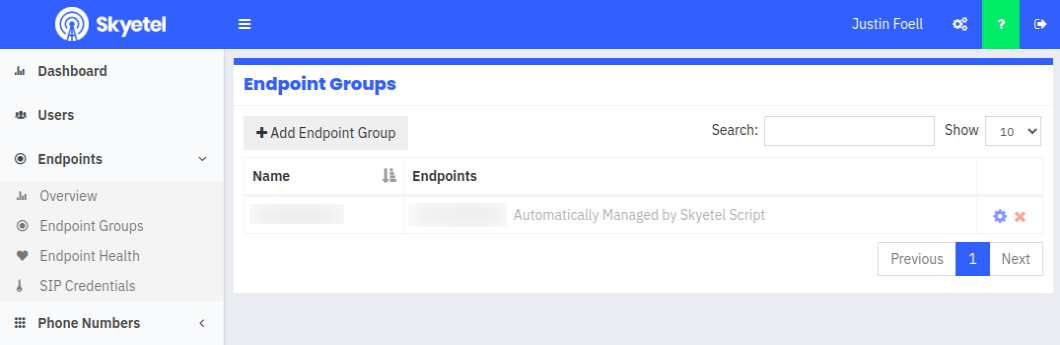
In the Skyetel dash I see there’s an endpoint group that was automatically created:
The last thing to do is change the local number that we ported from Google Voice to route to the new Endpoint Group.
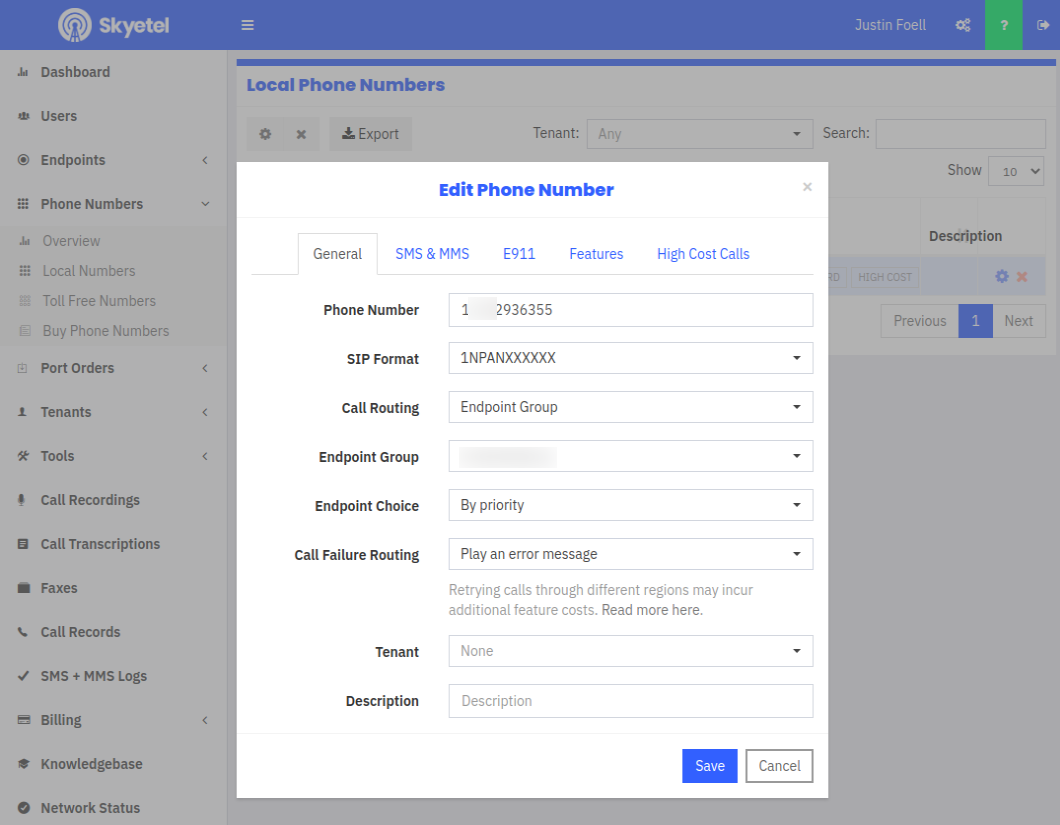
Click Save, then give it a few minutes and try calling your number from your cell phone – it should ring and connect. If audio is good, you’re good to go!
Leave a Reply