Preface: I know very little about live sound. I know even less about mixing equipment. While I’m audio enthusiast, my most recent significant audio purchase was a set of Klipsch speakers for a home theater… in 1999 😲
So when it came time to cobble together some equipment MBI Winds, I did a lot of asking around. There were plenty of people in the area with experience using the Behringer X32. So we got an X32 Rack which would fit in our small audio cart nicely.
When I try to figure out how to do something on the X32, my first stop is YouTube. It’s probably by someone who does sound for their church, so their application might not be the same as yours. They’re also likely using the full X32 console mixer – the OG big boy.
I don’t have the luxury or ease-of-use that comes with the full console that has all the buttons. Instead, it can be even more confusing because I have three options to configure the mixer:
The screen on the front of the X32 Rack (same as the big console, which makes YouTube Videos still helpful)
More choices = better, right?! Well, there’s no consistency in interface between any of them. So I’m starting this series “X32 Rack 3-ways” to show how to get things done. I’ll document a small feature using all three methods which will hopefully be helpful to other X32 Rack users out there. Full console folks can go about their YouTube business per normal 📺
DCA Mutes
My drumline peeps have been telling me DCAs are the way to go to simplifying live mixing. For me (with a much simpler setup than a WGI drumline), it seemed logical to use – if only to get all of the faders on to one (DCA) screen on X32 Mix on my iPad.
What initially confused me is that when I muted the mic to our front speaker from within the DCA group, it did nothing 🤔 This is because the default setup of the X32’s DCA mute button is to mute output to the main L&R channels but keep it in other monitors for adjustments. Our front soloist speaker is a seperate bus from the main L&R channels, so this wasn’t the desired effect I wanted. The solution is a global setting called “DCA Mutes” or “Mute System -> DCA Groups.” This setting mutes every channel that’s part of the DCA group mixer-wide. This was what I needed 🔇
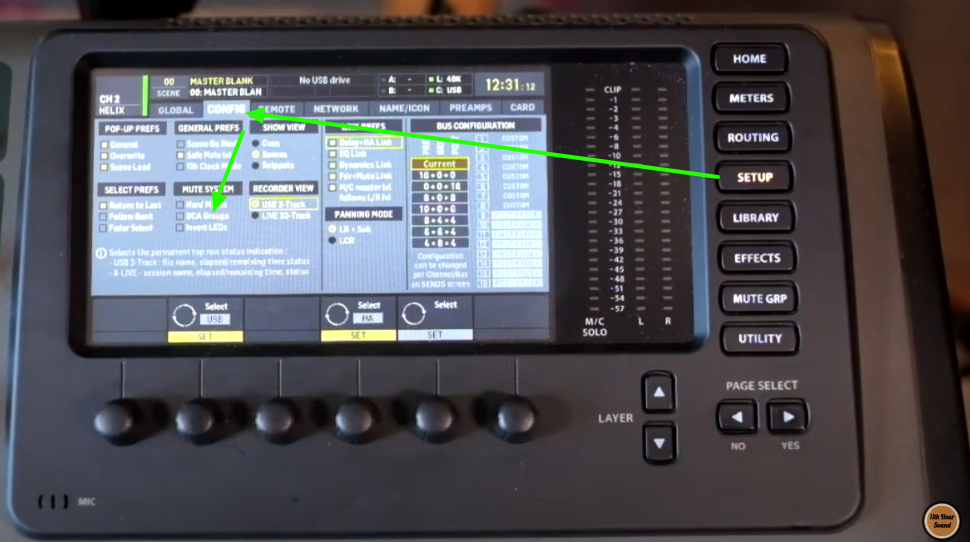
X32 Rack Screen
On the mixer itself you can get to it through the Setup screen, then the Config tab. There’s a “DCA Groups” box that needs to be checked in the “Mute System section.
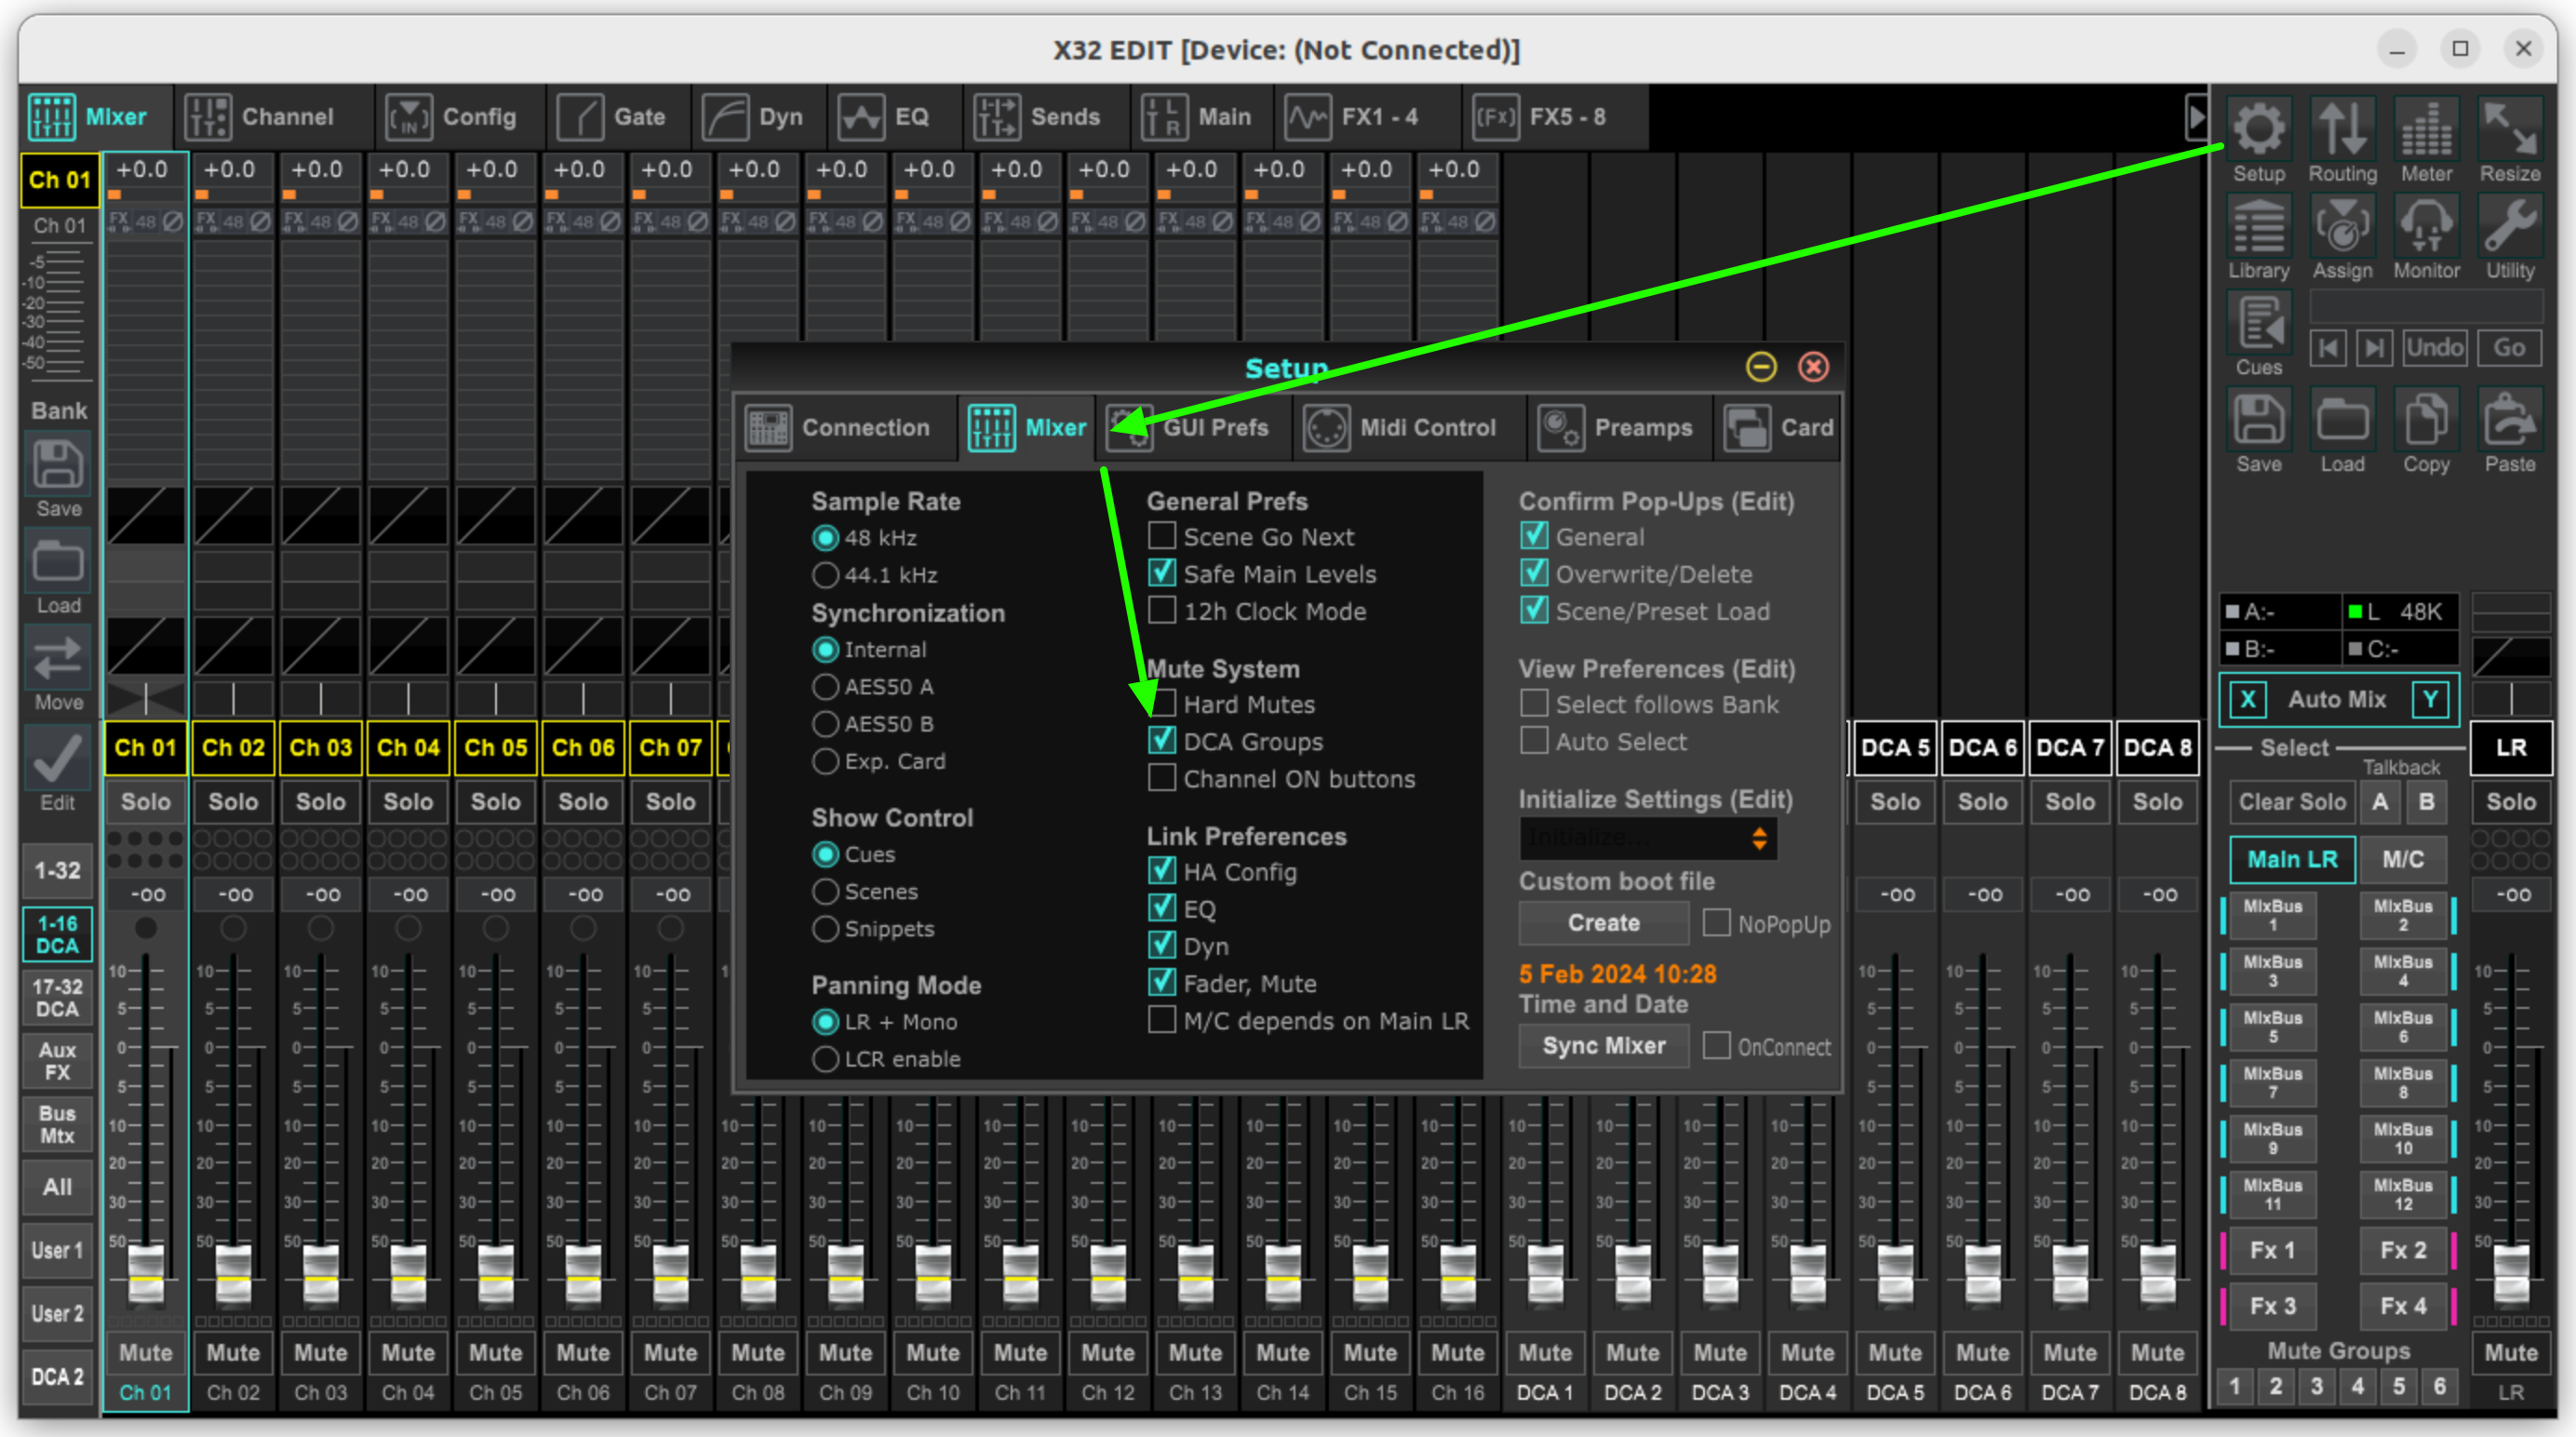
On X32 Edit you’ll find it in a similar place, but slightly different words: Setup, then Mixer, then the “DCA Groups” box needs to be checked in the “Mute System” section.
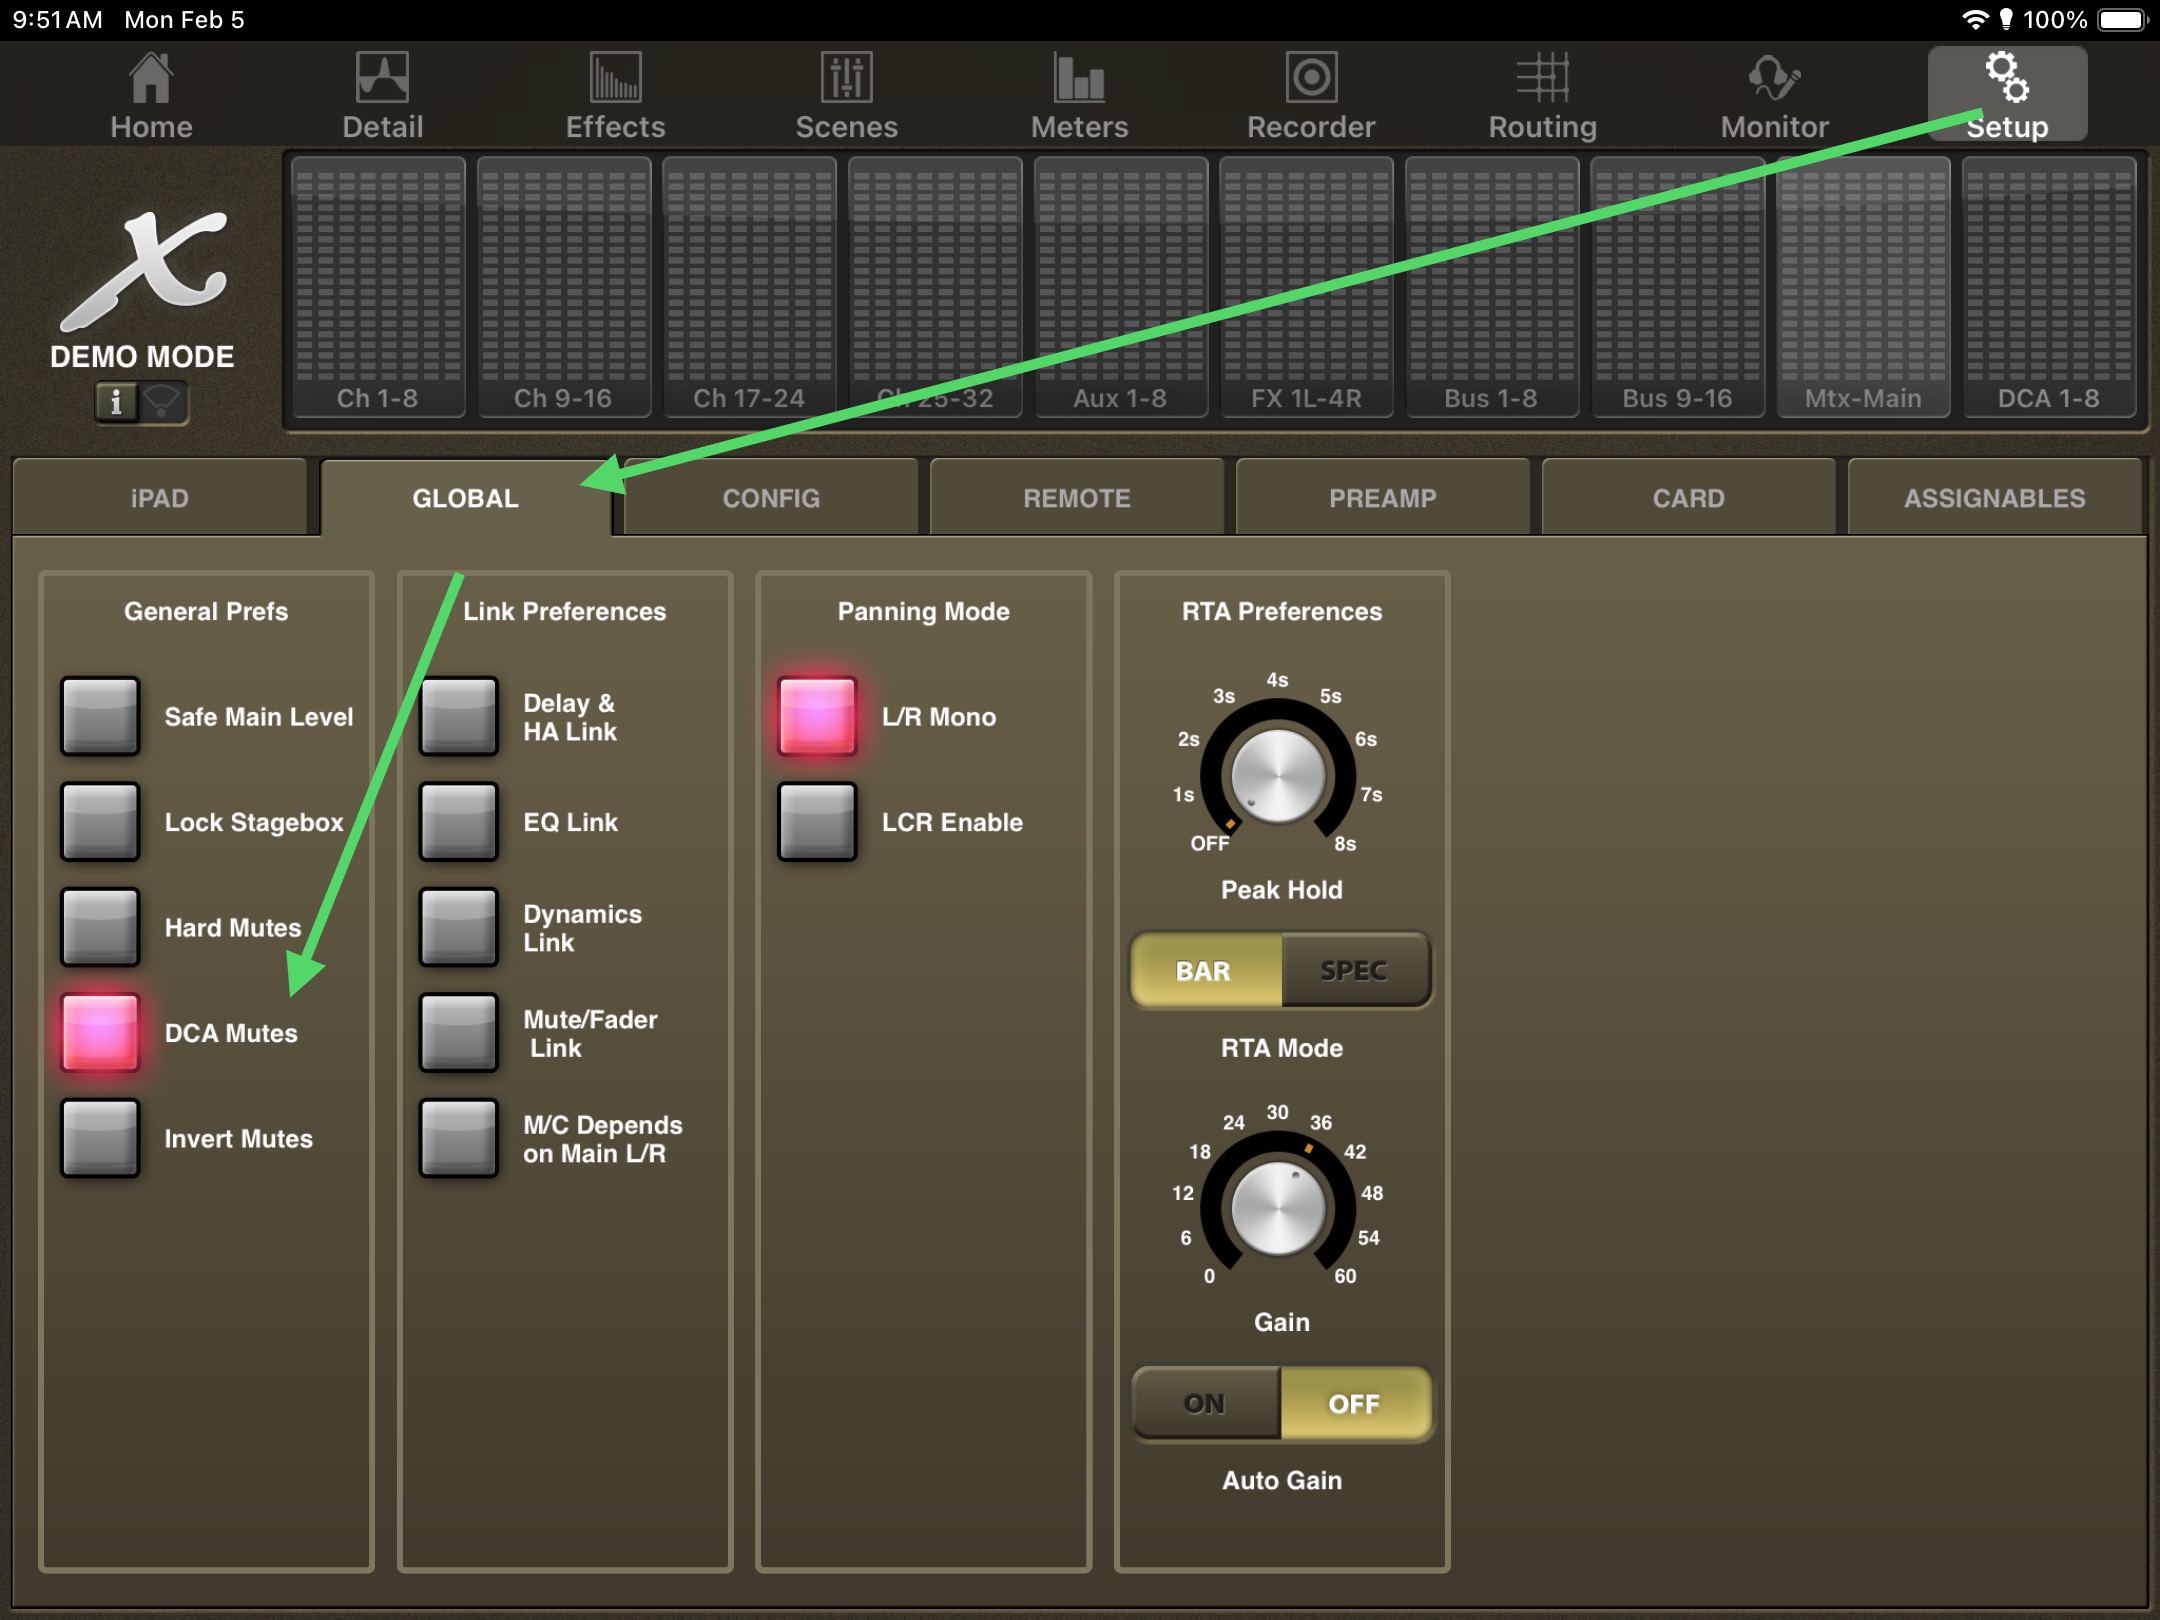
X32 Mix on iPad
On the iPad app it’s again named a little differently: Setup, then Global, then the “DCA Mutes” box needs to be checked in the “General Prefs” section.
In Practice
For live mixing I use the iPad. When the “DCA Mutes” option is active there’s a key visual indicator that it’s doing what you want. Press the mute button on the DCA channel and it will light up pink. With our new setting active you can go to the channel you expect will mute across the mixer, and it’s mute button will be blinking pink:
When we were putting together MBI Winds last year, I started asking around about equipment early in the summer. A nearby high school had a plastic sound cart that they hated. They said they were going to throw it away, so it was free for the taking 😲
I picked up the roto-molded SKB Gig Rig and we quickly put it into service. It was worse for wear. Missing the end cover doors, wheels that needed TLC, many latches broken. For the first season we used it as-is and just put a ratchet strap around the whole thing to hold it together since the latches were broken 😂
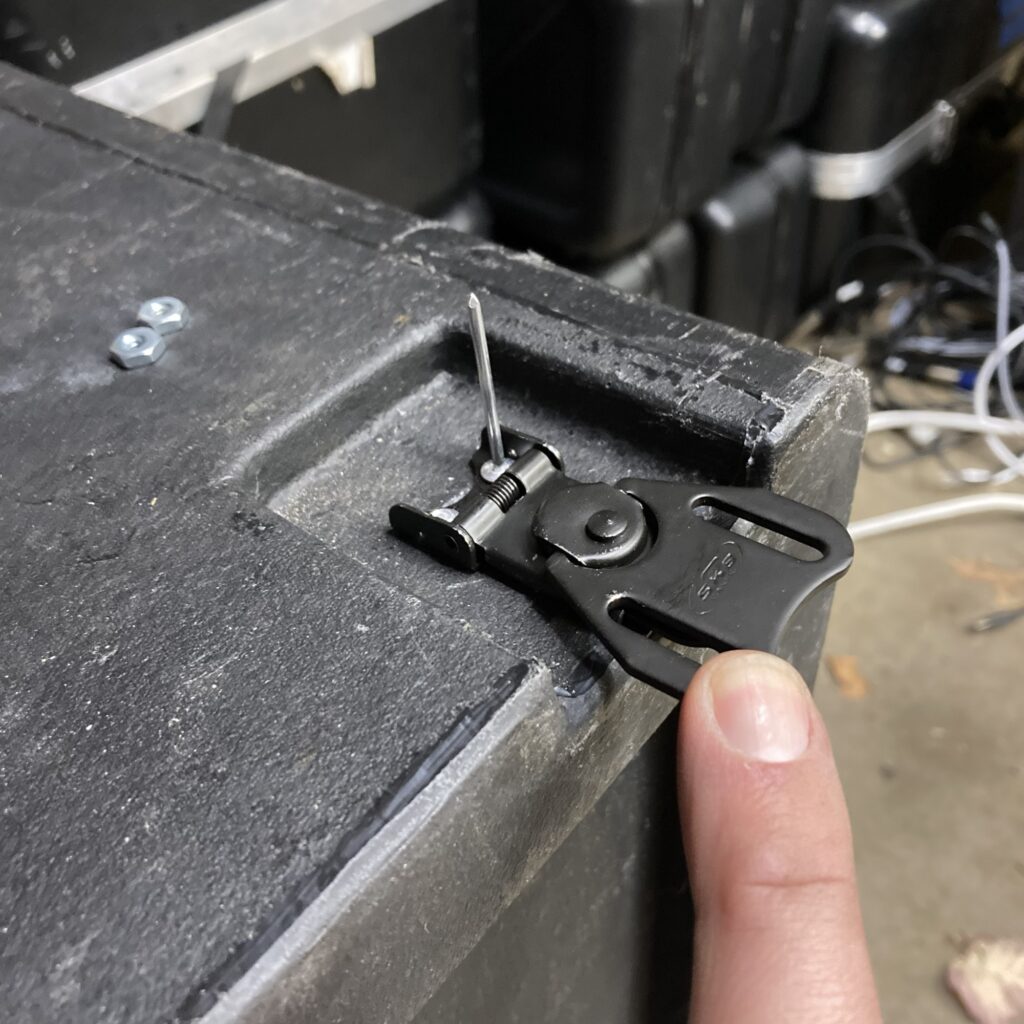
For the 2024 season I wanted to fix the latches and remove our ratchet strap for a more professional look 🤵 I reached out to SKB and started doing some research on my own. I found this Southco latch and catch plate to be drop-in replacements. However, SKB support was able to send me replacement latches free of charge.
Installation posed a challenge as I’ve never worked with pop rivets before. But I watched a couple youtube videos that I found helpful to remove the broken latches:
Trying it for myself
I purchased a pop rivet tool that included several rivet sizes. I did a couple practices on scrap pieces of metal to get the feel for it. Since the SKB rack is plastic, I don’t want to damage it.
I was able to remove the old rivets fairly easy using a drift/punch and a drill bit as shown in the first video. But when it came time to install the new rivets, there was an issue…
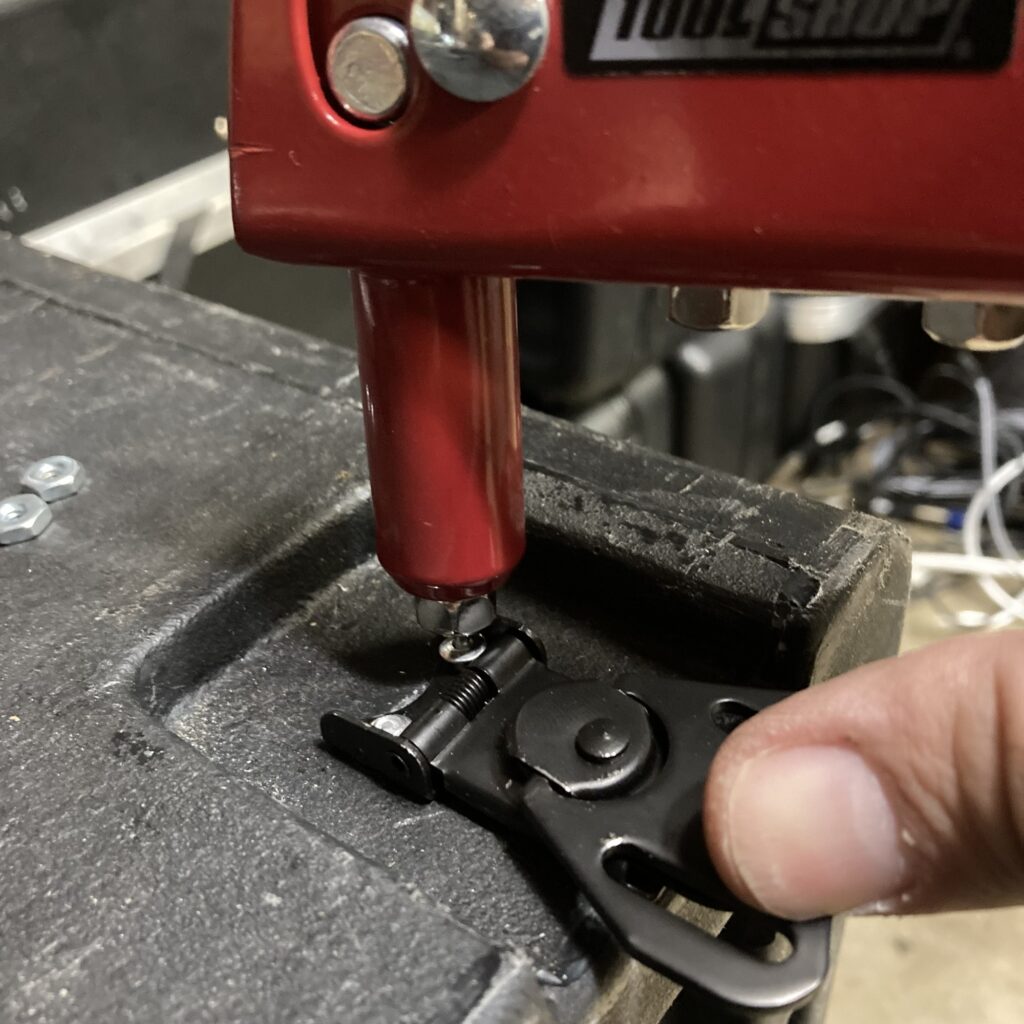
Above the rivet is in place, ready to be installed. The rivet tool pulls on the section of the pop rivet sticking out. But as you can see below, the nose piece gets blocked by the latch hinge:
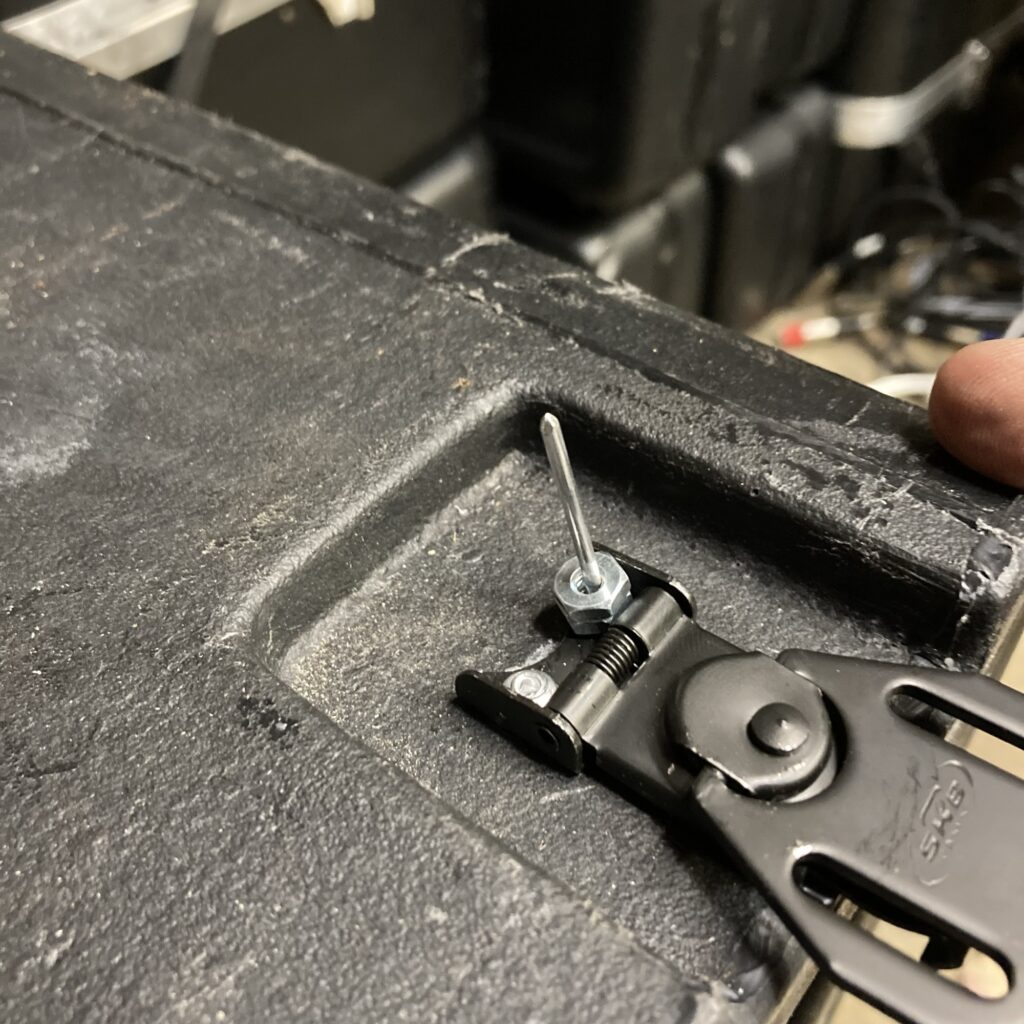
The quick and dirty solution was to use two small nuts as stand-offs. I could have used washers or something else, but this is what I had laying around that worked. Then the nose piece could be pushed in flush, and there was still enough of the rivet to grab.
Conclusion
I was able to fix all four broken latches with this method. I wound up using the 3/32″ rivets supplied with the tool because they were made of a softer aluminum that seems to get along better with the SKB’s plastic. SKB support included their own pop rivets but they seemed to require multiple pulls of the rivet tool and didn’t always behave like I expected. I chalk it up to first-timer experience, but whatever the case is, this rack is back!
Hey y’all, it’s been a while. I straight up neglected my 10+ year run of fortnightly posts in November & December 2023. But with a new year comes a renewed commitment to all-the-things, and I am going to make this site one of them.
Besides me, I hope that others can rekindle their love of longer form content. Not everything fits in 280 characters or a single photo. Your stories shouldn’t be held captive in the golden cage of meta.
Maybe you could start or renew your commitment to writing on a schedule as well. It’s cathartic, I promise 😎
I got to ride bikes twice in Italy. The first time I almost died. But I chose to ride again because it was still wonderful in a chaotic way.
E-Bikes – a game changer
I rented a bike in Rome and also in Florence. Both were electric pedal assist. Riding them is so incredibly easy – you could blast around without ever breaking a sweat. E-bikes are a “no excuses” type of transportation.
The annoying thing? Every city or municipality has partners with a different bike share company. In Rome I downloaded the app for Lime, signed up for an account, added my credit card, and found a nearby bike. Then in Florence I had to do the same thing on Ridemovi. A first world problem for sure, but still annoying.
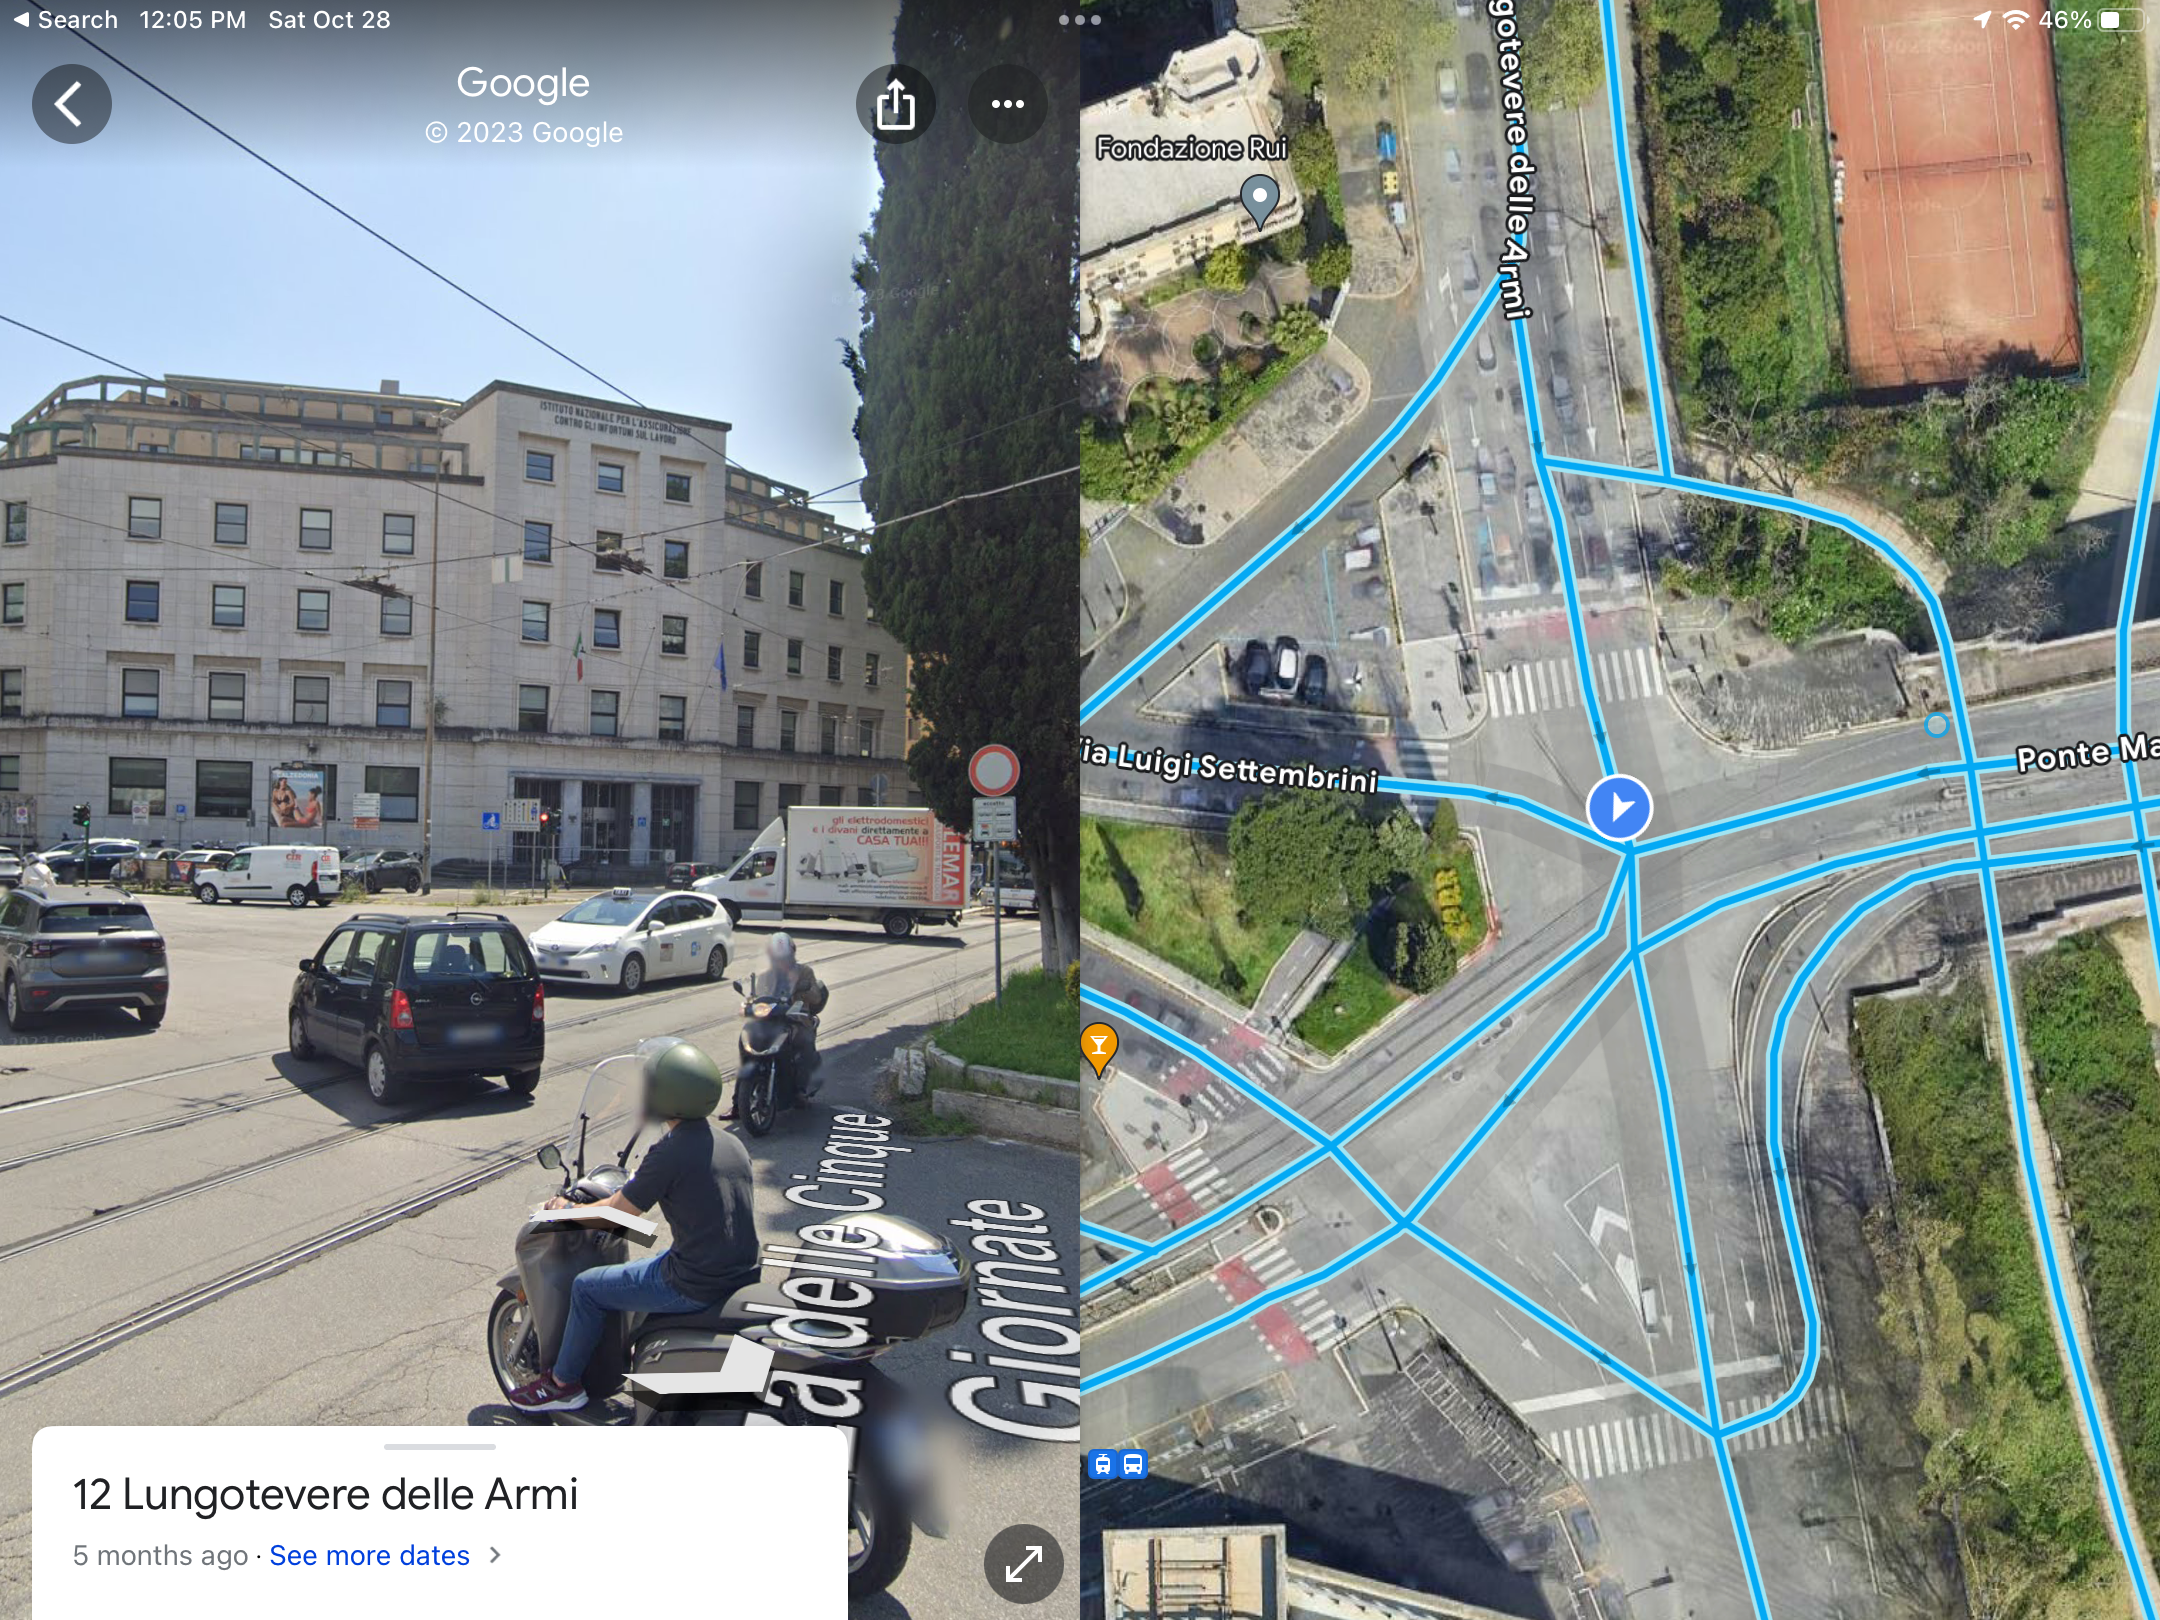
I was on the one-way road, on the right side (opposite the green arrow above) getting ready to turn right. What I didn’t realize is that when the light turned green the signal with the red arrow also turned green to merge together.
To give you an idea, I turned where the small black car is in the next photo. Not realizing more traffic was also going to be going to be merging – where the box truck is:
Luckily the front of traffic was a swarm of motor-scooters starting from a stop. They were able to quickly stop, honk at me, and let me clear the area 😰
In retrospect, the proper right turn probably should have followed this bikeway on the right:
See that sign with the bike and the arrow? ⬆️🚲 Well that means bikes ahead only. I missed that. (Barely) Live and Learn!
Once I cleared that intersection I was on a separated bikeway that was divine 🤩
Run whatchu Brung
I also observed what the local riders did… 🕵️
Before I left the US, I had a picture in my mind of Italians riding bikes. It’s the home of the the Giro d’Italia. Surely everyone would be riding Bianchi, Pinorello, or Colnago bikes – all with Campagnolo components.
Some folks were riding Bianchis and Pinorello bikes, but they were people that looked like they were serious about riding – going on bike-packing tours, or putting out some serious watts.
The bike I spotted that most closely resembled the picture in my mind was owned by a college-aged kid at the train station. He had a 1970s Motobecane. Sure, it’s French, not Italian, but it was vintage and it was cherry 😍
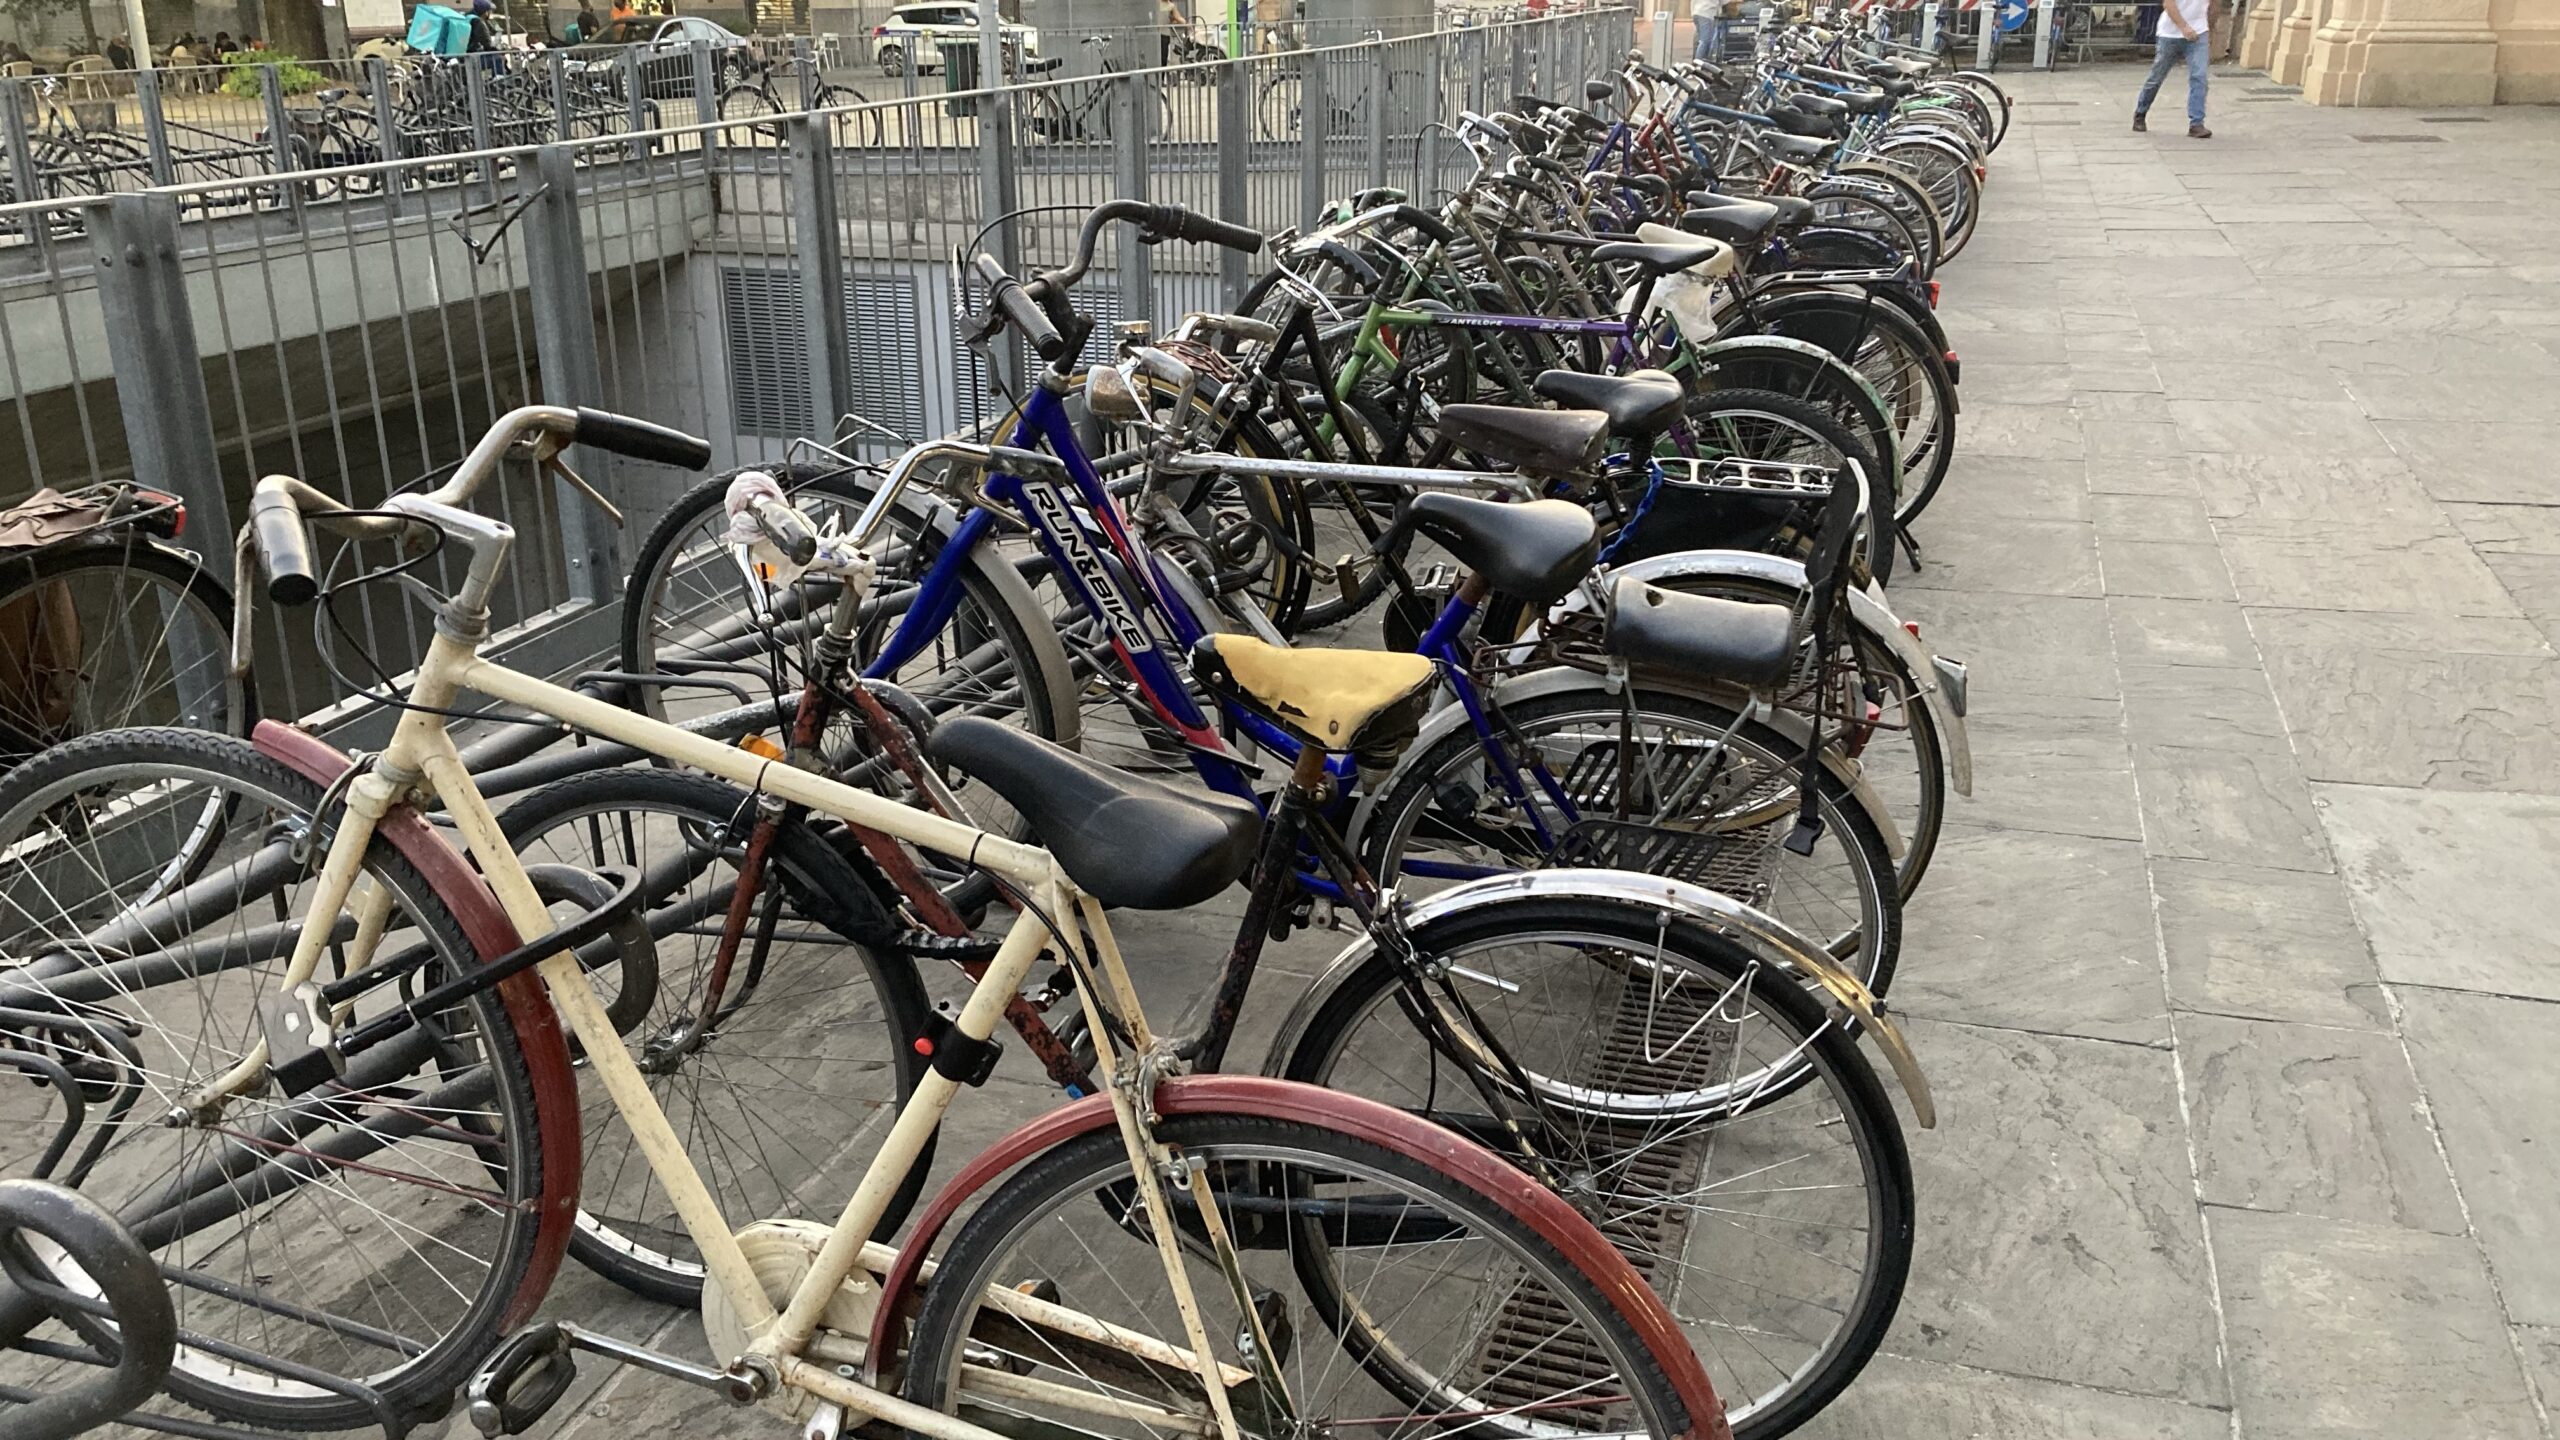
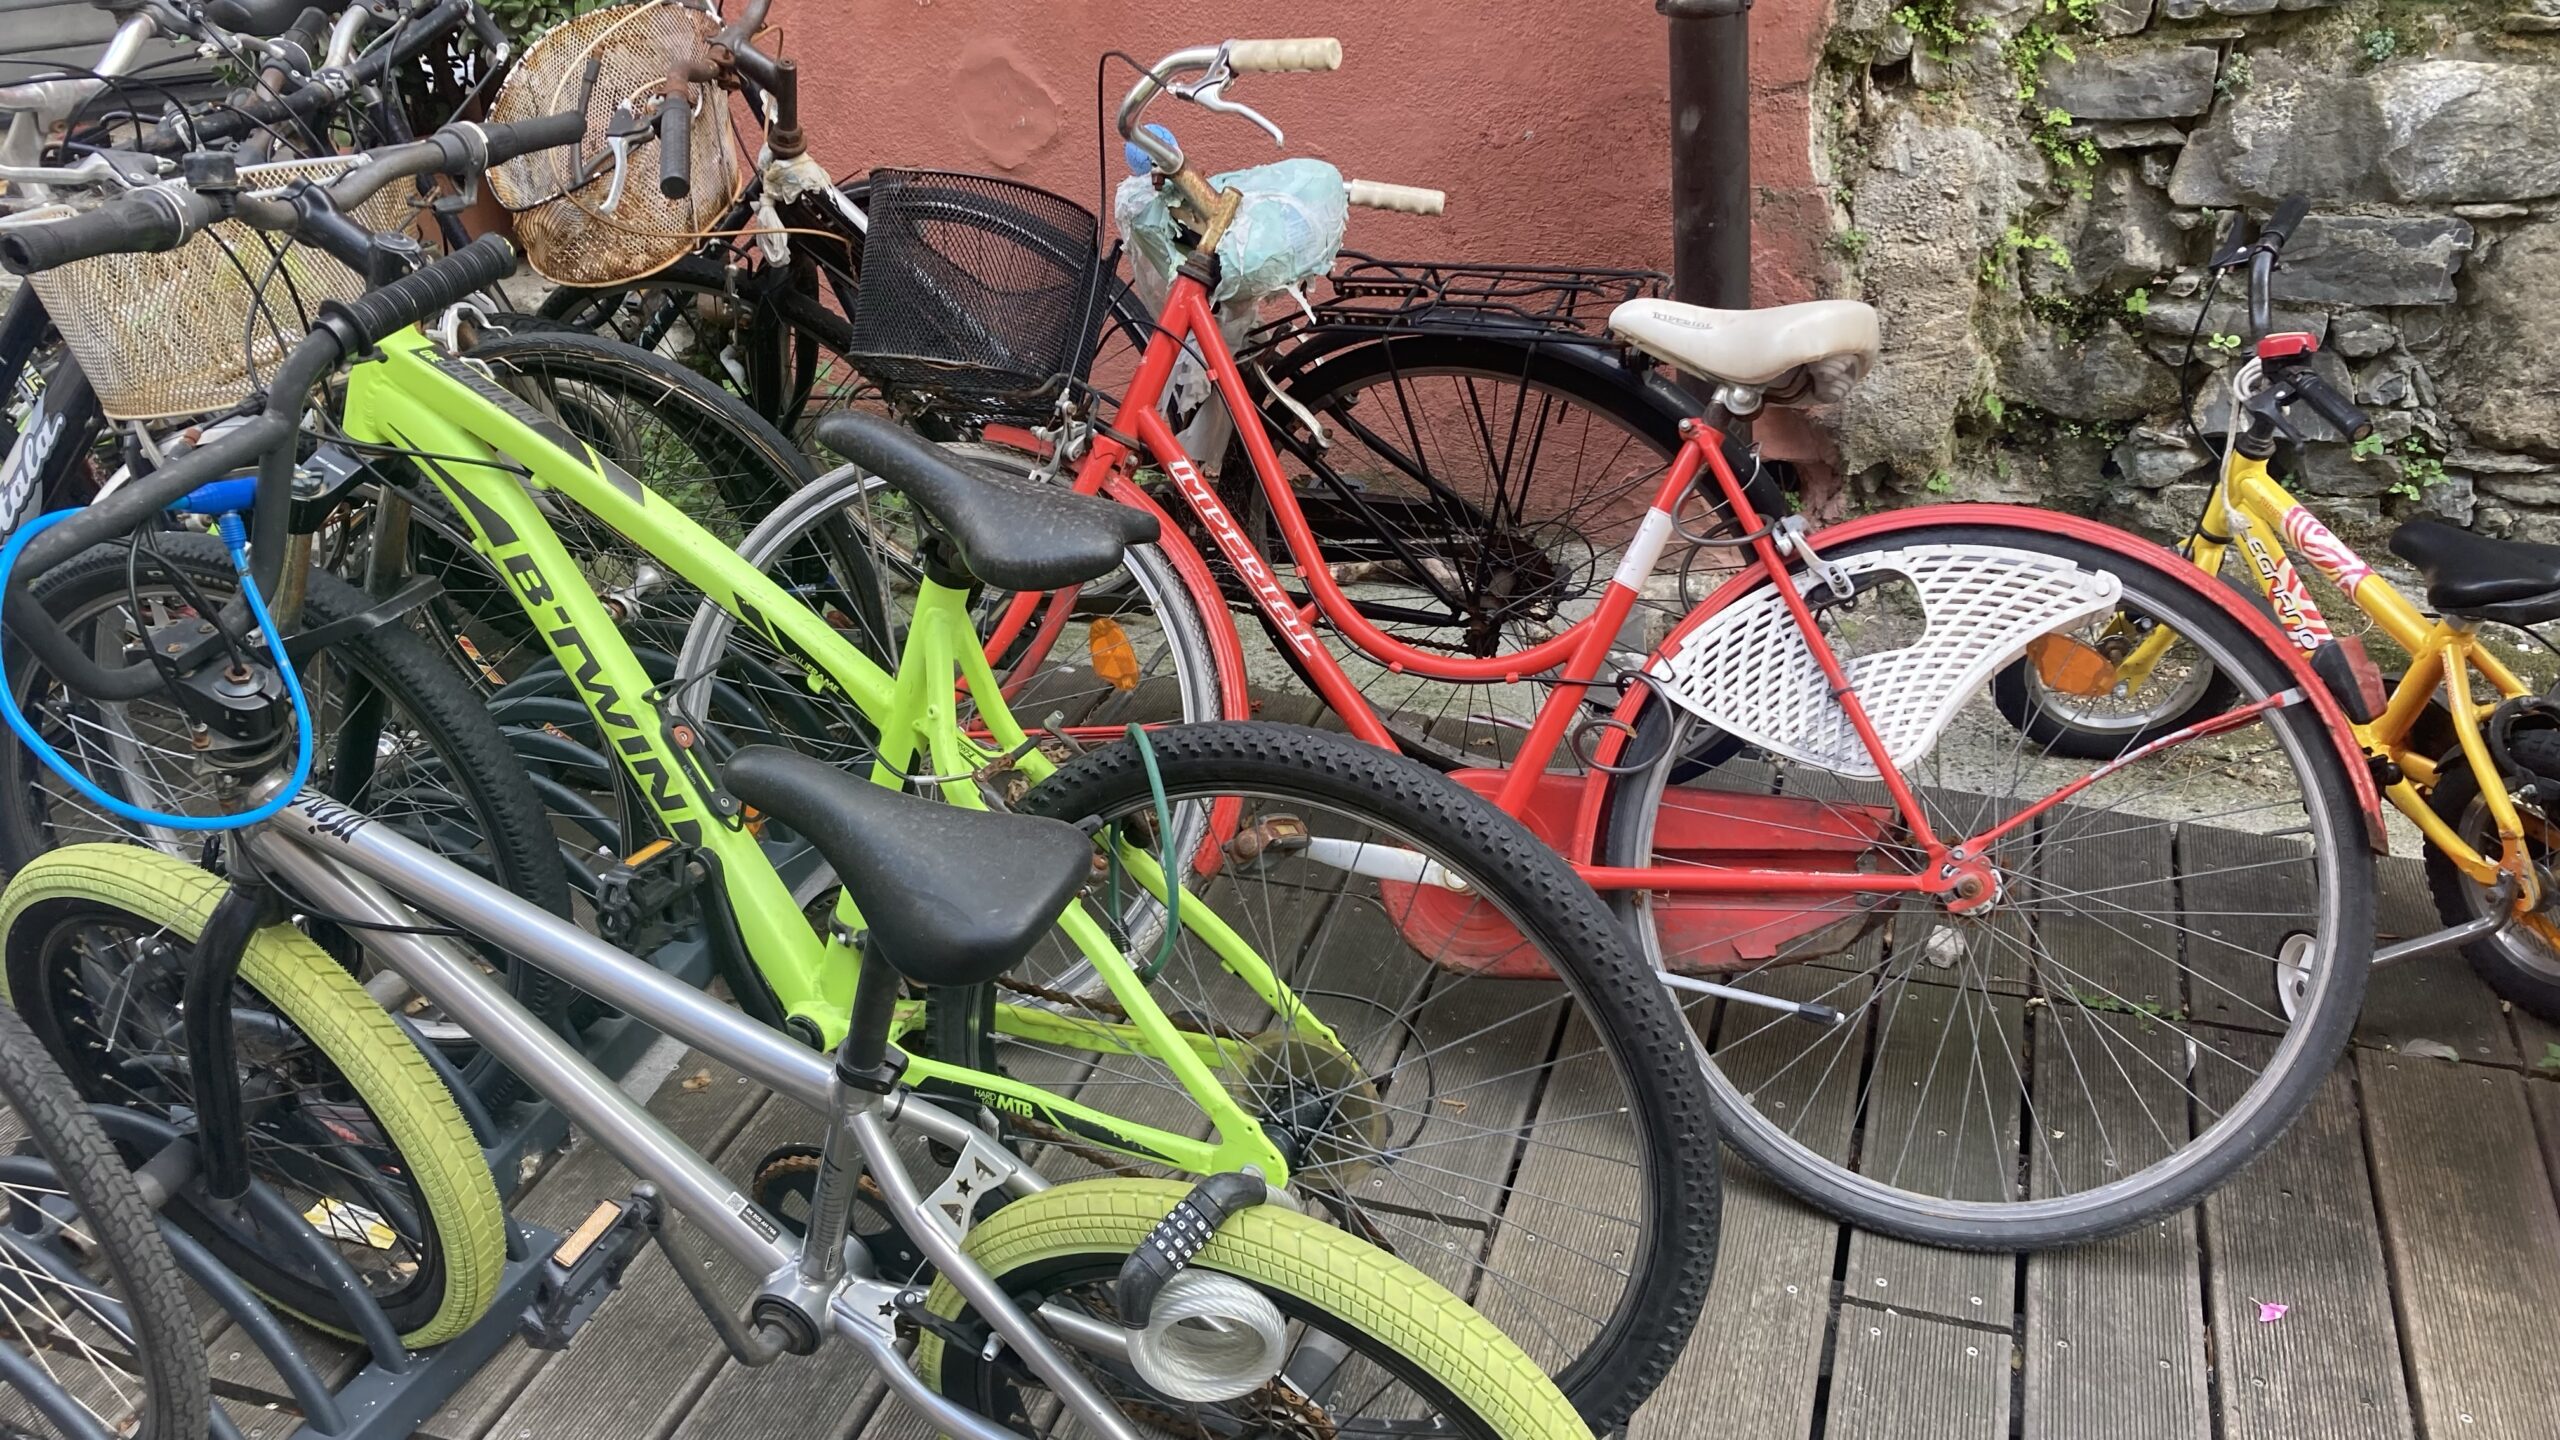
Everyone else just seemed to ride whatever they had.
Nothing really stood out amongst the regular bikes, but a couple brands seemed to be popular.
B’Twin
B’Twin is a store-brand of a sporting goods retailer called Decathlon. As the largest sporting goods retailer in Europe, I imagine it’s a bit like Dick’s Sporting Goods. Decathlon also has a Rockrider brand of mountain bikes and I also saw several of those.
Imperial
Imperial was the other brand that showed up a lot. You can see another in the background of the B’Twin photo. This one I really liked the color scheme on – especially the matching basket, grips, seat, and spoke-guard.
Strangely I couldn’t find any information about this brand on the internet. <Insert Jackie Chan “What?!?” Meme Here>. Seriously, internet dead-end. It’s not this Imperial Bicycles – they make components and exactly one model.
But these bikes were everywhere, both vintage and clearly brand new as the above photo would suggest. Maybe it’s a model or a style and not a brand?
Dangerous but Delightful
Riding in Italy was a bit harrowing at times. Their roads are very narrow, the intersections complex. Then you’ll find yourself on a delightful bikeway. It’s all part of the charm. Just own it. If you’re on an e-bike, riding near traffic doesn’t matter anyway because you’re going to be zooming upwards of 30km/h in seconds 🚲💨
If you have any leads on the mystery “Imperial” bike, let me know in the comments!
As someone with celiac, I had a lot of reservations about traveling to Italy. But then I read an article that explained how good (actually great) it is. I won’t re-hash everything they said, but I will reinforce much of it. Plus I’ll share some times when the experience went from good to simply fair. Above all I want to stress that dining out in Italy is much better regarding food allergies (and similar conditions like celiac) than in the US. When it’s fair instead of good, that’s when it’s on par with the United States.
I set out to consume two things every day Italy: espresso & gelato. I think I missed one day for each in total. My first day in Rome I got an affogato at a cafe across from the Coliseum. 2-in-1 💪
Gelato shops were ubiquitous. Most of them had gluten free (senza glutine) cones. But there’s trouble in paradise: the farther we got from Rome, the less of a chance of finding a gluten free cone 😥 By the time we got to Venice, I had to have my gelato in a cup! First world problems, amirite?
Communicating with locals
85% of the people I interacted with spoke enough English for me to feel safe. “Senza Glutine?” went a long way with waiters and hosts. They’d typically reply with “Pasta” or “Pizza” and then I’d stop in. If they said “Salad” I’d pass. That’s like the time the waiter at Applebees tried to sell me on steamed broccoli – I instantly wanted to fight him 🥦👊
For others that didn’t speak English (it was rare), I had purchased, printed, and laminated an Italian GF restaurant card. I presented it to a hotel kitchen staffer that didn’t speak English and then she brought me an entire tray of GF goodies! 💥
Celiachia App
Italy takes celiac seriously, and they have an app called AIC Mobile. Get it! Sign up for an account a few days ahead of time because it’s not intuitive. They’ll ask for a member ID but you can skip it, which wasn’t clear to me. Members (Italians diagnosed with celiac) get free access to the app, but you can pay $3.99 in-app for “Welcome Access” that lasts a week or so.
Gluten Free Gems
These are a few must visit places if you’re in the area:
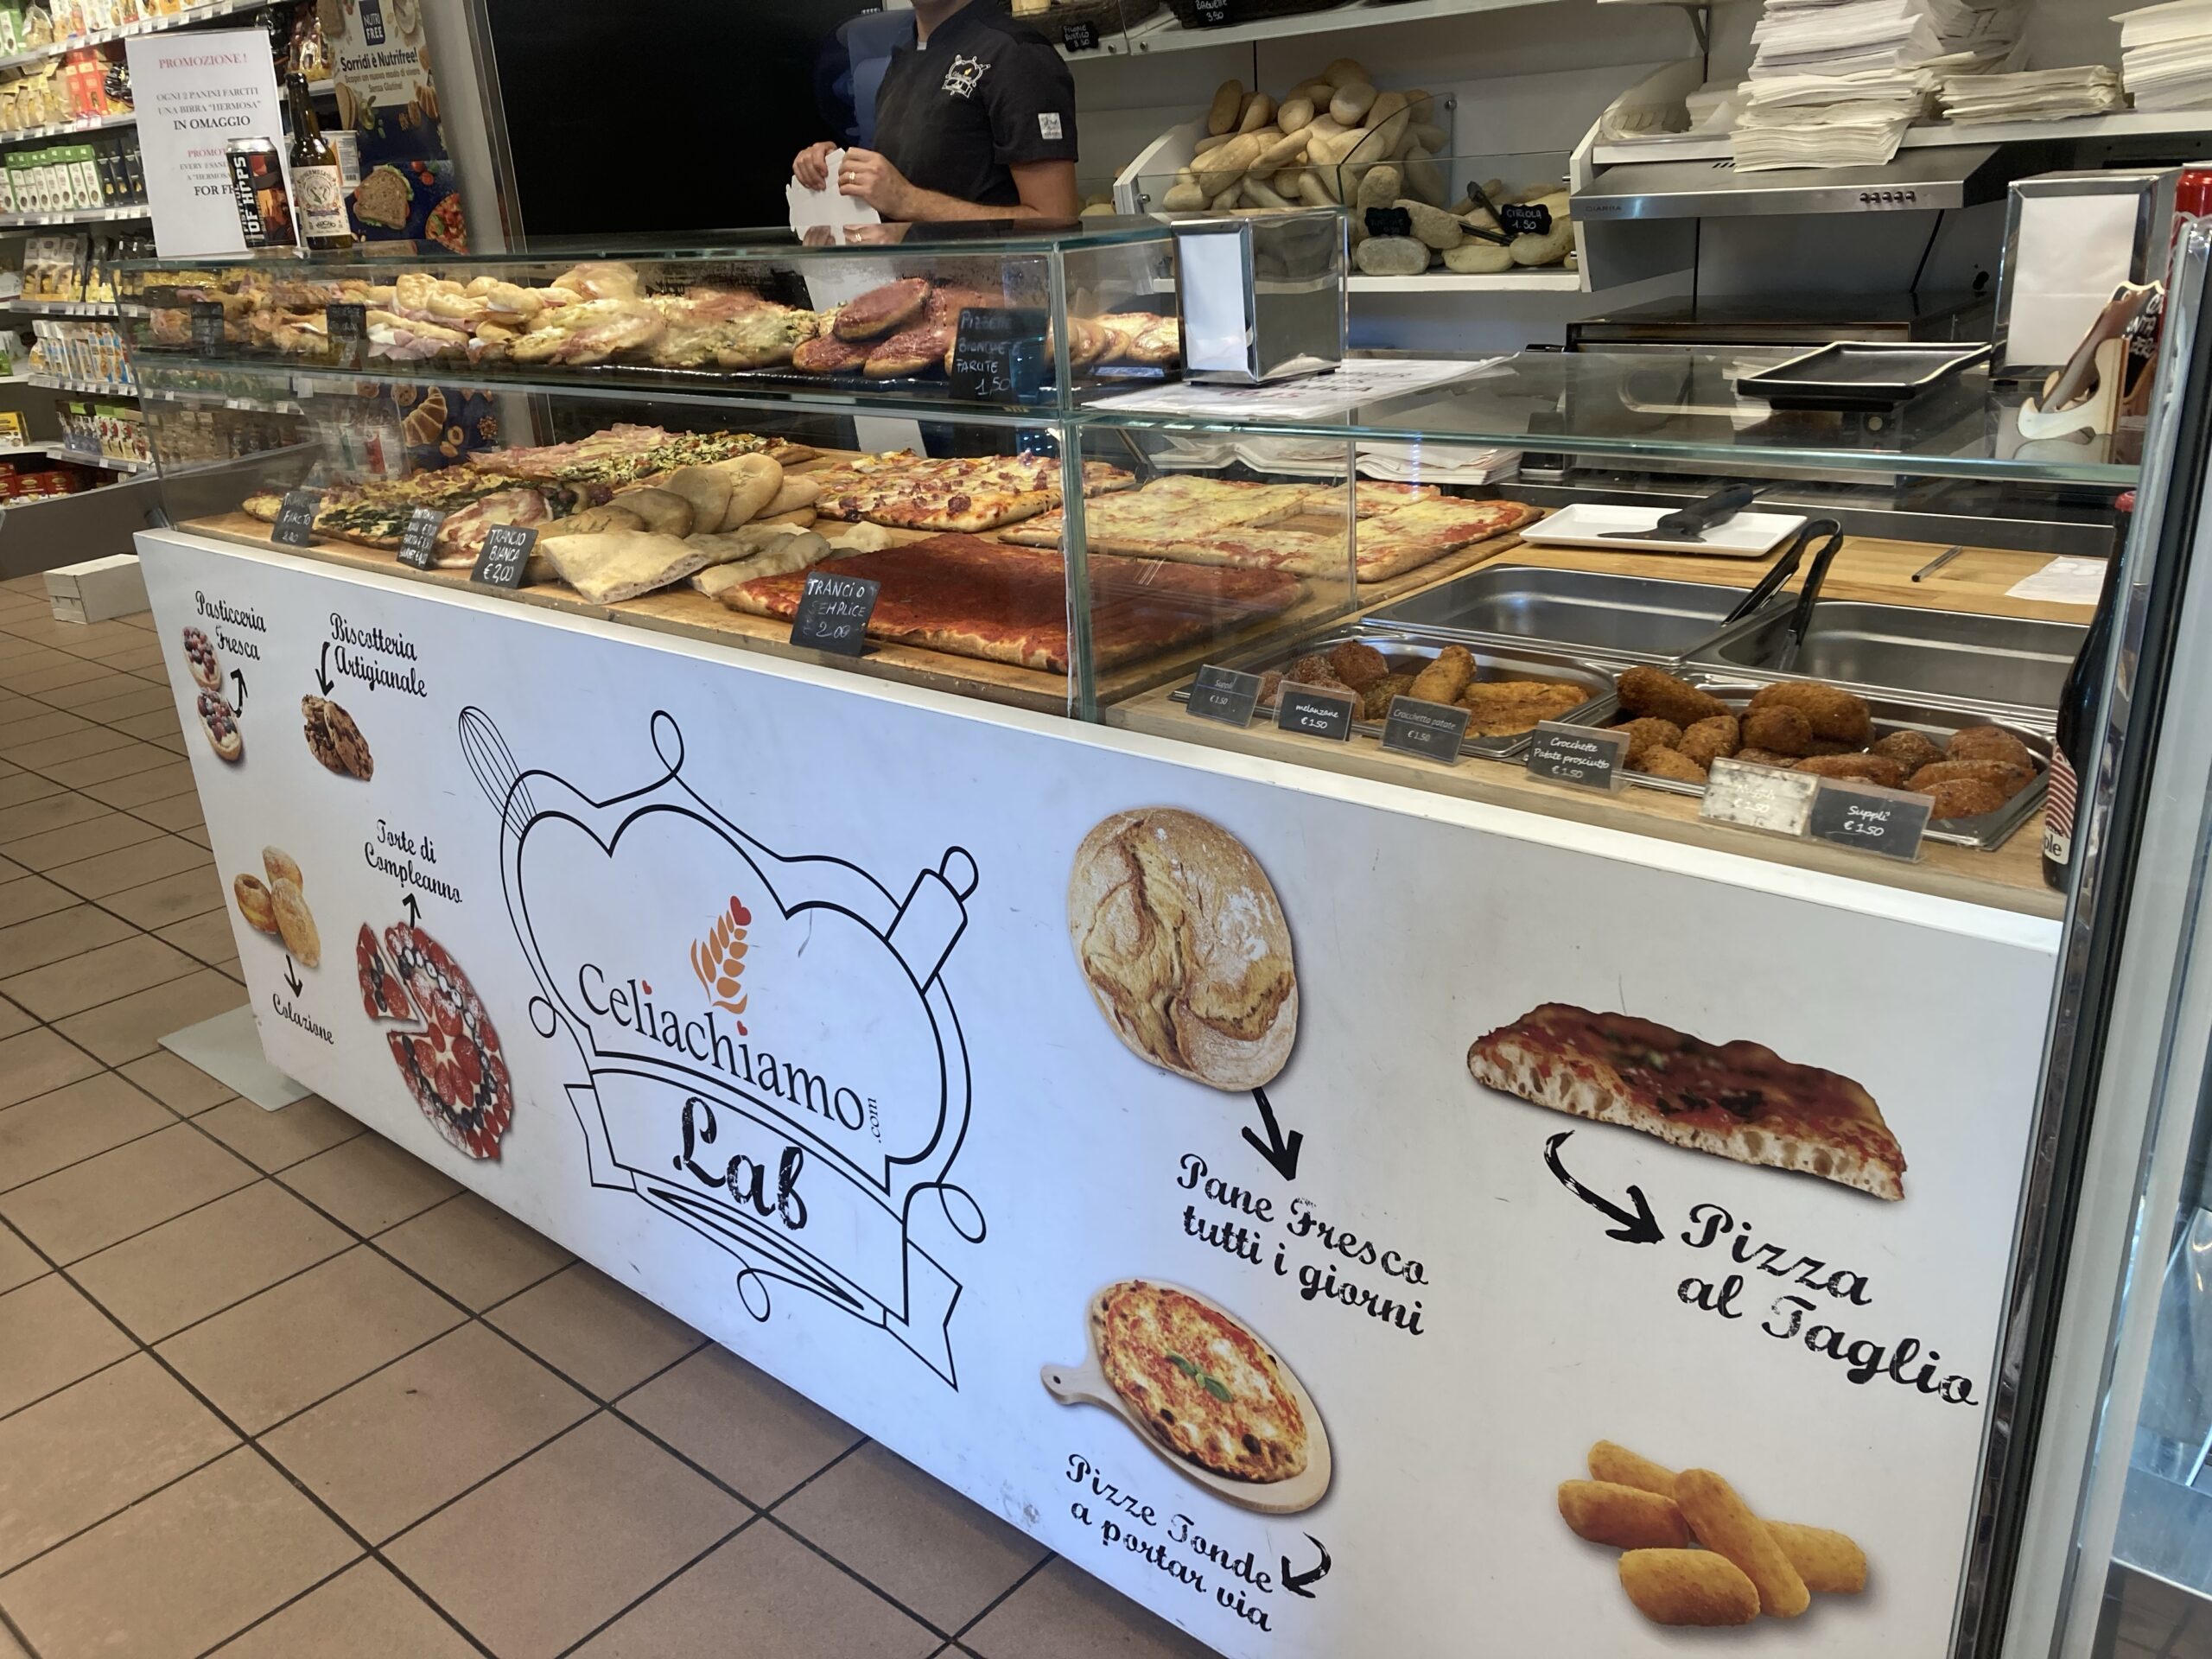
Celiachiamo Lab (Rome)
An entirely gluten free grocery store. A must see above everything else I listed here. I can’t begin to tell you about all the things they had, so I’ll just show off their bakery case.
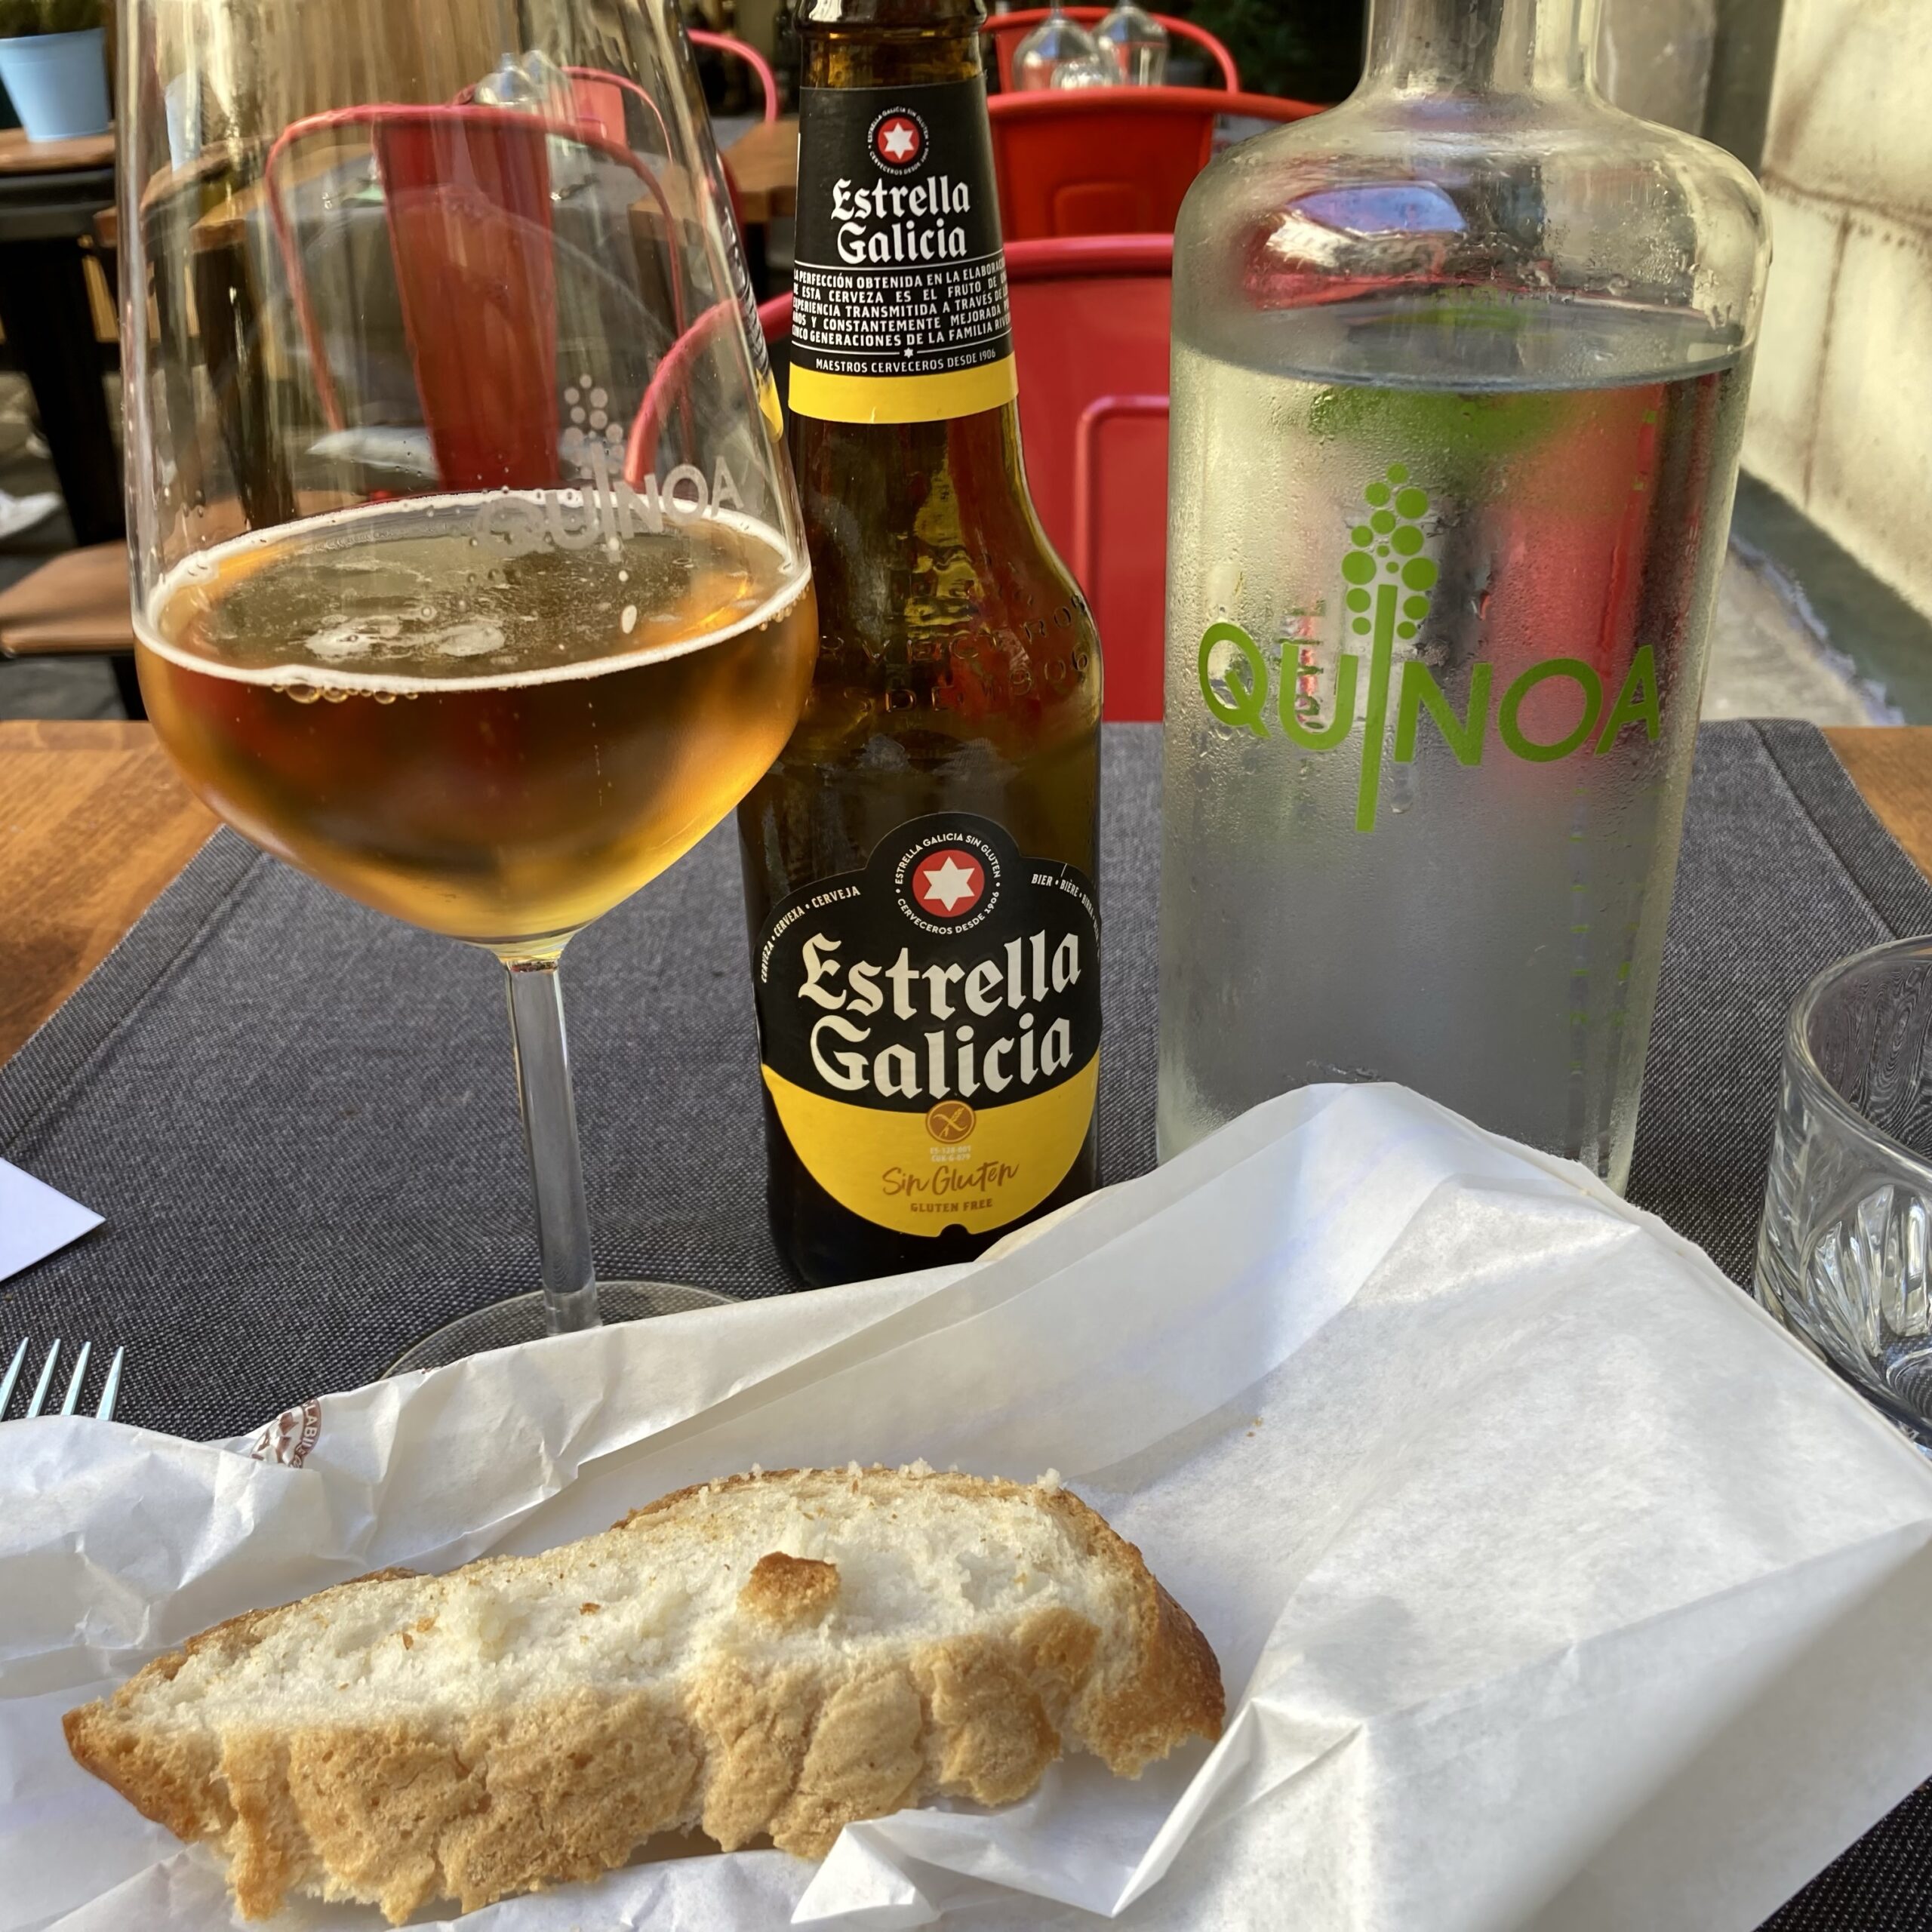
Quinoa GF Restaurant (Florence)
Entirely gluten free restaurant – yep. I’m lucky that we have a handful of dedicated GF restaurants in Minnesota. Amazing to encounter one abroad. Beer and fresh baked bread 🍞🤩
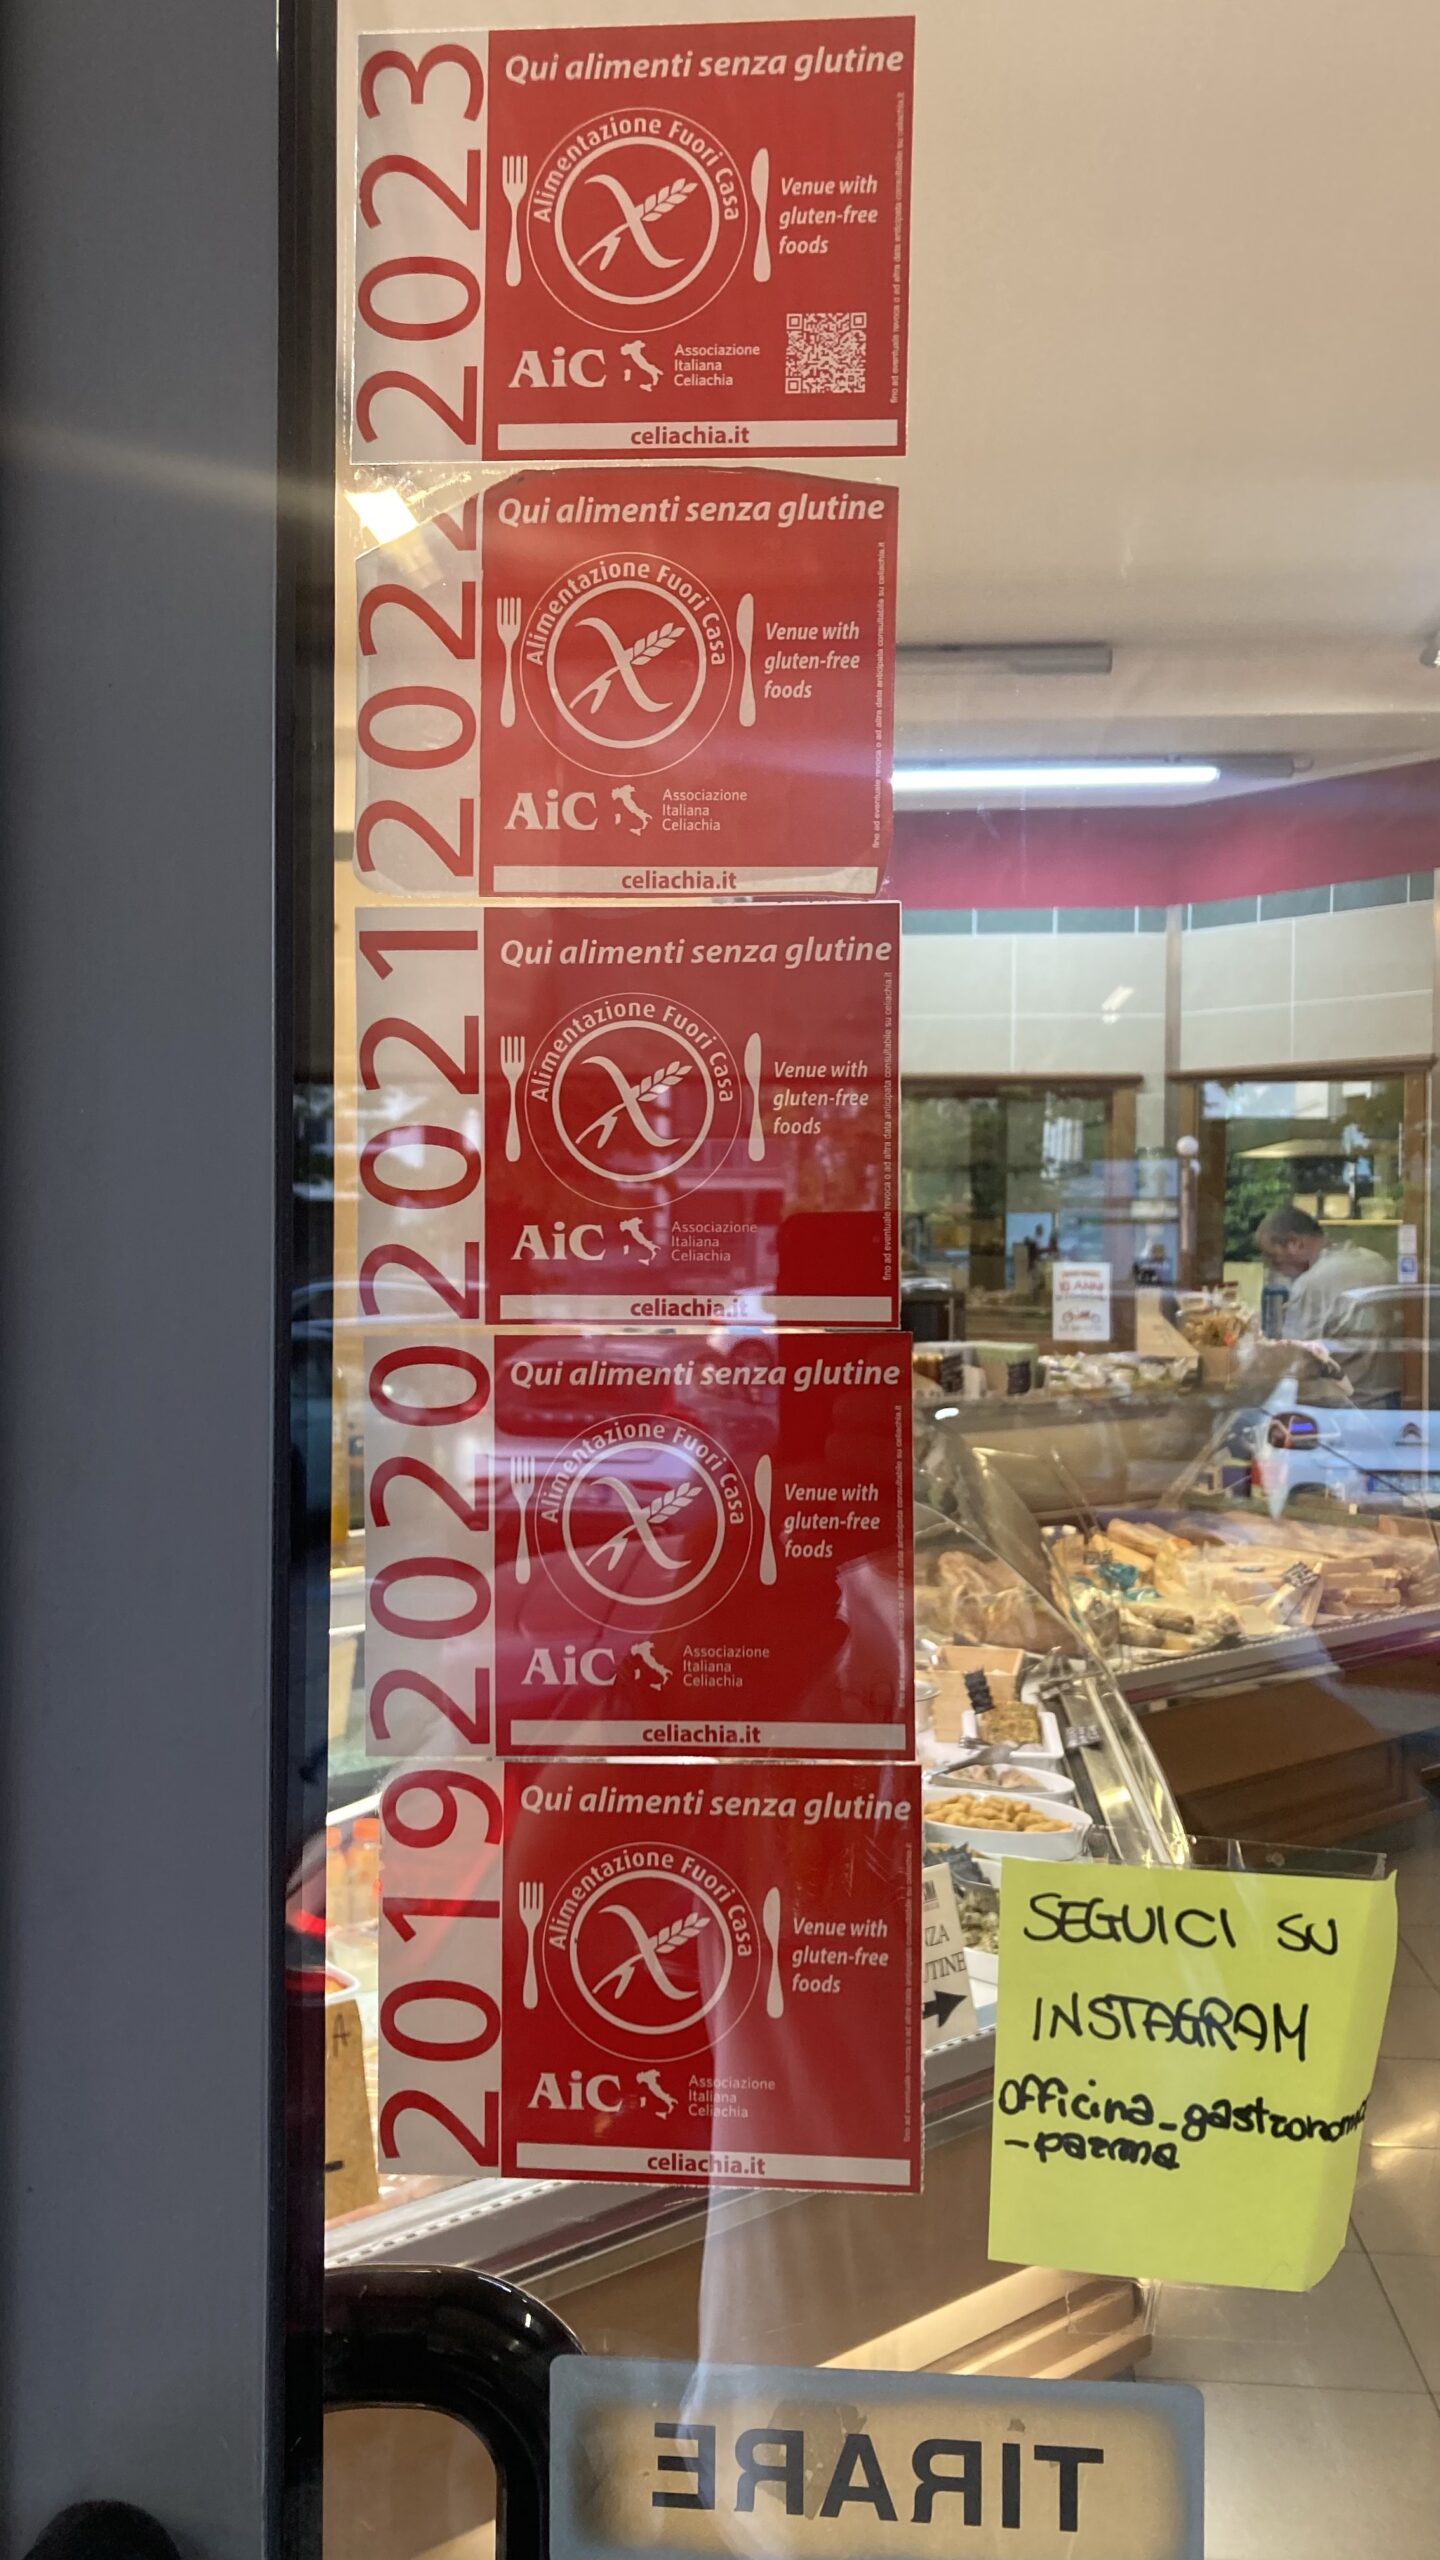
Officina Gastronomica (Parma)
Sort of a hole-in-the-wall strip-mall deli case. Not dedicated gluten free, but more than half of everything they had was GF and kept separate or sealed. It’s not far from the Parma train station, if you’re in the area.
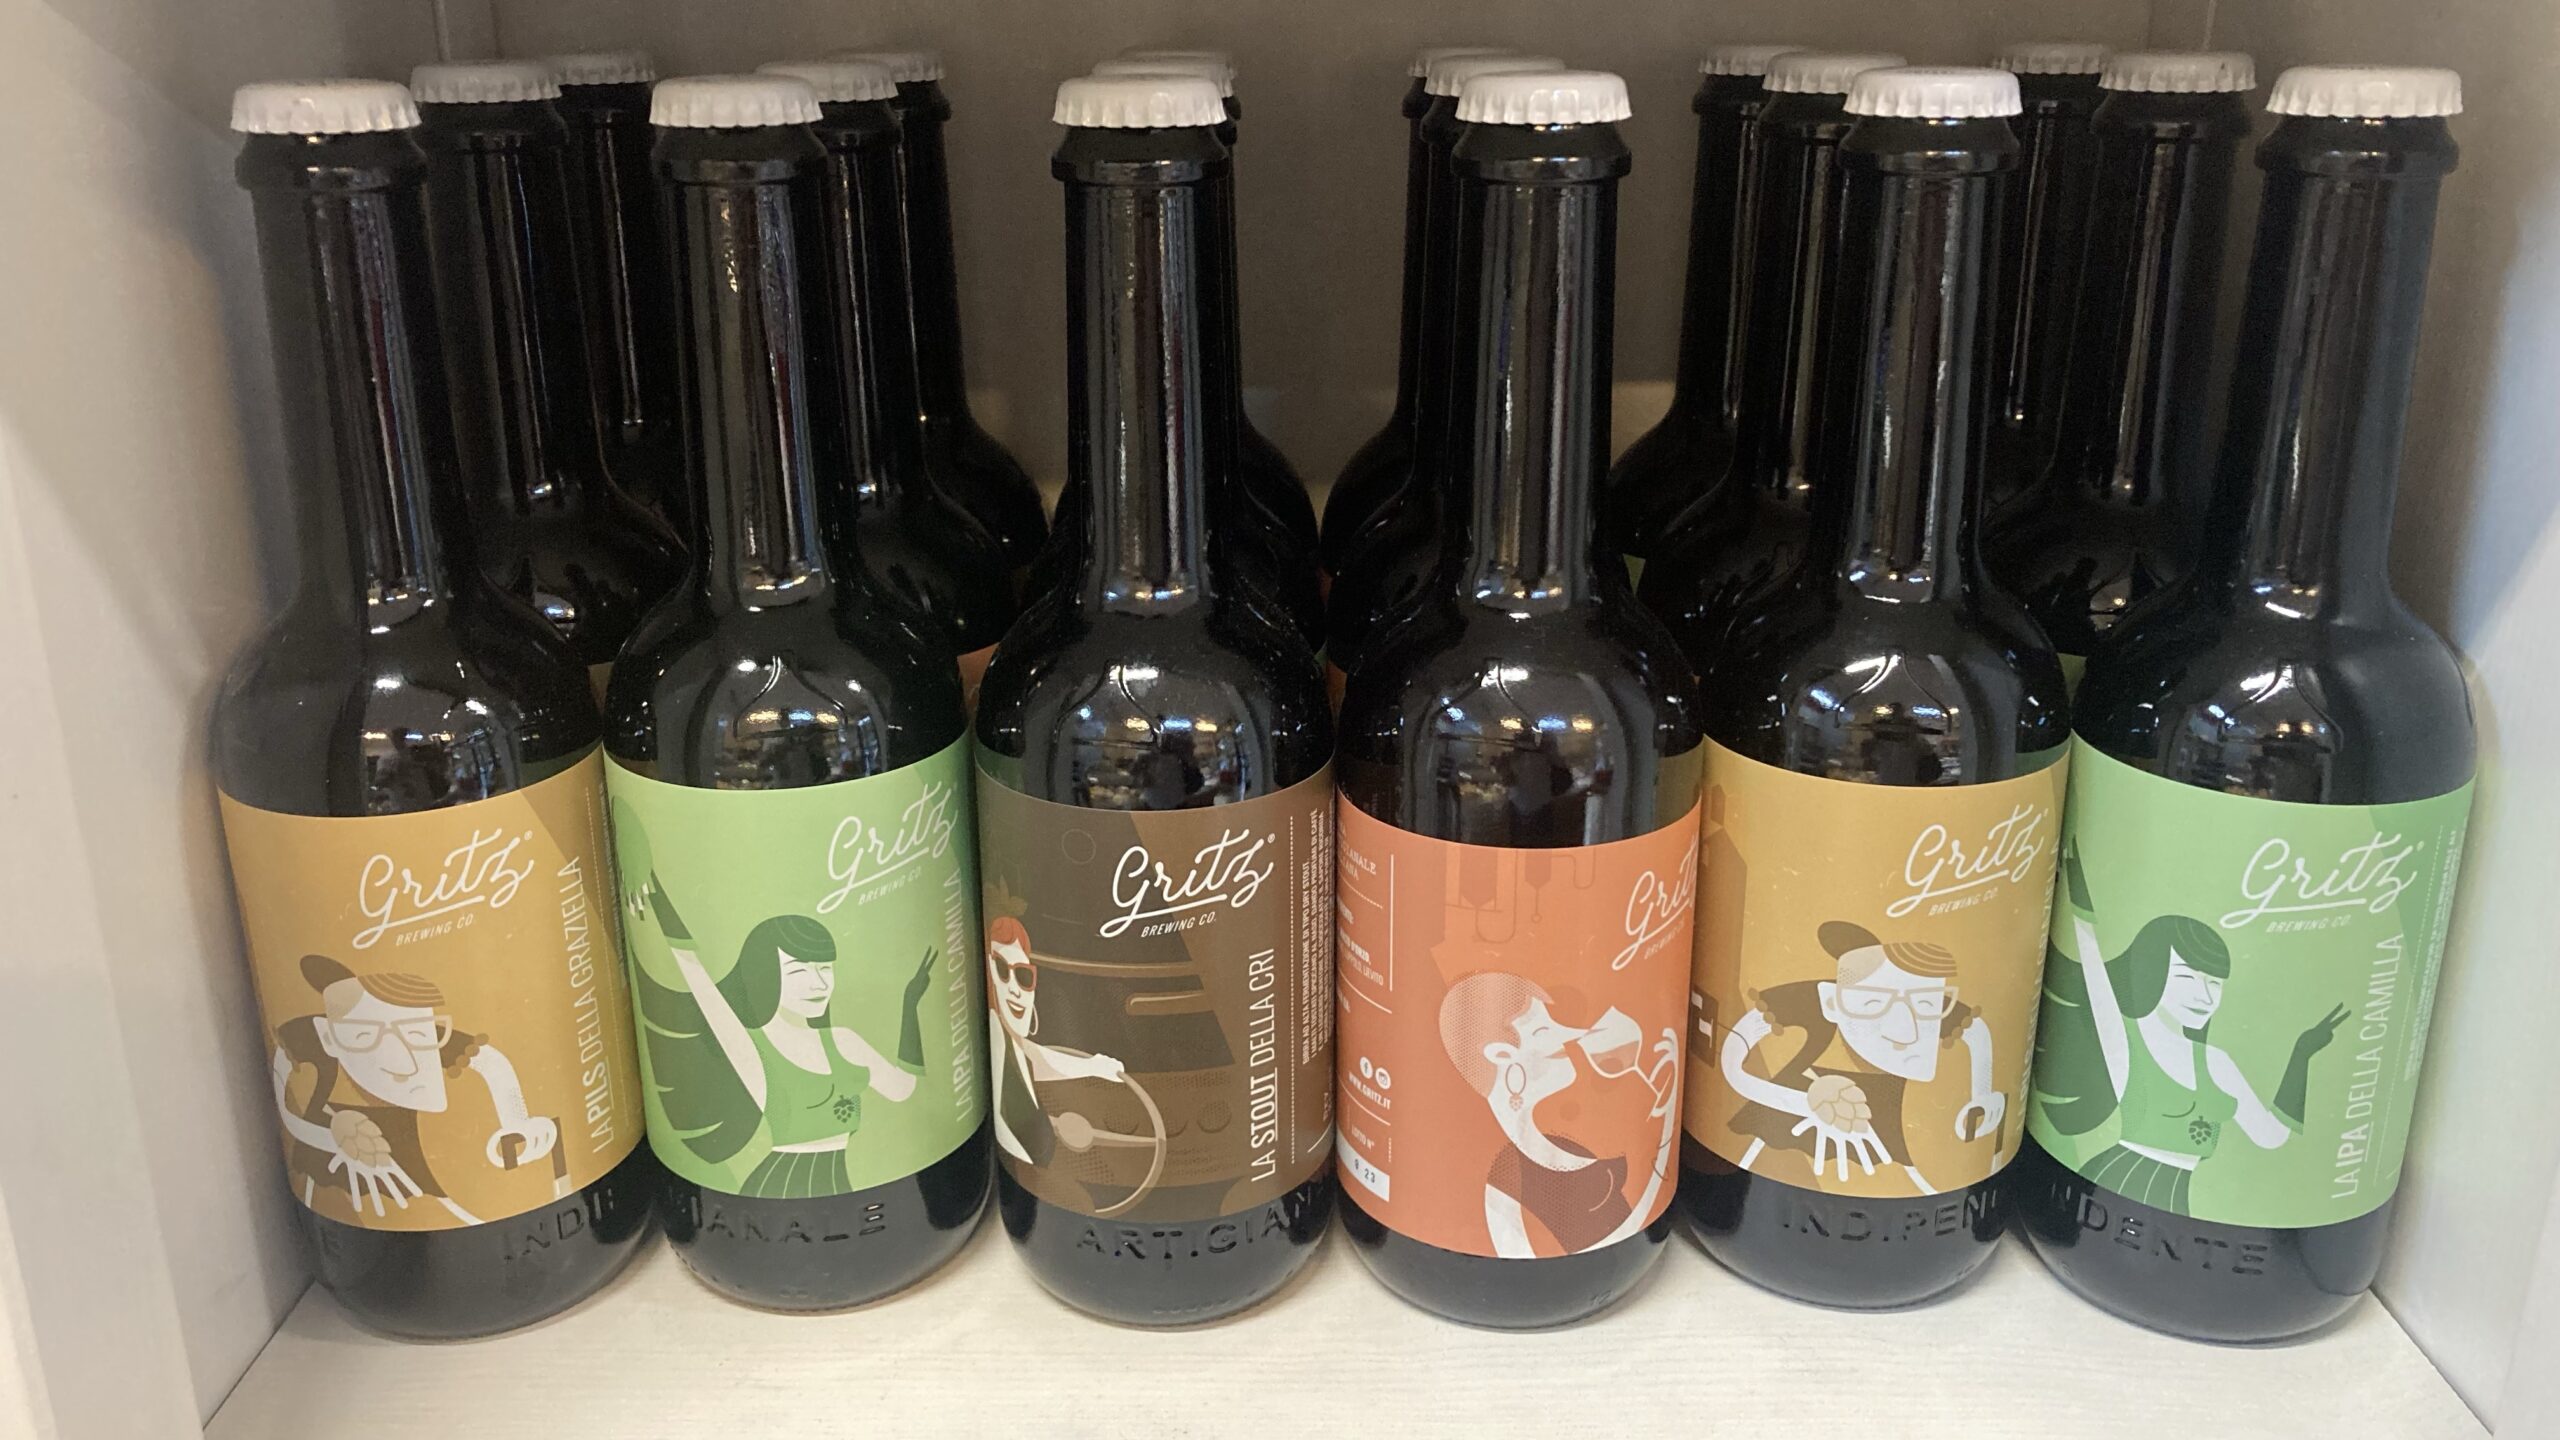
I had a GF ravioli that was stuffed with potato – almost like a pierogi. I had the cook put some buttered spinach on the top and washed it down with a GF beer 🍺
Eat up, don’t worry!
There are so many delicious GF things I ate in Italy, many of them just at regular restaurants. I’m telling you, some of these dishes are life changing. In Rome alone: GF tiramisu at Tiz Cucina e Sofa and a parmesan bowl full of pasta at Ristorante Cantina 26. I even had a fantastic GF bacon cheeseburger 🍔 (yes I had ONE burger in Italy) from Deliburger in La Spezia.
The bottom line is you don’t need to worry if you’re celiac or gluten sensitive. I was there for 9 days and didn’t have any issues. On the flip side, I got sick last year on my trip to Scotland from a hot chocolate mix of all things 🤢 Italy, especially Rome, was a truly amazing dining experience 🇮🇹🍝