This is a love letter to Schwalbe. I love their Big Apple bike tires. If you have a mountain bike that is going to serve most of its life pounding the pavement these are for you. My Redline 29er mountain bike does 95% of its miles on the pavement, and it does it on Big Apples.
They’re big and fat so you keep the same look and level of comfort, it just lowers the rolling resistance because you’ll sound less like a jeep driving down the highway.
Changing tires has an immediate and apparent affect on how your bike handles. The same thing goes for toy cars and full-sized ones. It doesn’t matter if it’s 2-wheels or 4, those little patches of rubber are the only thing connecting you to the road.
More Big Apples
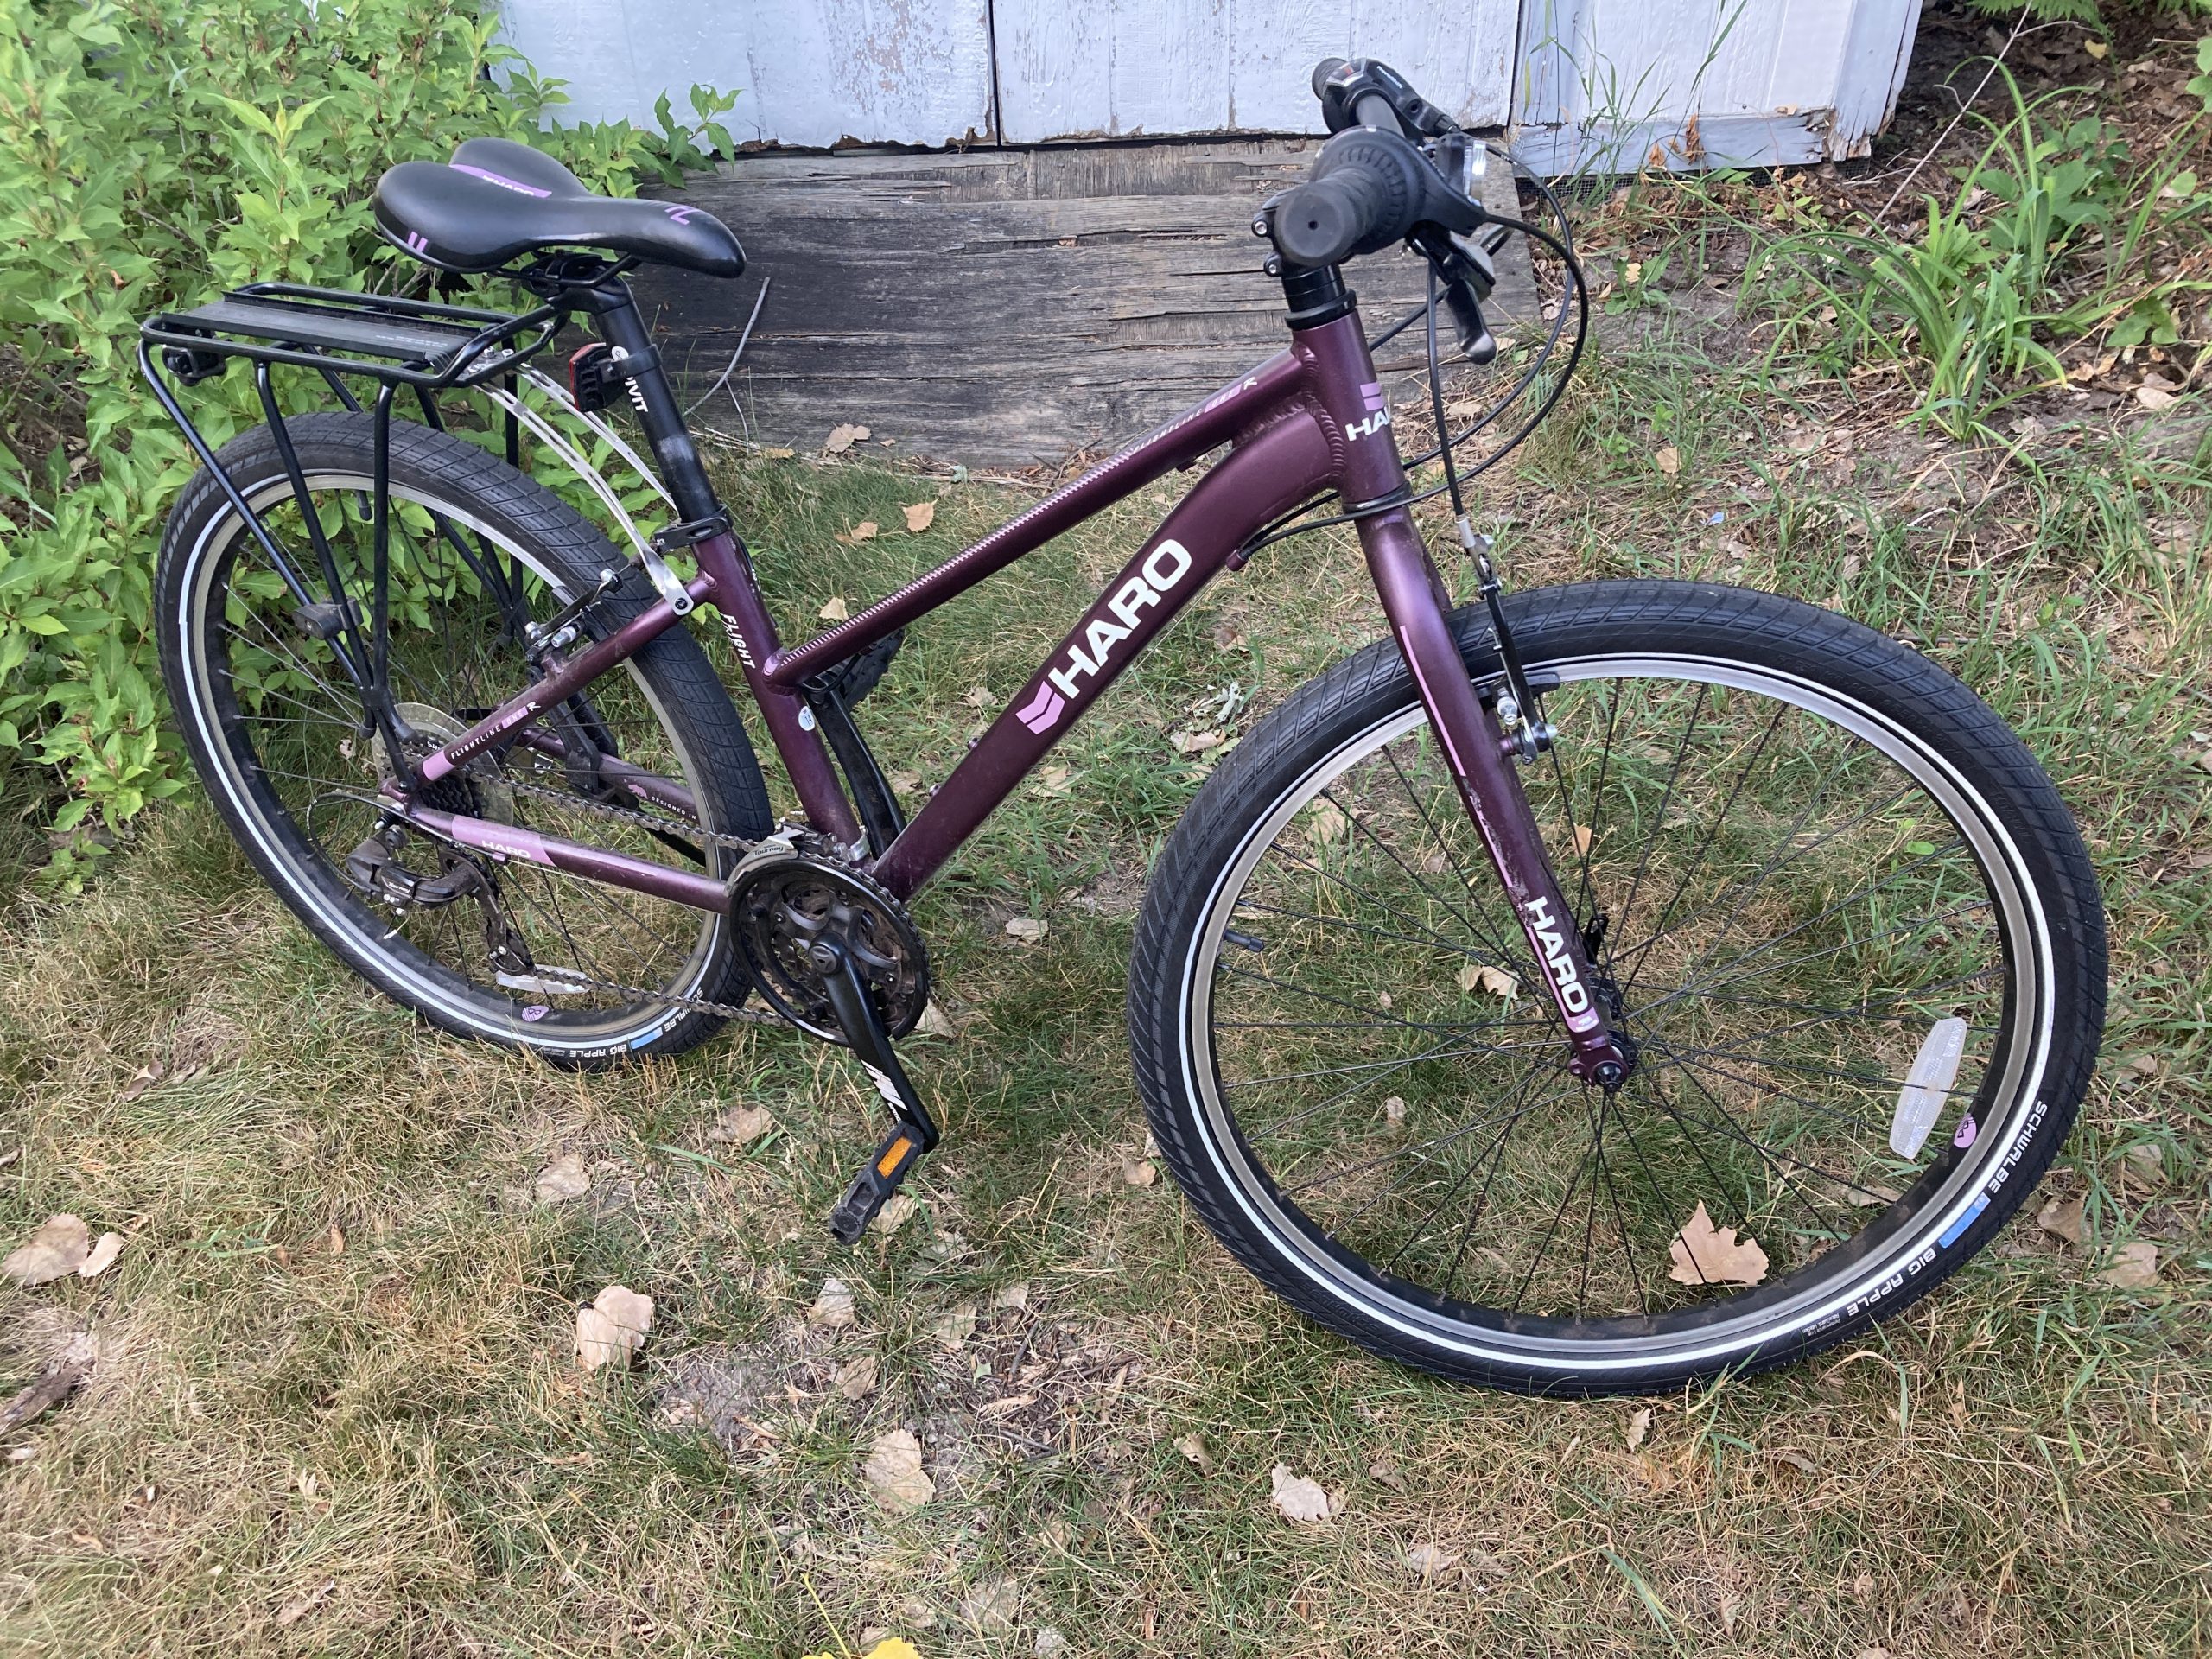
I got my son a set to put on his Haro Flightline. We’re going on some longer rides this summer – mostly on Minnesota’s expansive network of paved bike trails. He doesn’t have the luxury (or allowance) of keeping a separate road & mountain bike like dad.
It’s a relatively quick change (~30 minutes) to go back to stock tires if we’re going to head out to the single track trails.
Rode with Jules to a friend's party in EP. He did great on his Haro Flightline now equipped with Schwalbe Big Apples. Also convinced him to raise his seat!
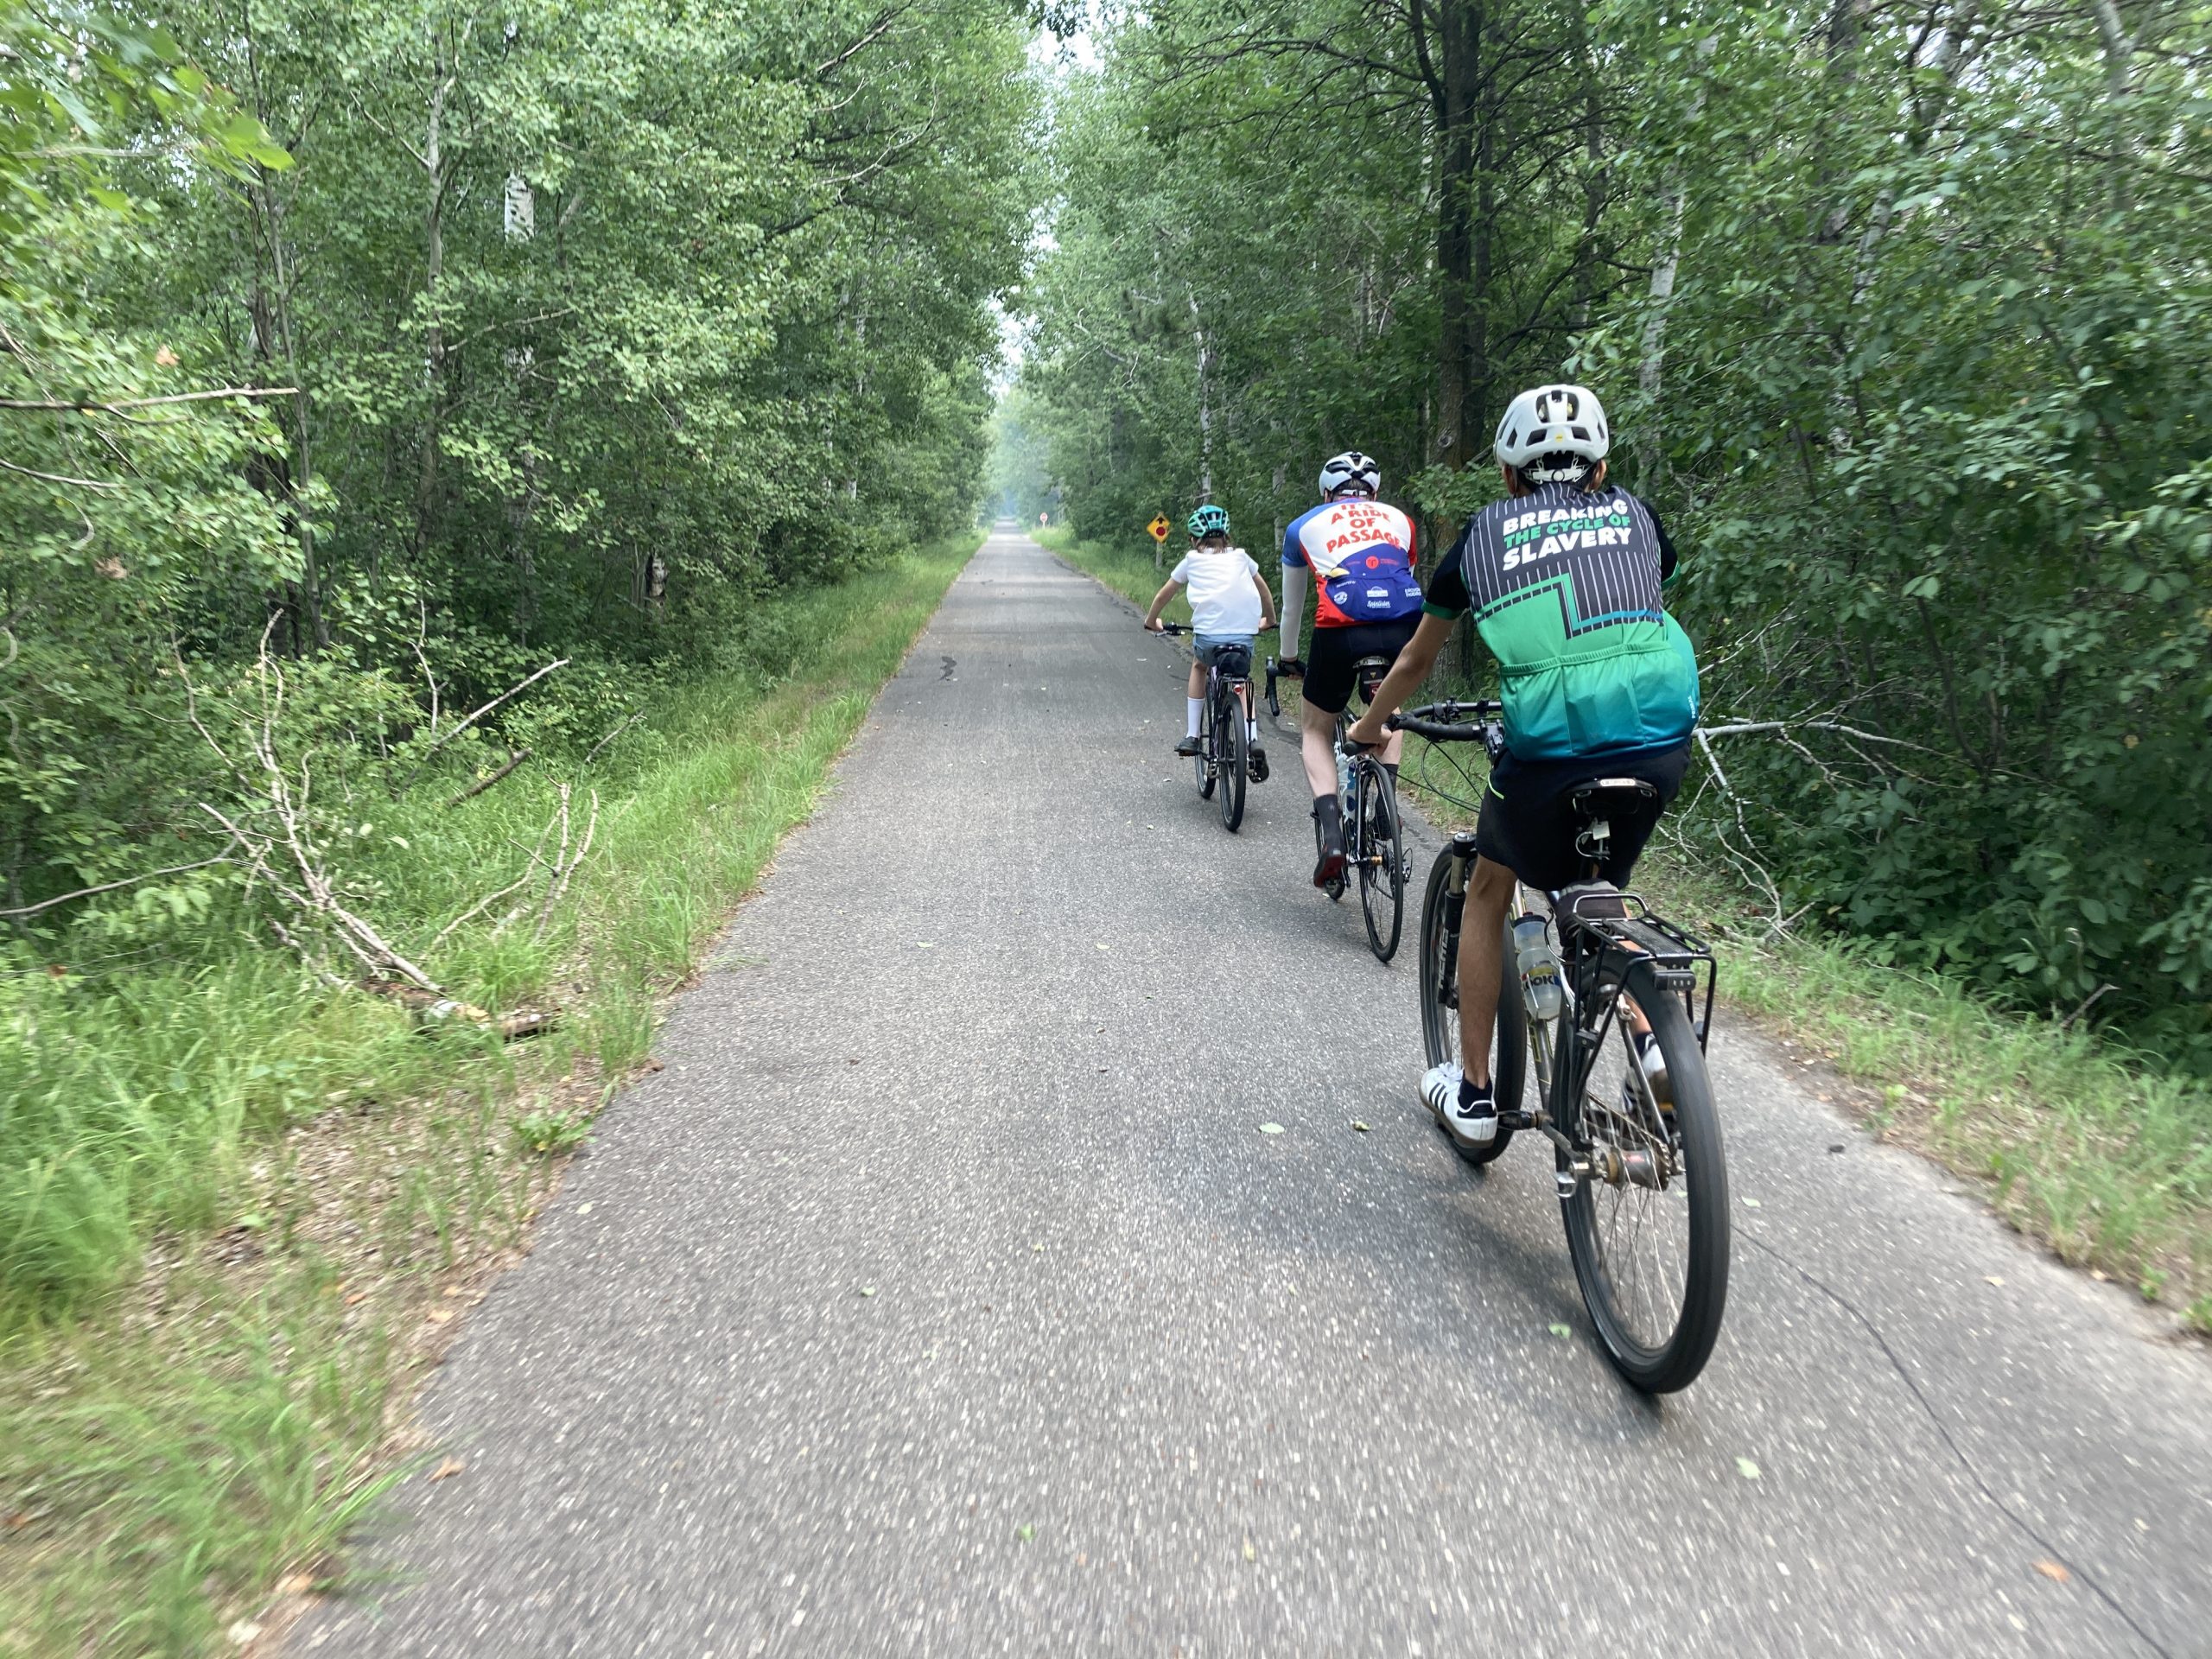
He also was our lead out man for most of a 28 mile ride on the Heartland Trail. They really help him roll fast!
3 out of 4 bikes on this trip used Schwalbe tires 😍
Brand Loyalty
Because of my great experience with Schwalbe, when it came time buy studded tires, I went for the (terribly expensive) Ice Spiker Pros. They cost more per tire than the snow tires on my Subaru. But I wasn’t concerned about quality because I knew from my past experience it was going to be great.
My only gripe is that I wish they were cheaper, especially for the smaller sizes. I want to get a set of Big Apples for my cargo trailer – but they’d cost more than the trailer itself! But I can’t complain – whenever I buy their products it’s money well spent. 💸
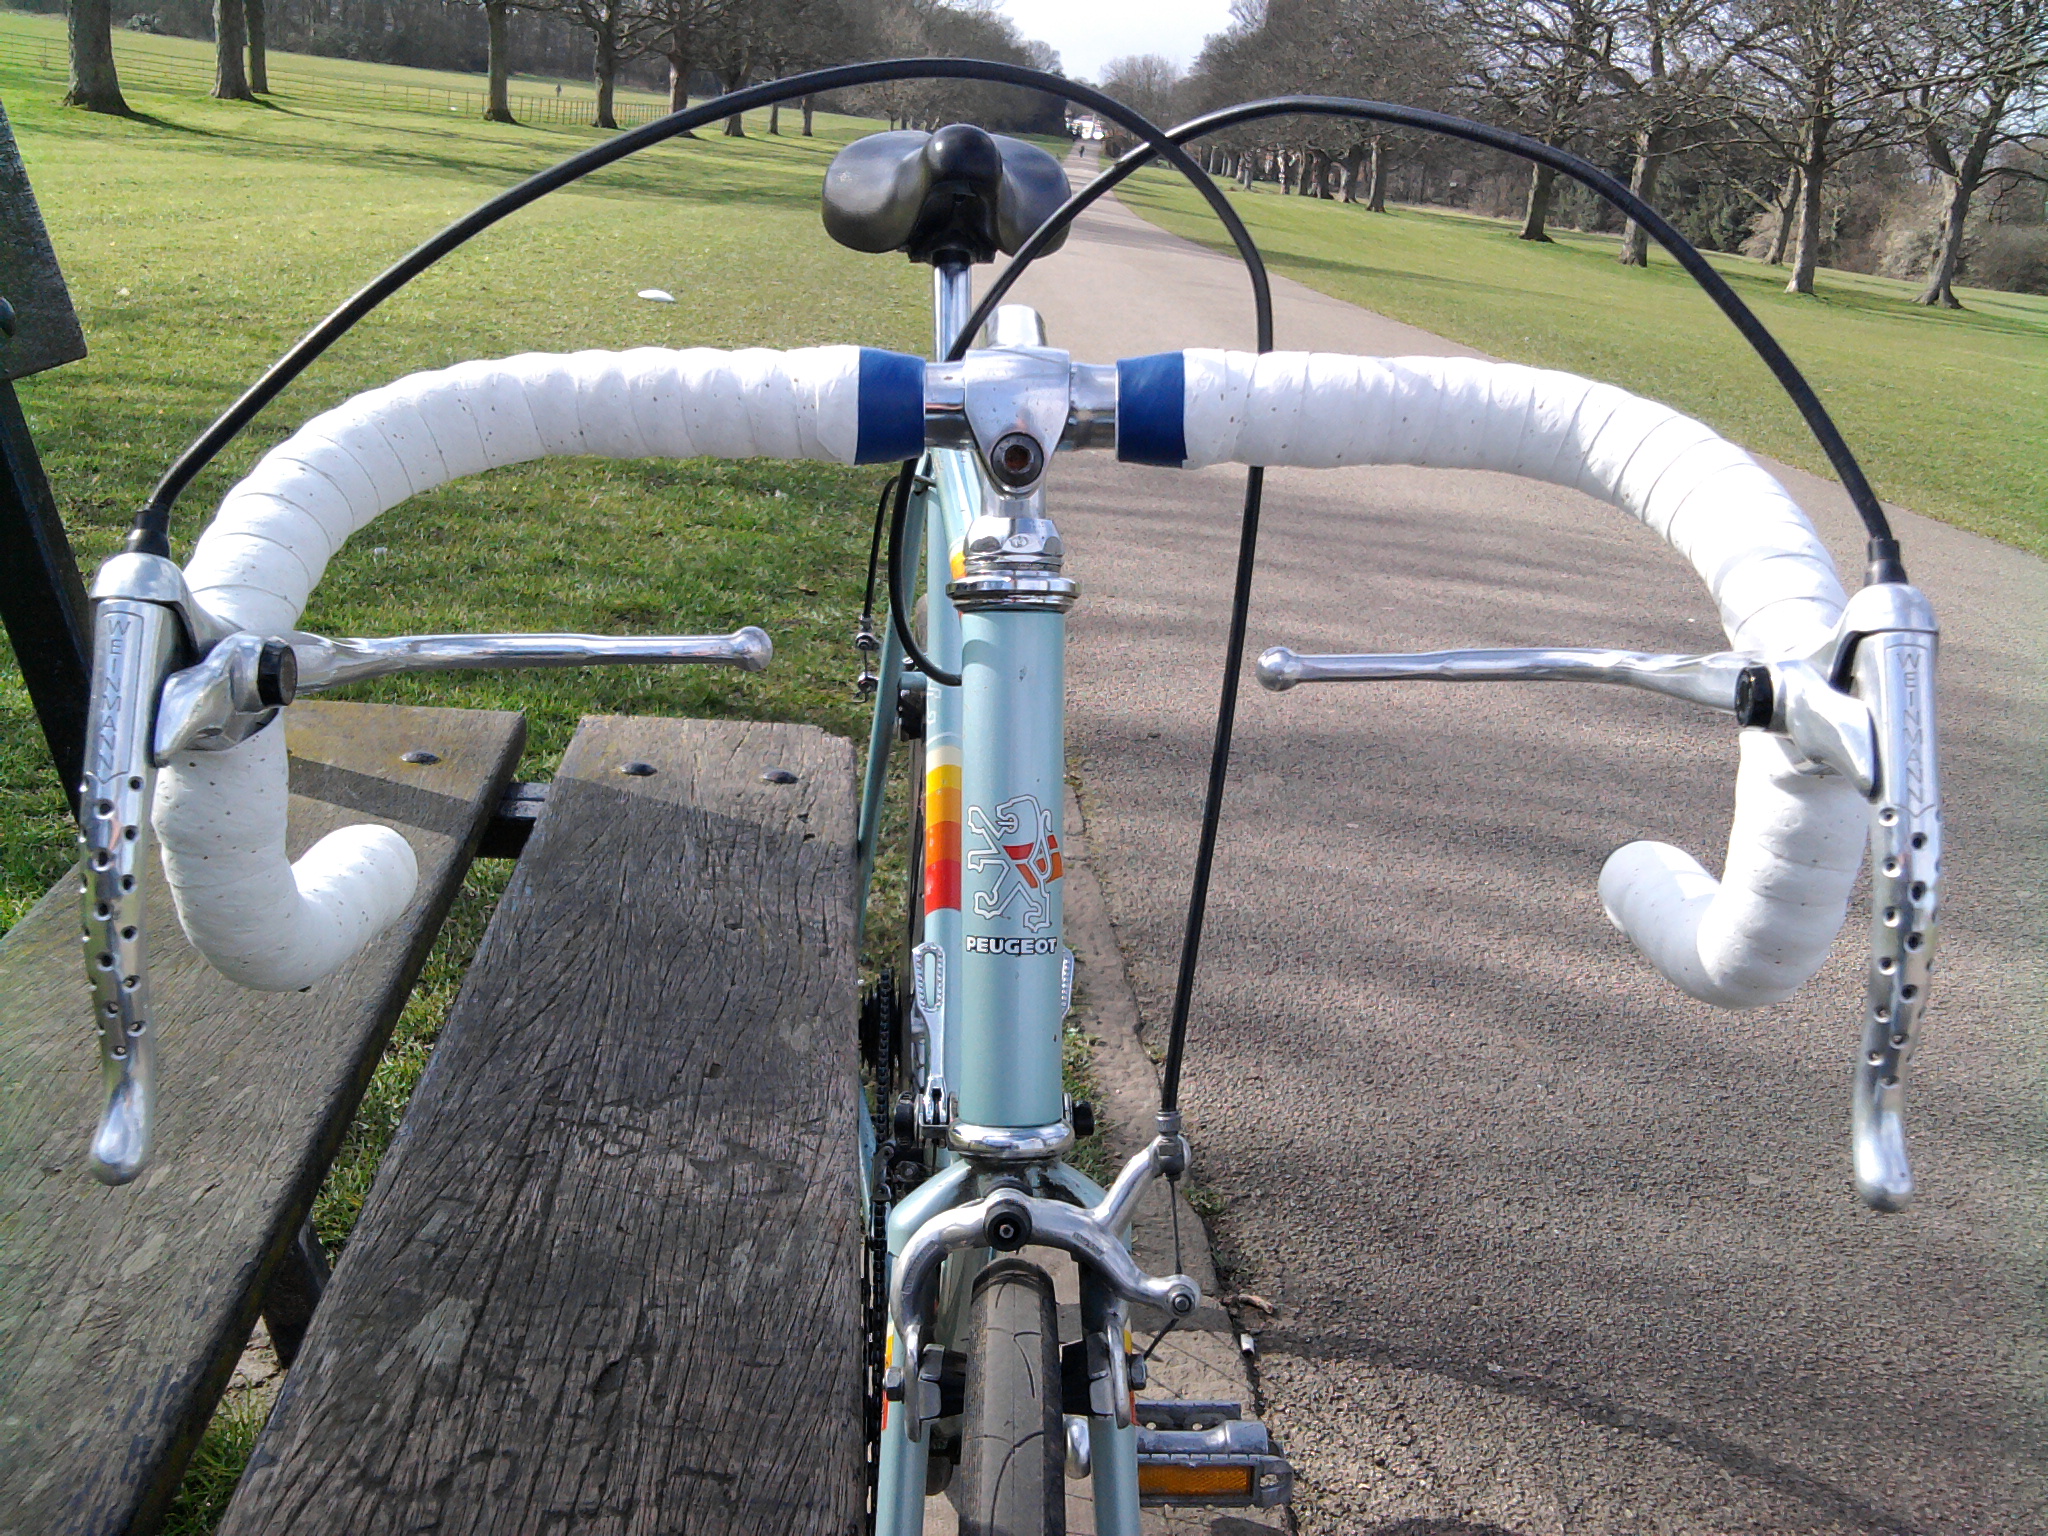
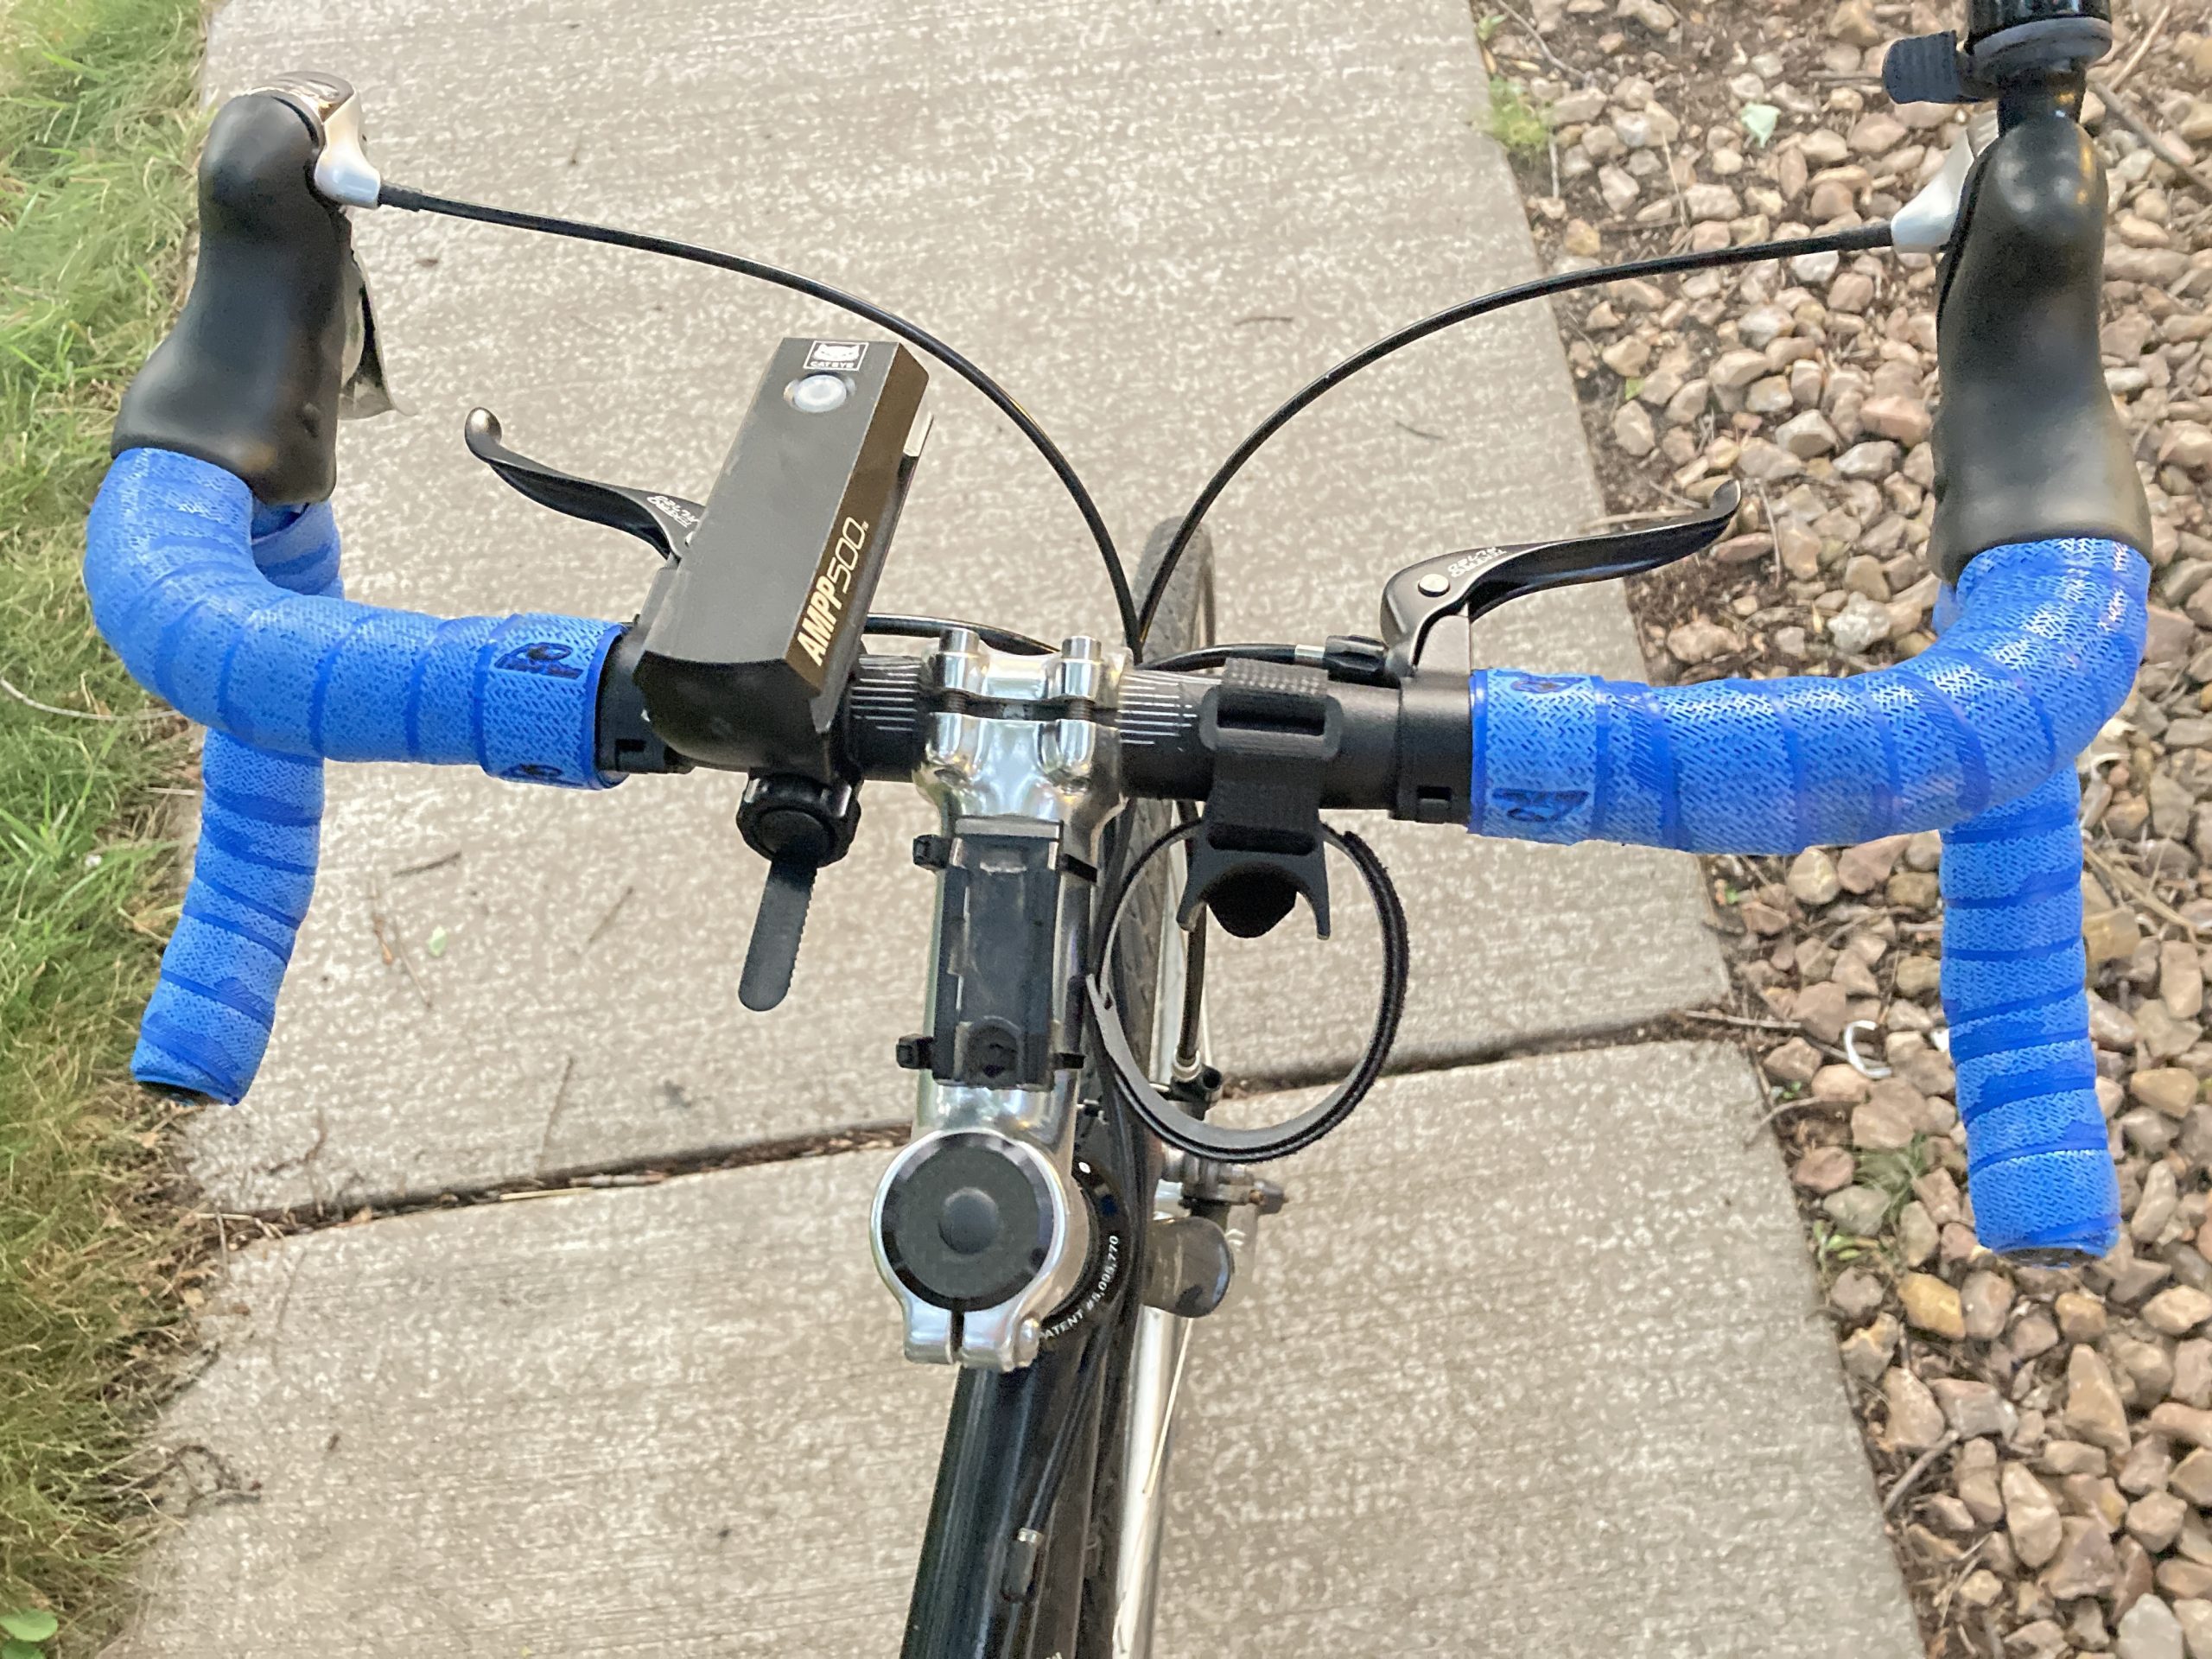
Remember how your dad’s 10-speed from the 70s/80s had an extra set of brake levers by the “tops”? They were for the top part of a drop style handlebar, like this:
Whatever the case is, I’m still fond of them and wish they were still a thing. Bike manufactures mostly solved this problem by putting ergonomic hoods on the brake levers so you can rest your hand on the top of the bar where it curves down.
Like driving with your hands at 9 & 3 the paddle shifters are easier to reach… but I can still press the brake when I’m cruising at 12 & crotch 😎 I want the same thing on my bike. I like keeping my hands on the tops when I’m relaxing, and I don’t want to do an emergency hand move if I need to stop quickly.
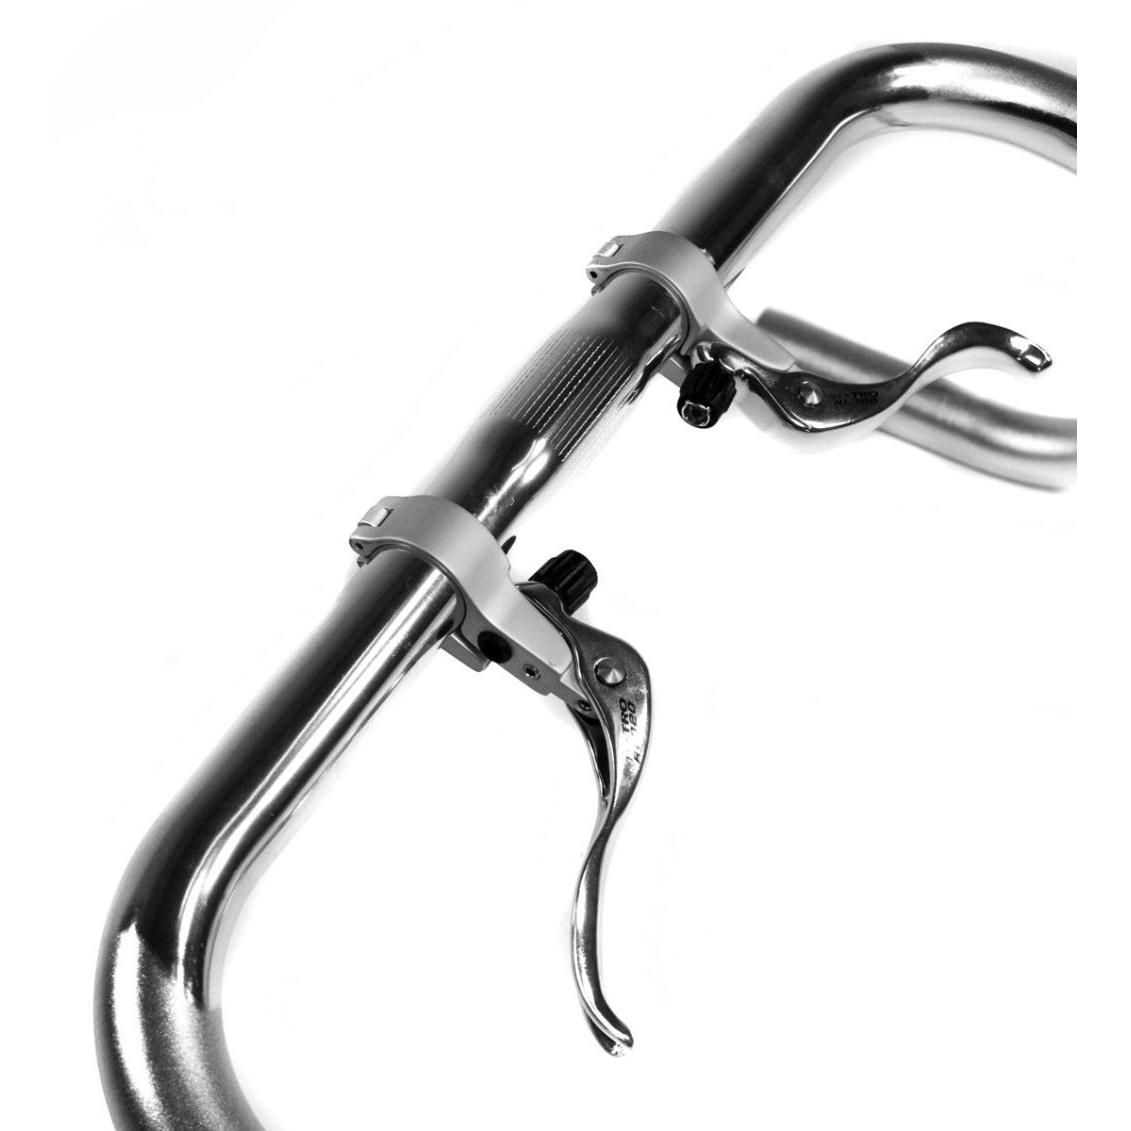
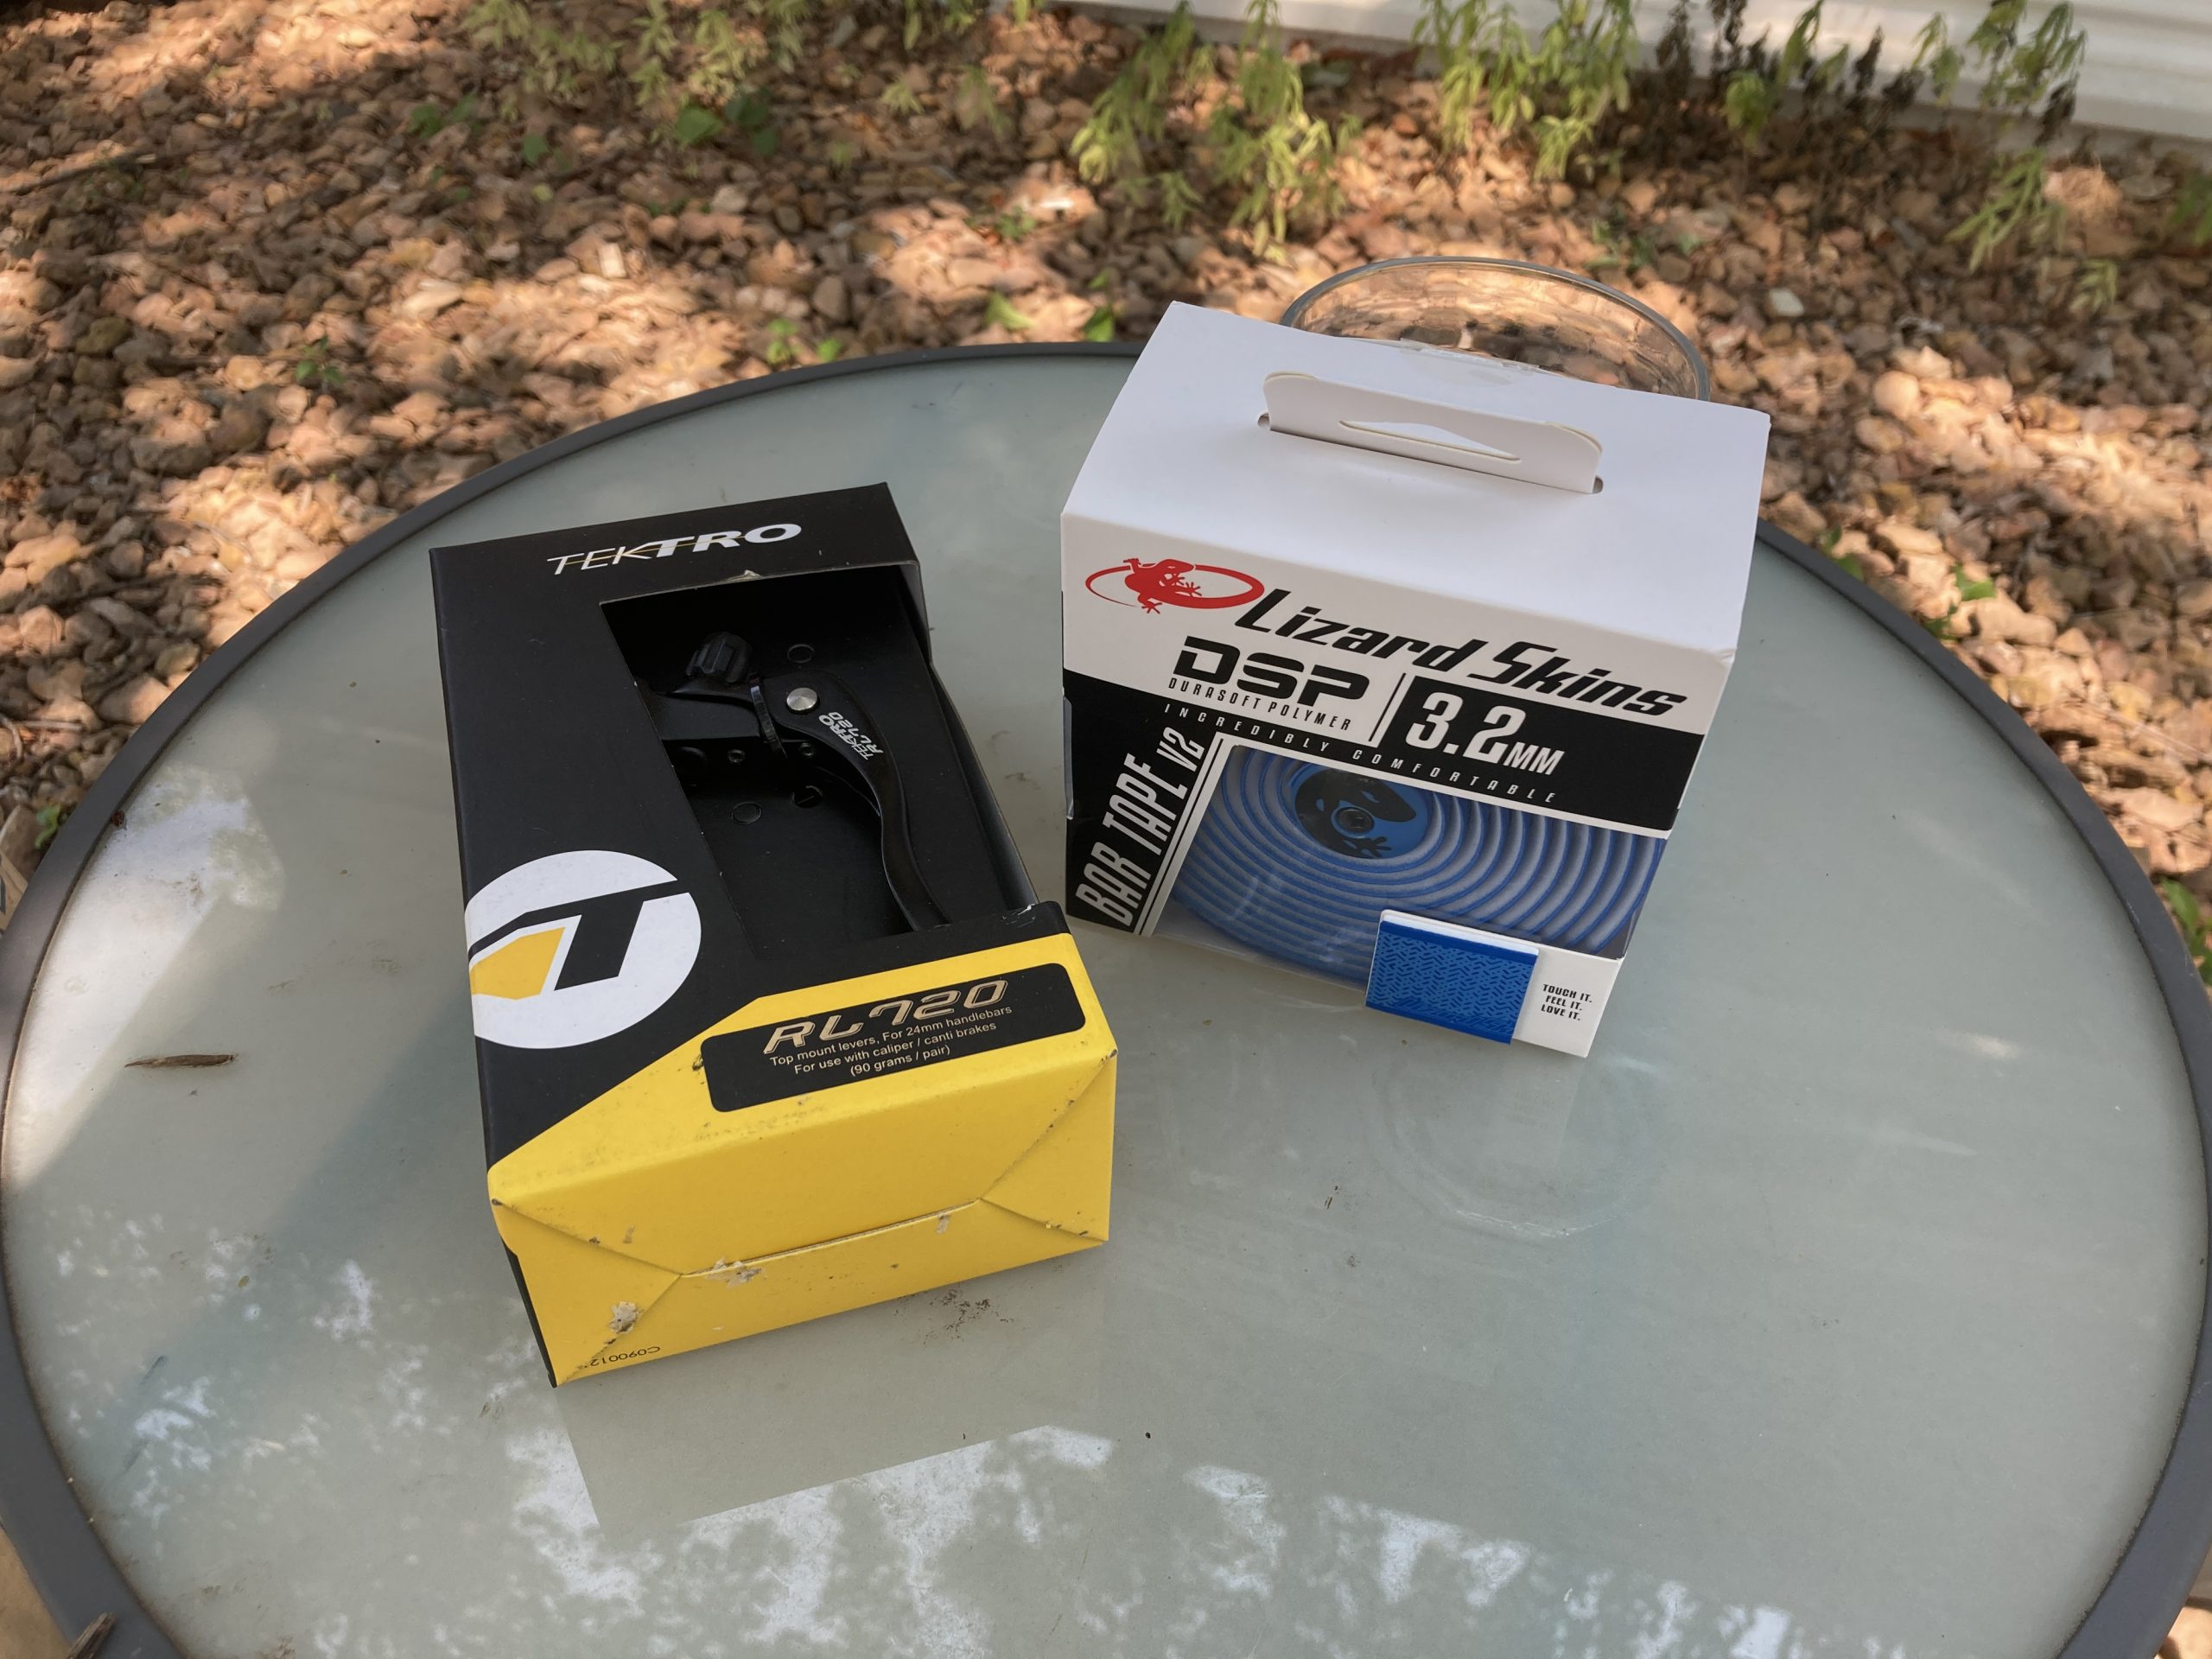
These cute little add-ons go in-line with the drop levers to provide full braking ability from the tops. When you’re adding them, you’ll need to remove and reinstall your bar tape, so I took the opportunity to get some new bar tape – went with Lizard Skins 3.2mm tape in blue to add some color.
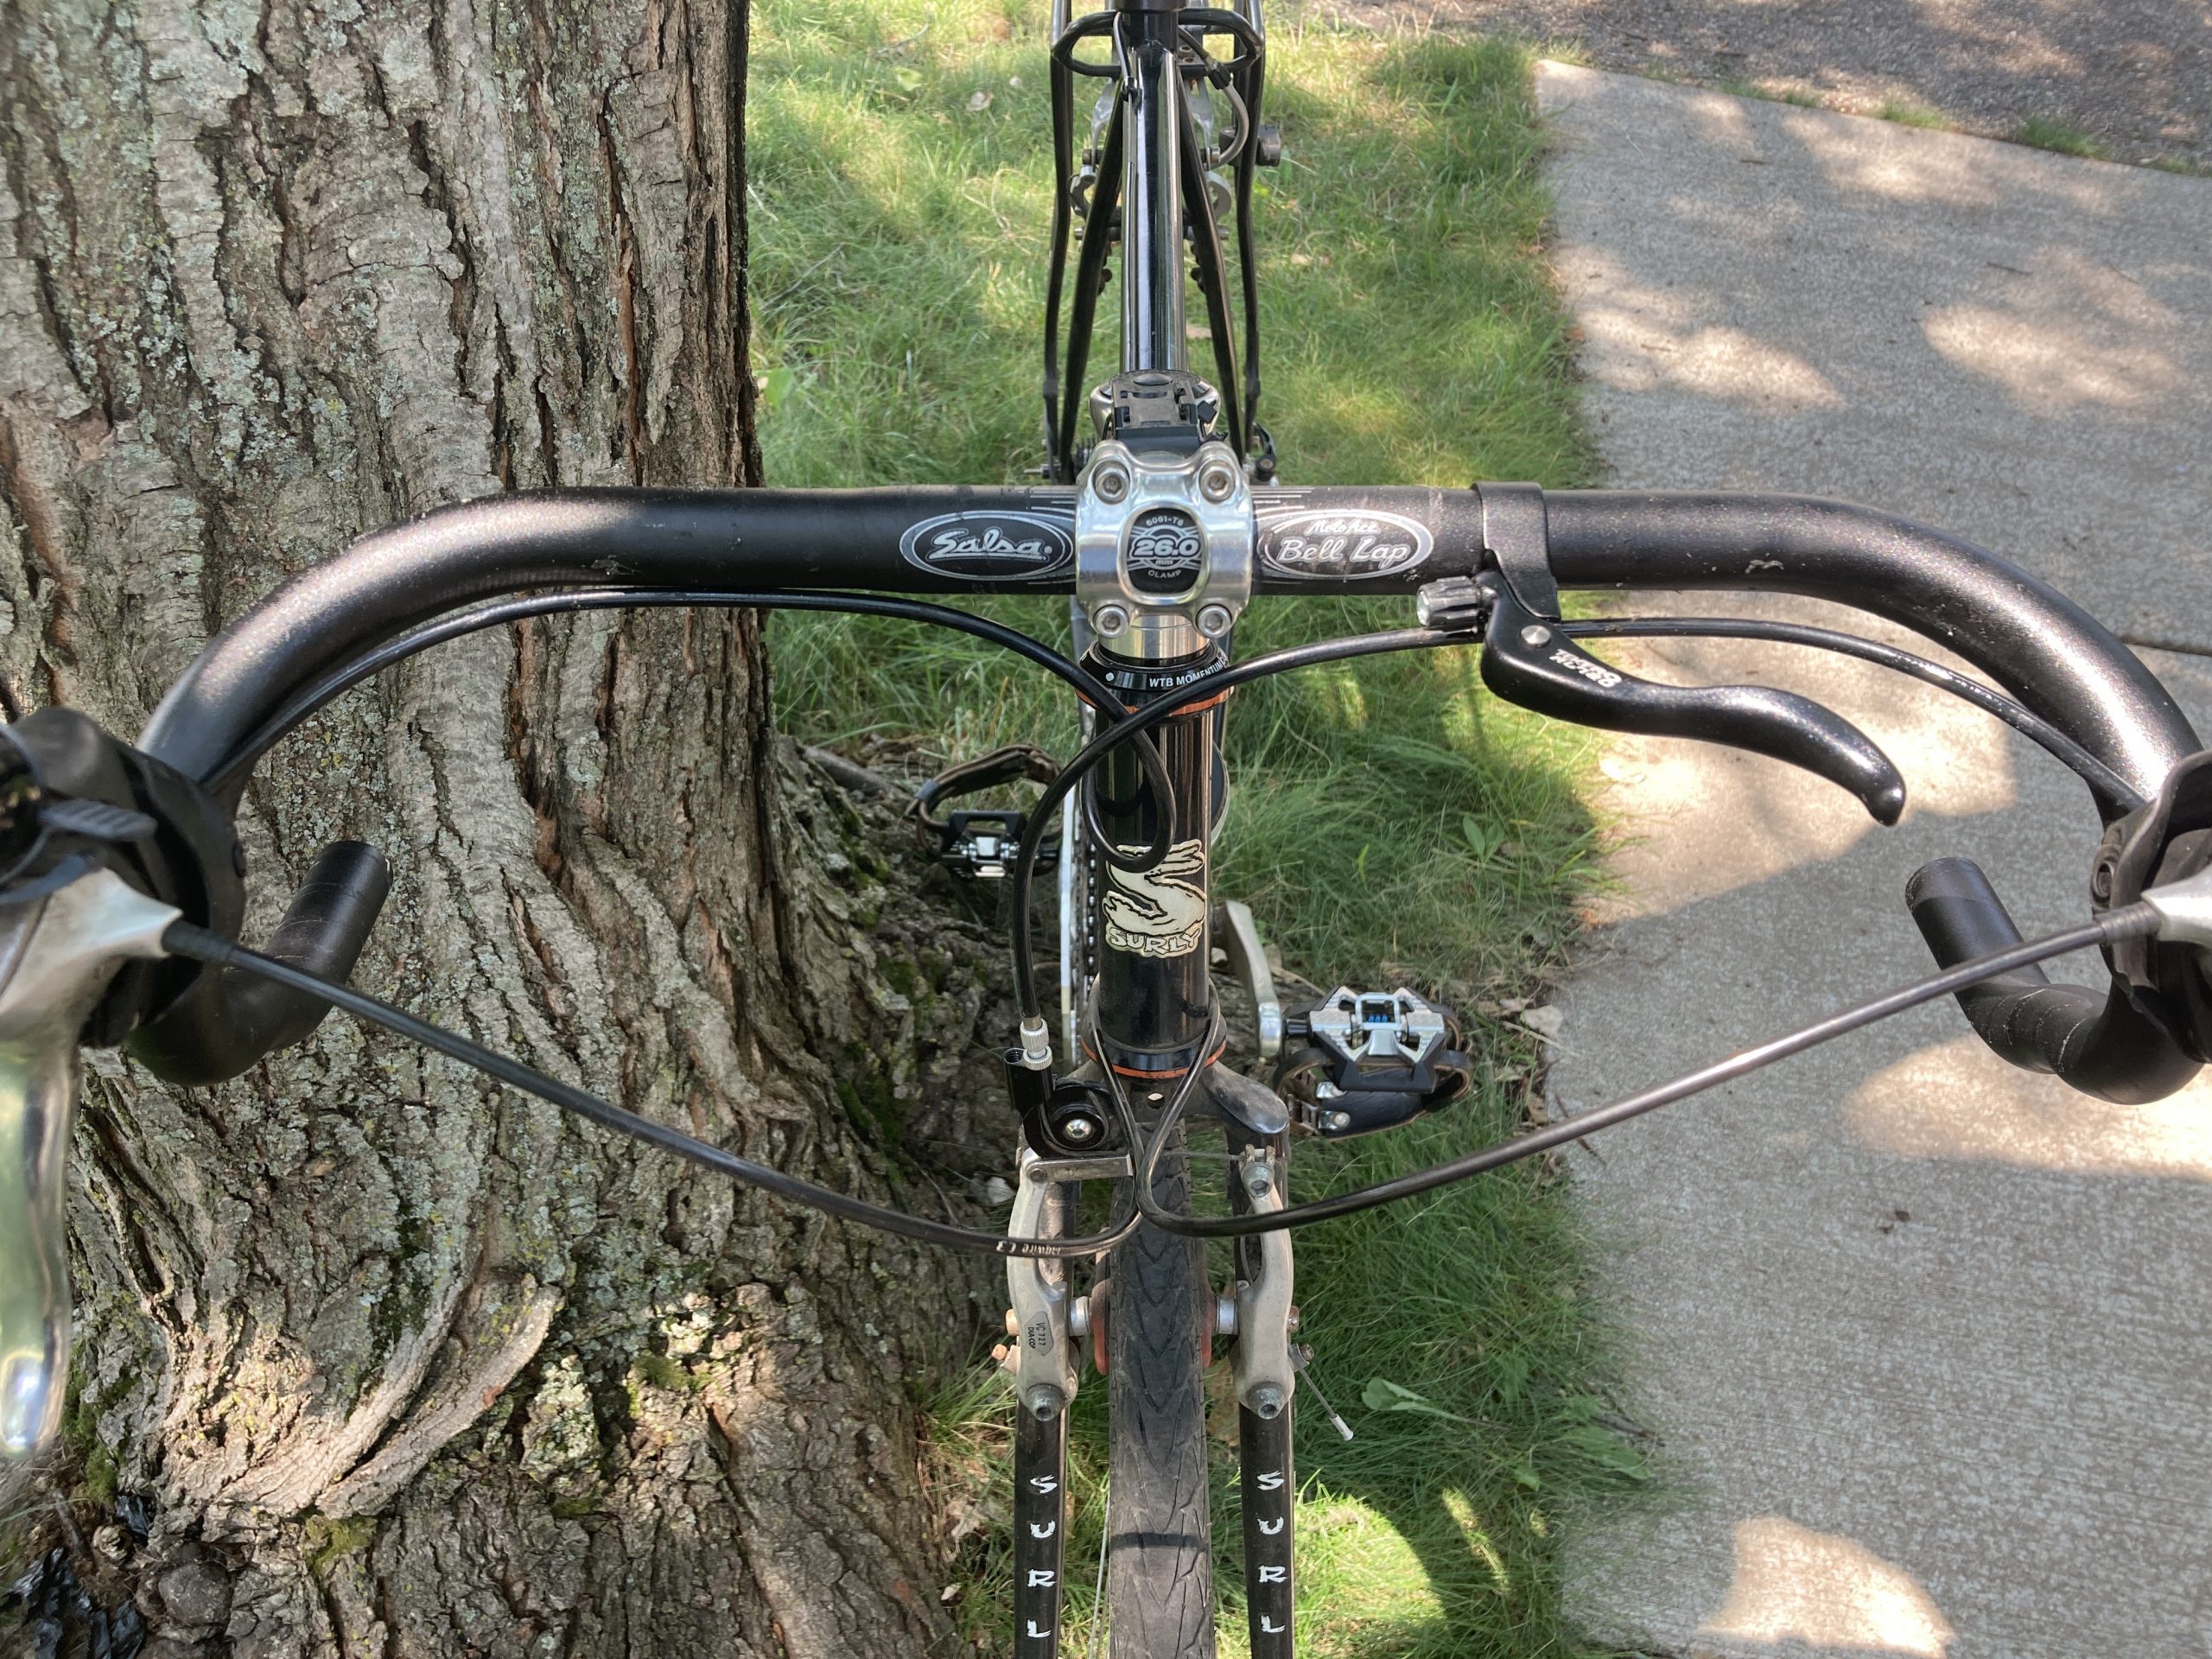
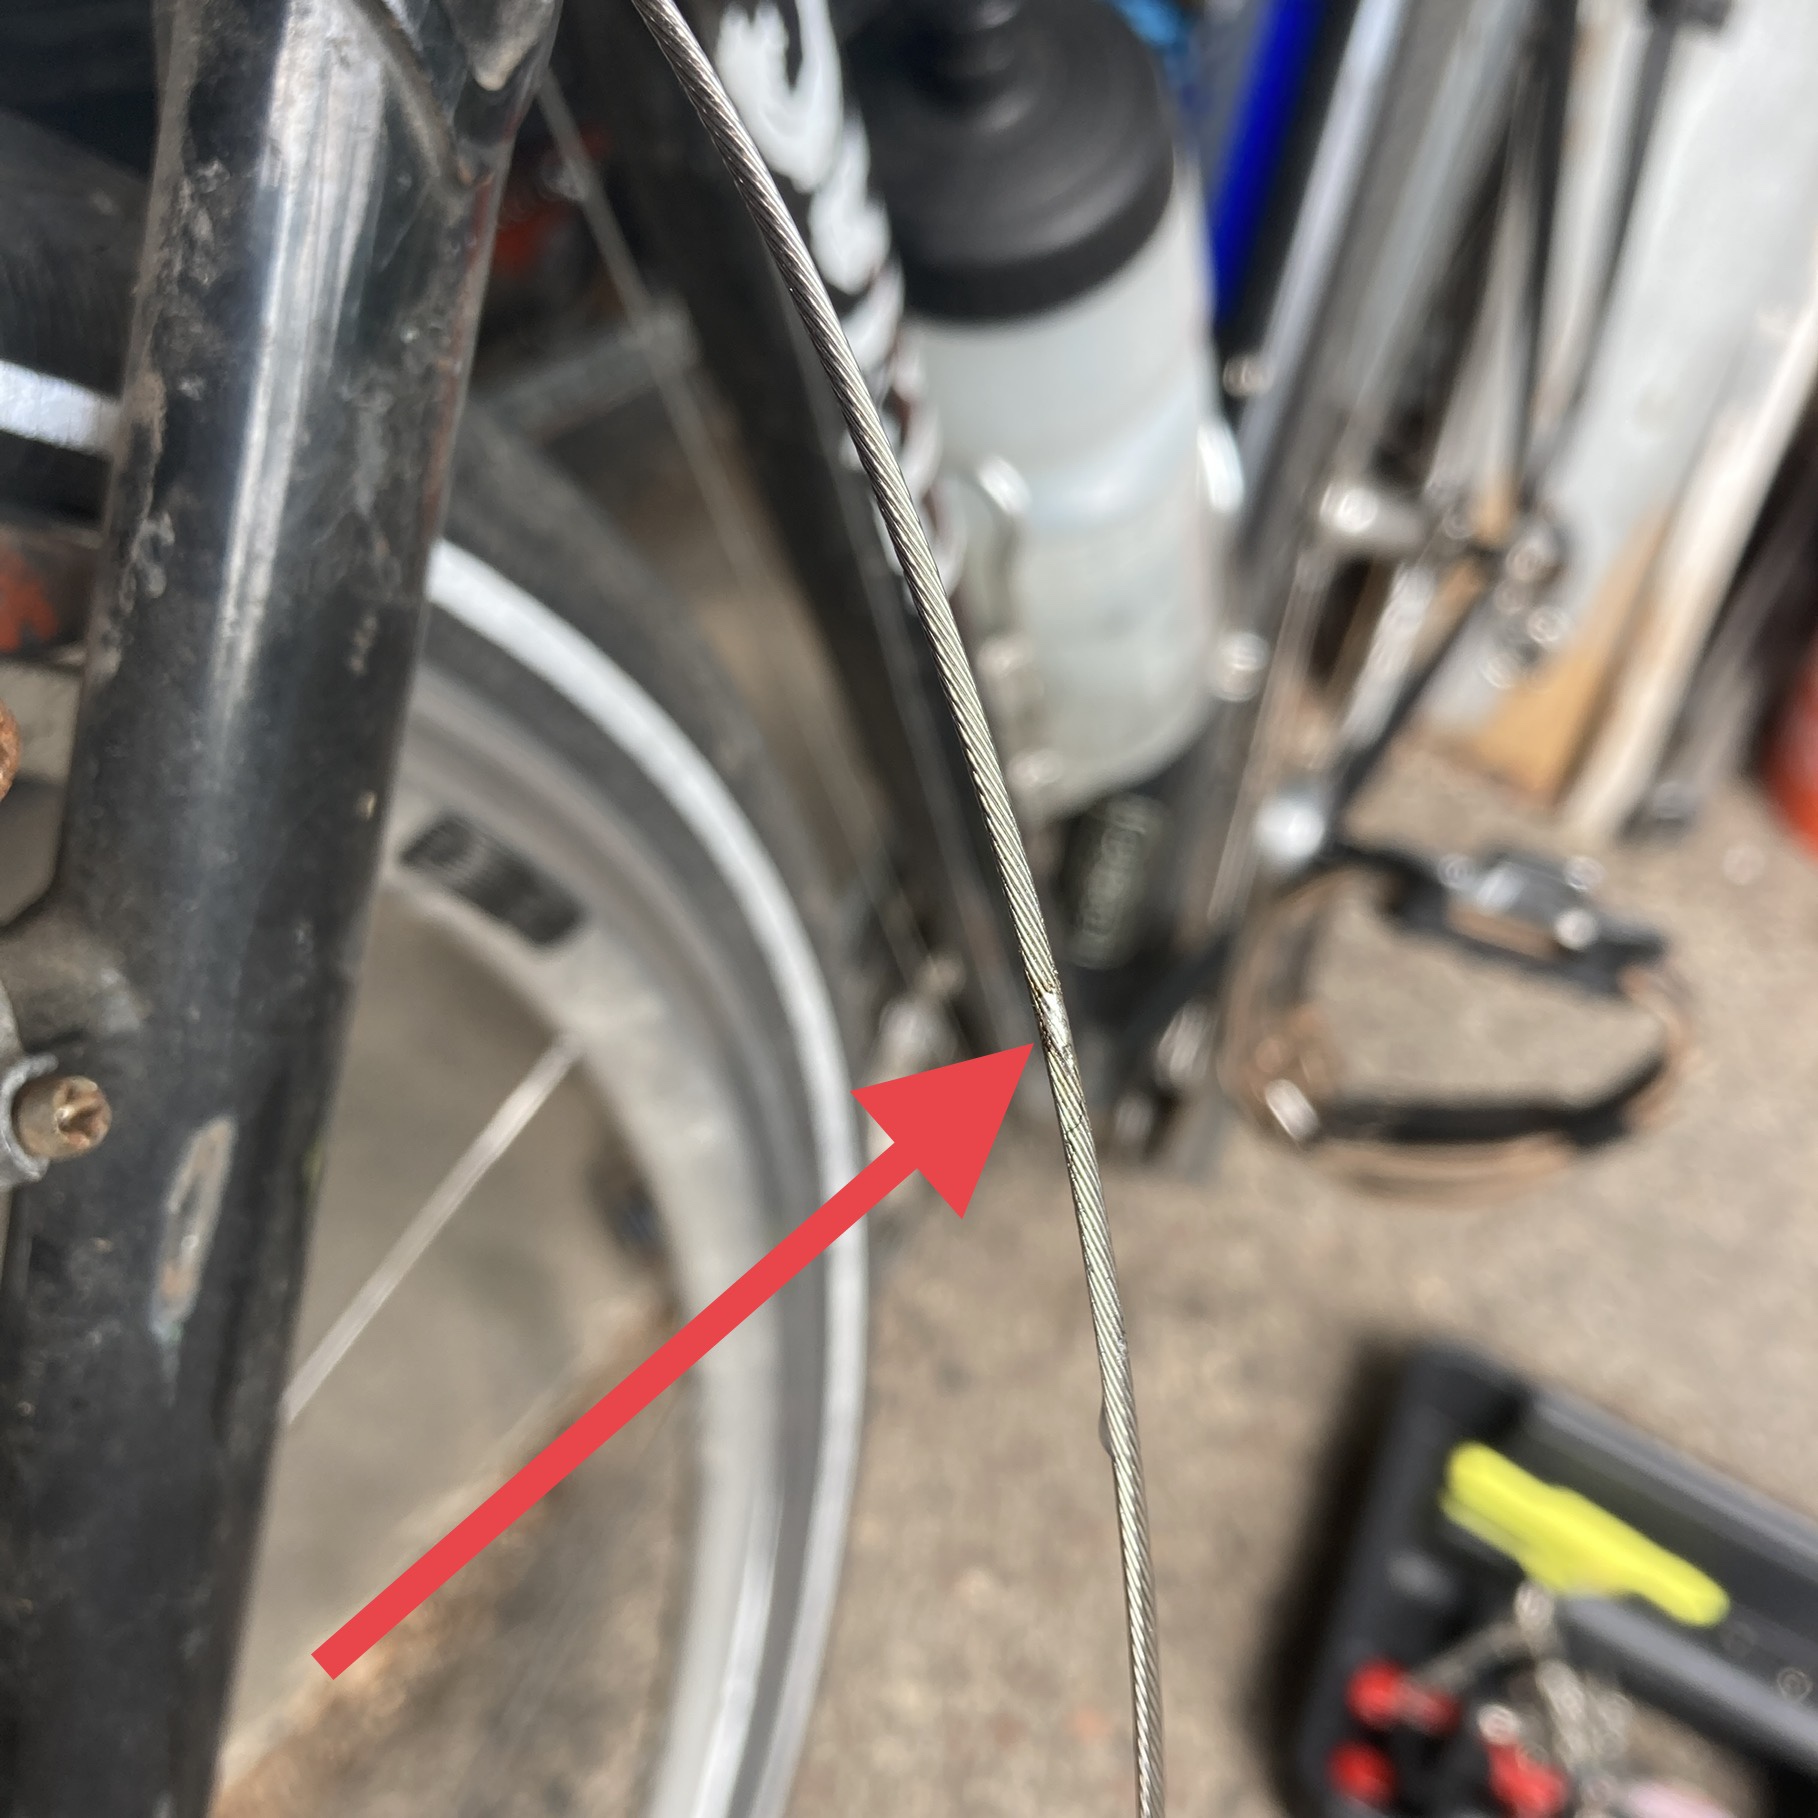
Another thing to know is that there are several sizes of cross levers for several sizes of handlebars. Tektro offers sizes in 24mm, 26mm, and 31.8mm. My handlebars from the original Cross Check complete spec are 26mm at the stem, then taper down to 24mm. After removing the bar tape, you can see this is the farthest inward I could place the levers:
If I wanted to go closer to the stem I would have had to purchase the 26mm version – just be aware of what your setup is before purchasing levers.
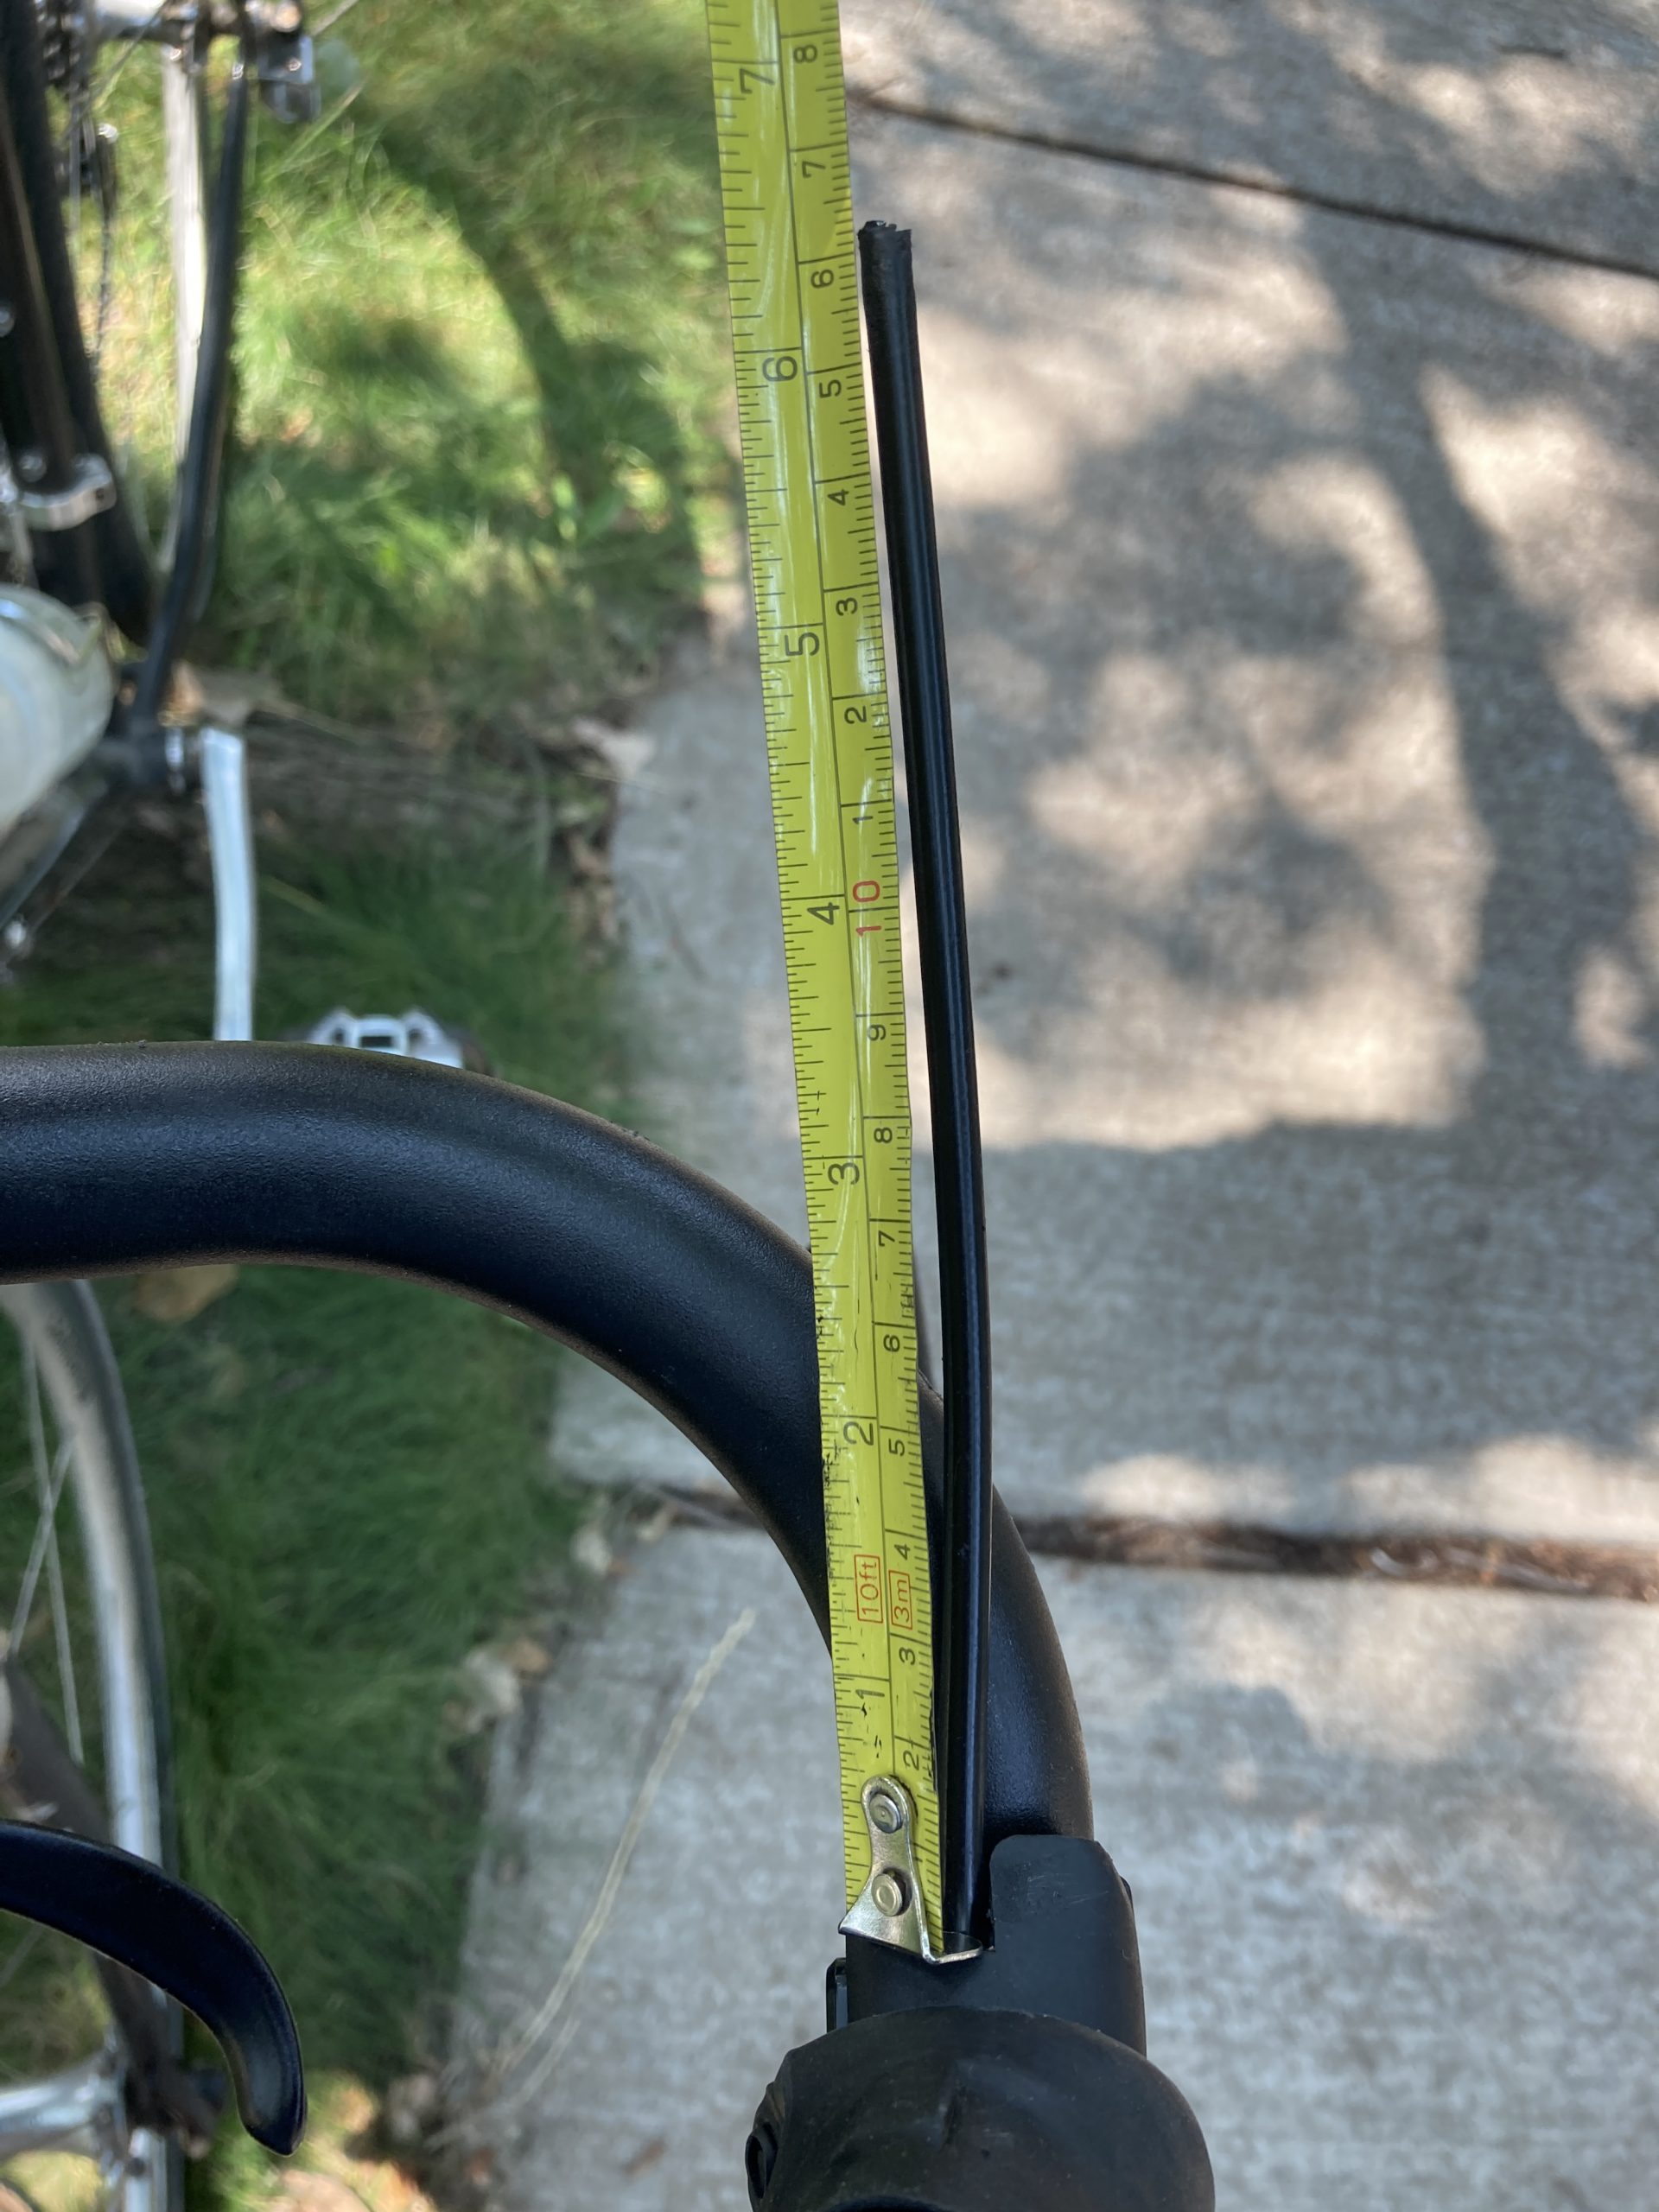
You’ll need to cut your brake cable housing. After removing your bar tape, pull out the brake cables. Keep in mind that you might need to replace your brake cable(s) if they’re frayed. Figure out where you want to cut your cable to put the new levers in-line – remember to measure twice and cut once! I cut my brake cable housing 65mm from the brake hoods.
Brake Cable & Housing Tools & Tips
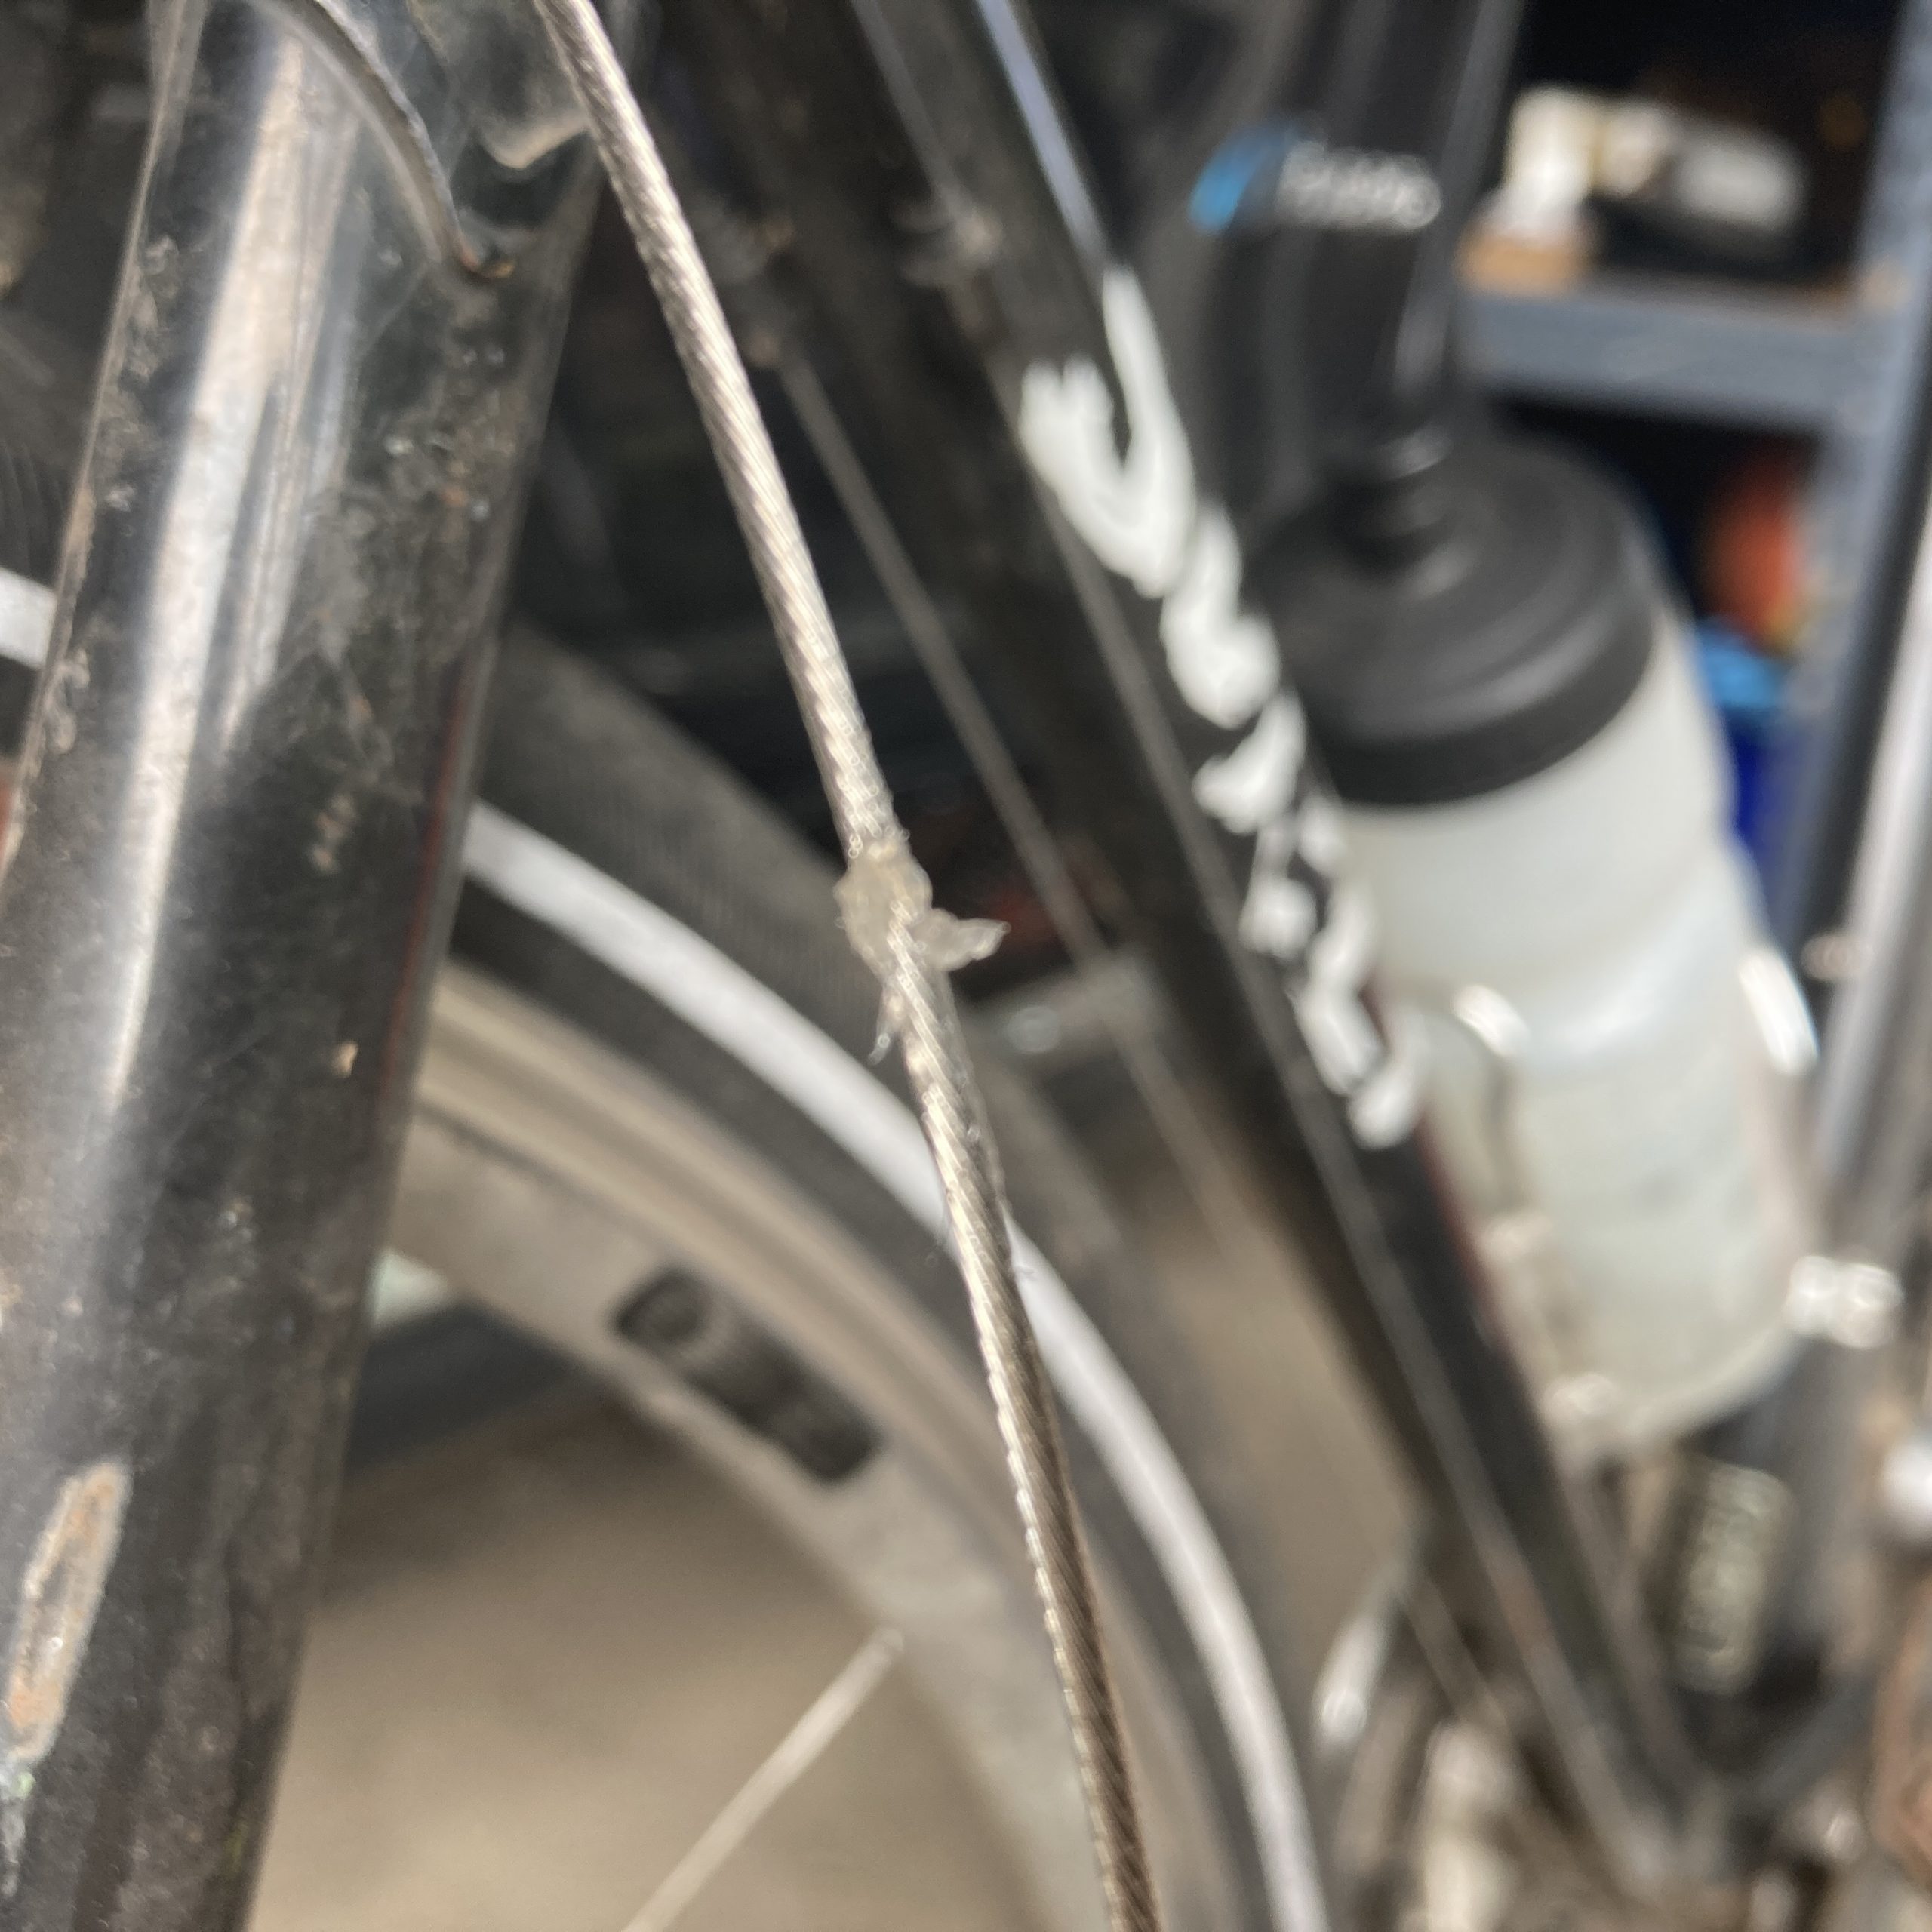
I cut my brake cable housing with a standard side cutter and as you can see above, the cut was rough at best. Then when I went to thread my front brake cable back in, it split and frayed 😩
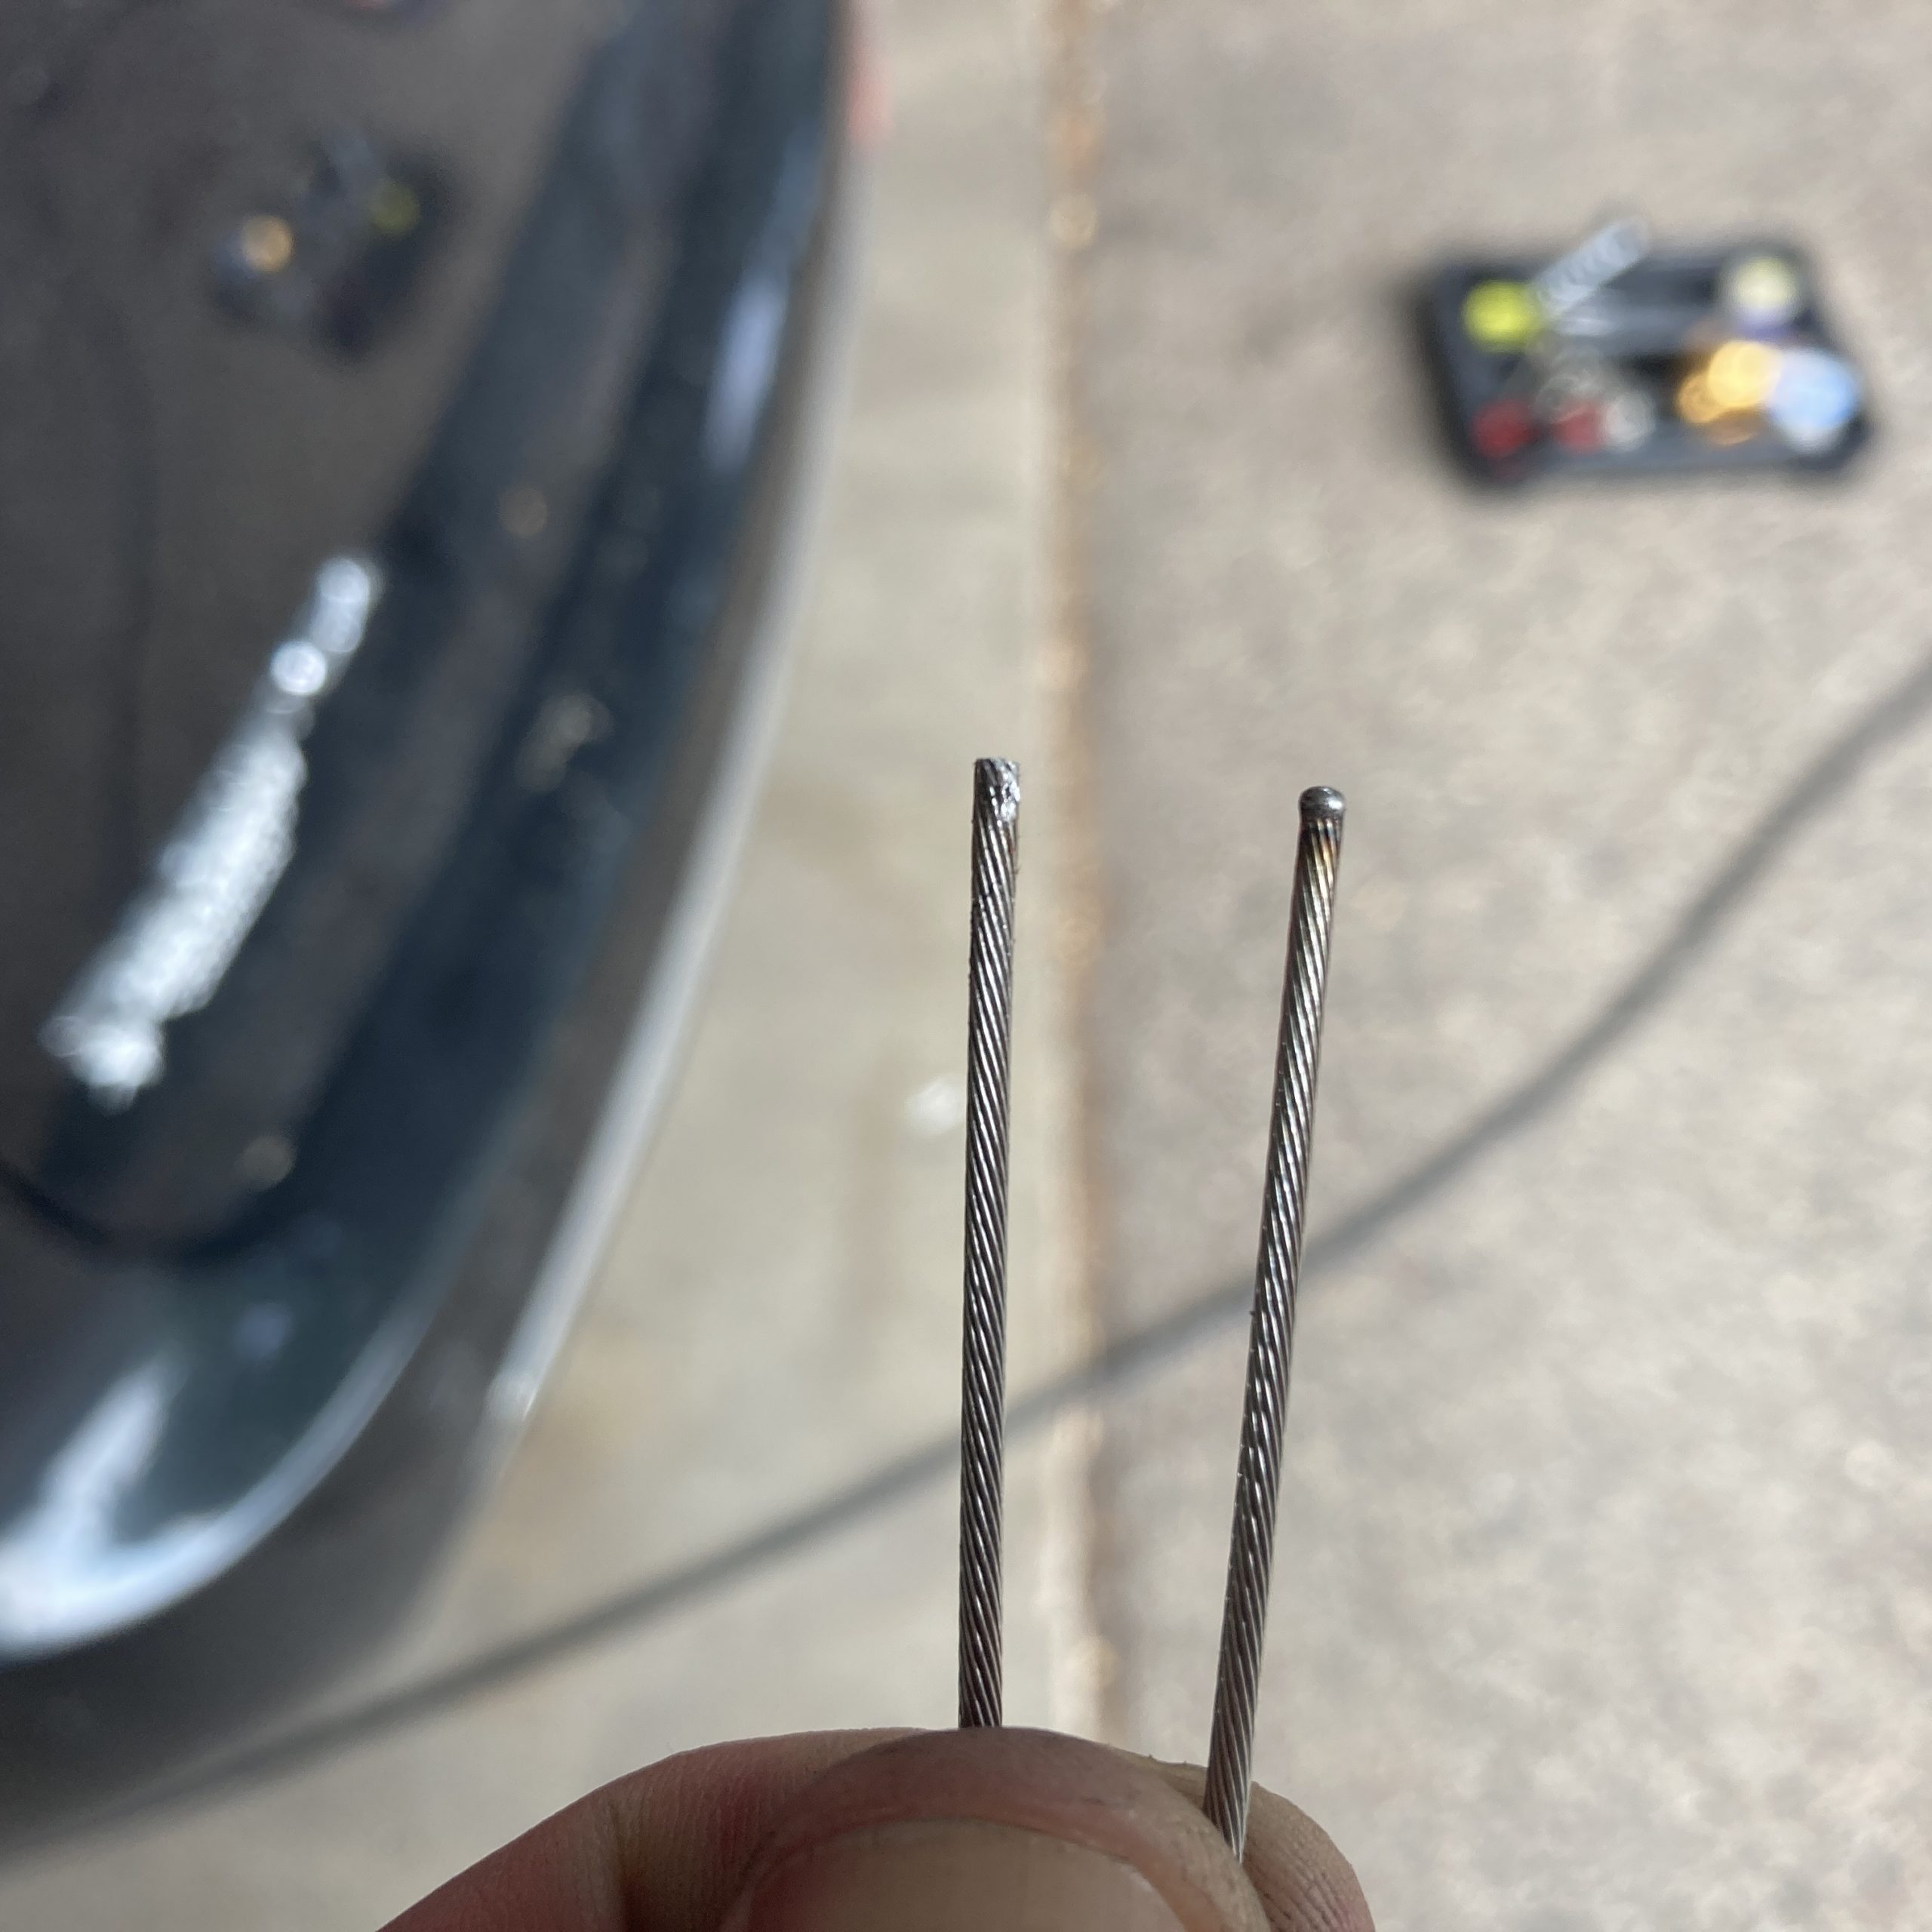
So I went to the bike shop and bought a new front brake cable and a Park Tool CN-10 Cable/Housing cutter. I noticed on the new brake cable that the manufacturer spot-welds the end to make sure it won’t fray:
I thought to myself, why not do something similar at home before cutting the cable so it won’t fray? I decided to try and solder the cable with my TS-100 soldering iron. Apparently this is not a new or novel idea 😎 I started by applying some flux to the place I wanted to cut:
Then I added enough solder to soak into the cable and create a “solid” section:
I cut it and it turned out pretty good. In the image below you can compare the soldered section (left) with the original spot-welded section (right).
Bar Tape
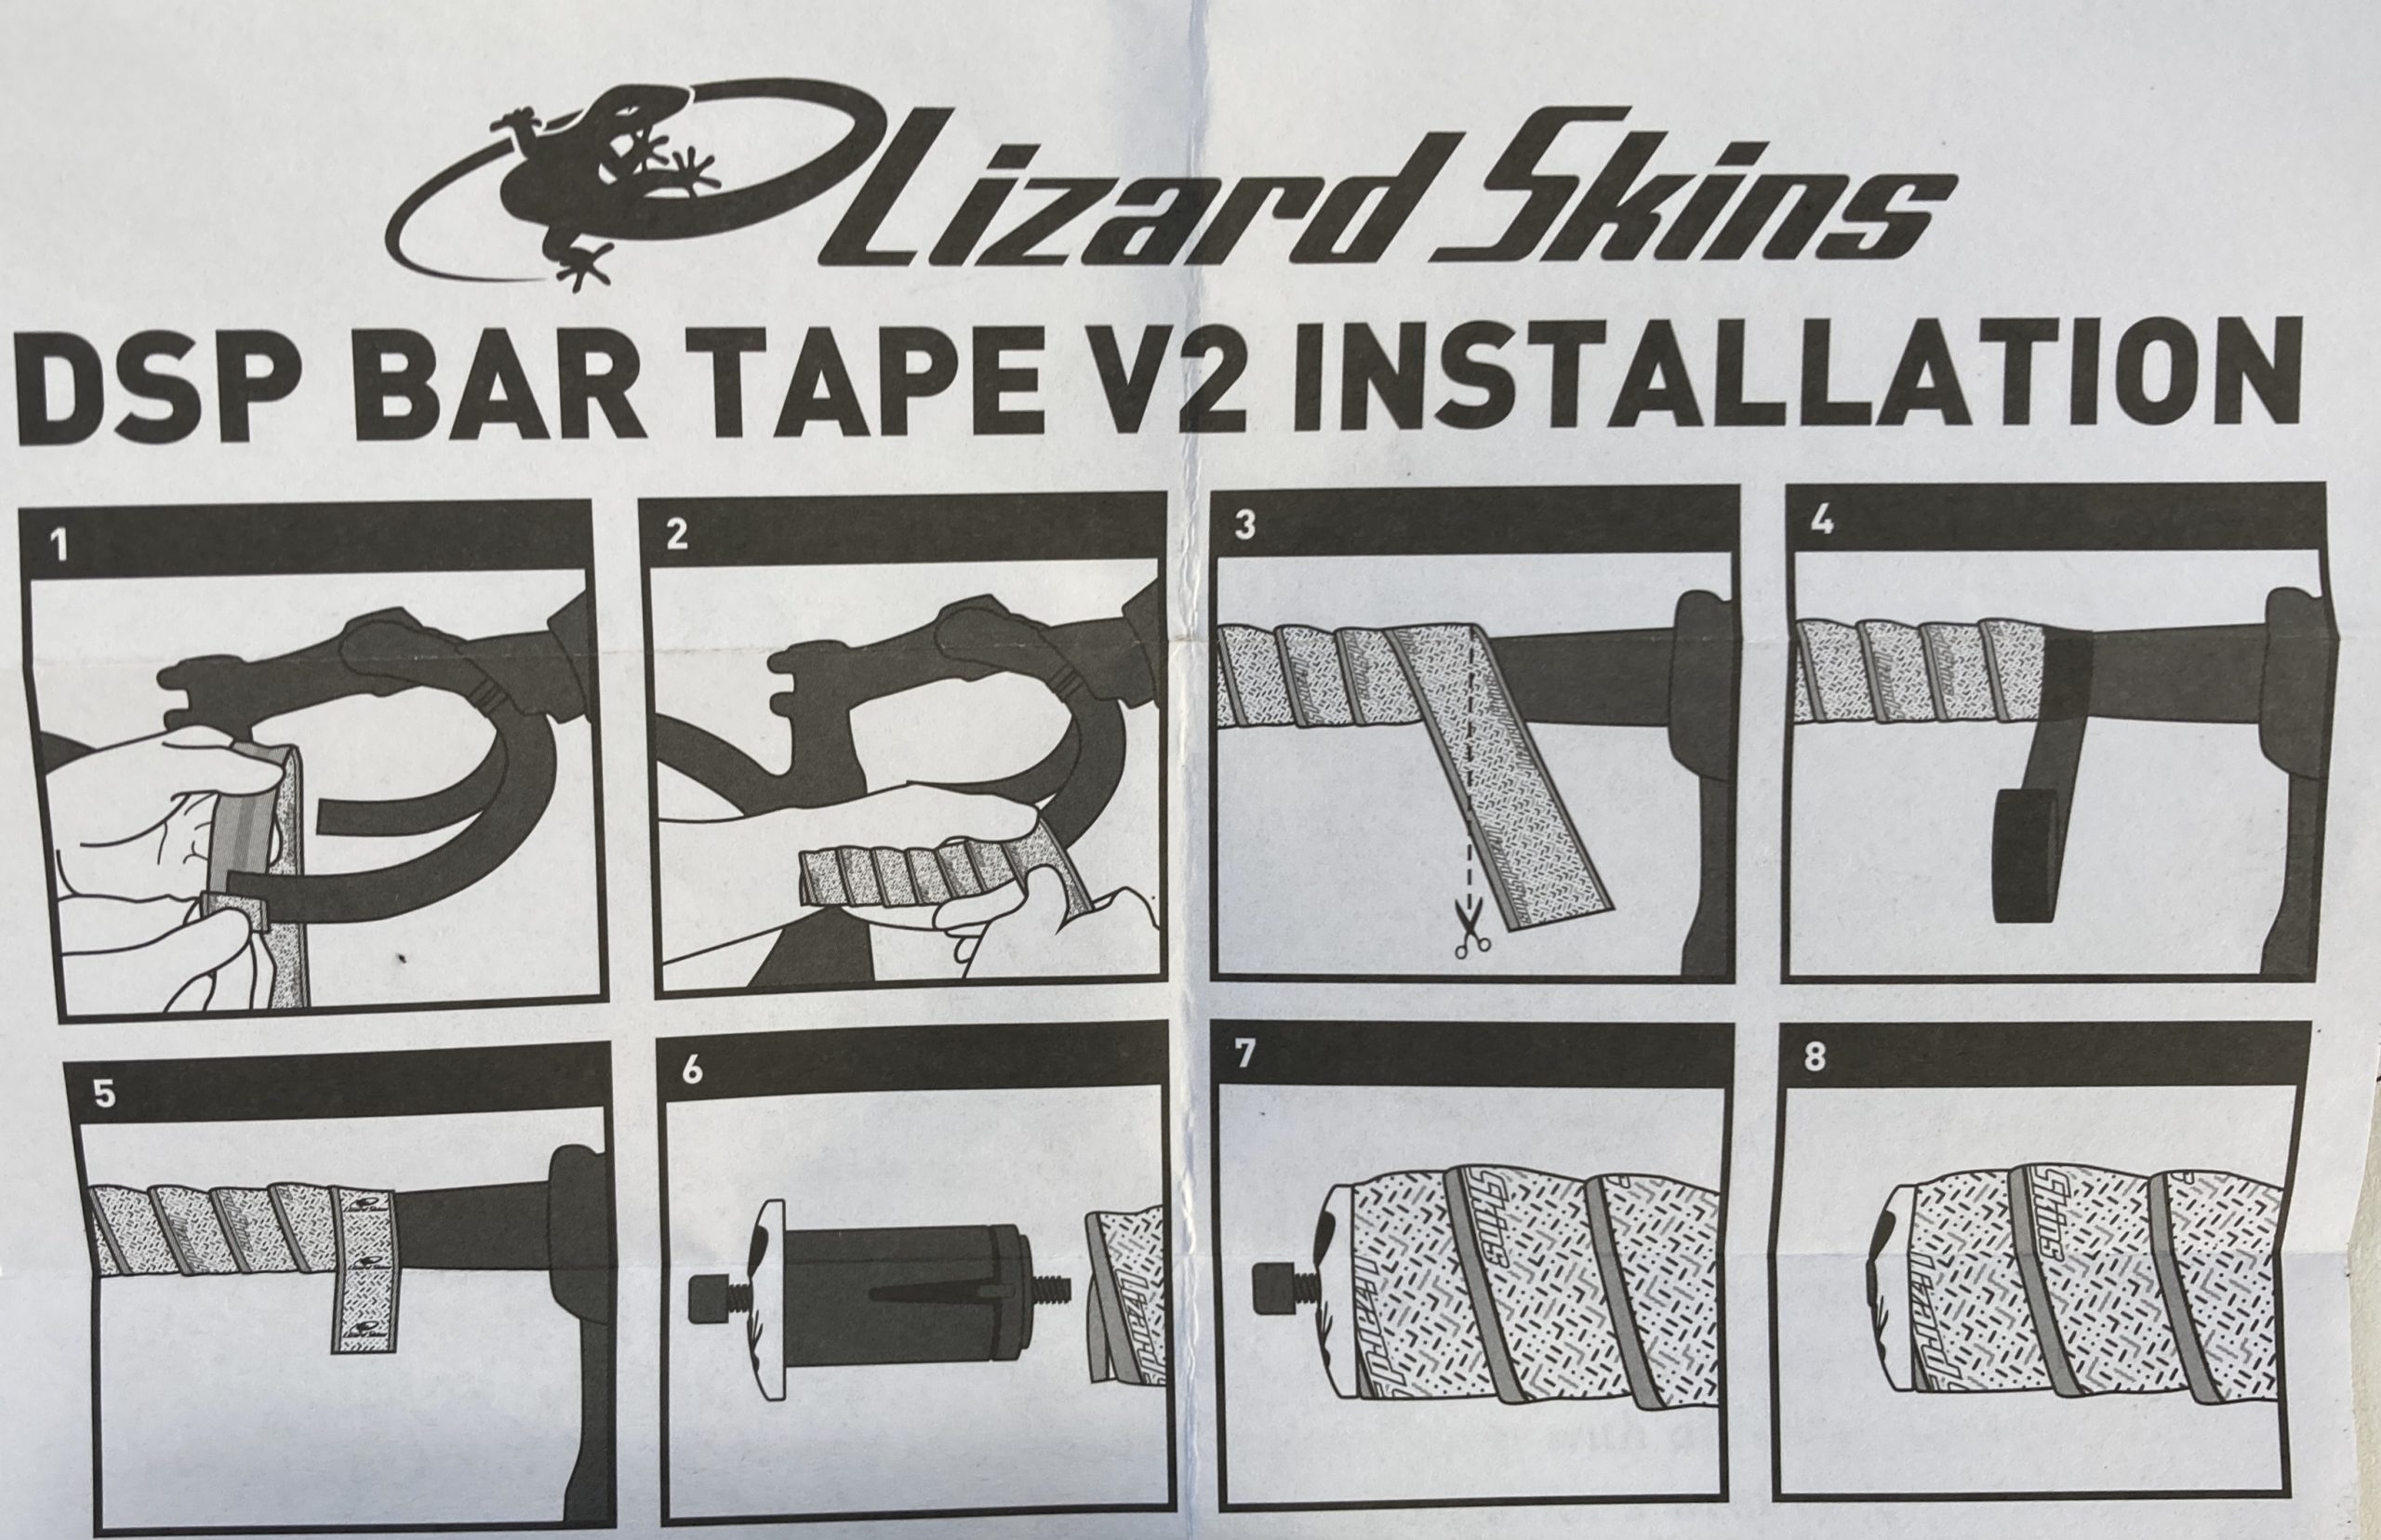
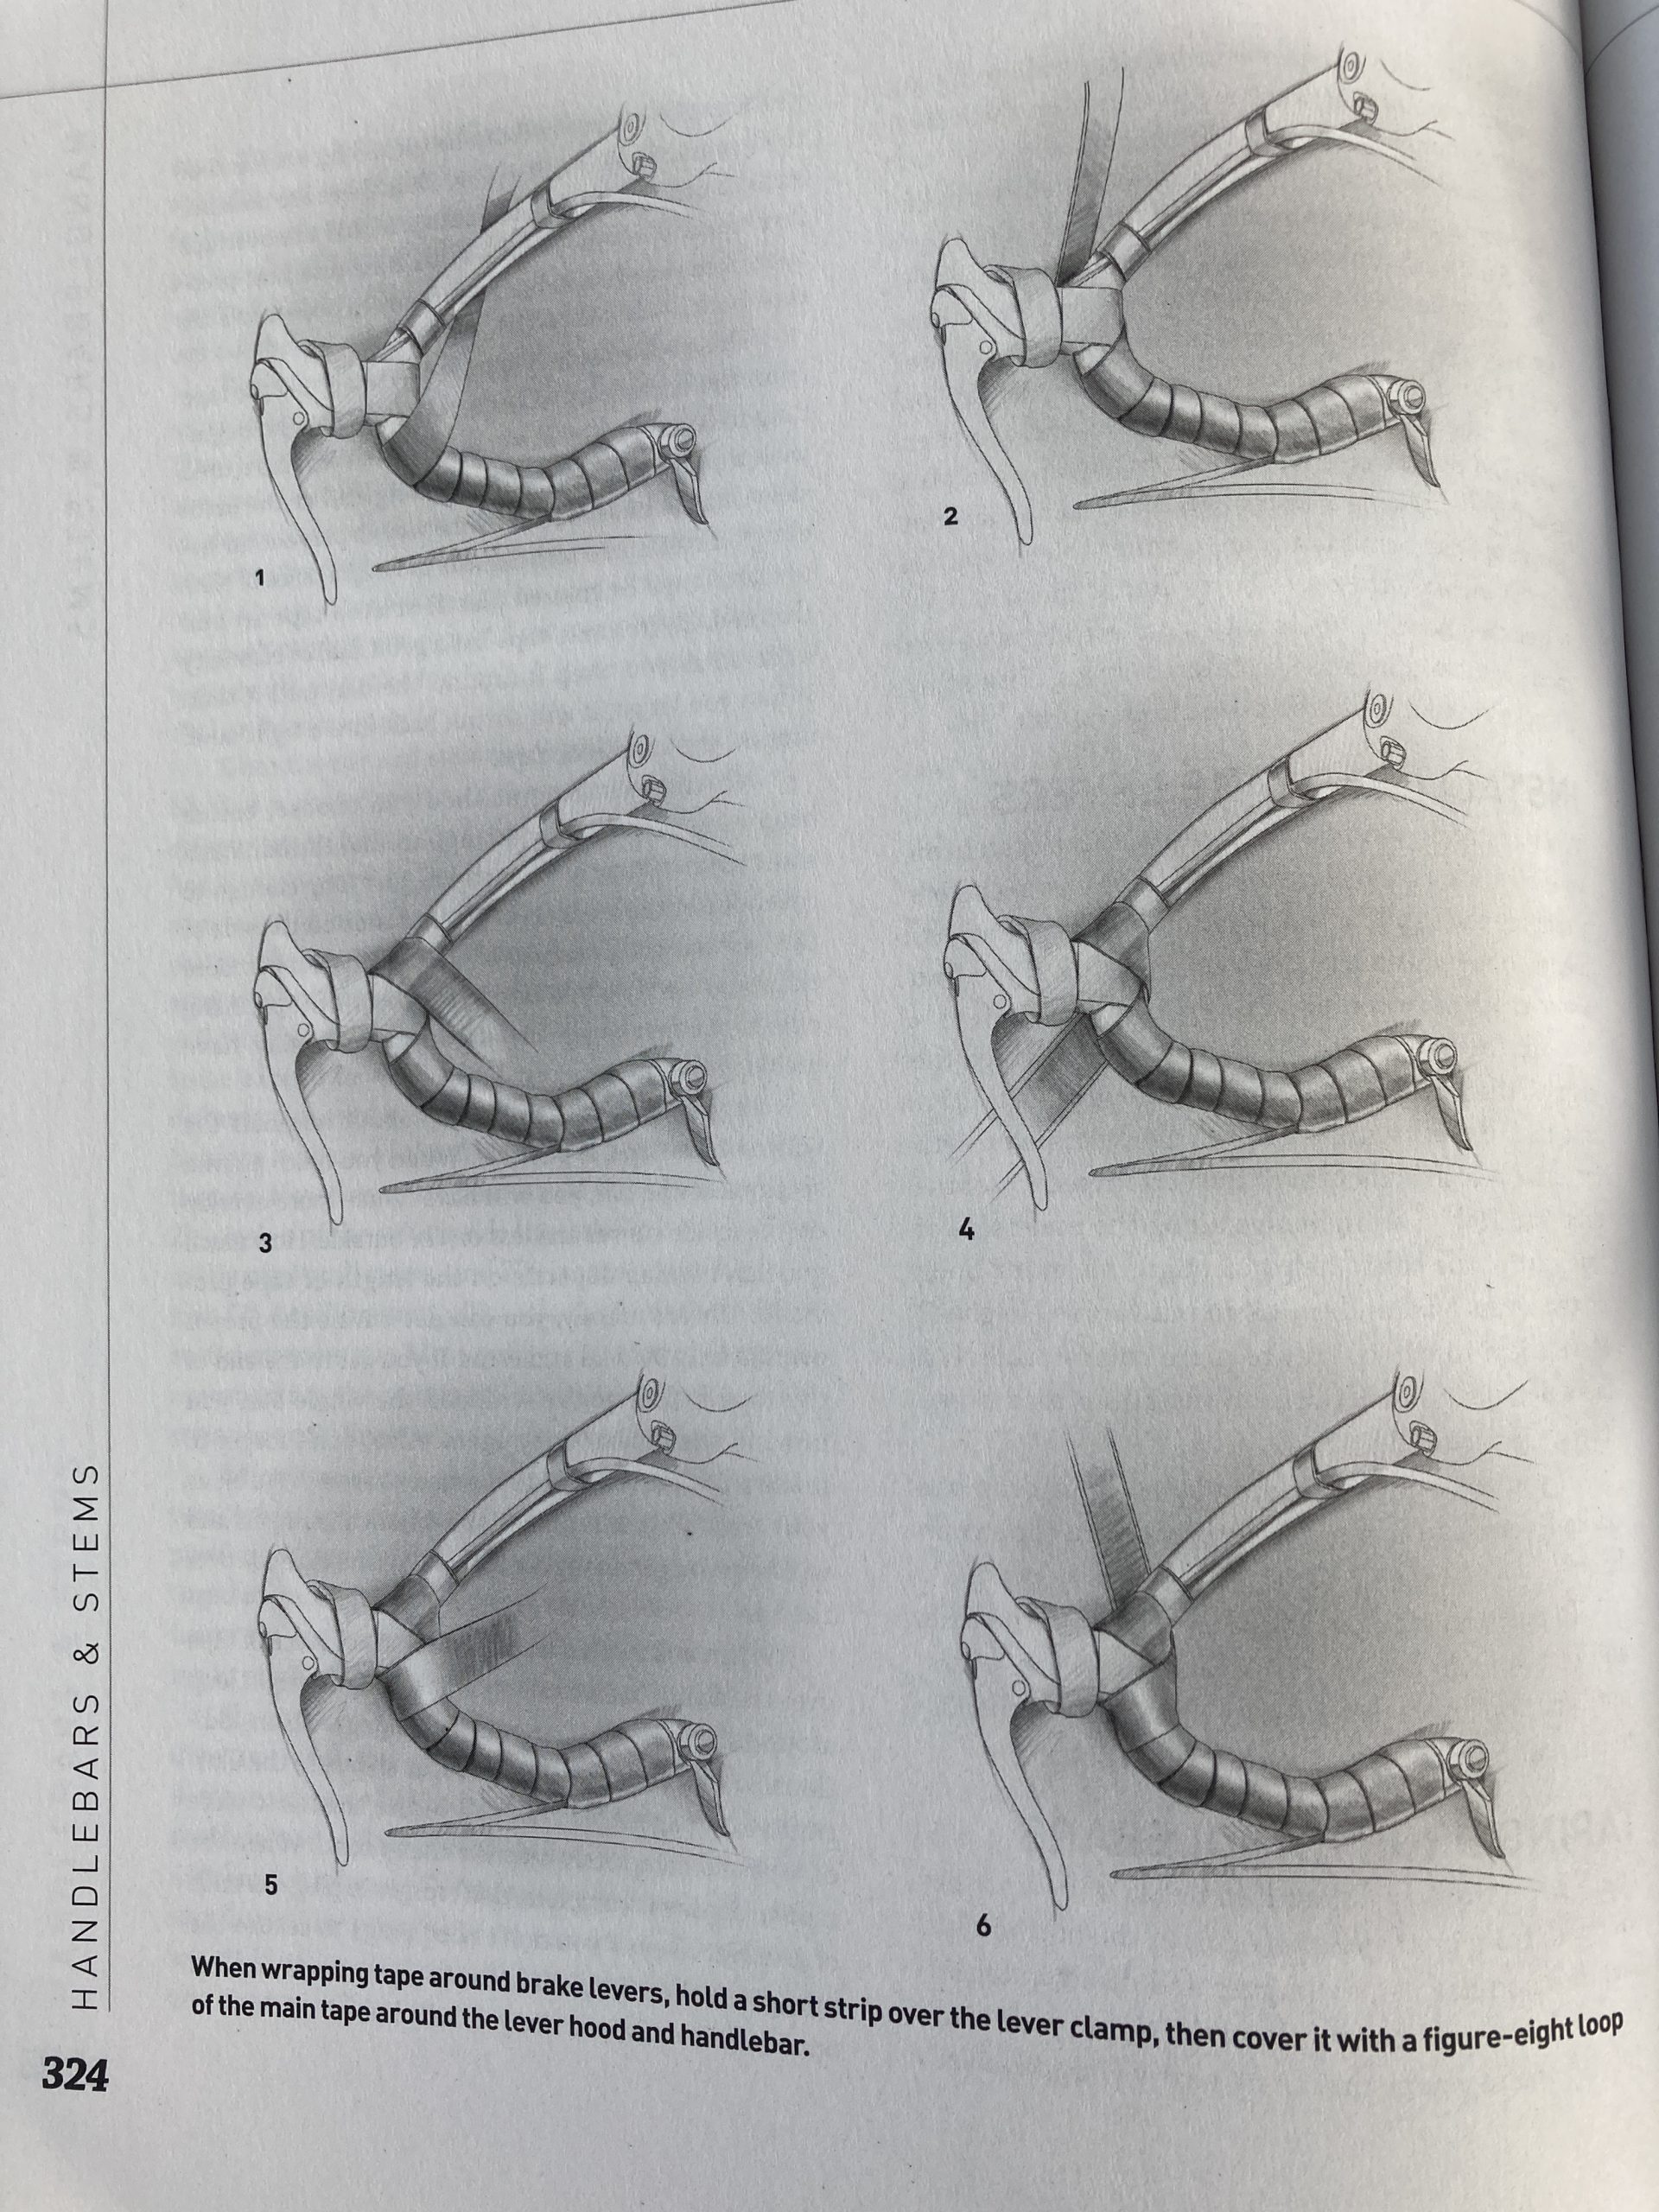
If you’re anything like me I suggest setting aside a couple hours for this project as you’ll be wrapping (and re-wrapping) your bars to get it just right. Two reference materials I kept close at hand were the Lizard Skins instruction diagram:
You can see I kept this diagram open (in the grass) to reference as I was taping the bars.
You can also see in that photo that I wrapped the right side wrong coming off the main brakes.
That mistake may have cost me $40 in handlebar tape 😩 I only wrap my bars once every 5 years or so. Next time I might practice with a strip of paper and memorize that figure 8 pattern.
I did manage to undo and redo it correctly. Notice the tape angles are all symmetrical. We’ll see if it holds 🤞
Post-Ride Verdict
The top levers work great – I don’t have to frantically move my hands from the tops to the hoods if I need to brake quickly.
I like the bar tape so far, the best part is Lizard Skins come with screw-tighten bar ends. My old Cinelli bar tape had press-in ends that would fall out on occasion.
Bicycle tire tubes are the most prolific piece of trash that is generated by the bicycling industry. Luckily it’s nowhere near the poundage of old car tire waste out there. Still because it’s the thing most often replaced on a bike, people have found several clever ways to use punctured tubes instead of putting them in the landfill.
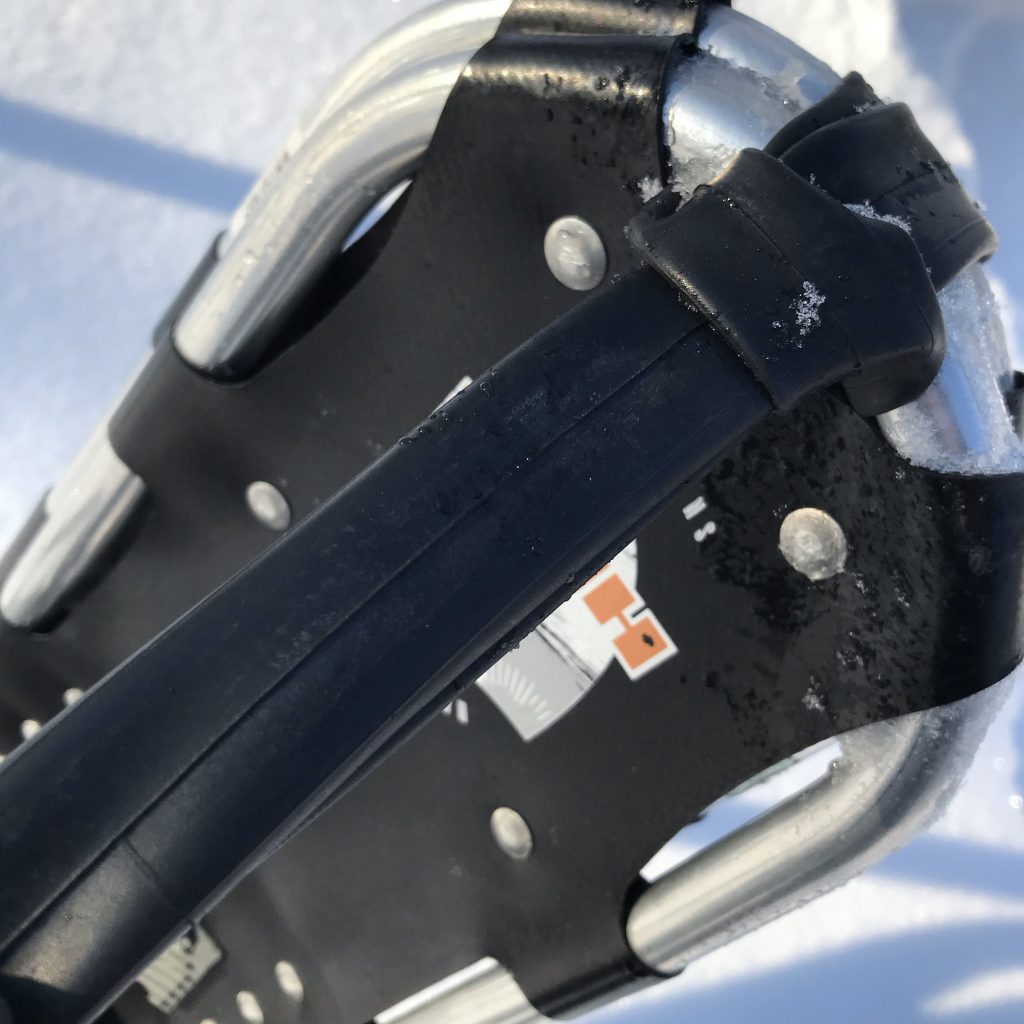
I like to keep one in my bike trunk bag for carrying things. I use the tube as a shoulder belt to strap things to my back. I’ve used them to carry a shovel, a pole saw, and most recently: snowshoes.
I used one in January to go snowshoeing at my local nature center:
Elapsed Time
Moving Time
Distance
Average Speed
Max Speed
Elevation Gain
Calories Burned
00:57:56
hours
00:13:30
hours
0.43
mi.
31:07
min/mile
12:46
min/mile
27.23
ft.
29
kcal
Went to Innsbruck Nature Center… Honestly didn't need snowshoes – the trail was already hard-packed from hikers. Was good to venture off of the trail however.
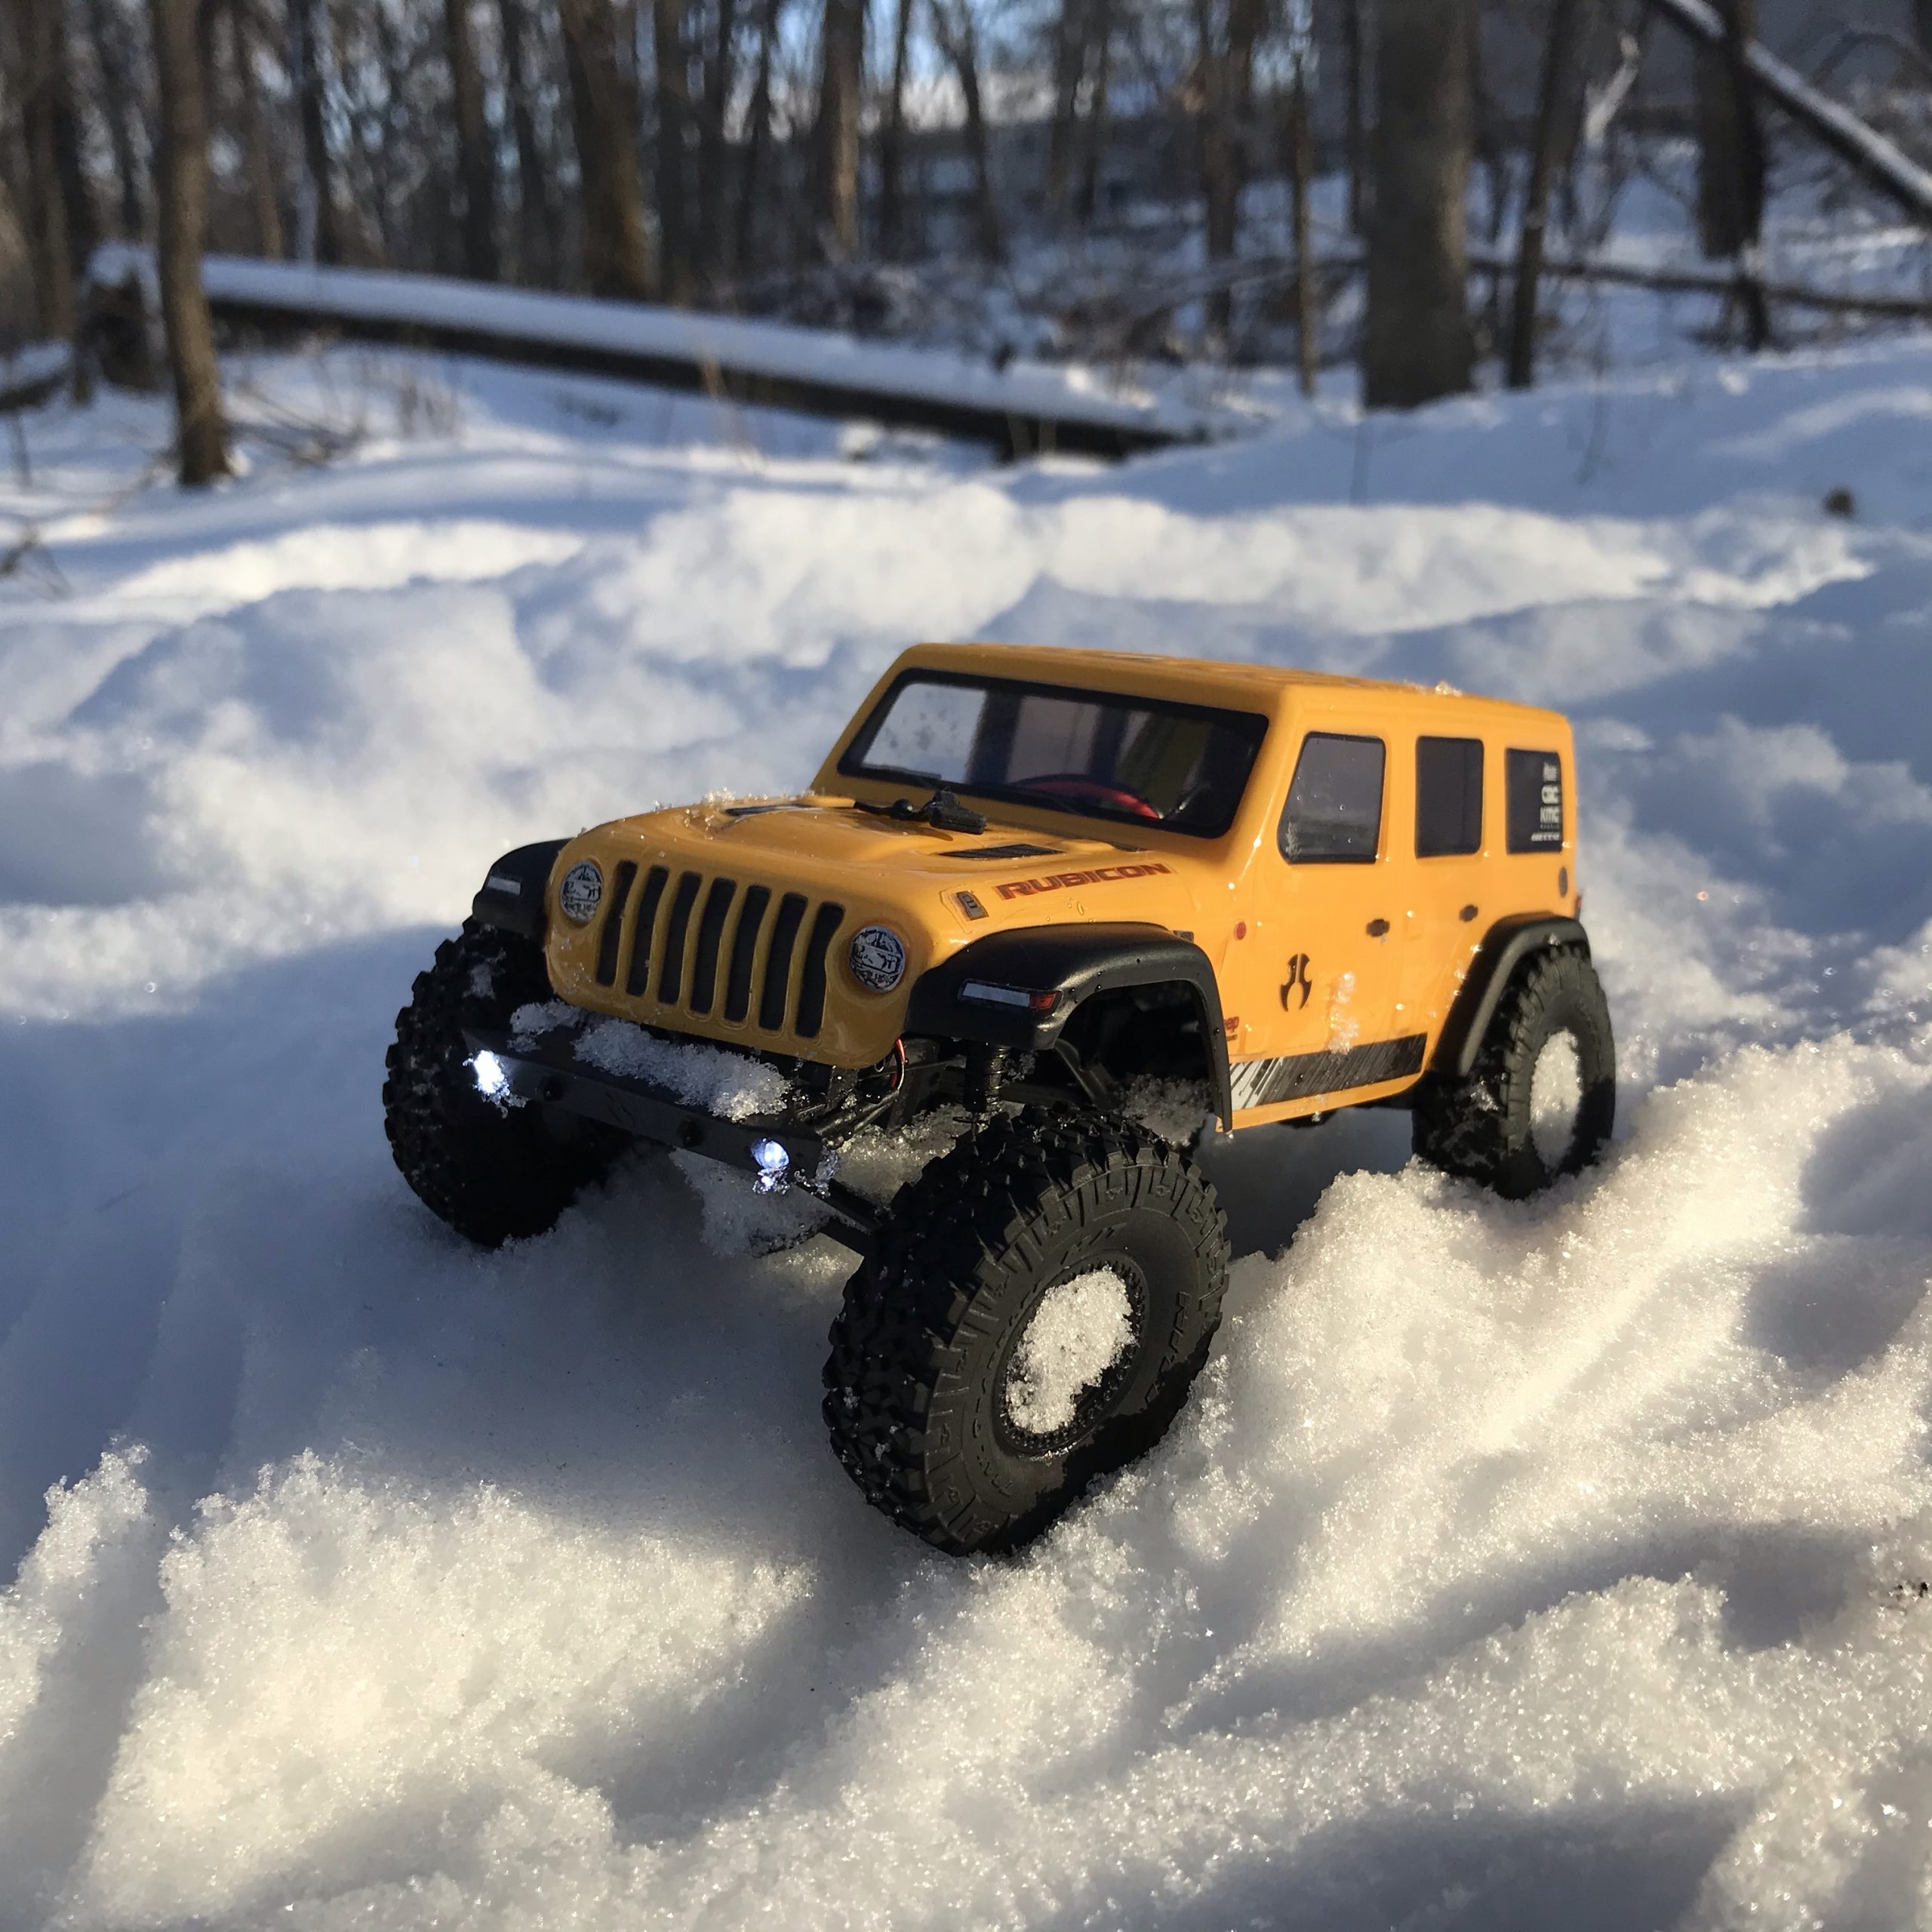
Tested out my SCX24 RC Crawler 😎
Rigging With Bike Tubes
Fastening one end of any object is simple, go around the object(s) and loop the tube back through itself to to create a cow hitch.
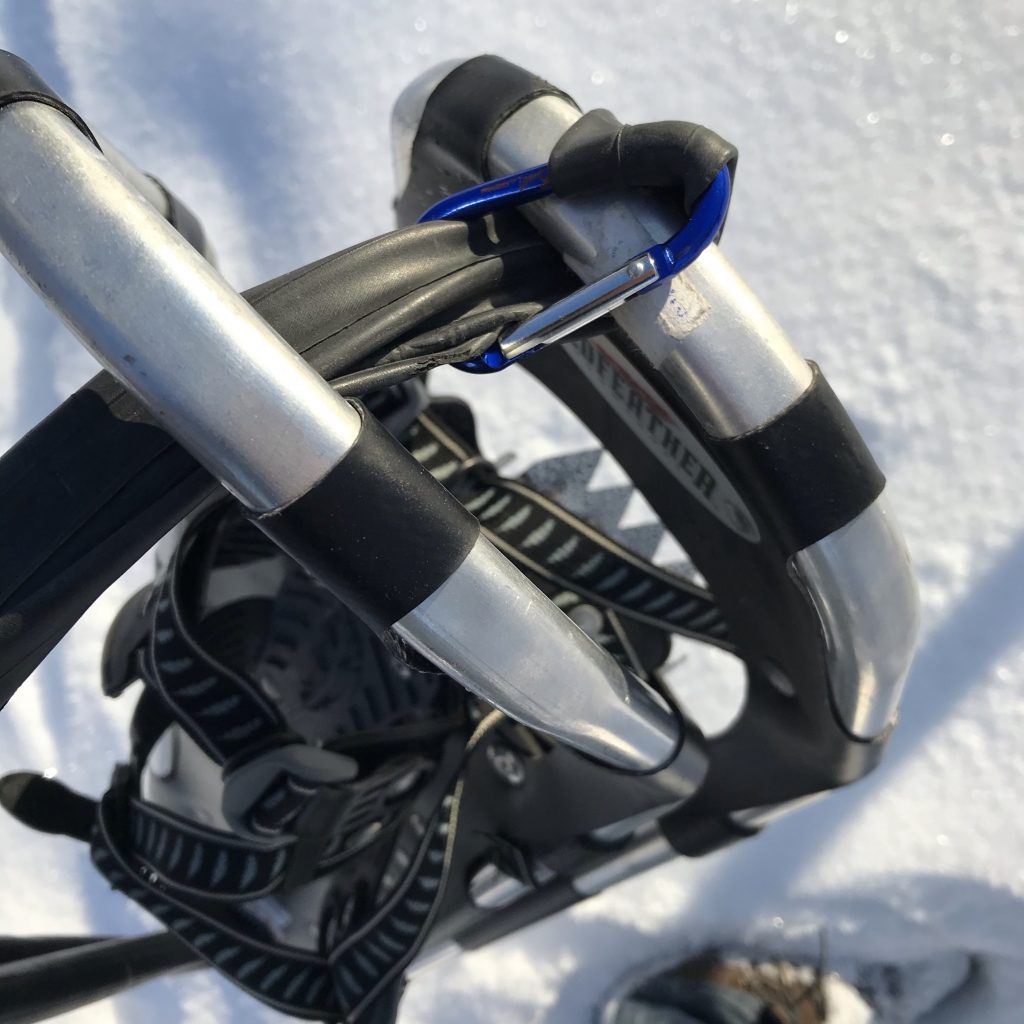
You can only create a cow hitch on one end. On the other end I use a cheap carabiner (that I also keep in my trunk bag) as a link to fasten it similarly.
Then I sling it over my shoulder and head on my way. I keep a couple different sized punctured bike tubes in the garage. You’ll find that some are too loose and others are too tight, depending on what you’re trying to carry. Experiment with sizes and then put the most versatile one in your trunk bag for ad-hoc trips.
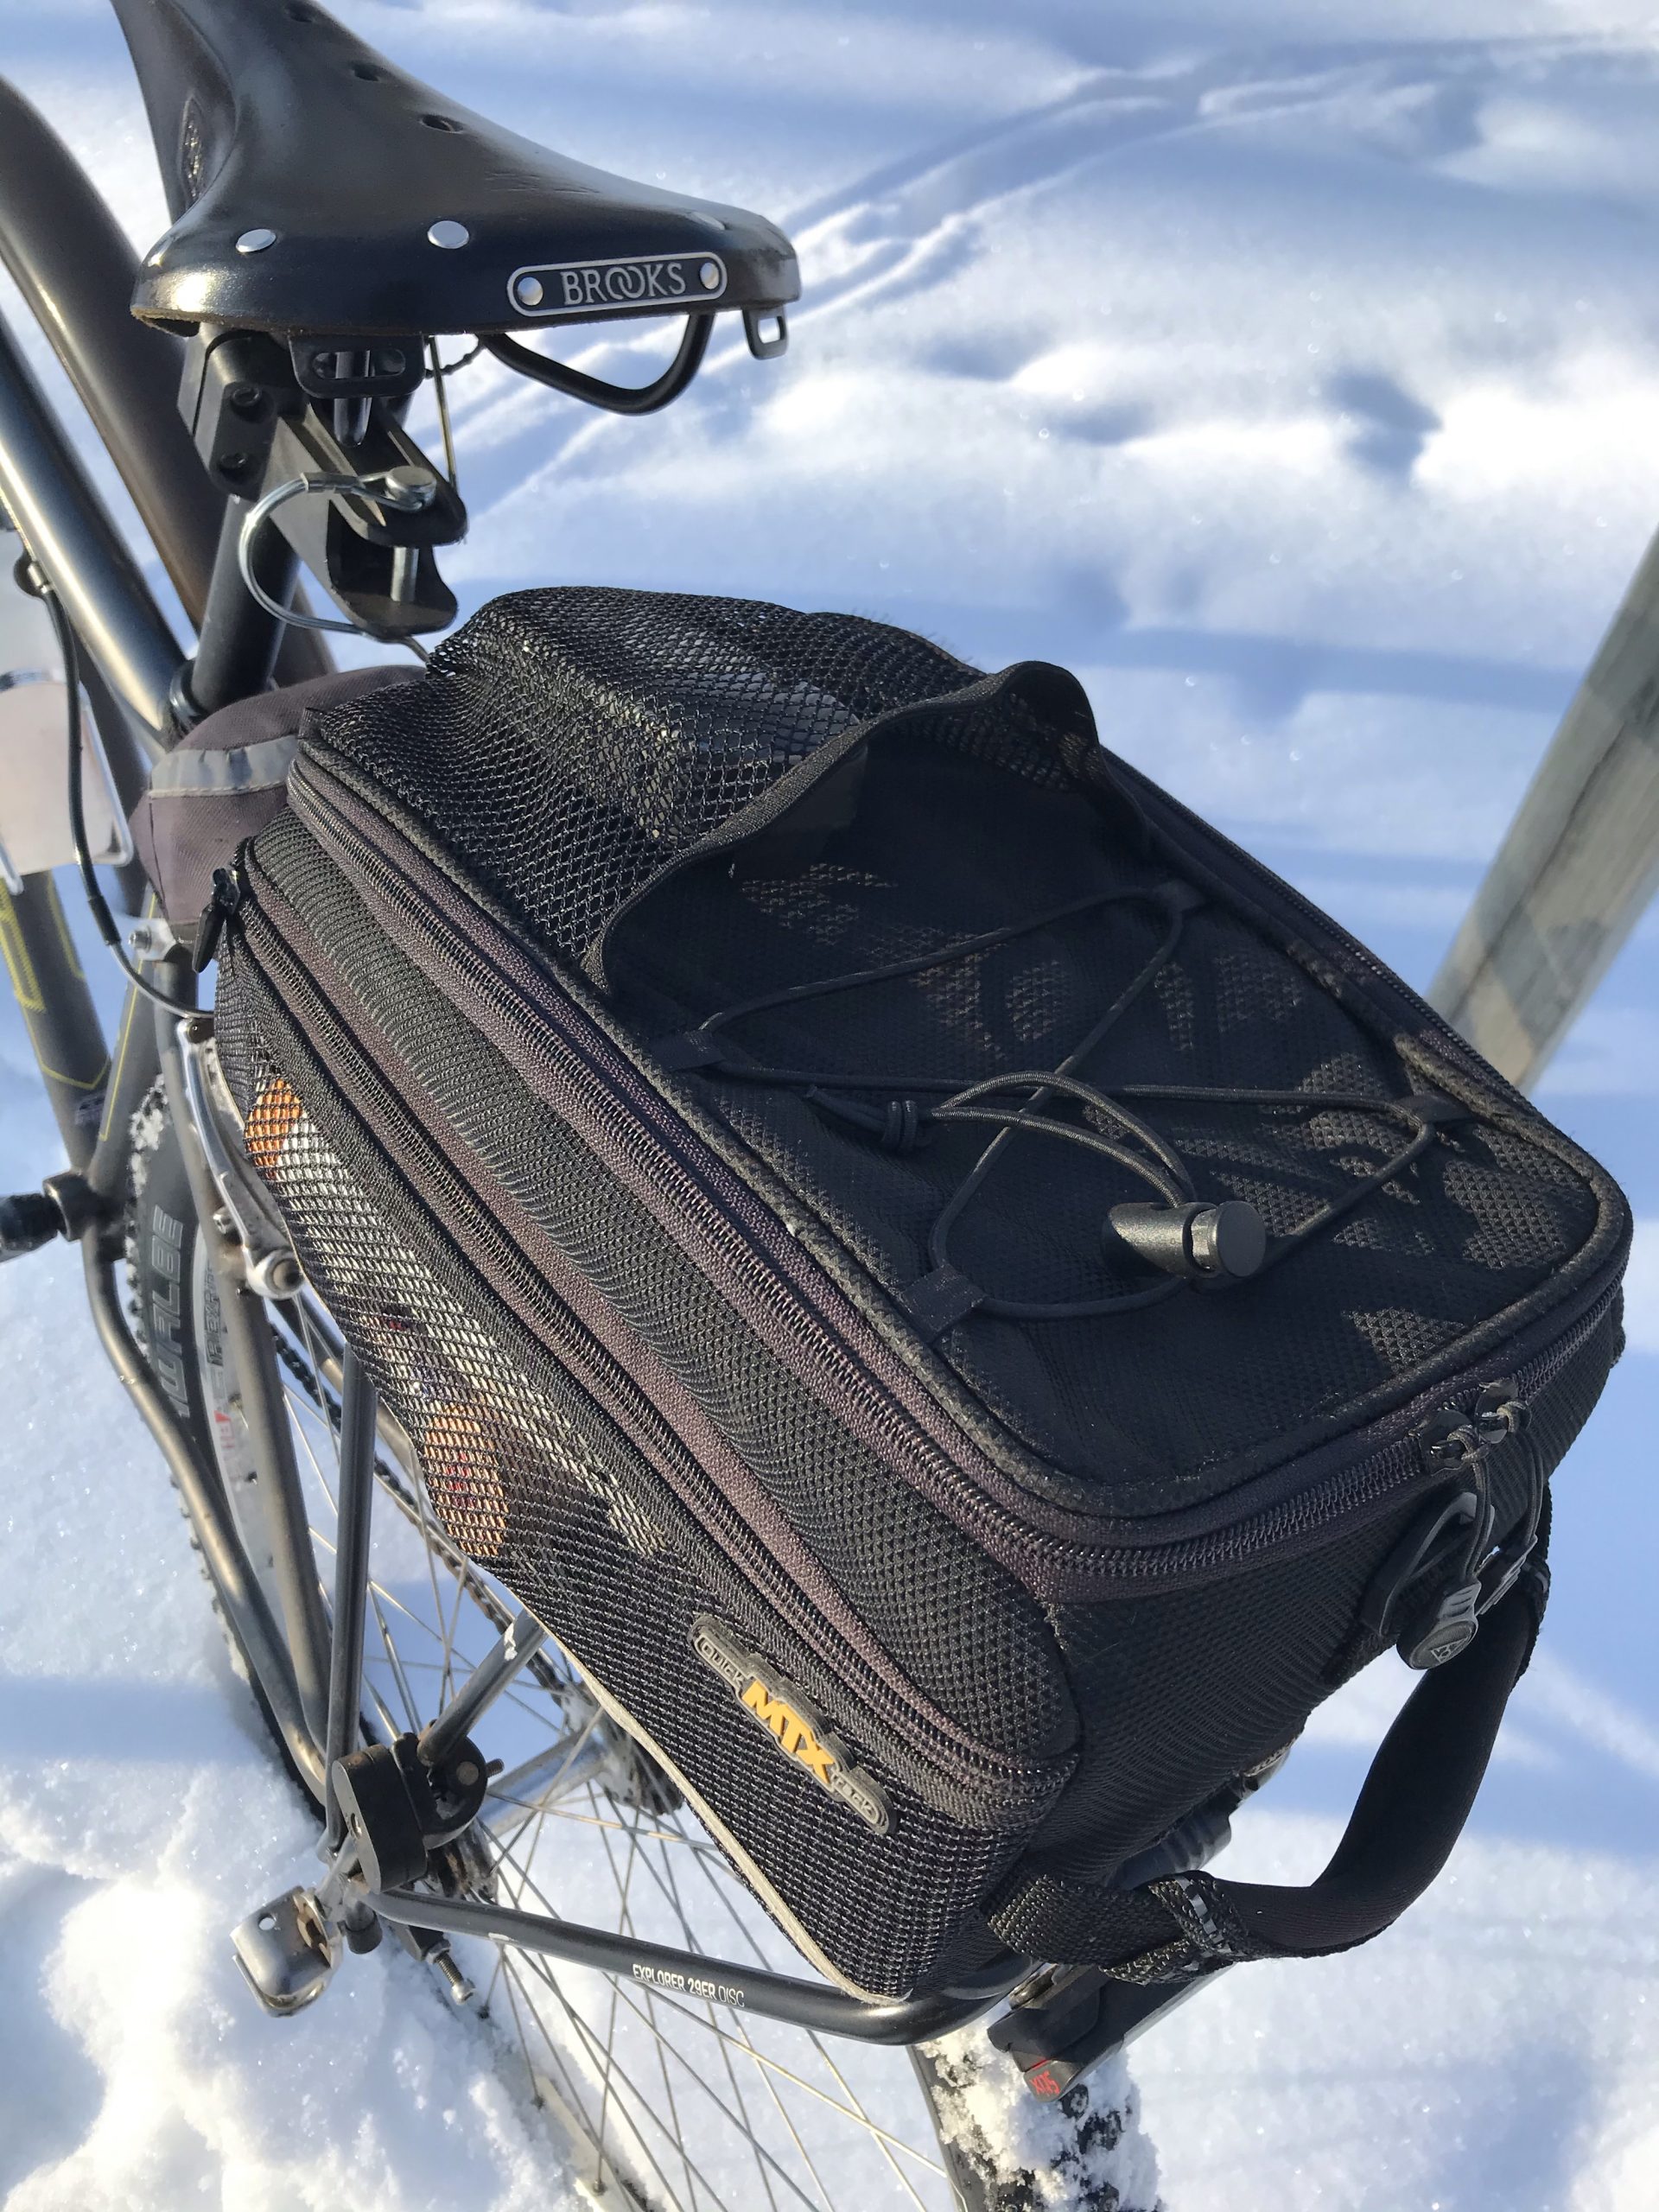
My only complaint about this trunk bag is the Made in China tag. Not because of the country of origin, but because of its placement. From day one of owning this bag, it was perfectly in the way of the zipper. You can see that mine has been “run over” by the zipper a number of times.
Despite the stupid tag, this thing has several useful compartments. Mesh zippered pockets on the sides where I keep sunscreen, lip balm, zip ties, and rain covers for shoes.
There’s a mesh pocket and elastic cords on the top for anything you want to have quick access to – or if you want to strap something down that is bigger than the bag.
Inside it’s one big compartment, but on the lid there’s another pocket inside. I keep a set of repair tools with a patch kit, and a couple maps of the local trail system.
It securely locks into place with the trademark Topeak QuickTrack system, so I never worry about it flying off.
Case Study: RC Trunk
I write about radio control (RC) related stuff over at MeatballRacing.com and recently I found a YouTube channel called Berm Peak that also shares my enthusiasm for both bicycles and RC.
In this video he reviews a different Topeak trunk bag that has fold-out panniers.
He put in a 1:24-scale crawler, which is a perfect fit for these bags. Similarly, I put in my Jeep, the controller, some sunglasses and headed to the local nature center to do some crawling.
Elapsed Time
Moving Time
Distance
Average Speed
Max Speed
Elevation Gain
Calories Burned
01:13:37
hours
00:10:20
hours
1.04
mi.
6.04
mph
8.72
mph
61.35
ft.
118
kcal
Put the studded tires on and rode to a trail nearby for some snowshoeing
When when I got there, I switched to snowshoes for a hike.
Elapsed Time
Moving Time
Distance
Average Speed
Max Speed
Elevation Gain
Calories Burned
00:57:56
hours
00:13:30
hours
0.43
mi.
31:07
min/mile
12:46
min/mile
27.23
ft.
29
kcal
Went to Innsbruck Nature Center… Honestly didn't need snowshoes – the trail was already hard-packed from hikers. Was good to venture off of the trail however.
Tested out my SCX24 RC Crawler 😎
I can’t fit the showshoes in the trunk bag, but I have a carrying solution for those I’ll share later.
I hiked to a good spot and played in the snow.
The trunk bag is indeed super versatile – I feel like every year I come up with another useful way to use it.
At my work we have a thing about giving tacos (🌮) to people when they help you out, do something great or funny – as a show of support. The tacos can be redeemed for prizes or gift cards – and one of those prizes is a Fitbit. I wanted a model upgrade from the ones our company was offering. In November 2020, Costco had a Fitbit Charge 4 bundle for $90.
I brokered a deal with my wife. I’d redeem a $100 Amazon gift card with my tacos and give it to her, and then buy the model I want from Costco.
The reason I got the Charge 4 is because it has a built-in GPS. I don’t like using my phone to record my activities as it drains the battery very quickly. Also my handheld Garmin eTrex Vista GPS is starting to act weird – it randomly turns off sometimes when I’m riding.
Hooking it up to Strava was simple, I did it through the https://strava.fitbit.com/ website. Here’s an article that goes into detail about connecting the two. When you finish an activity, Fitbit automatically transfers the information via the app (including GPS track) to Strava. As a bonus now my heart rate information is sent for more accurate effort calculation.
Battery Life
Since I considered GPS to be a requirement, this is the 2nd best feature. It would be a folly to call it charge if the battery life sucked. Without GPS use, I can easily go a week before putting it on the charger. With GPS use, I’ve found it takes about 10% of the battery for every hour you’re recording activity. By that marker, I’d guess you could use the GPS for 9+ hours before it conked out.
Sleep Tracking
All fitness trackers can track sleep. Along with a great battery life, the Charge 4 charges quickly. Putting it on the charger while I take a shower is enough to keep it topped up. I don’t ever have to take it off for a night to get a full charge.
Water Resistant 50 Meters
I always would put my phone in a ziplock bag while kayaking and still worry that it will make it’s way to the bottom of the lake. Fitbit says you can wear your tracker or smartwatch in the shower, pool and beyond. That should be just fine for kayaking – it will get wet, but it will survive.
Those are the good things, now onto some of the annoyances…
UI Issues
The swipe functions don’t always work as expected, partly because the screen is small, partly because the screen is very tall and skinny.
The most common issue is when I swipe down from the top to get the notification list (to inevitably clear it out). The Charge often thinks I’m swiping to the side because I didn’t swipe perfectly vertical top to bottom.
Another thing I do occasionally is leave the home screen on the weather. It will stay here until you press the watch button – so the next time you wake the screen you can see the weather. You’ll still get notifications on these secondary screens, but once they go away you cannot swipe down to see them again – you must go back to the home screen (clock) and swipe down from there.
Multiple Activities
I realize this is probably an edge case, but I imagine I’m not the only one experiencing this issue. The Charge 4 currently can’t pause one activity and start another. Here’s the scenario: I put studded tires on my bike and rode to the local nature center:
Elapsed Time
Moving Time
Distance
Average Speed
Max Speed
Elevation Gain
Calories Burned
01:13:37
hours
00:10:20
hours
1.04
mi.
6.04
mph
8.72
mph
61.35
ft.
118
kcal
Put the studded tires on and rode to a trail nearby for some snowshoeing
I brought my snowshoes with me, and when I got to the trail, I walked around the park. On the Charge 4 you can pause and resume your activity. This is great if I bike somewhere like the library, I can pause my ride when I arrive, and resume once I head home – then it records as a single activity.
But you can’t start another GPS activity until you finish the first one. Rather than my activity showing up as three (ride out, hike, ride back) I want them to appear simply as two: bike & snowshoe.
So I used my trusty(?) Garmin for the hike and hoped it didn’t turn off on me while I was out.
Elapsed Time
Moving Time
Distance
Average Speed
Max Speed
Elevation Gain
Calories Burned
00:57:56
hours
00:13:30
hours
0.43
mi.
31:07
min/mile
12:46
min/mile
27.23
ft.
29
kcal
Went to Innsbruck Nature Center… Honestly didn't need snowshoes – the trail was already hard-packed from hikers. Was good to venture off of the trail however.
Tested out my SCX24 RC Crawler 😎
Verdict?
I looked at getting the cheapish Apple Watch for around $150 and also looked at the new Fitbit Versa 3. While they both have built-in GPS, neither of them were going to match the battery life of the Charge. If it goes on sale again for < $100 I would easily recommend it to anyone looking at a fitness watch – especially for tracking bike rides.


