With all the other news of the global Coronavirus pandemic, police killings, and riots, I want to take a moment to make sure a important local story doesn’t get lost.
It was recently brought to my attention that Duron Jr. has died. This apparently happened at the end of April, but I just found about it last week. This young man was only in the 5th grade when he was struck by an SUV while crossing 61st from Fridley Middle School to the Fridley Community Center.
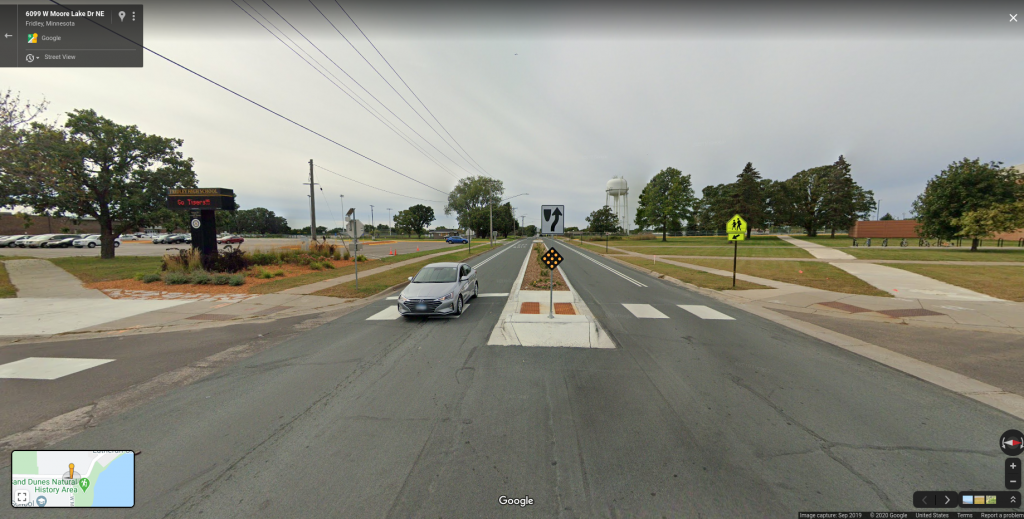
Next the city took down the (useless) plastic fences and erected bollards on the road to keep cars from passing each other on the shoulder.
I wondered how long they’d be there, and I now know Fridley has bollards as one of the tools in its toolboxes for testing changes without doing anything permanent.
Then throughout 2019 the city took action to apply more treatment to the 61st. Ave. They added a median with a pedestrian refuge to give pedestrians a little more priority at the intersection.
There is now a marked bike lane on both shoulders as parking was never allowed there previously. And there’s double white-striped paint to reinforce that passing is not allowed.
61st is a city-owned street. No county or state policies or politics stand in the way of making the street safe for everyone. I’m glad they took what was relatively swift action for a government agency.
But why do we wait until someone is struck by a vehicle – so severely that they risk death – to take action?
As car-loving Americans, we tend to have this have our cake and eat it too mentality when it comes to roads. Do we want safety? Yeah, sure, but dammit I’ll bitch to the mayor if I had to wait a minute longer in my car while dropping my kid off at school.
This last part is an unknown – I don’t know what the answer is right now, but I intend to find out. Sadly almost all of our government agencies, from city to federal, aren’t set up to proactively address problems in our built environment until somebody dies.
Will the crash that ended Duron’s life be recorded as a fatality? He sustained his injuries for over two years. But undoubtedly he would still be a thriving young student if he wasn’t struck that day.
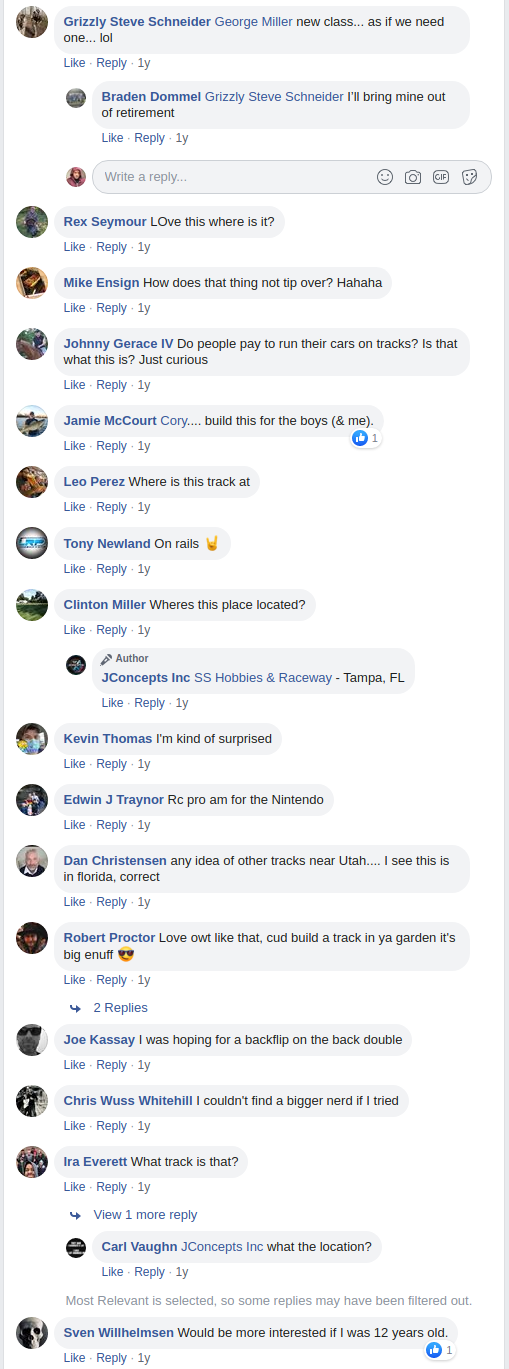
Most of the chatter about this video is positive, but the first and last comments in this screenshot are what I want to talk about:
I get mad when I hear things like “just what we need – another class” or that something is too juvenile for them to have fun. No matter how you cut it, RC racing at its core is toy cars. Yes they’re expensive, configurable, luxury toy cars. But they’re still toy cars as much as a $400 magnesium yo-yo is still a skill toy.
Let’s look at the reality and see if can’t all get along or at least agree to disagree without starting a flame-war
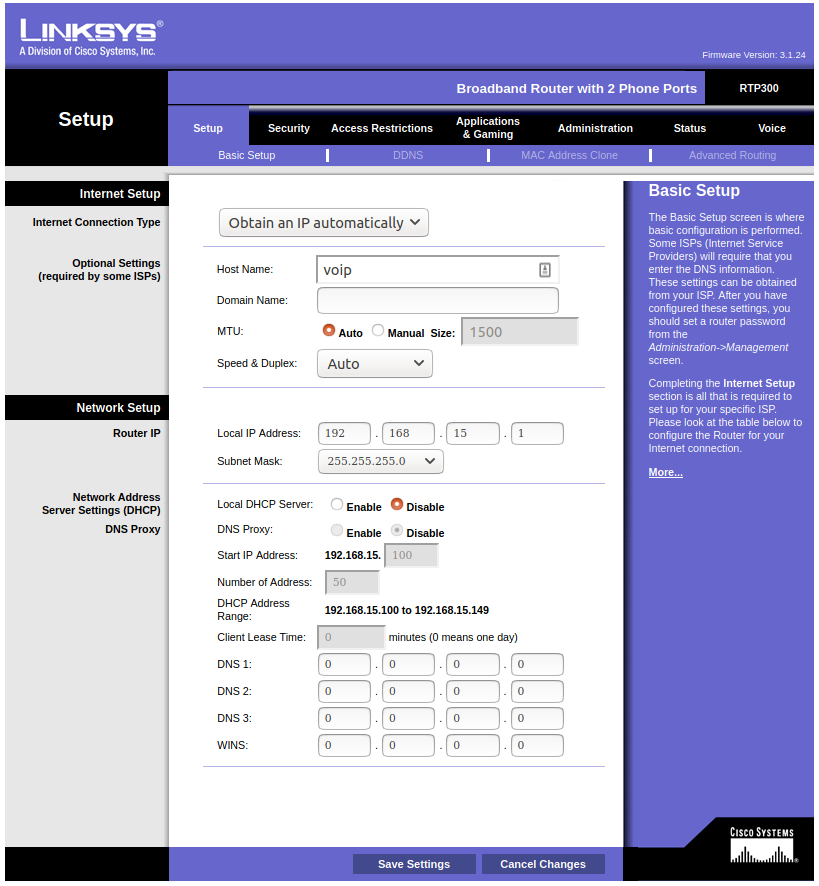
For phones I have a Linksys RTP300 analog telephone adapter (ATA) that I purchased at a local thrift store. It’s a discontinued product, but they’re easy to find for cheap on eBay.
Since I did this years ago, some of the instructions and firmware files are getting hard to find, but if you need instructions – let me know in the comments and I’ll try to help as best I can.
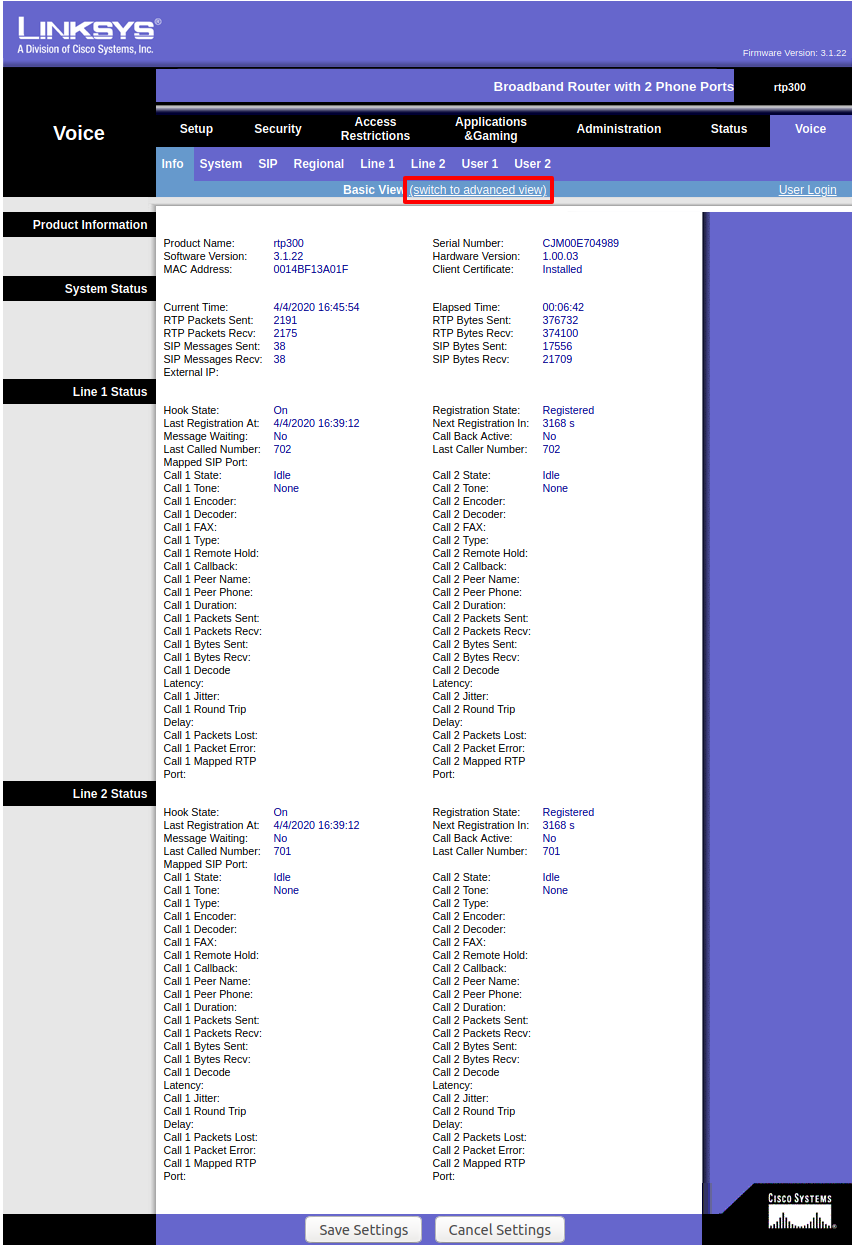
Getting into the RTP-300 admin panel
It had been at least a year since I’ve logged into the admin interface on my RTP-300. Luckily, there are some fun things you can do to help figure out how to get in. If you have a phone hooked up to it and it’s powered on, you can use the Interactive Voice Response (IVR) to get information. This article from Cisco (who purchased Linksys) has many of the available codes.
Pick up the phone and dial #### to get into the IVR menu. Then press 110# and the nice lady will read back to you the IP of your ATA.
Good info, but it wasn’t running the web interface on port 80, so I had to figure that out. The IVR option for port wasn’t working, so I did an nmap scan of all ports 1-65535 from the command line – you could use the raspberry pi or any other computer on the same network as your RTP-300:
$ nmap 172.16.0.11 -Pn
Starting Nmap 7.60 ( https://nmap.org ) at 2020-04-04 18:02 CDT
Nmap scan report for voip.lan (172.16.0.11)
Host is up (0.0048s latency).
Not shown: 999 filtered ports
PORT STATE SERVICE
8080/tcp open http-proxy
There it is, port 8080. I made sure to add the address (with port) in my password manager. Then I had to use Firefox to finally connect to the ATA admin because Chrome wouldn’t complete the connection – likely because the RTP300 doesn’t have support for HTTPS. ¯_(ツ)_/¯
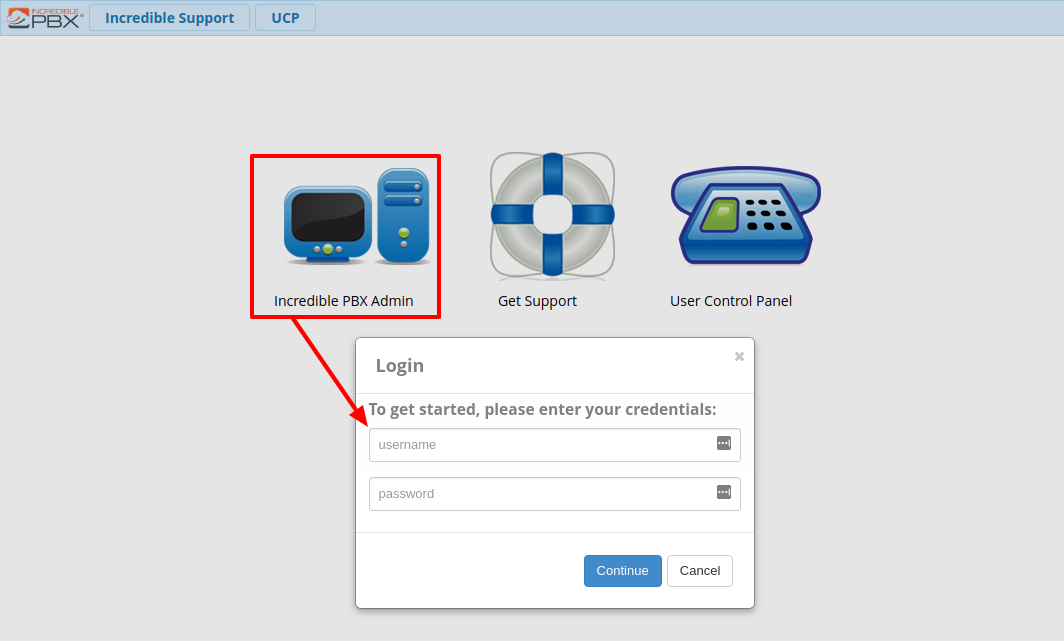
But we’re in! We’ll first do some configuration in Asterisk and then come back to the RTP300 configuration.
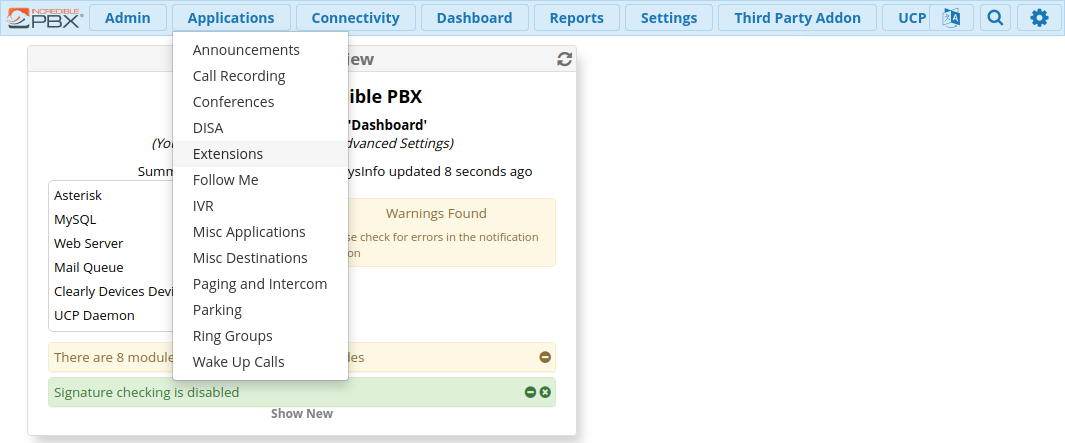
Once you’re logged in to the IncrediblePBX/Asterisk web admin, navigate to Extensions (under Applications).
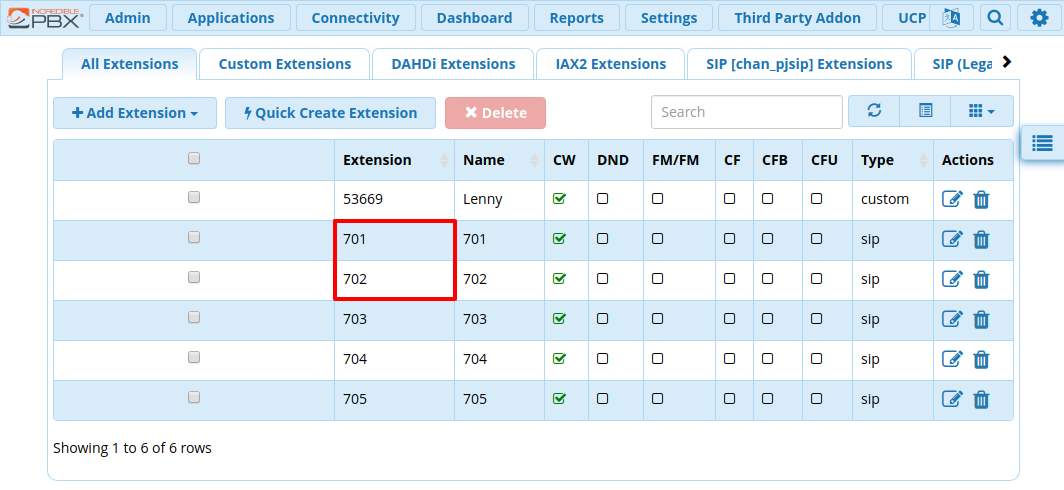
There you can see there are a few extensions pre-configured for you, including 701 & 702, which will work great with the RTP-300.
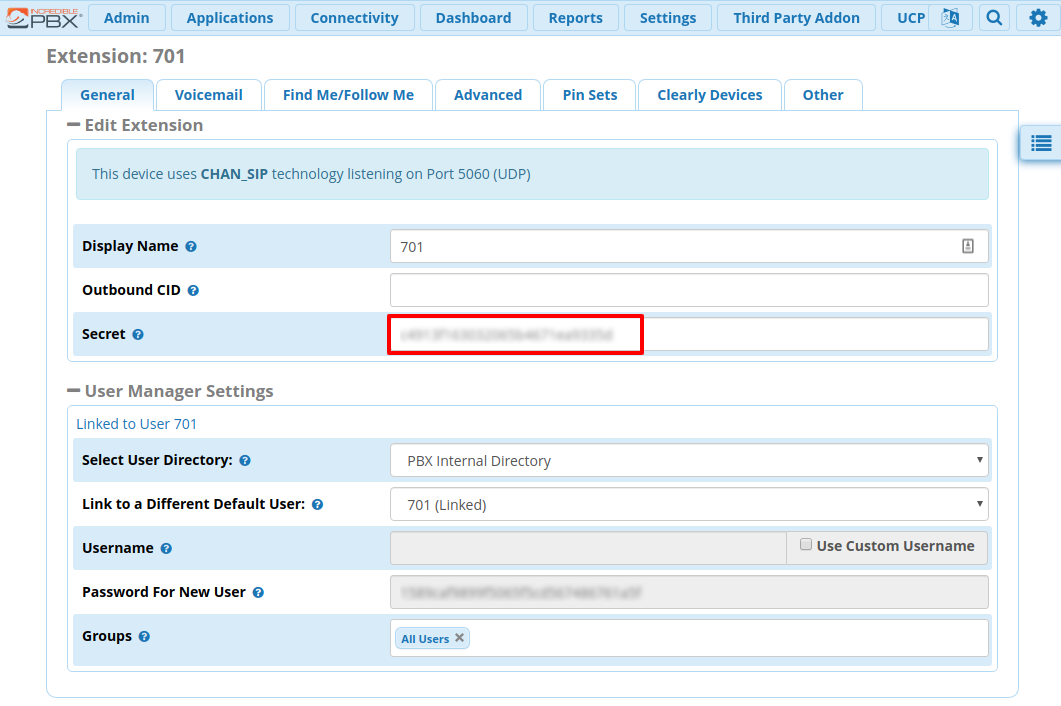
Click the Edit button to the right (paper/pencil icon) to edit and view more information about that extension. You’ll need to do two things in here. First, copy the “Secret” key for each extension.
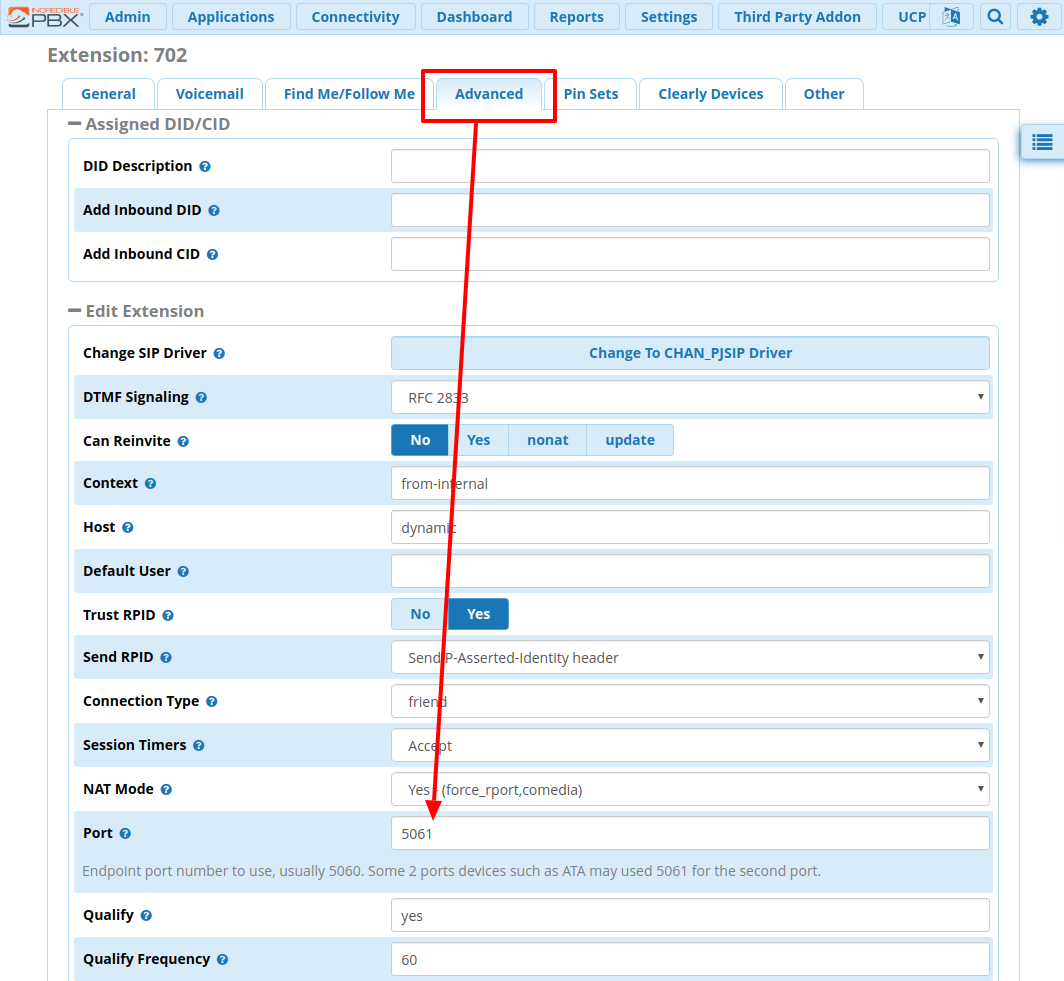
Second, for extension 702, also change the SIP port to 5061. There’s a note in there about how 5061 is sometimes used for “Line 2” on ATAs – and that’s exactly the case for the RTP-300.
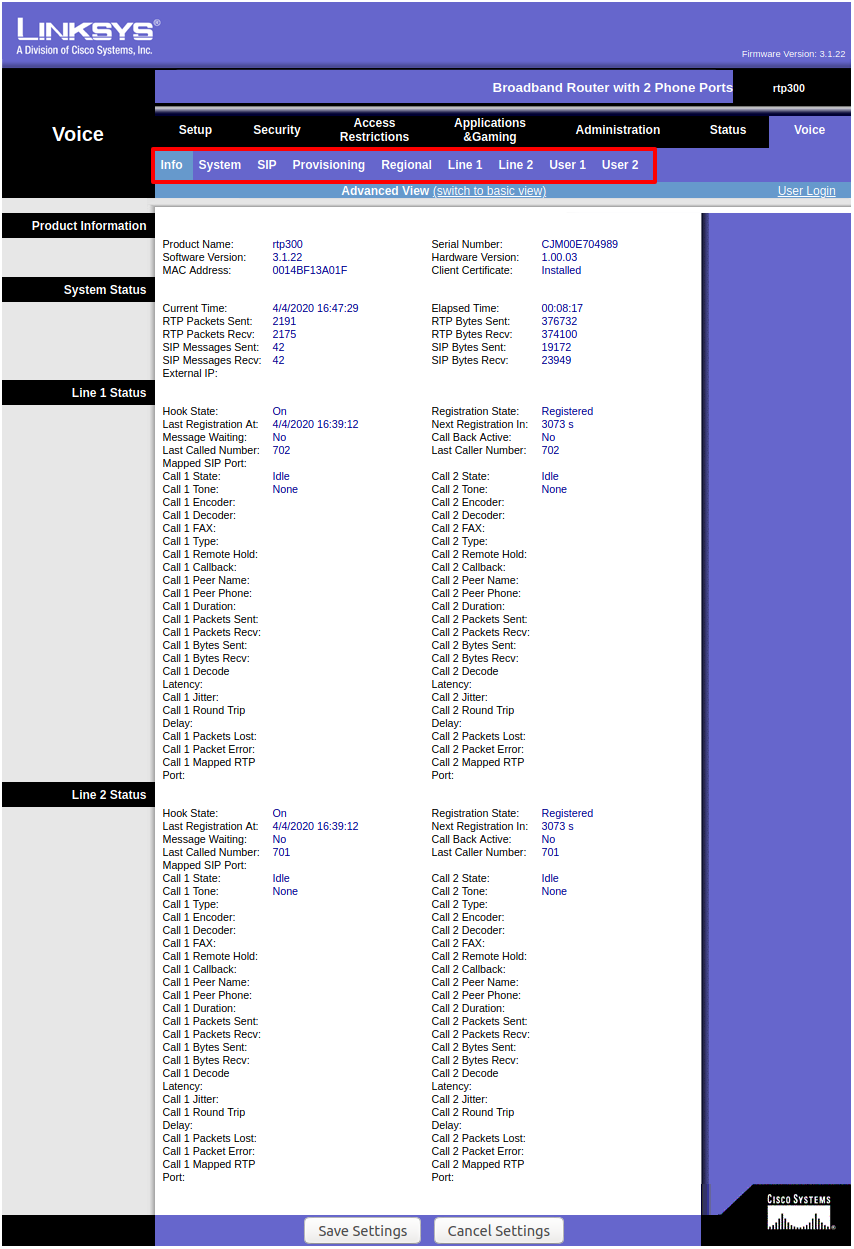
RTP-300 Admin Navigation
The RTP-300 admin interface is little weird. Once you’re logged in you’ll want to navigate to the voice menu item on the far right.
Click the “Admin Login” link to switch from an informational view to one where we can actually make changes. Then click “switch to advanced view”.
Advanced view will show all of the extensions and settings.
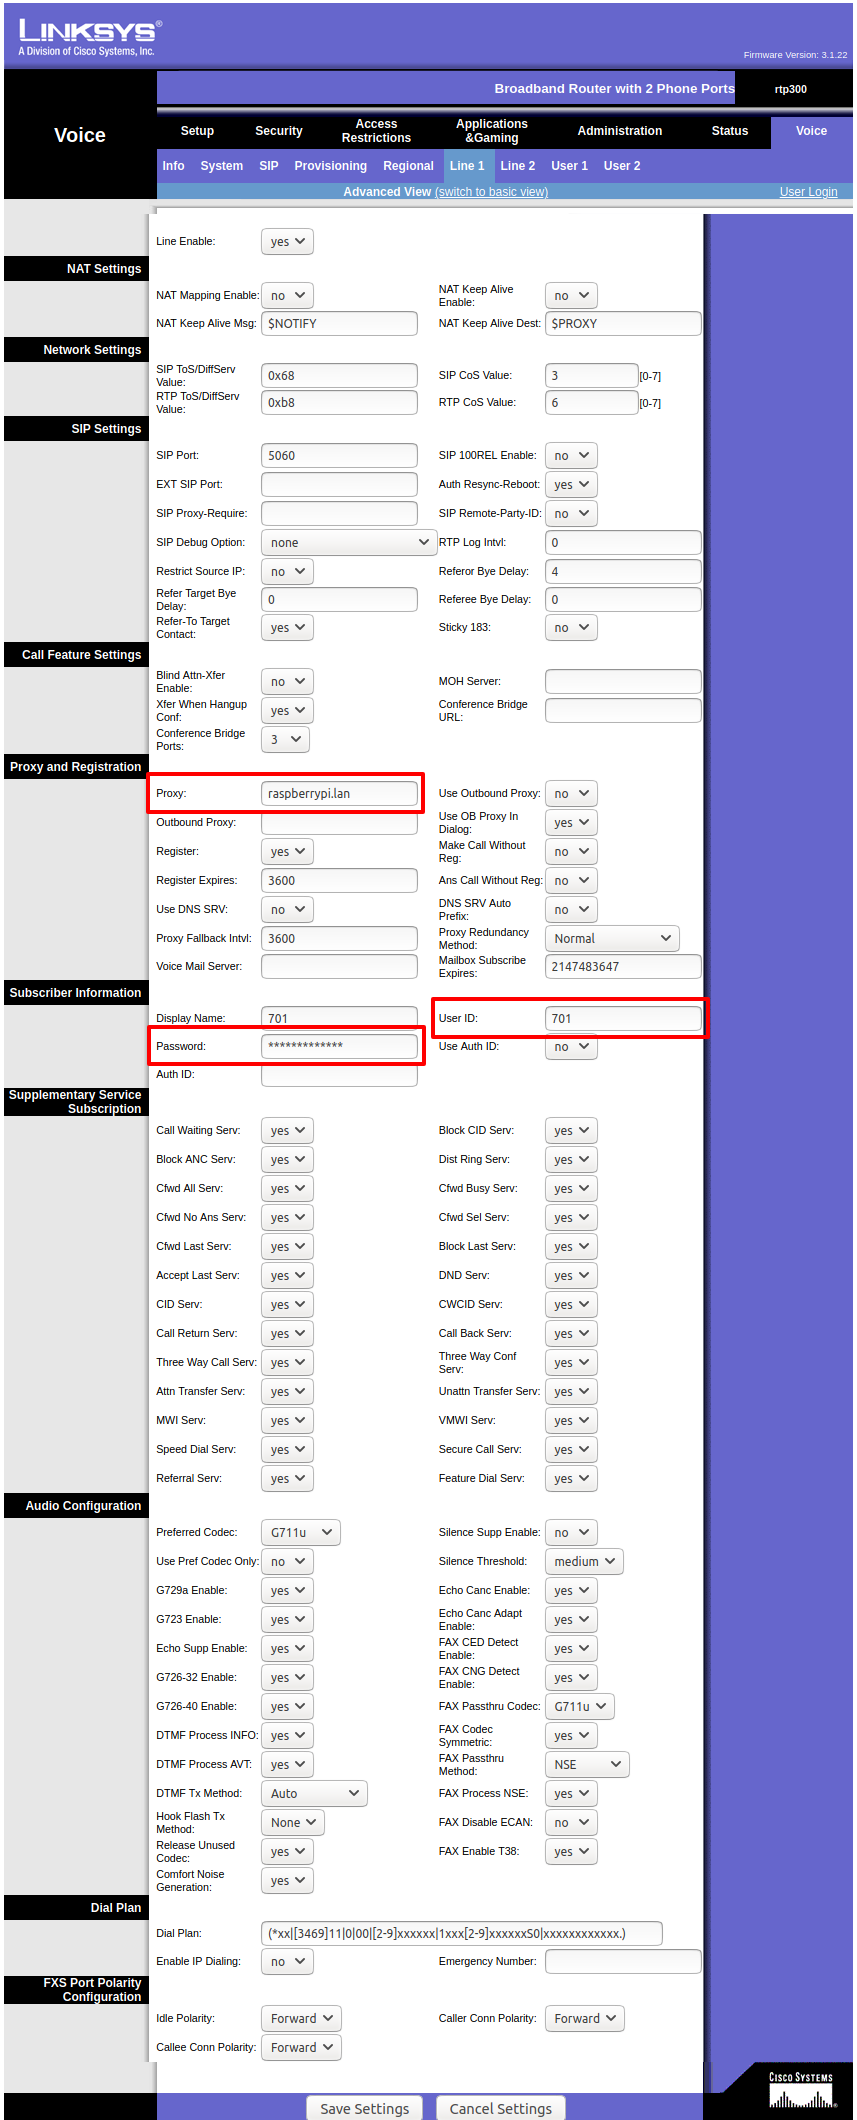
RTP-300 Extension Configuration for IncrediblePBX
Configuring phone lines 1 & 2 is fairly simple despite the overwhelming number of settings fields on the admin. We just need to enter three values:
The IP address or domain name of our IncrediblePBX server as the SIP “Proxy” This is the SIP server the ATA is going to register this line with.
The Incredible PBX extension number as the “User ID”
The extension secret as the “Password”
Test!
Once you have these settings saved, the ATA should now register itself with Asterisk on your IncrediblePBX system. The best way to know if it worked is to pick up the receiver one of your lines – you should hear a dial tone 📞
If you’ve got a dial-tone and a phone on each port, you should be able to dial each extension with 701# or 702#. The # isn’t strictly necessary, it just instructs the ATA that you’re done dialing so it can stop waiting for further input. If you’re feeling fancy you could add a 70X entry to the dialplan on the line configuration of the ATA.
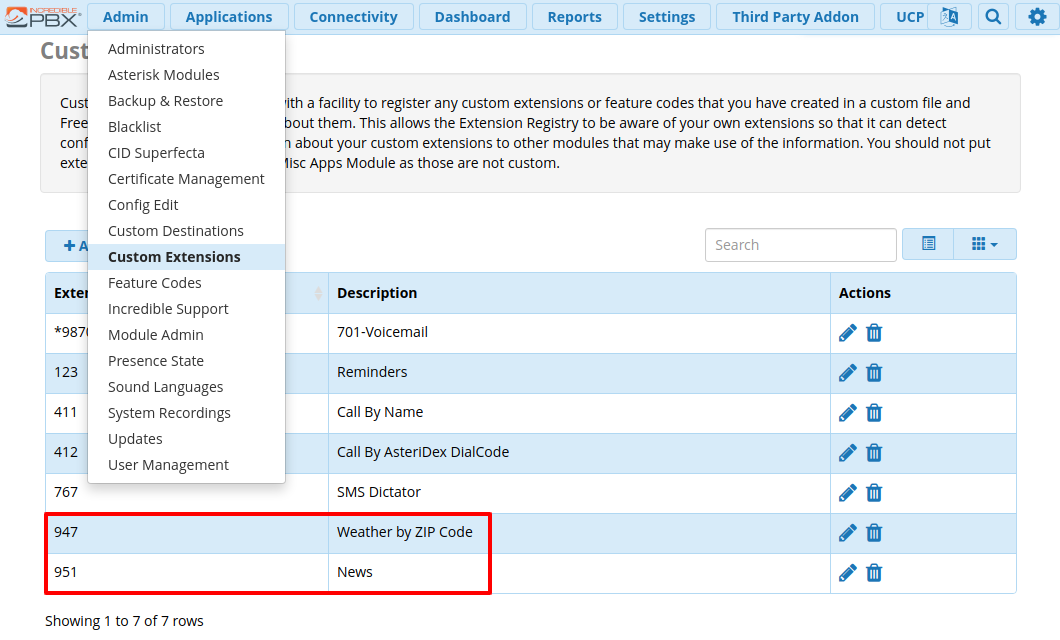
If that’s working, try one of the pre-configured Nerdvittles custom extensions. You can see them in the IncrediblePBX/Asterisk web admin by going to “Admin” and “Custom Extensions.”
Try 947# for weather by zip code ⛈️ or 951# for the latest news 📰
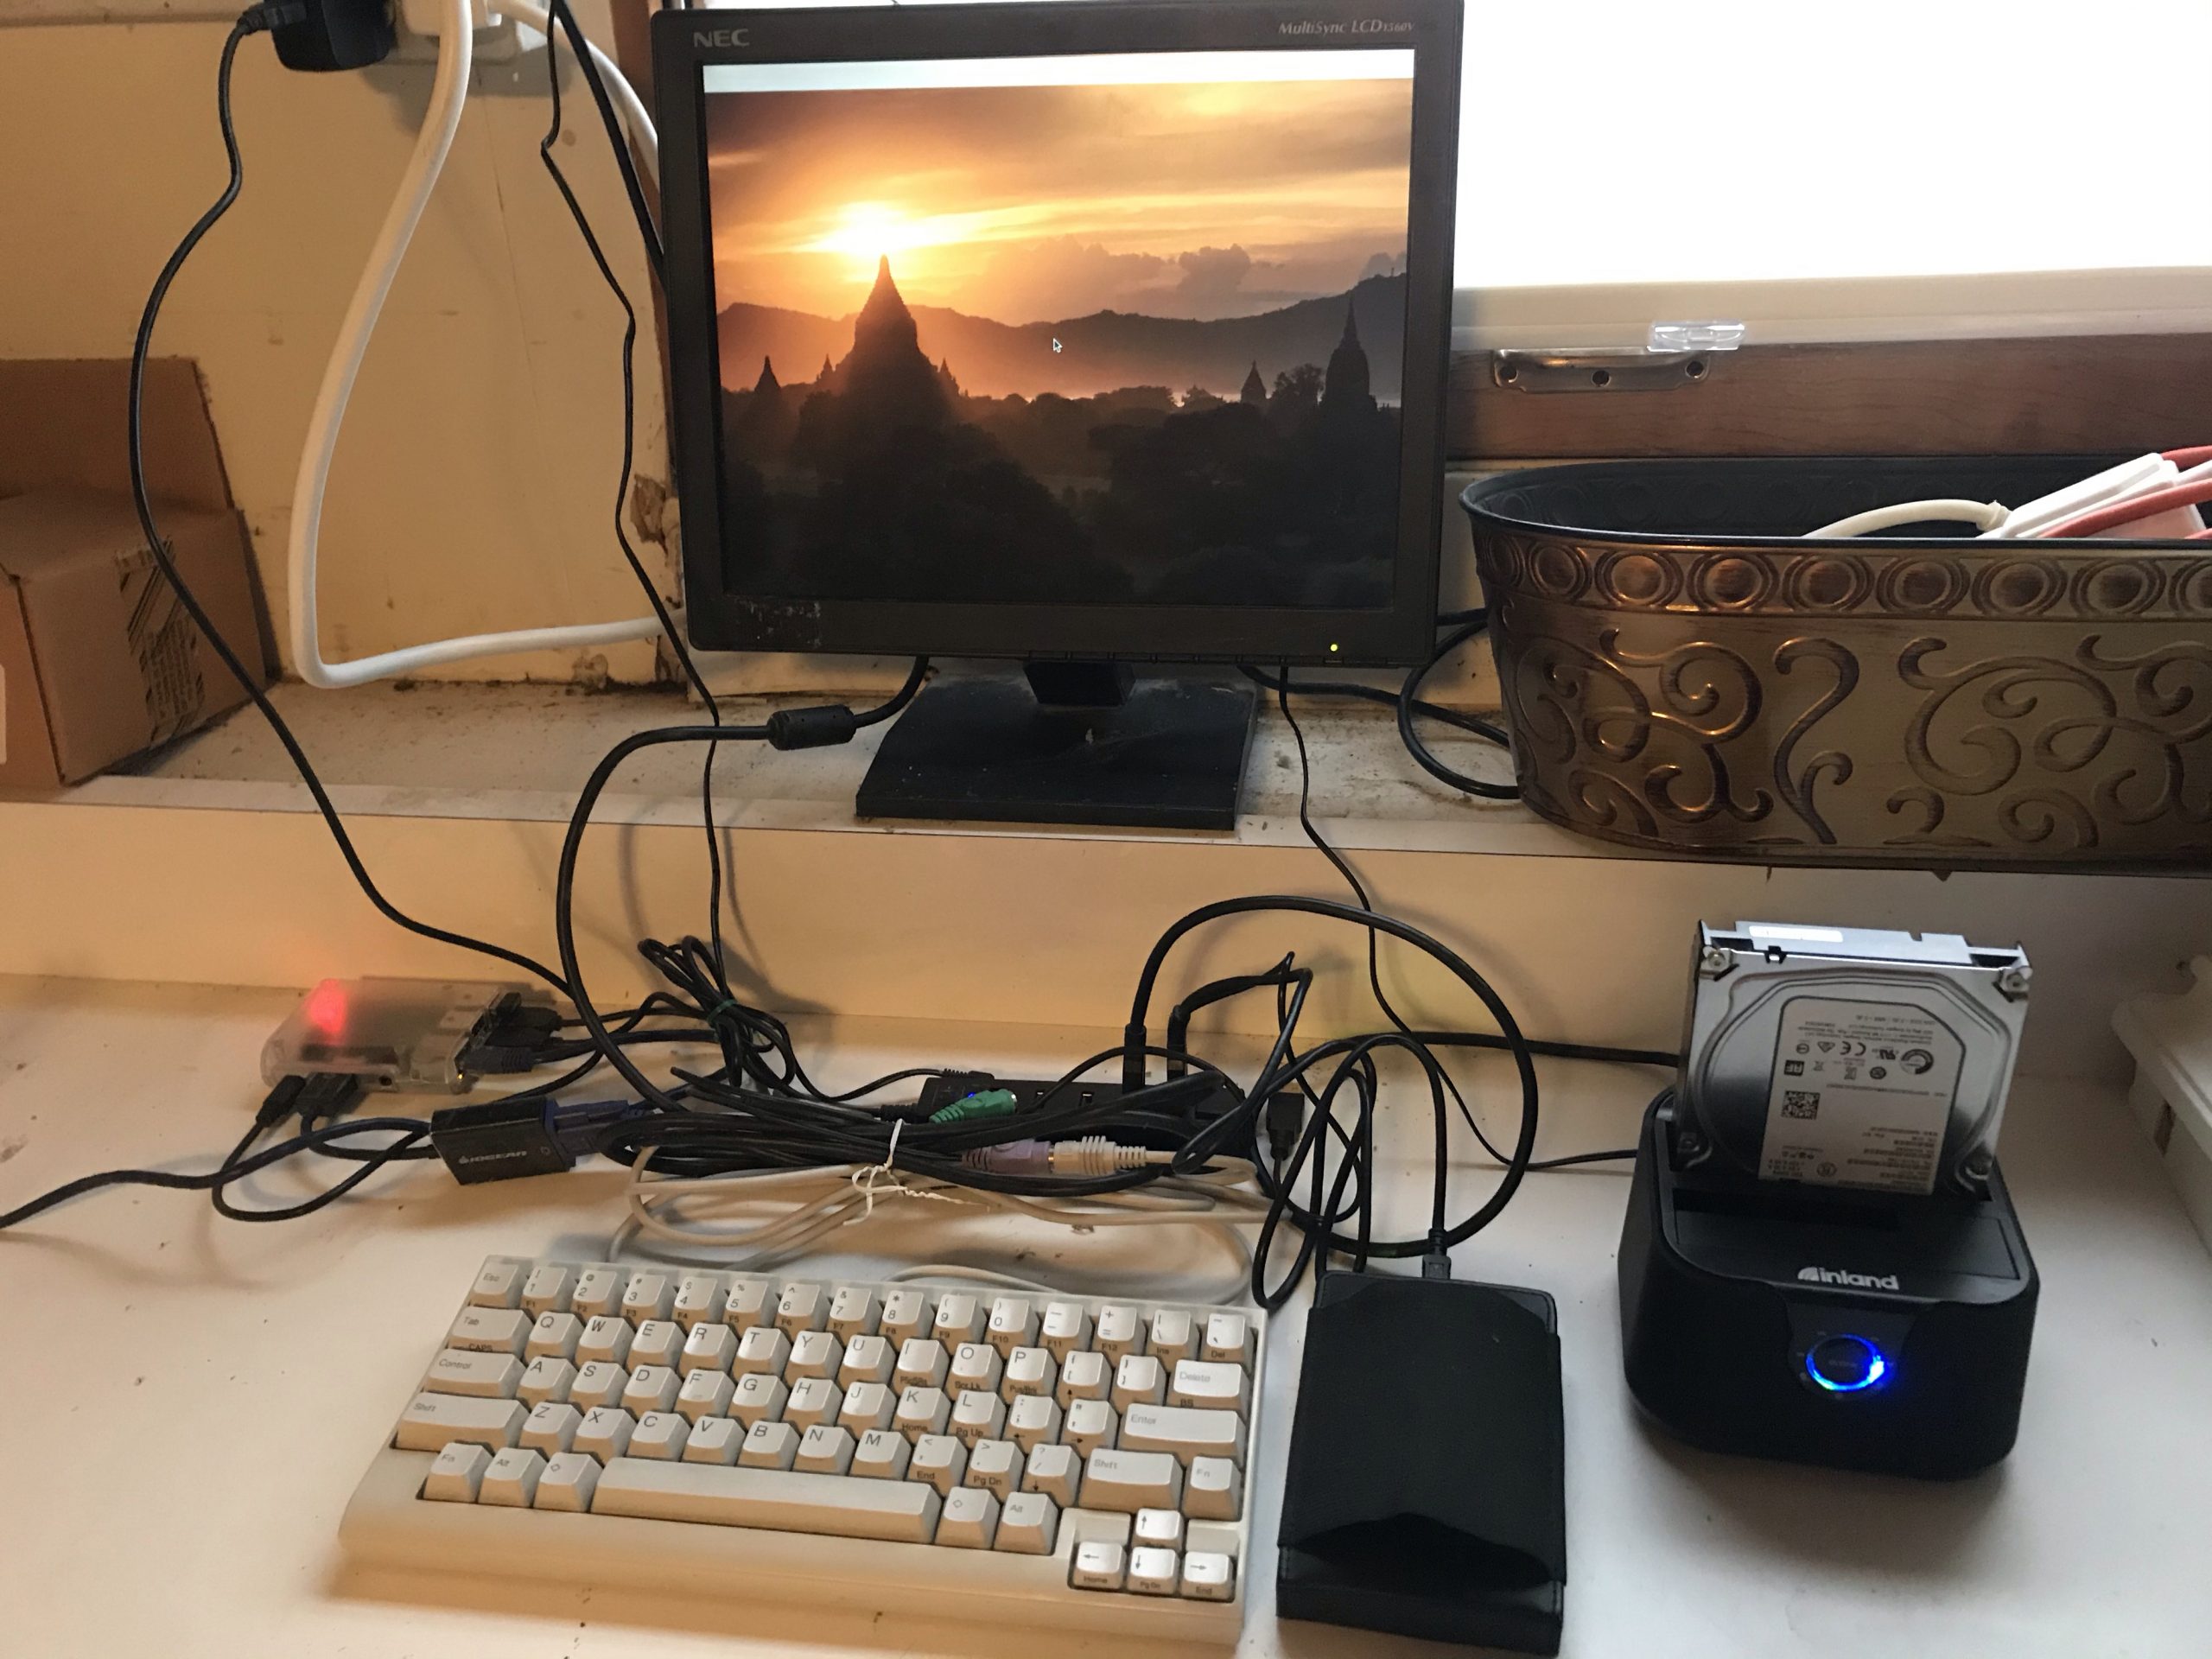
This write-up covers installation of IncrediblePBX 2020.3 on a RaspberryPi 3. The latest instructions are always available on NerdVittles and incrediblepbx.com, but I wanted to document my experience here for posterity. This article will cover installing X Windows for a GUI, and Samba & SSHFS for cross-platform file sharing on your home network.
Eject the SD card and put it into your Raspberry Pi and boot it up.
Initial Setup
Follow the on-screen instructions carefully. I like to connect my RaspberryPi to the network, then ssh into it and run most of the configuration commands from a terminal on my main computer because:
I can select/copy/paste any instructions from the terminal into a document for later reference.
I don’t have to stand next to the cat’s litter box (where my Pi is located in the laundry room) 🤧
Because the IncrediblePBX installation is geared specifically towards having a turn-key phone system, it lacks some of the pre-installed stuff you normally get in a vanilla Raspbian installation, but that’s why were here (and we’ll fix it).
Caveats
You’ll inevitably use raspi-config to change the settings for your Pi. For IncrediblePBX, don’t enable predictable names on network interfaces unless you know what you’re doing. Some of the IncrediblePBX scripts are looking for good ol’ eth0.
For some reason IncrediblePBX didn’t include ntp so I installed it with:
# apt install ntp ntpdate
Both of those are needed before running /root/timezone-setup (specified by the on-screen instructions).
X Windows
Before setting up your PBX-equipped Pi to run X, you should add a “regular” user as having the system automatically log into X as root is a categorically bad idea. All of my examples in this article use the username as justin, but you should replace every instance with your own name 😀
# adduser justin
Follow the prompts for adduser, then add that user to the sudo group so you can still do useful stuff as a privileged user.
# usermod –aG sudo justin
Then log out and log in as your user, and run sudo raspi-config. Under “Boot Options” and set the “Desktop / CLI” option to “Desktop GUI, automatically logged in as ‘justin’ user.” raspi-config will prompt you to install X (follow those instructions). It will also ask you to reboot after changing that setting.
X Windows “Black Screen” Issue
When I went to log into X, I saw a black screen with the pointer mouse cursor and then it would log me out and show the login manager (LightDM). 🤔
After getting some clues about the error from my ~/.xsession-errors file, I found that I needed to remove this file out of /etc/profile.d in order to be able to log in to X:
I use samba to share files read-only across the network. This is especially useful for watching videos via VLC on devices like AppleTV and Amazon FireTV. Install samba by running:
$ sudo apt install samba
The Pi3, when set to boot up and log into the UI, will automatically mount any USB-attached drives under /media/justin, so I share my media folder read-only to the network.
$ sudo vi /etc/samba/smb.conf
To the bottom of the smb.conf file add:
[media]
  comment = Media
  path = /media/justin
  browseable = yes
  guest ok = yes
  read only = yes
  force user = justin
  force group = justin
SSHFS for Read-Write Access
For read-write access to any of the drives on the Raspberry Pi, I use SSHFS.
Linux (Ubuntu)
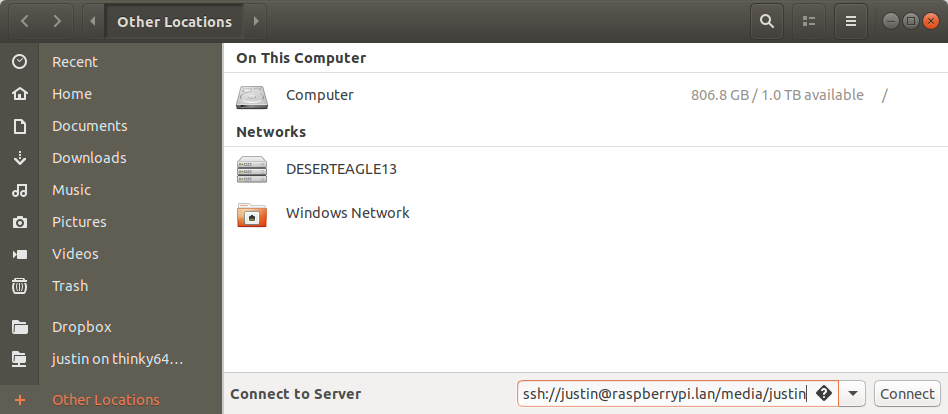
In Ubuntu 18.04 you can connect to a sshfs URL in Nautilus by going to “Other Locations” and typing in the location in the “Connect to Server” box in the status bar at the bottom of this screen. Everything on my home network gets a .lan DNS name care of OpenWRT, so I connect to raspberrypi.lan – you can substitute your IP address. Your URL might look something like: sshfs://yourusername@X.X.X.X/media/yourusername
MacOS
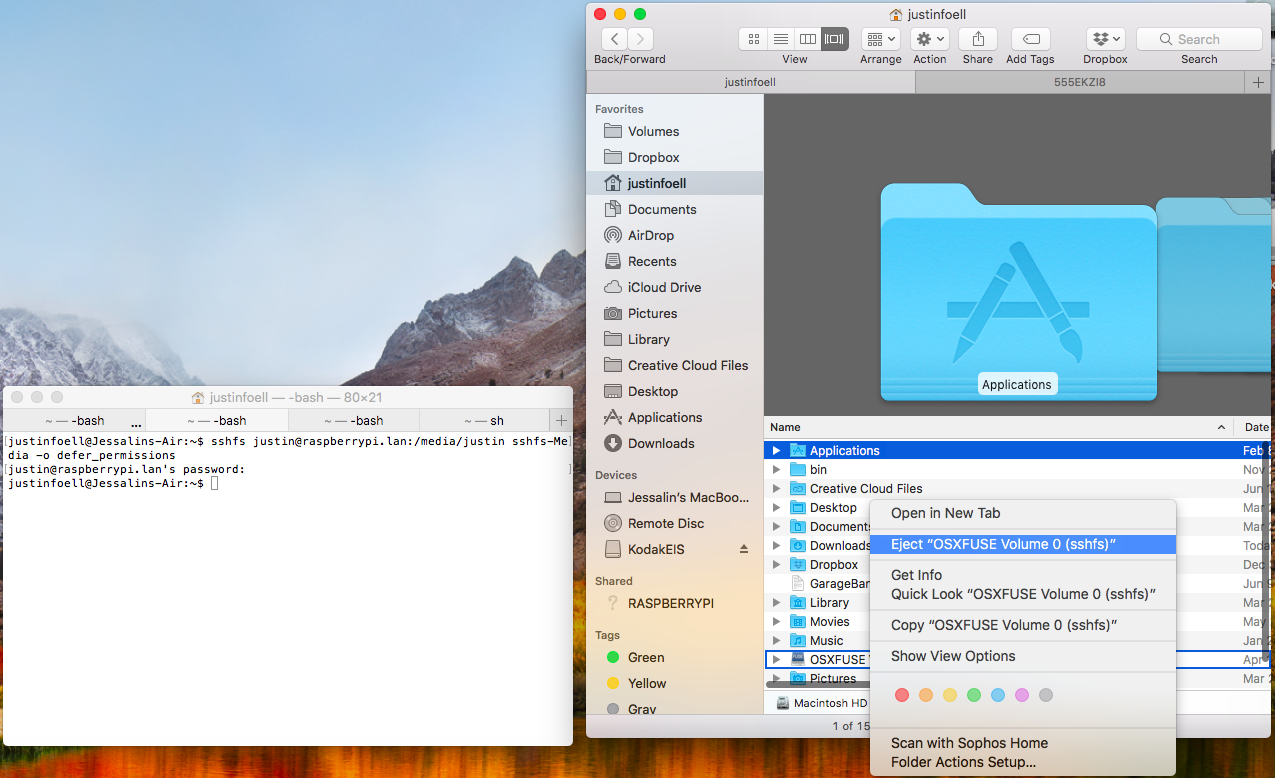
For MacOS you’ll need to install FUSE for MacOS / OSXFuse and their SSHFS extension. Unfortunately the options for connecting through a GUI aren’t supported in recent versions of MacOS.
To connect you must “mount” the remote location. Make a folder in your home directory that will serve as the mount point. I created a folder called sshfs-Media.
$ mkdir ~/sshfs-Media
It doesn’t matter what it’s named, you just need to use it for the sshfs command. You’ll see that once it’s mounted, OSXFUSE will give it a different name in the Finder.
The remote location will show up as “OSXFUSE Volume X” in the Finder under your home directory and under “Volumes.” You can”Eject” (un-mount) the remote location if you wish to disconnect.
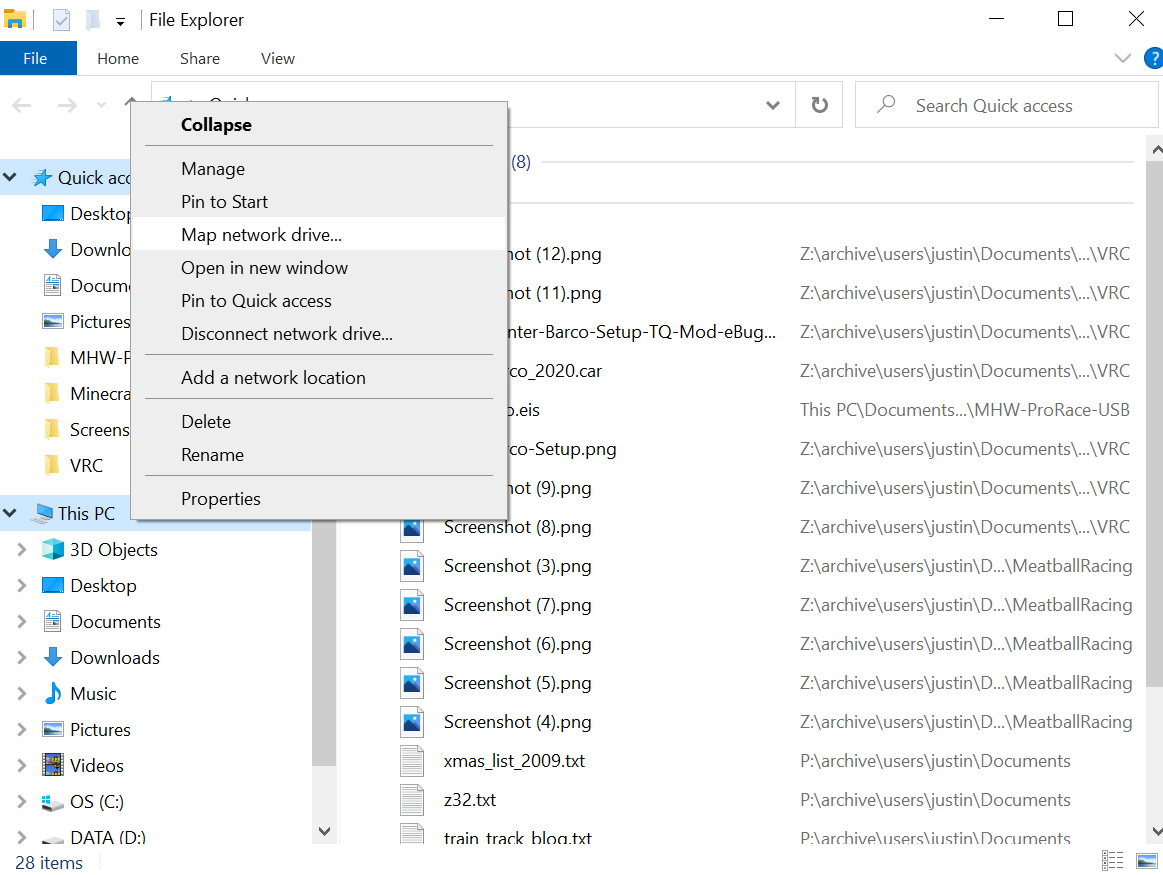
Windows 10
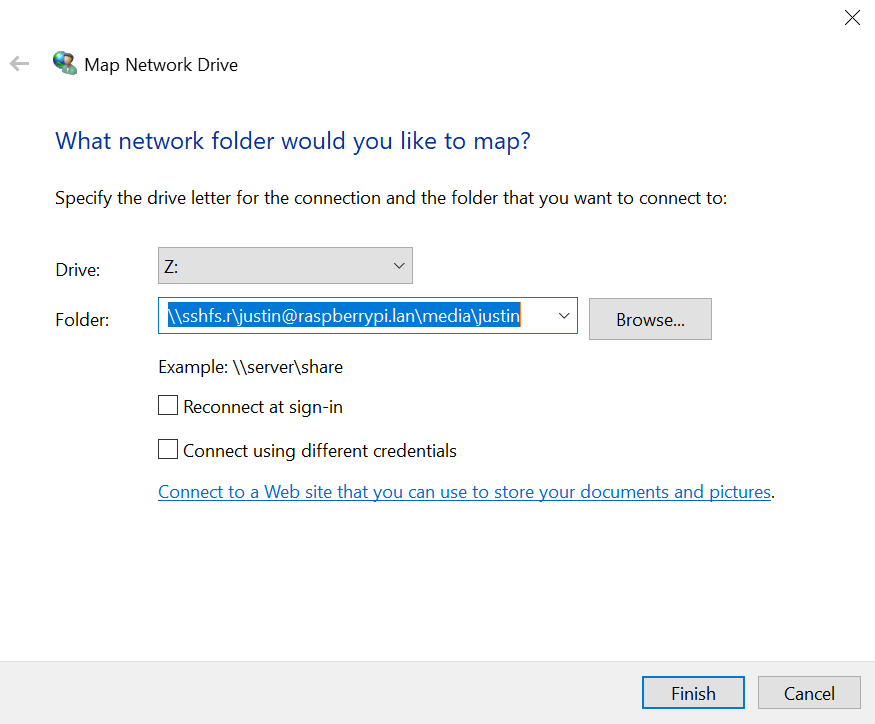
For access in windows I installed sshfs-win. Once it’s installed you can map a network drive over the SSHFS protocol. Right click “This PC” and select “Map network drive…”
That will bring up a dialog where you can enter the drive letter you want it to show up as, and the path information. sshfs-win has a protocol shortcut called sshfs.r if you want to map a path that is outside of your home directory (/home/justin) on the remote system. In my case I want to mount /media/justin. Remember to use backslashes for paths in Windows!
Test
At this point you should have a RaspberryPi on your network that boots into a UI, automatically mounts external USB drives, and shares them read-only on your network. You should also be able to connect read-write using your Pi username and password for authentication from any computer.
We haven’t even touched the fully blown PBX that is already installed – we’ll get into that next! Stay tuned.
With almost everyone quarantined in their homes for the Coronavirus pandemic, RC racing (along with everything else) has come to a halt. I enjoy competitive RC club racing and I can’t wait to get back into it. Until then there’s two things we all can do: