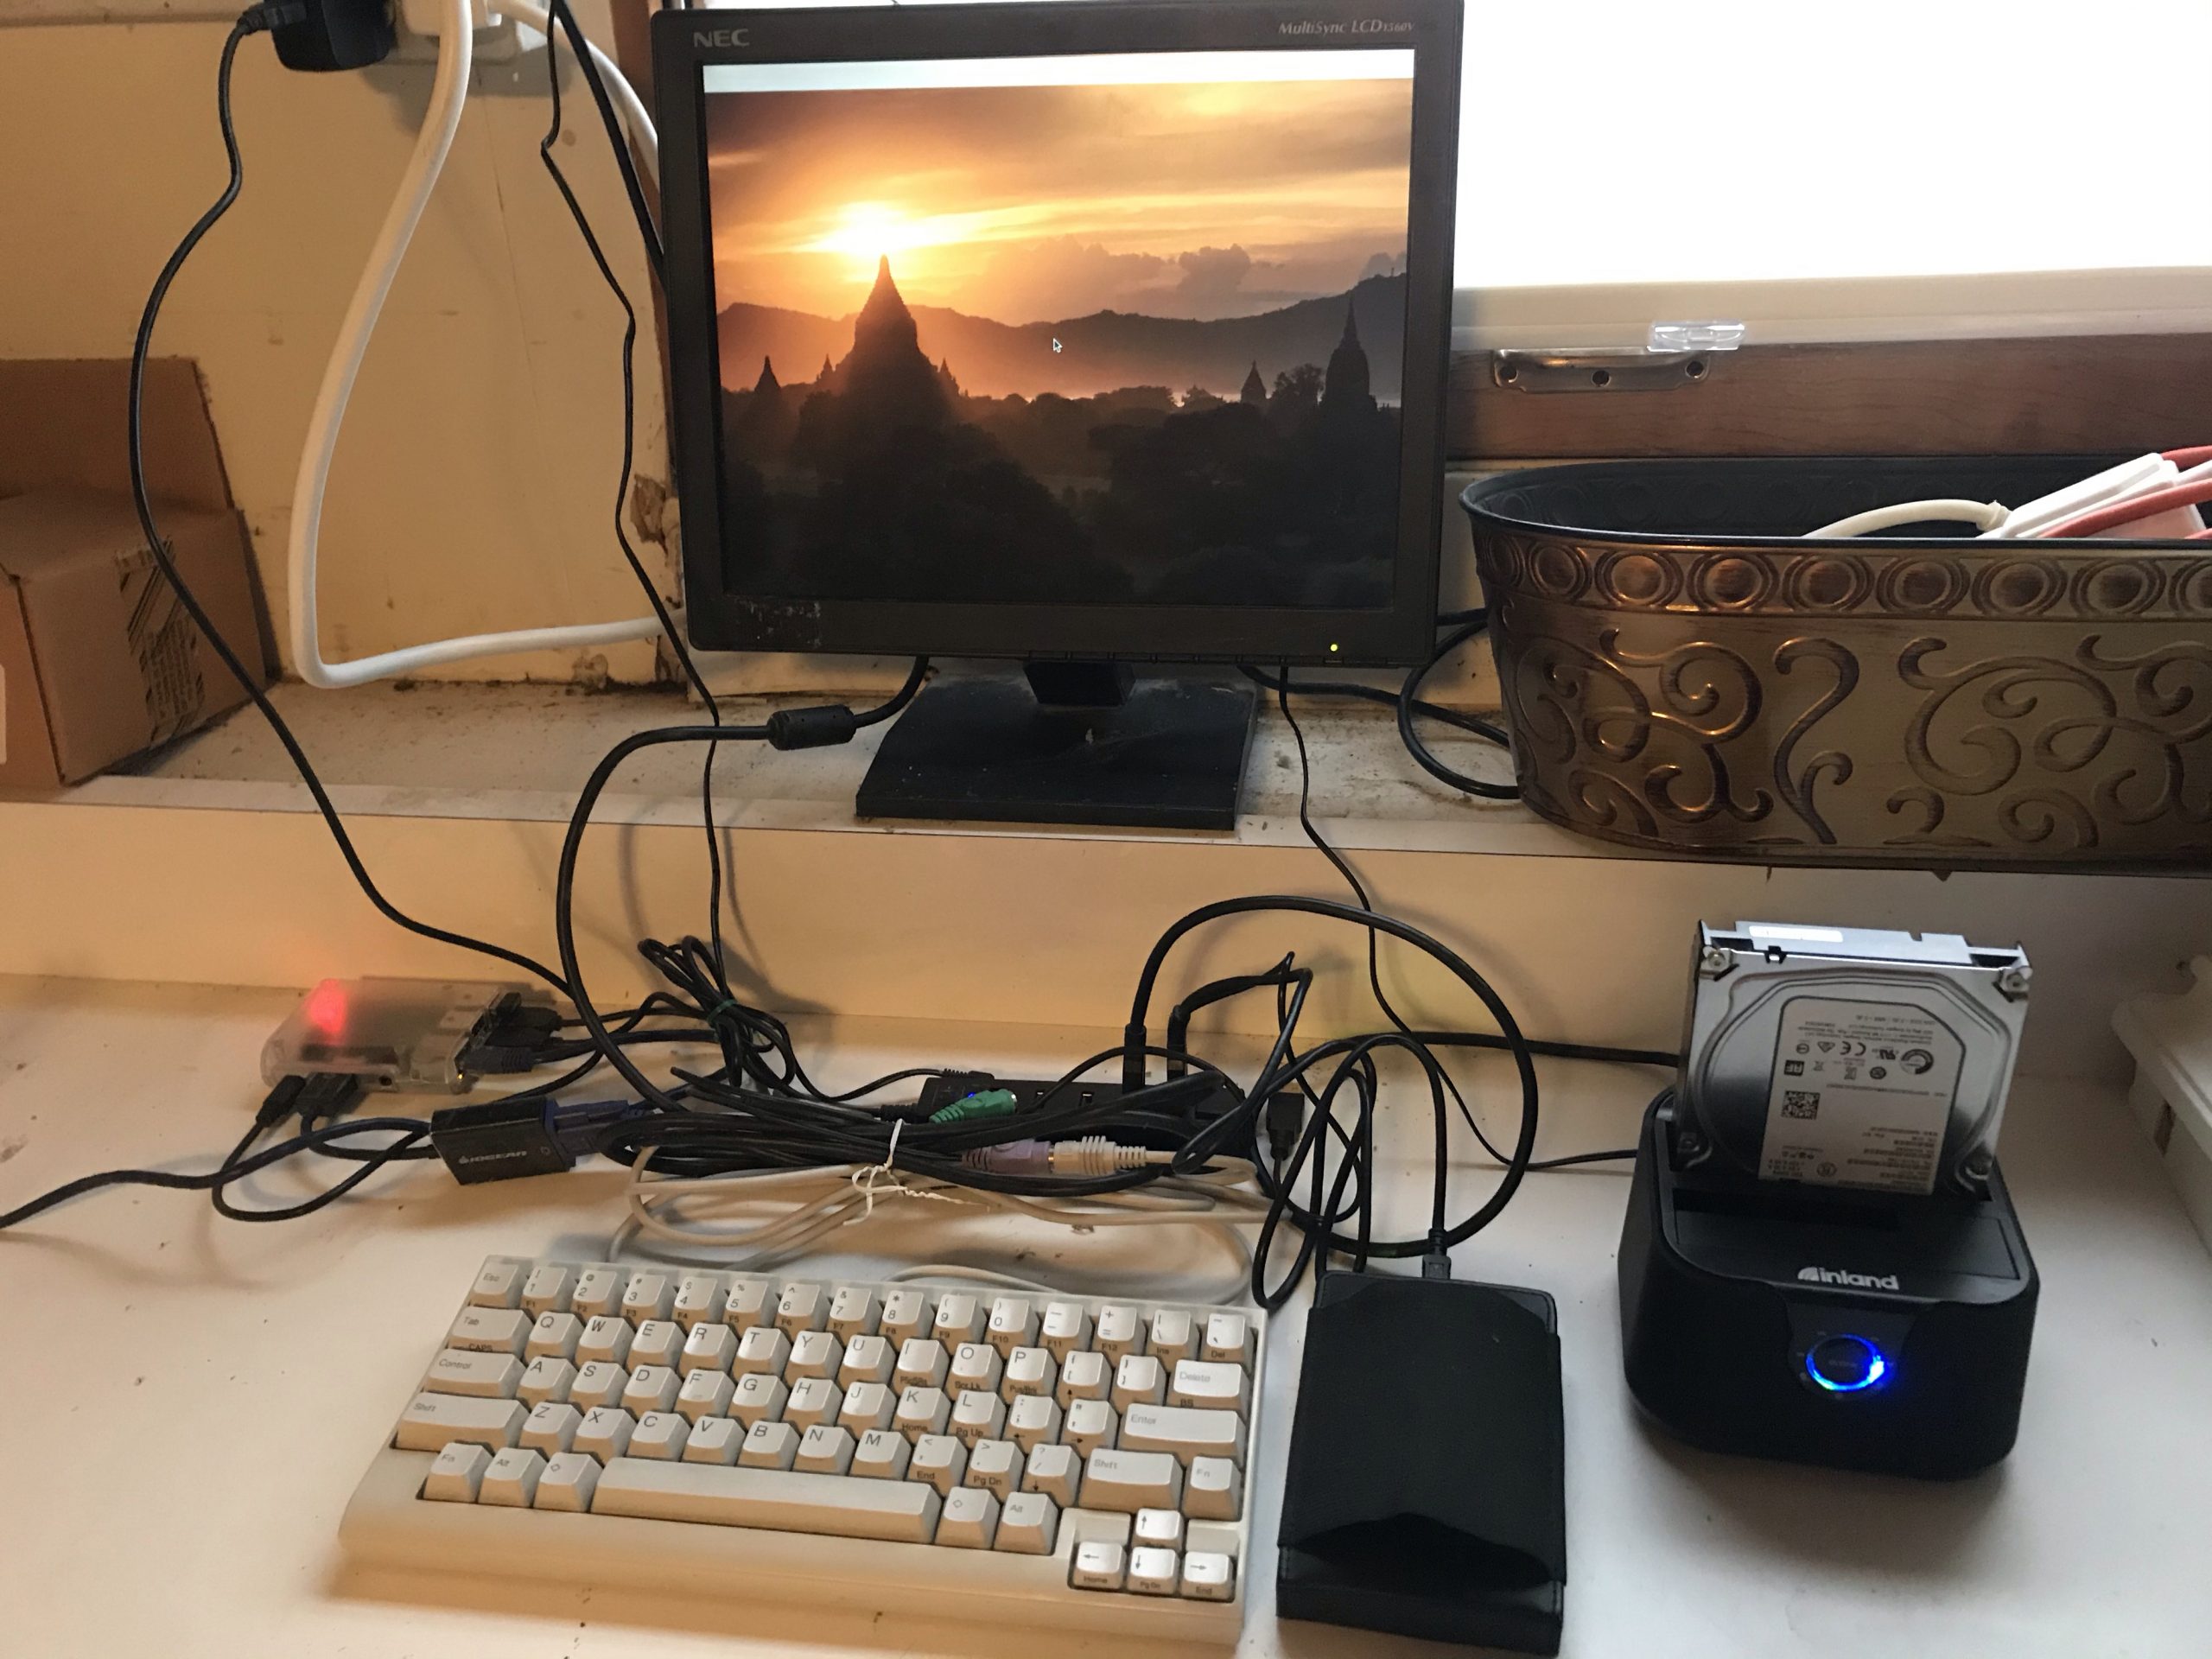
I replaced an 11-bay mega-tower computer, that had a 1000-watt power supply, with this:
While this setup still looks a little crazy, it’s more adapter wires than anything:
This write-up covers installation of IncrediblePBX 2020.3 on a RaspberryPi 3. The latest instructions are always available on NerdVittles and incrediblepbx.com, but I wanted to document my experience here for posterity. This article will cover installing X Windows for a GUI, and Samba & SSHFS for cross-platform file sharing on your home network.
IncrediblePBX Image
To put the IncrediblePBX image onto an SD card after you’ve downloaded it, use dd from the command line:
$ sudo dd bs=1M if=/path/to/incrediblepbx2020.3/incrediblepbx2020.3.img of=/dev/mmcblk0 status=progress
Eject the SD card and put it into your Raspberry Pi and boot it up.
Initial Setup
Follow the on-screen instructions carefully. I like to connect my RaspberryPi to the network, then ssh into it and run most of the configuration commands from a terminal on my main computer because:
- I can select/copy/paste any instructions from the terminal into a document for later reference.
- I don’t have to stand next to the cat’s litter box (where my Pi is located in the laundry room) 🤧
Because the IncrediblePBX installation is geared specifically towards having a turn-key phone system, it lacks some of the pre-installed stuff you normally get in a vanilla Raspbian installation, but that’s why were here (and we’ll fix it).
Caveats
You’ll inevitably use raspi-config to change the settings for your Pi. For IncrediblePBX, don’t enable predictable names on network interfaces unless you know what you’re doing. Some of the IncrediblePBX scripts are looking for good ol’ eth0.
For some reason IncrediblePBX didn’t include ntp so I installed it with:
# apt install ntp ntpdate
Both of those are needed before running /root/timezone-setup (specified by the on-screen instructions).
X Windows
Before setting up your PBX-equipped Pi to run X, you should add a “regular” user as having the system automatically log into X as root is a categorically bad idea. All of my examples in this article use the username as justin, but you should replace every instance with your own name 😀
# adduser justin
Follow the prompts for adduser, then add that user to the sudo group so you can still do useful stuff as a privileged user.
# usermod –aG sudo justin
Then log out and log in as your user, and run sudo raspi-config. Under “Boot Options” and set the “Desktop / CLI” option to “Desktop GUI, automatically logged in as ‘justin’ user.” raspi-config will prompt you to install X (follow those instructions). It will also ask you to reboot after changing that setting.
X Windows “Black Screen” Issue
When I went to log into X, I saw a black screen with the pointer mouse cursor and then it would log me out and show the login manager (LightDM). 🤔
After getting some clues about the error from my ~/.xsession-errors file, I found that I needed to remove this file out of /etc/profile.d in order to be able to log in to X:
$ mkdir ~/bin
$ mv /etc/profile.d/helloworld.sh ~/bin
Samba for Read-Only Access
I use samba to share files read-only across the network. This is especially useful for watching videos via VLC on devices like AppleTV and Amazon FireTV. Install samba by running:
$ sudo apt install samba
The Pi3, when set to boot up and log into the UI, will automatically mount any USB-attached drives under /media/justin, so I share my media folder read-only to the network.
$ sudo vi /etc/samba/smb.conf
To the bottom of the smb.conf file add:
[media]
  comment = Media
  path = /media/justin
  browseable = yes
  guest ok = yes
  read only = yes
  force user = justin
  force group = justin
SSHFS for Read-Write Access
For read-write access to any of the drives on the Raspberry Pi, I use SSHFS.
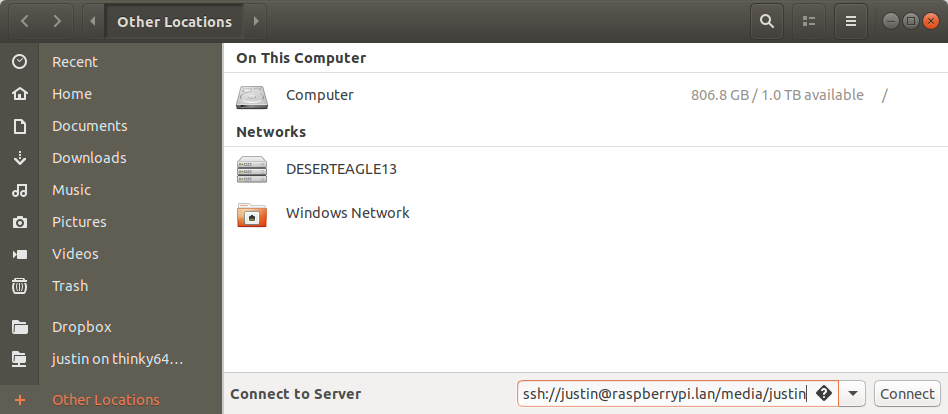
Linux (Ubuntu)
In Ubuntu 18.04 you can connect to a sshfs URL in Nautilus by going to “Other Locations” and typing in the location in the “Connect to Server” box in the status bar at the bottom of this screen. Everything on my home network gets a .lan DNS name care of OpenWRT, so I connect to raspberrypi.lan – you can substitute your IP address. Your URL might look something like: sshfs://yourusername@X.X.X.X/media/yourusername
MacOS
For MacOS you’ll need to install FUSE for MacOS / OSXFuse and their SSHFS extension. Unfortunately the options for connecting through a GUI aren’t supported in recent versions of MacOS.
To connect you must “mount” the remote location. Make a folder in your home directory that will serve as the mount point. I created a folder called sshfs-Media.
$ mkdir ~/sshfs-Media
It doesn’t matter what it’s named, you just need to use it for the sshfs command. You’ll see that once it’s mounted, OSXFUSE will give it a different name in the Finder.
I had to use a defer_permissions option to OSXFUSE to get it to work, your mileage may vary.
$ sshfs justin@raspberrypi.lan:/media/justin ~/sshfs-Media -o defer_permissions
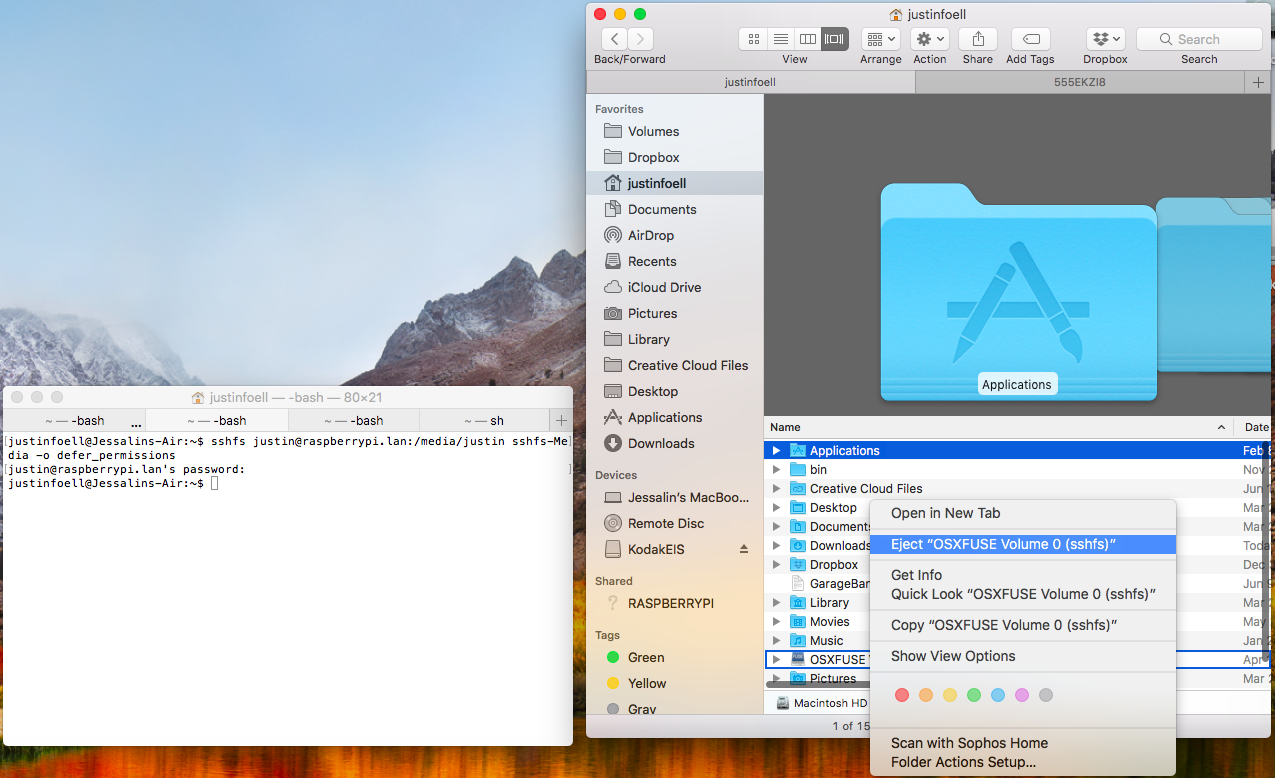
The remote location will show up as “OSXFUSE Volume X” in the Finder under your home directory and under “Volumes.” You can”Eject” (un-mount) the remote location if you wish to disconnect.
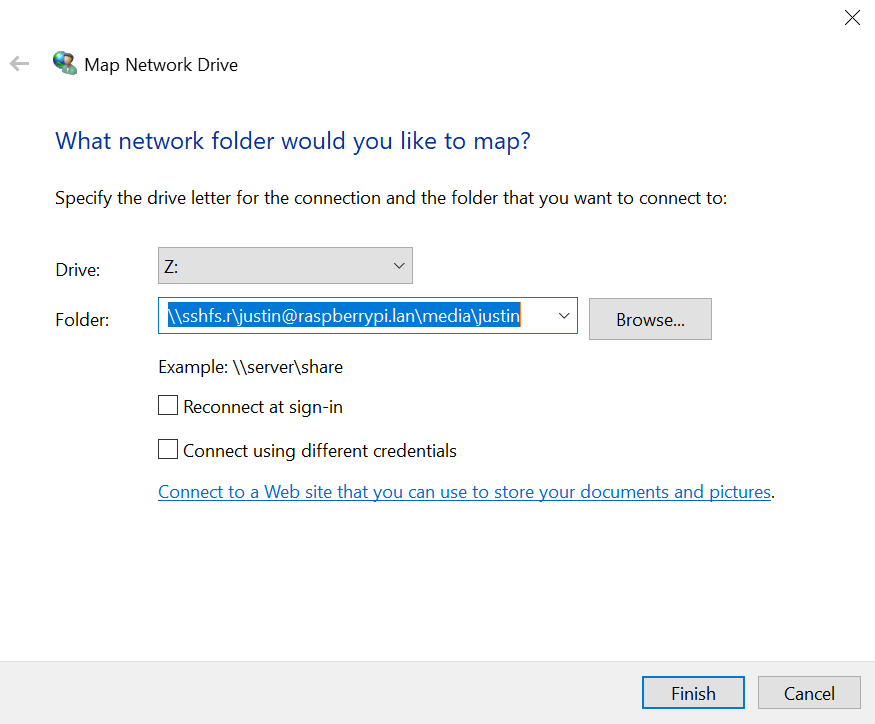
Windows 10
For access in windows I installed sshfs-win. Once it’s installed you can map a network drive over the SSHFS protocol. Right click “This PC” and select “Map network drive…”
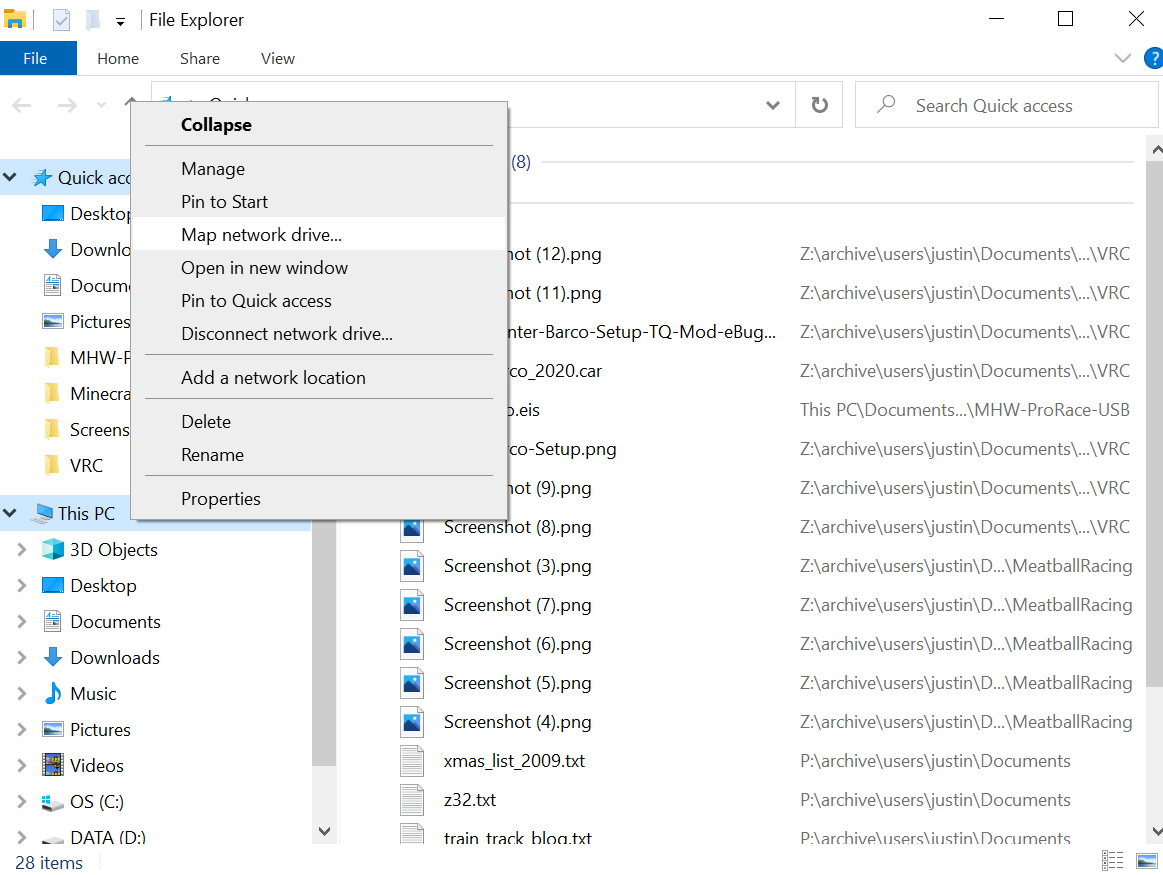
That will bring up a dialog where you can enter the drive letter you want it to show up as, and the path information. sshfs-win has a protocol shortcut called sshfs.r if you want to map a path that is outside of your home directory (/home/justin) on the remote system. In my case I want to mount /media/justin. Remember to use backslashes for paths in Windows!
Test
At this point you should have a RaspberryPi on your network that boots into a UI, automatically mounts external USB drives, and shares them read-only on your network. You should also be able to connect read-write using your Pi username and password for authentication from any computer.
We haven’t even touched the fully blown PBX that is already installed – we’ll get into that next! Stay tuned.
Leave a Reply