I took a road trip earlier this year in my new Chevy Bolt. While it’s not a study, I hope you’ll find my personal story and anecdotal evidence compelling.
TL;DR? I drove from Minneapolis to Chicago and back, and it cost me $45.90 in energy for the whole trip.
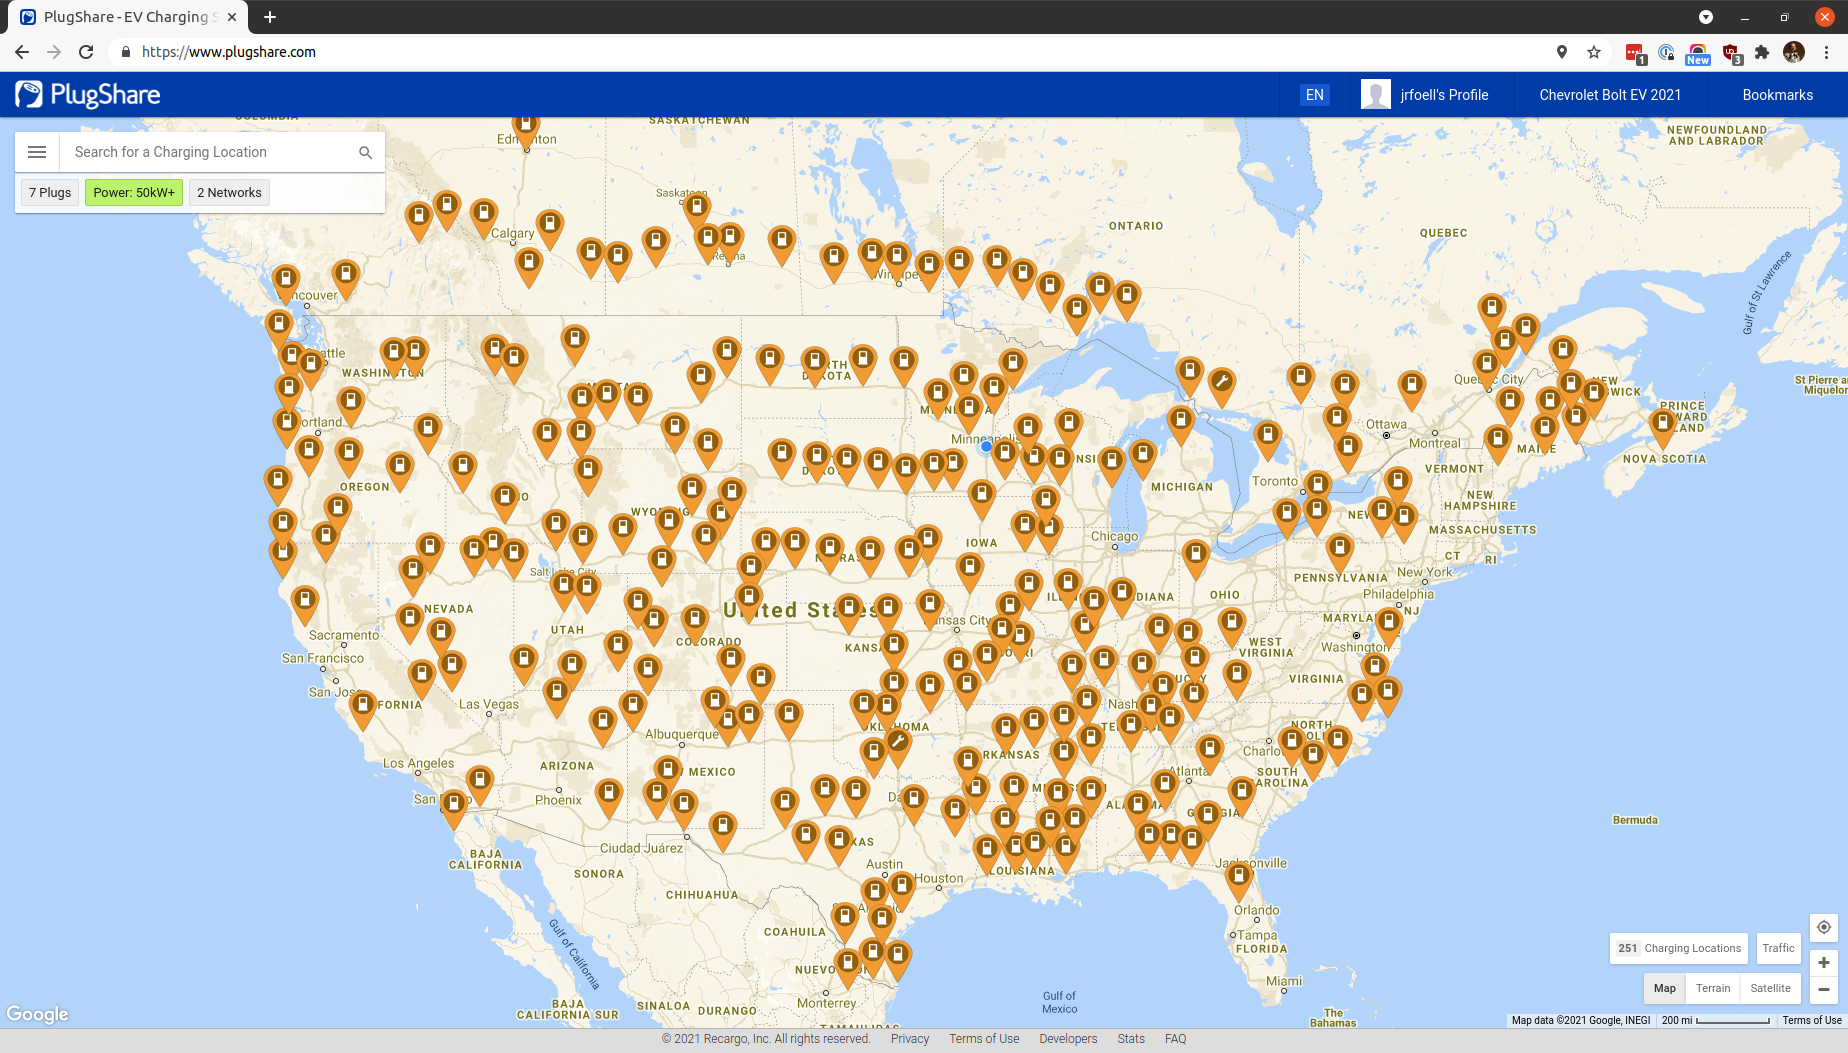
Before I went on my first EV road trip, I needed to know where to stop, as there aren’t fast charging stations on every corner like gas stations. The best resource for finding charging stations across all of the different networks is plugshare.com.
All of the other fast charging stations we used were Electrify America. I don’t want to make this an Electrify America commercial – but they seem to have a pretty darn good DC fast charging network:
EA Network May 2021
Probably second only to the Tesla Supercharger network:
Tesla Supercharger Network May 2021
An aside about Electrify America – it’s a Volkswagen company created in the wake of their diesel scandal.
Charge Speed
I’ve seen some complaints that the only reason they’re not buying a Chevy Bolt specifically is because of the charge rate. I could see this argument as valid if you’re consistently doing cross-country road trips. But for a 400-mile (each way) road trip, this car is great.
The Bolt will fast charge at around 53kw – a far cry from the hundreds of kilowatts the Teslas will slurp up, but it’s no slouch. On our trip we left in the morning and our first charge was at lunch time. After an hour lunch it charged from 25% to over 90% – good to go for another 200+ miles.
It’s sort of topsy turvy to think about charging in terms of miles per hour – the charger is stationary 🤓 But Level 1 & 2 and DC fast chargers can all pump X amount of miles back into your EV in an hour.
At 53kw when you’re at the bottom of the tank it will fill about 28 miles every 10 minutes. That comes out to 168MPH, but that’s not the full story. Charging will slow in all EVs as they approach the top of the tank so to speak. Full charge rate usually starts dropping off somewhere between 66-80% charge level. Around 66% when the charge rate is between 30-40kwh, the Bolt added 18 miles in 10 minutes (108MPH).
At our second stop we just needed to “top up” to get to the final destination. Topping up is a bit of a misnomer. EV lithium batteries take the fastest charge when they’re below 50%. So it’s best to use the middle range of the battery and not get hung up on getting it to 100%. The very end of the charge takes longer because all of the battery cells need to reach their maximum voltage together without going over 🔋🔥
Hotel & Return Trip
I found a hotel on plugshare.com that had a level 2 (240 volt) charger. The $5 was a single-use fee that the hotel charged to activate the charger. You could probably find a hotel that includes it for free, but it wasn’t a big deal. I paid the $5 and charged up to 100% which covered all my in-town trips, plus enough power leftover to get to Madison on the way out of town.
On our way home during the last charge, the Bolt went from %18 to 60% in 35 minutes. It brought the range back up to 160 miles – more than enough to get home from Eau Claire to Minneapolis with energy to spare.
What do you do while you’re waiting?
One thing I didn’t expect to do was talk to curious people noticing me plugging the monster cable into a little hatchback. One guy who just bought an EV chatted me up while he was going around town to get familiar with his neighborhood charging stations.
Another guy wanted to know what we did while it charged. Well, I had a conversation with him – how meta. We told him about the new Ford F-150 Lightning as he needs a truck for his farm.
If no one else is around and it’s not mealtime, we both brought books. I honestly didn’t get more than a chapter in between the bathroom breaks, the conversations, and snack time 📕🍫
All seemed great, until it wasn’t. I did a ride with a friend in April and it inexplicably dropped GPS signal after 5 miles.
Elapsed Time
Moving Time
Distance
Average Speed
Max Speed
Elevation Gain
Calories Burned
02:53:01
hours
00:29:05
hours
4.90
mi.
10.10
mph
21.03
mph
73.16
ft.
1,304
kcal
My Fitbit stopped recording for some reason (said it lost GPS signal 😖). Actually went 16 miles, see https://www.strava.com/activities/5186103344
We went down Chicago to 38th. Continued south on Chicago then east on 46th to Sift. Then took the creek trail back to the river, then back the way we came.
Then it happened again, and again, and again. I found myself having to use my phone to record the remainder of the ride. That is, if I even noticed that my fitbit had conked out.
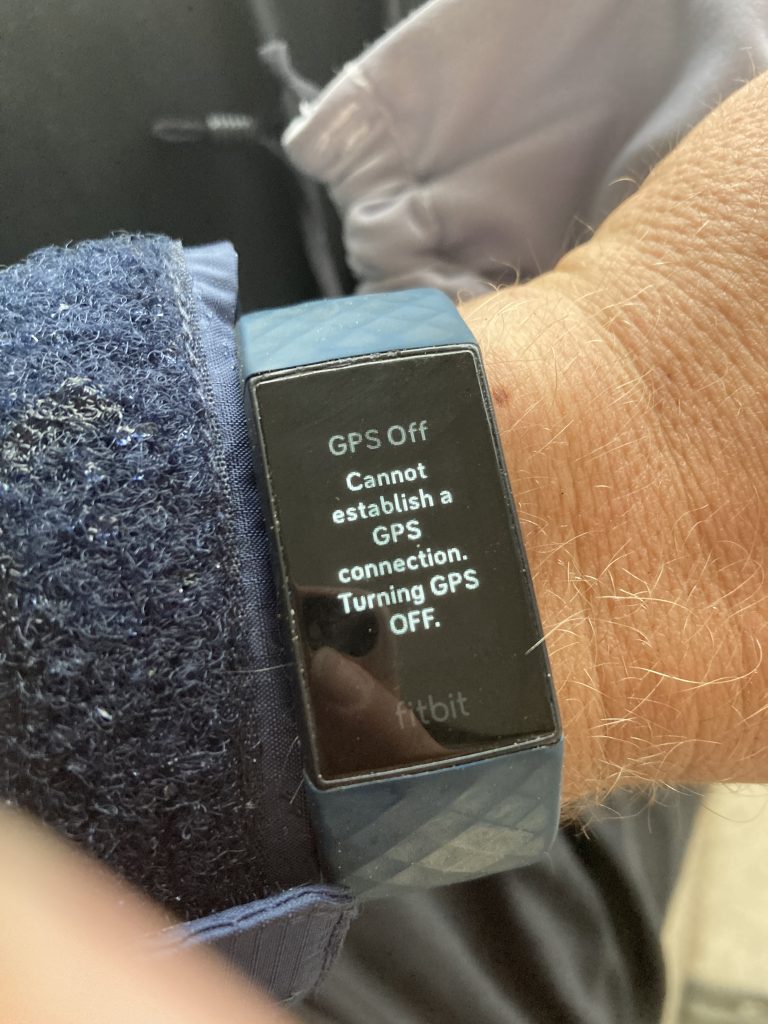
I could be riding outside in perfectly clear weather and then BAM, I’d get the dreaded “Cannot establish a GPS Connection. Turning GPS off” message 😡 WTF? No option to retry or anything. My fitbit would say “we’re done here” and give up. Very frustrating.
I opened a support chat with Fitbit to see what’s up. They had me go through the usual paces of making sure it had a full charge, disabling/removing unnecessary apps, make sure the firmware was updated, double-checking the GPS settings. Then they put a “watch” on my account to see what the tracker was logging.
Charge 4 RMA
They saw the same problems I was having, and then they told me to send my unit in for a replacement. Curiously they didn’t tell me what they were doing – presumably they knew what the problem was and they had a newer hardware version of the Charge 4 that would remedy the problem. But I can’t tell what has changed since there’s no indication of hardware version without opening it up to look at the circuit board.
I did some testing and noticed a new behavior when doing activities that use GPS. When you go into a building, or tunnel, or someplace where GPS signal is lost, it doesn’t turn the GPS off, it starts looking for a signal – indicated by a dim arrow icon in the upper left.
To confirm that it’s truly fixed, I went to my piano lesson (which is in a basement) and left the GPS running the whole time – 30 minutes indoors. It never turned the GPS off and I was able to record my full ride home.
Elapsed Time
Moving Time
Distance
Average Speed
Max Speed
Elevation Gain
Calories Burned
01:27:29
hours
00:59:04
hours
8.98
mi.
9.12
mph
20.36
mph
208.66
ft.
514
kcal
More Fitbit Charge 4 GPS testing
I wouldn’t recommend doing this normally – searching for GPS signal is likely a very power hungry operation. If you’re stopping somewhere, best to hit the pause button and then resume when you leave.
Get it replaced
I’m not the only one having this issue, as indicated by this thread in the Fitbit community forum. If you have one of these, you should contact support to get it replaced. With the issue fixed, it’s great and I no longer worry about losing my riding log.
My wife bought a pontoon this summer and while I’m not an avid angler, it has given us more opportunities to go fishing. If you’re out on the lake, why not drop a line in? 🎣
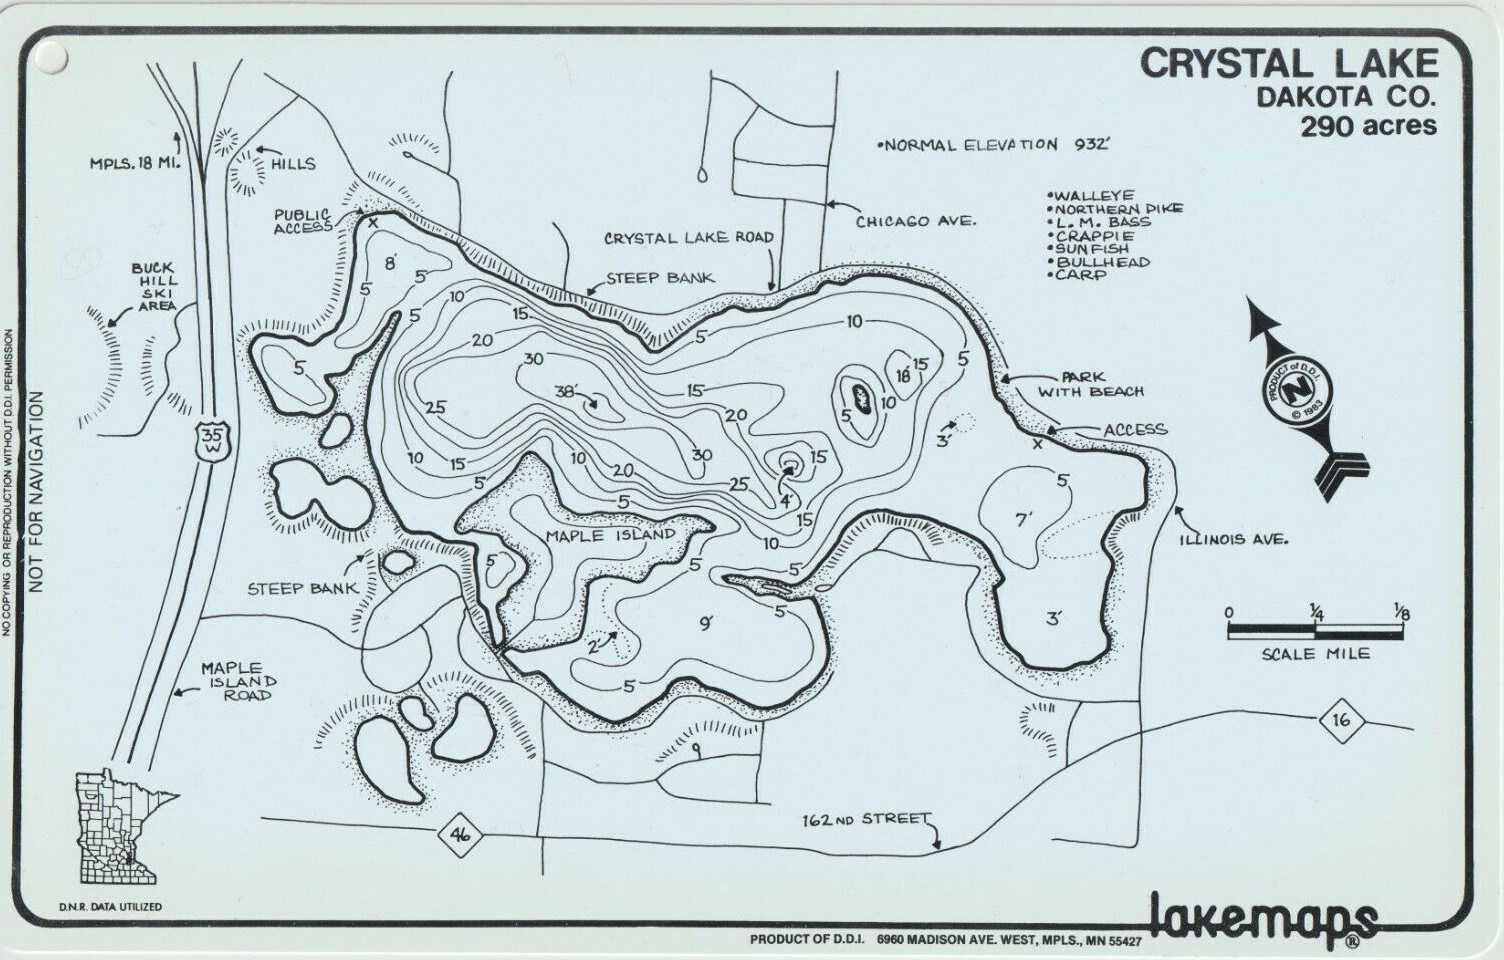
I’m normally one of those guys that buys the waterproof lake map to keep in the boat:
These Minnesota-made lakemaps are no longer produced and considered “vintage” – but you can still get them at bait shops around the state. What about something a little more high tech, but not too expensive? I went to eBay looking for an old multi-mode Garmin GPS and got a nüvi 500 that has modes for driving, hiking, biking and boating.
Knowing that it was pretty easy to load Open Street Maps onto my handheld Garmin eTrex Vista HCx, I assumed I could do the same thing with the nüvi 500… Yes and no. You can do it, but it’s not easy.
Sea vs. Lake
The first thing to understand is commercial and free maps such as Garmin Bluechart and Open Sea Map are for ocean-going. The only lakes they cover are the Great Lakes and some very popular inland waters, such as the Boundary Waters. Loading those maps will allow the nuvi to switch to “Boat Mode” (you must have a nautical map loaded to switch), but they won’t have any info about your local lake. Also, the older Garmin Inland Lakes maps that used to work for this unit is no longer available. Planned obsolescence is an art, not a science 😩
Boat Mode
I found Jeff Jahr’s boatmode.img file which is an empty map with the nautical flag set that allows me to choose “Boating” as the mode. The file needs to be renamed to gmapsupp.img and placed in a garmin folder either on a microSD card (inserted near the battery) or on the device’s internal memory.
But you can really only have one or two gmapsupp.img files on the device (one in internal memory and one on the SD card). How can I add more map data? It turns out these img files act as containers and can contain many maps 💪 Here’s how I put them together
The Process
To put these together I used a Windows computer. All of the software shown here is available for MacOS as well. It is probably possible in Linux, but I don’t (yet) know how to do the GPX to IMG conversion. If you have Linux tips, share them in the comments.
Download Lake Contours
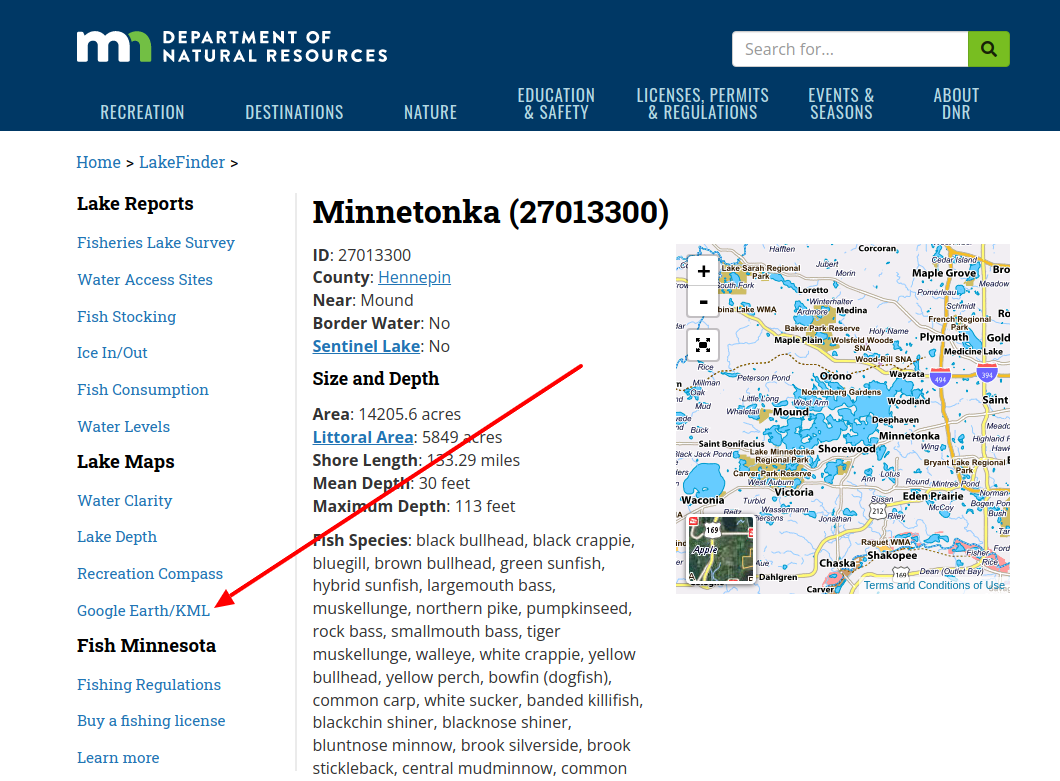
I get the lake depth contours from the MN DNR “Lake Finder” – just search for the lake you frequent and click the “Google Earth / KML” link in the sidebar.
That will download a lake.kml file. I always rename them to lake-name.kml (lake-minnetonka.kml in this case) and put them in a folder with the lake name, because we’ll be repeating this process and adding more files later.
Convert KML to GPX
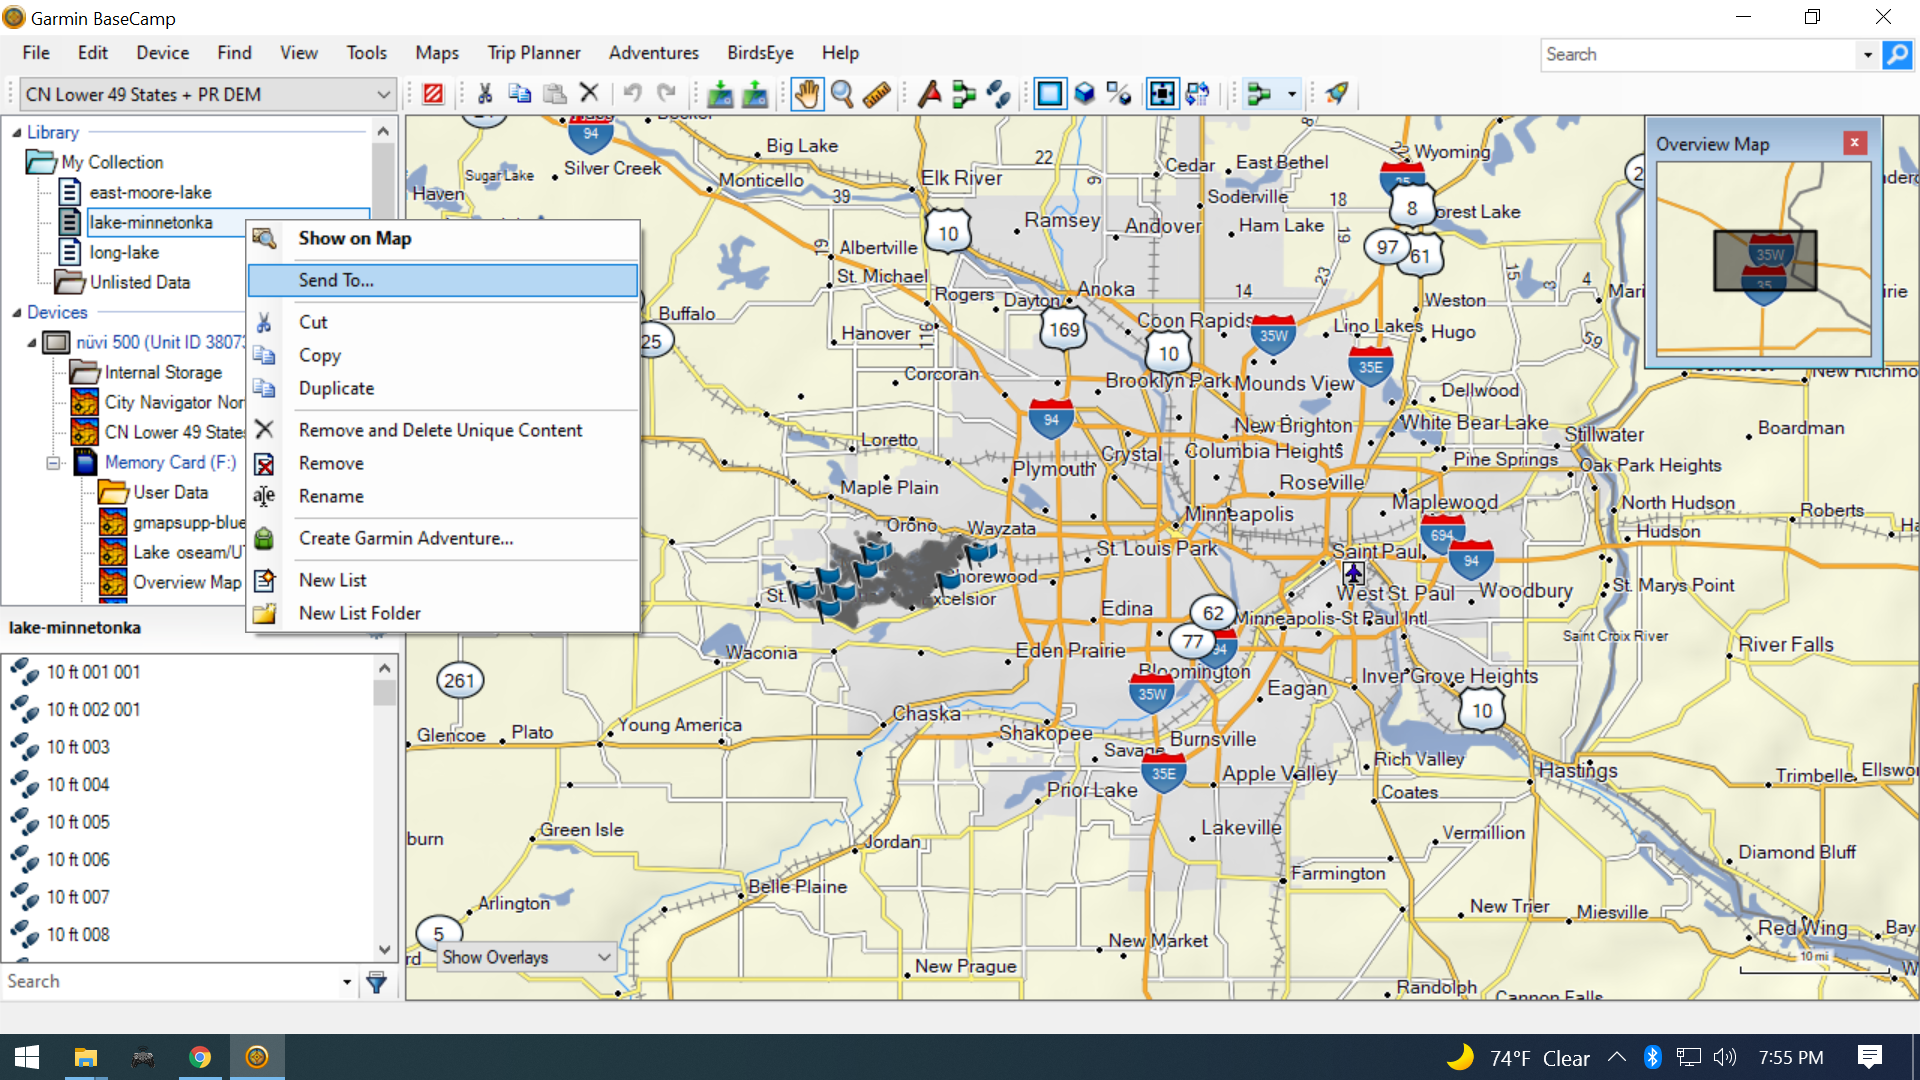
Use Garmin’s free BaseCamp program to import the KML data into “My Collection.” With BaseCamp installed and started, drag and drop the lake kml file into the “My Collection” folder in BaseCamp.
I like to use BaseCamp because it keeps the contour depth labels when converting to GPX. The downside is it wants to copy those GPX files to your GPS device, so you need to have your GPS plugged in during the conversion.
Select your imported KML lake under “My Collection”, right-click and select “Send To…”
Choose your GPS’s memory card “User Data” folder and the conversion will start. There will be a progress bar under “User Data” while it’s working.
All of the lake depth GPX files will be on your GPS’s memory card in the Garmin -> GPX folder. I move those files back into the lake folder I created earlier for my KML file.
Alternative:
gpsbabel is a cross platform (Windows/MacOS/Linux) program to convert the KML files to GPX, but I couldn’t figure out how to retain the track labels (5ft, 10ft, 15ft, etc.) during conversion. If you know how, let me know in the comments!
Create IMG from GPX
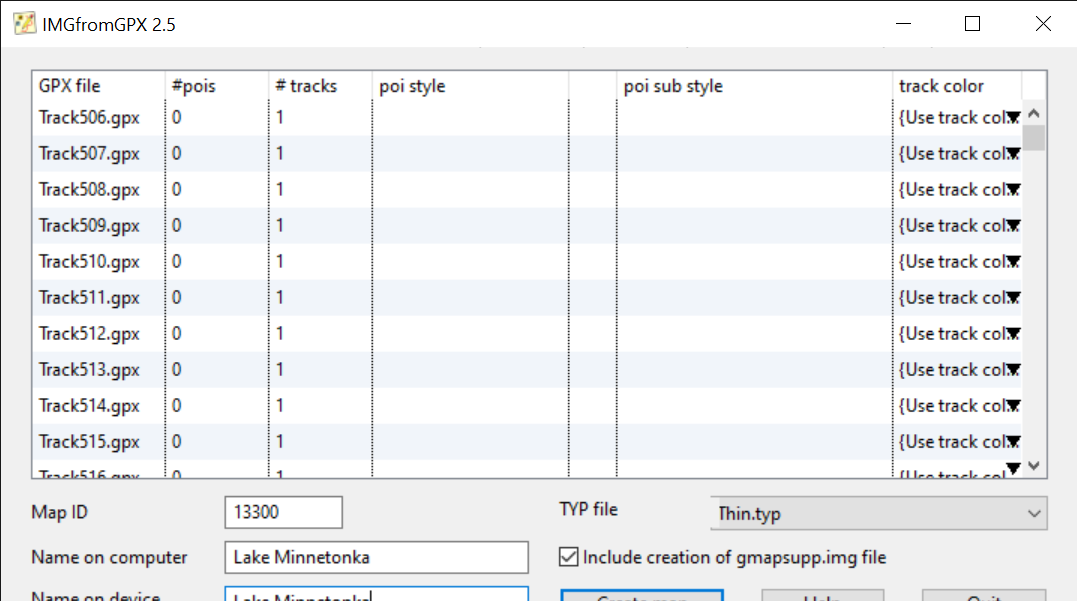
I installed IMGfromGPX (Windows & MacOS only) to turn the lake contour tracks into a map. With IMGfromGPX started, drag the GPX files created by BaseCamp from your lake folder into the main IMGfromGPX window:
I set the Map ID to the last 4 or 5 digits of the Lake ID on the MN DNR site – just in case they need to be unique. Set the computer/device names to the lake name – that name is what shows up in the “Map Info” screen on your Garmin. For TYP file select “Thin.typ” to keep the contour lines thin. I don’t mess with track color since the default has been fine.
Check “Include creation of gmapsupp.img file” and then push the “Create map” button. It will prompt where to save your data – choose your lake folder. Ignore any prompts to run registry files – we’re not using these maps with MapSource or other mapping software on the computer.
Linux Only:
I think that mkgmap can turn GPX files into a Garmin IMG file. If you know how to do it, let me know in the comments.
Combine multiple IMG files
Repeat these steps for whatever lakes you frequent:
Download Lake Contours
Convert KML to GPX
Create IMG from GPX
Once you’ve got a few, we’ll combine them into one IMG file map using mkgmap. To install mkgmap, I unzipped the mkgmap folder in C:\Program Files\mkgmap-r4807. If you installed yours in a different place, your command for combining them will look a little different – just replace C:\Program Files\mkgmap-r4807\mkgmap.jar with the path to where you installed it.
Since my individual lake folders were all in my Documents\Garmin\Lake KML folder, my command to combine them looked like this:
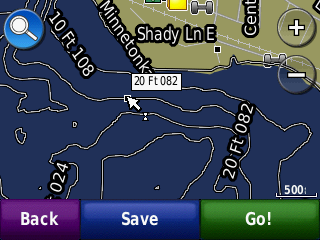
Once they’re combined, you can copy the master gmapsupp.img file to the garmin folder on your microSD card, or directly to the garmin folder on your GPS’s internal memory. When you restart it, you should now have contour lines on the lakes you added:
Conclusion
Yes this process is a bit tedious, but it might give life to an old device that would otherwise get tossed out. I’m not sure if I’ll stick with this unit or not. It’s got some other quirks too – I immediately noticed the clock was wrong as part of some bizarro Y2K for GPSes problem that happened in April 2019.
If I try something different, I’ll probably get a Navionics subscription next summer @ $15/year and use my phone. But if I do ditch this GPS, hopefully this information will be useful for the next owner ♻️
That’s a click-baity title. But seriously I bought a Chevy Bolt without ever driving one. However, I had ridden in one and it seemed perfectly fine. It also met all of my criteria:
Is it all-electric? Yes ✅
Does it have a good range? Yes ✅
Does it look like a normal car? Yes ✅
Great! I’m sure whatever other quirks it has I can get used to. Even with an open battery recall, I think it’s a fantastic car.
I got a great deal on a new 2021 Bolt from an out-state dealer, and they just dropped it off at my house. My first “test drive” was picking my daughter up at school. After driving it for a couple of months I’ve gotten used to it. The number of settings that you can configure is rather daunting, so I put this reference together 😎
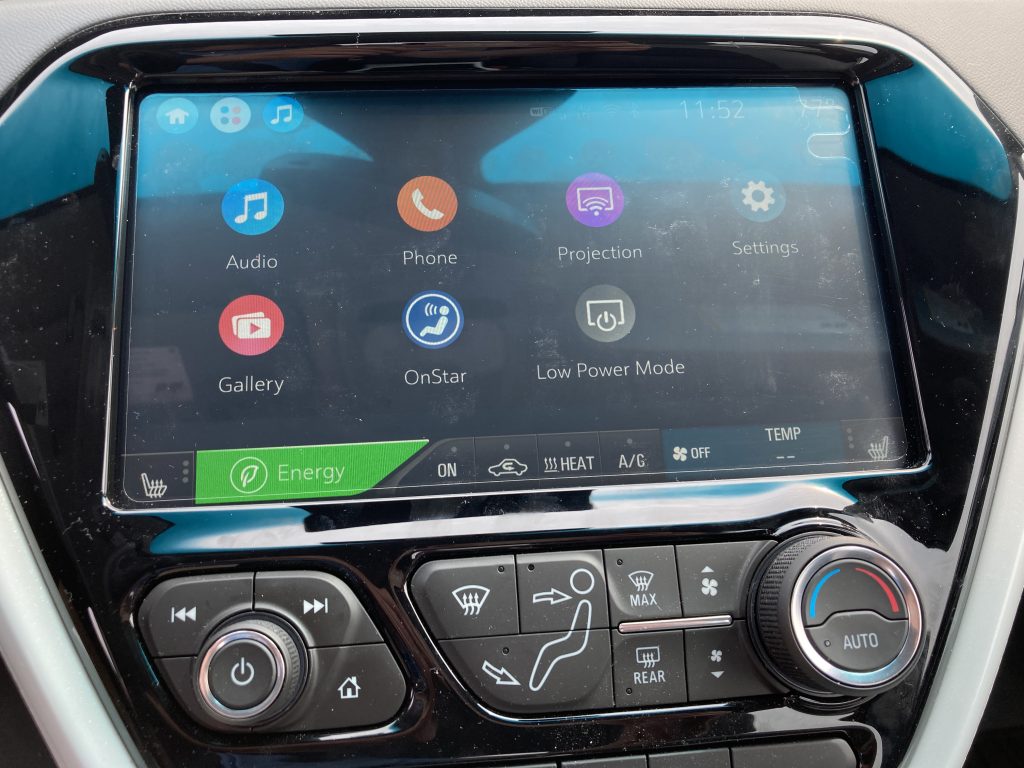
You can get to these options by going to the Settings icon from the all-icons menu.
Rear seat reminder: off. This is probably useful if you’re traveling with small kids or pets.
Radio settings
Auto volume: medium-low. This setting seemed the most natural to me where I didn’t notice the volume actively going up and down with the vehicle speed.
Vehicle settings
Remote lock / unlock / start
Passive lock / unlock: on
At first I wasn’t sure if I liked this setting. Mostly because my alarm was blaring when I was trying to get in the car. Later I realized it was from unplugging the charge cord before unlocking the vehicle (see charge cord theft alert below).
I’ve since gotten used to keeping the key fob in my pocket and pressing the door handle button to unlock the car.
The car locking on it’s own after I get out is mostly convenient, but sometimes the car locks while I’m getting out and walking to the other side to get something out of the back seat. No worries, just press the unlock button on the passenger side.
Energy Settings
Energy settings are always accessible at the bottom of the screen. Energy settings are kind of weird. You may want to turn location based charging on while you’re parked at home. Once your home location is set you can have separate options for home and away. To configure the away options, you’ll want to set them while you’re away from your home.
Charging options
Location based charging: on
Charge cord theft alert: off. I turned this off in case I’m at a charging station and someone else needs to charge. Otherwise the alarm will honk when you unplug it before the car is unlocked.
Charging
Home
Make these settings changes after you’ve set the home location, and while you’re there.
Charge mode: Departure
Portable cord limit: 12 Amps. Setting this to 12 Amps will only save if location-based charging is on. Make sure you’re on a 20-amp circuit or on a 15-amp circuit with no other loads.
Target charge level: 80% (the recall letter I received suggests 90%)
Away
Charge mode: Immediate
Target charge level: 100% (this is currently not recommended until the battery recall has been performed).
Verdict
This car is great. Even with the battery recall I would still buy one. Heck now would be a great time to buy a used Bolt (privately) because it’s going to get a brand new battery with a 100k mile warranty.
Several people on the r/BoltEV subreddit complain about the GM experience. Sure the dealerships aren’t as clean or well lit as the others, but does that matter? I bought my car over the phone because I don’t like going into any dealerships – no matter how nice they are 😱 My sales guy was great, I knew what I was getting in to, and he helped me get the best deal possible.
I’ve taken several road trips (post upcoming) and it’s been a pleasure to drive. Cheap and cheerful, would recommend.
This is a love letter to Schwalbe. I love their Big Apple bike tires. If you have a mountain bike that is going to serve most of its life pounding the pavement these are for you. My Redline 29er mountain bike does 95% of its miles on the pavement, and it does it on Big Apples.
They’re big and fat so you keep the same look and level of comfort, it just lowers the rolling resistance because you’ll sound less like a jeep driving down the highway.
Changing tires has an immediate and apparent affect on how your bike handles. The same thing goes for toy cars and full-sized ones. It doesn’t matter if it’s 2-wheels or 4, those little patches of rubber are the only thing connecting you to the road.
More Big Apples
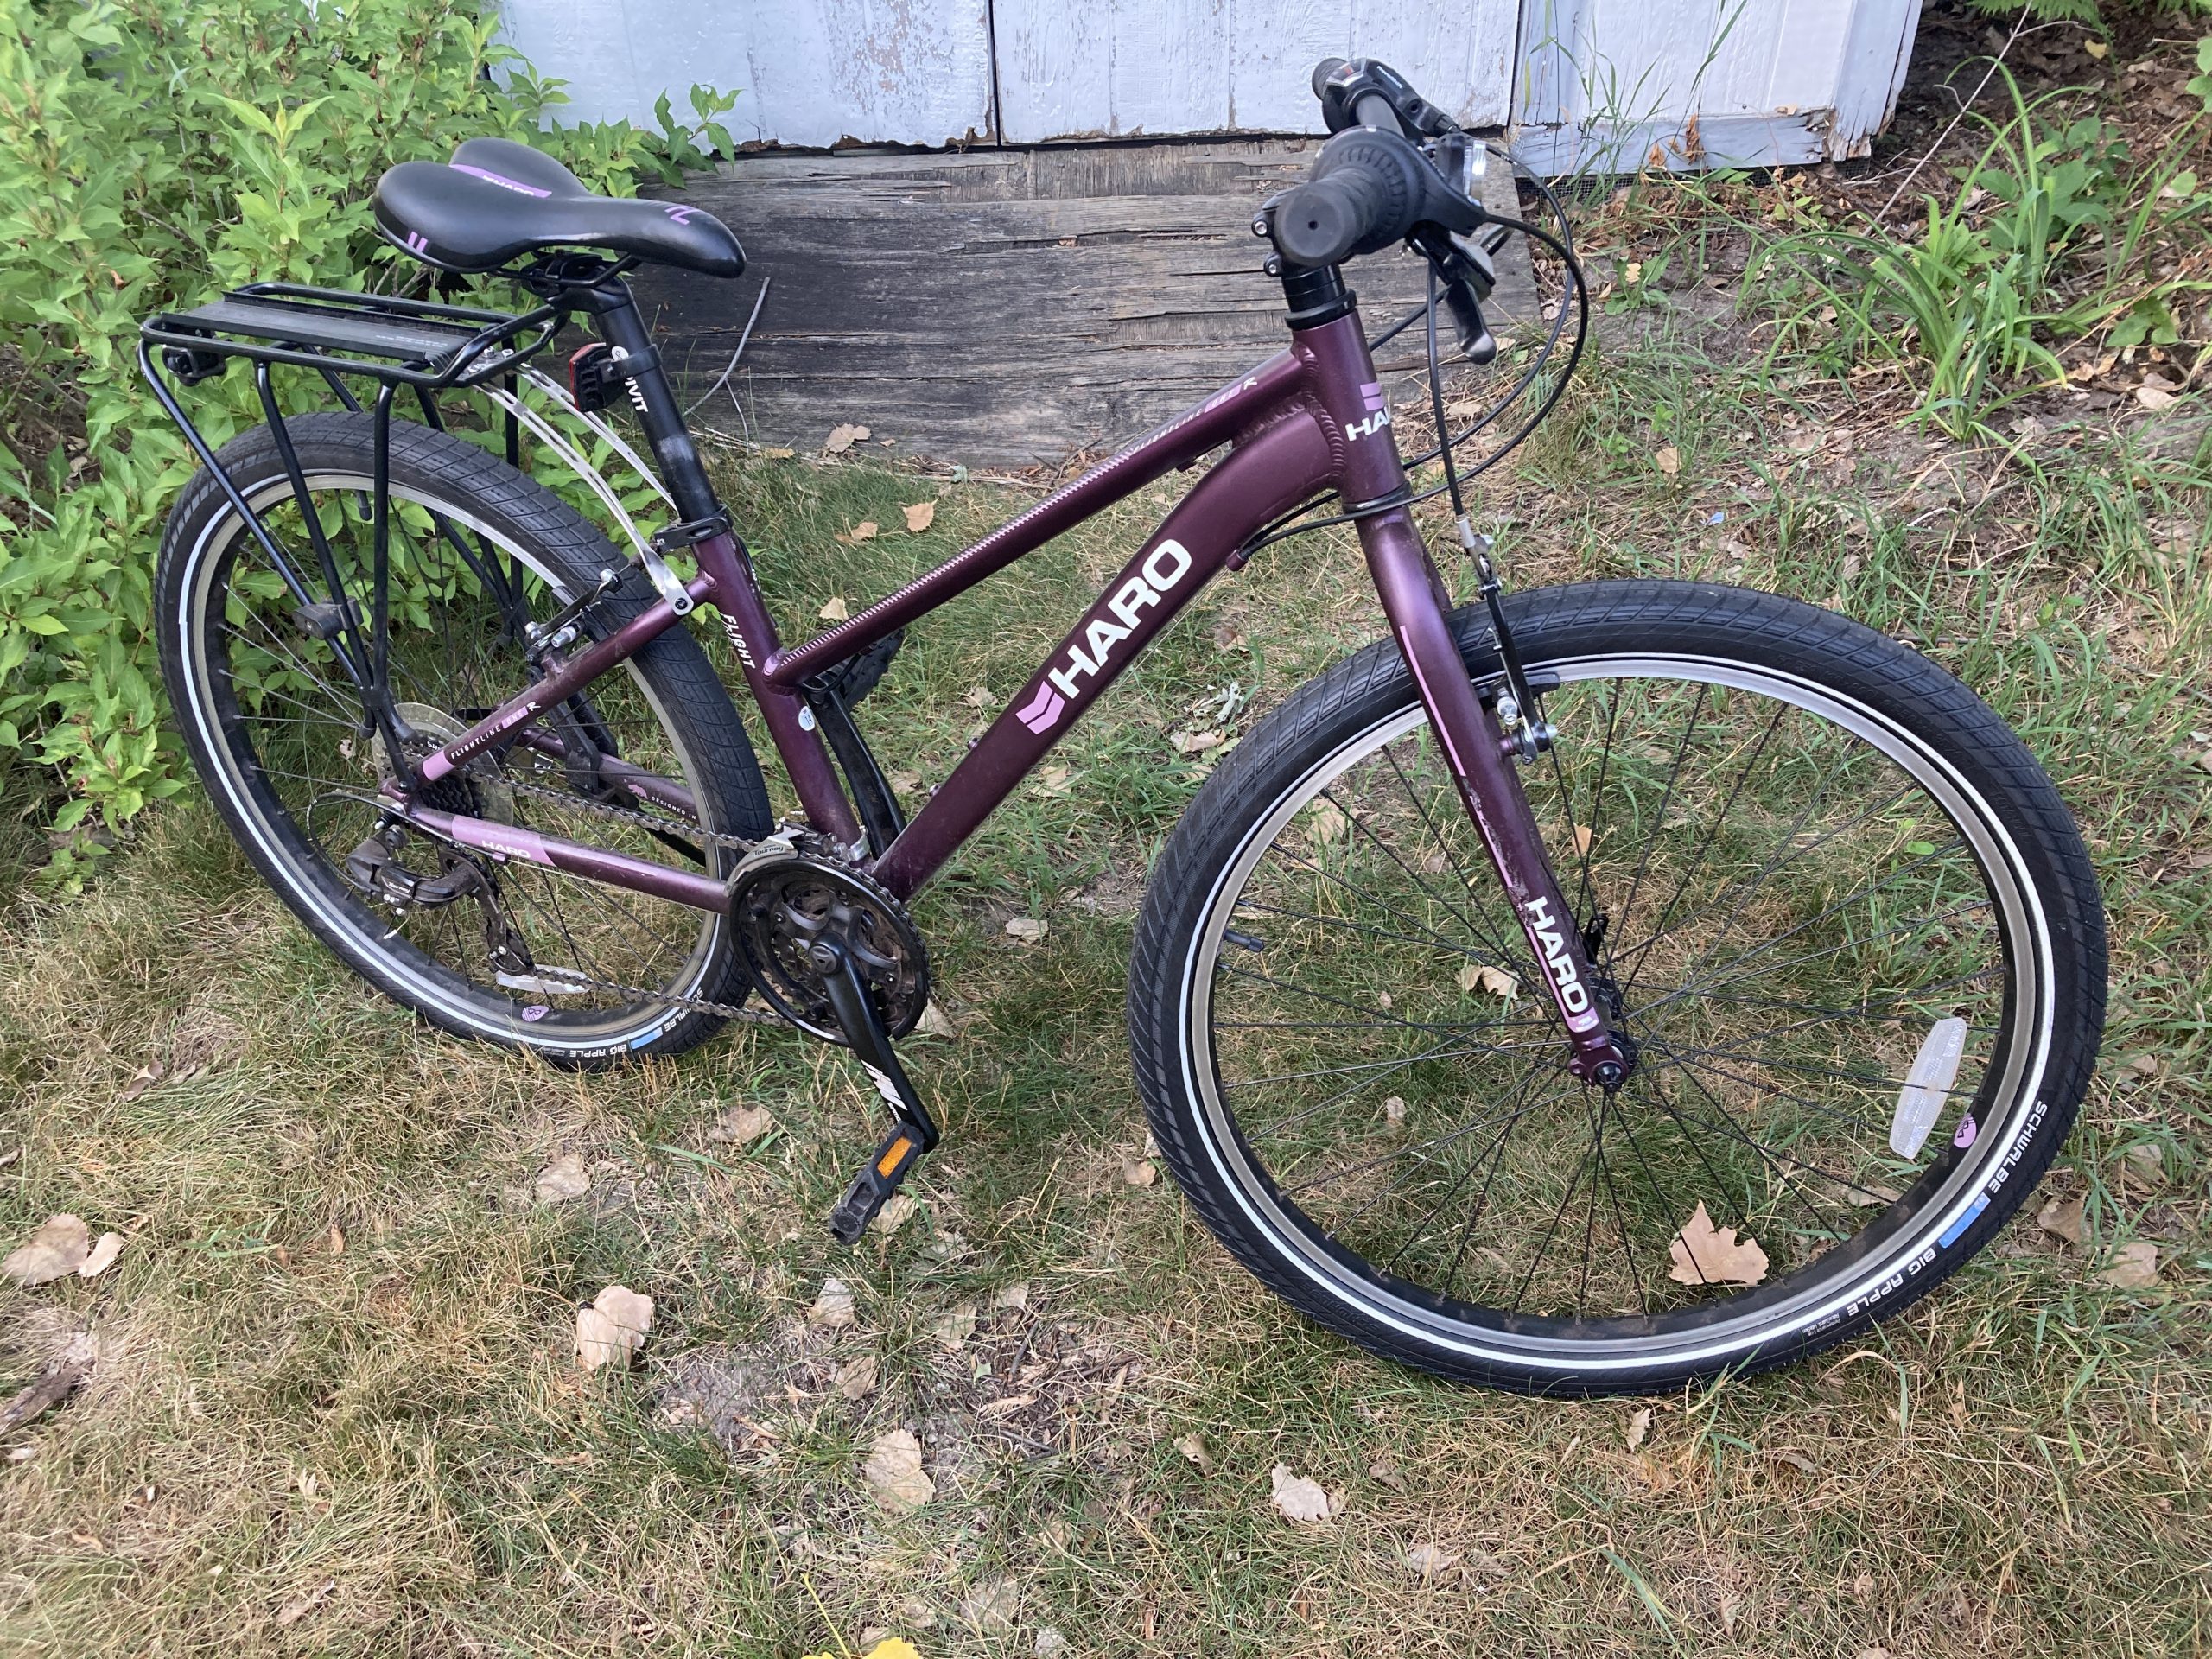
I got my son a set to put on his Haro Flightline. We’re going on some longer rides this summer – mostly on Minnesota’s expansive network of paved bike trails. He doesn’t have the luxury (or allowance) of keeping a separate road & mountain bike like dad.
It’s a relatively quick change (~30 minutes) to go back to stock tires if we’re going to head out to the single track trails.
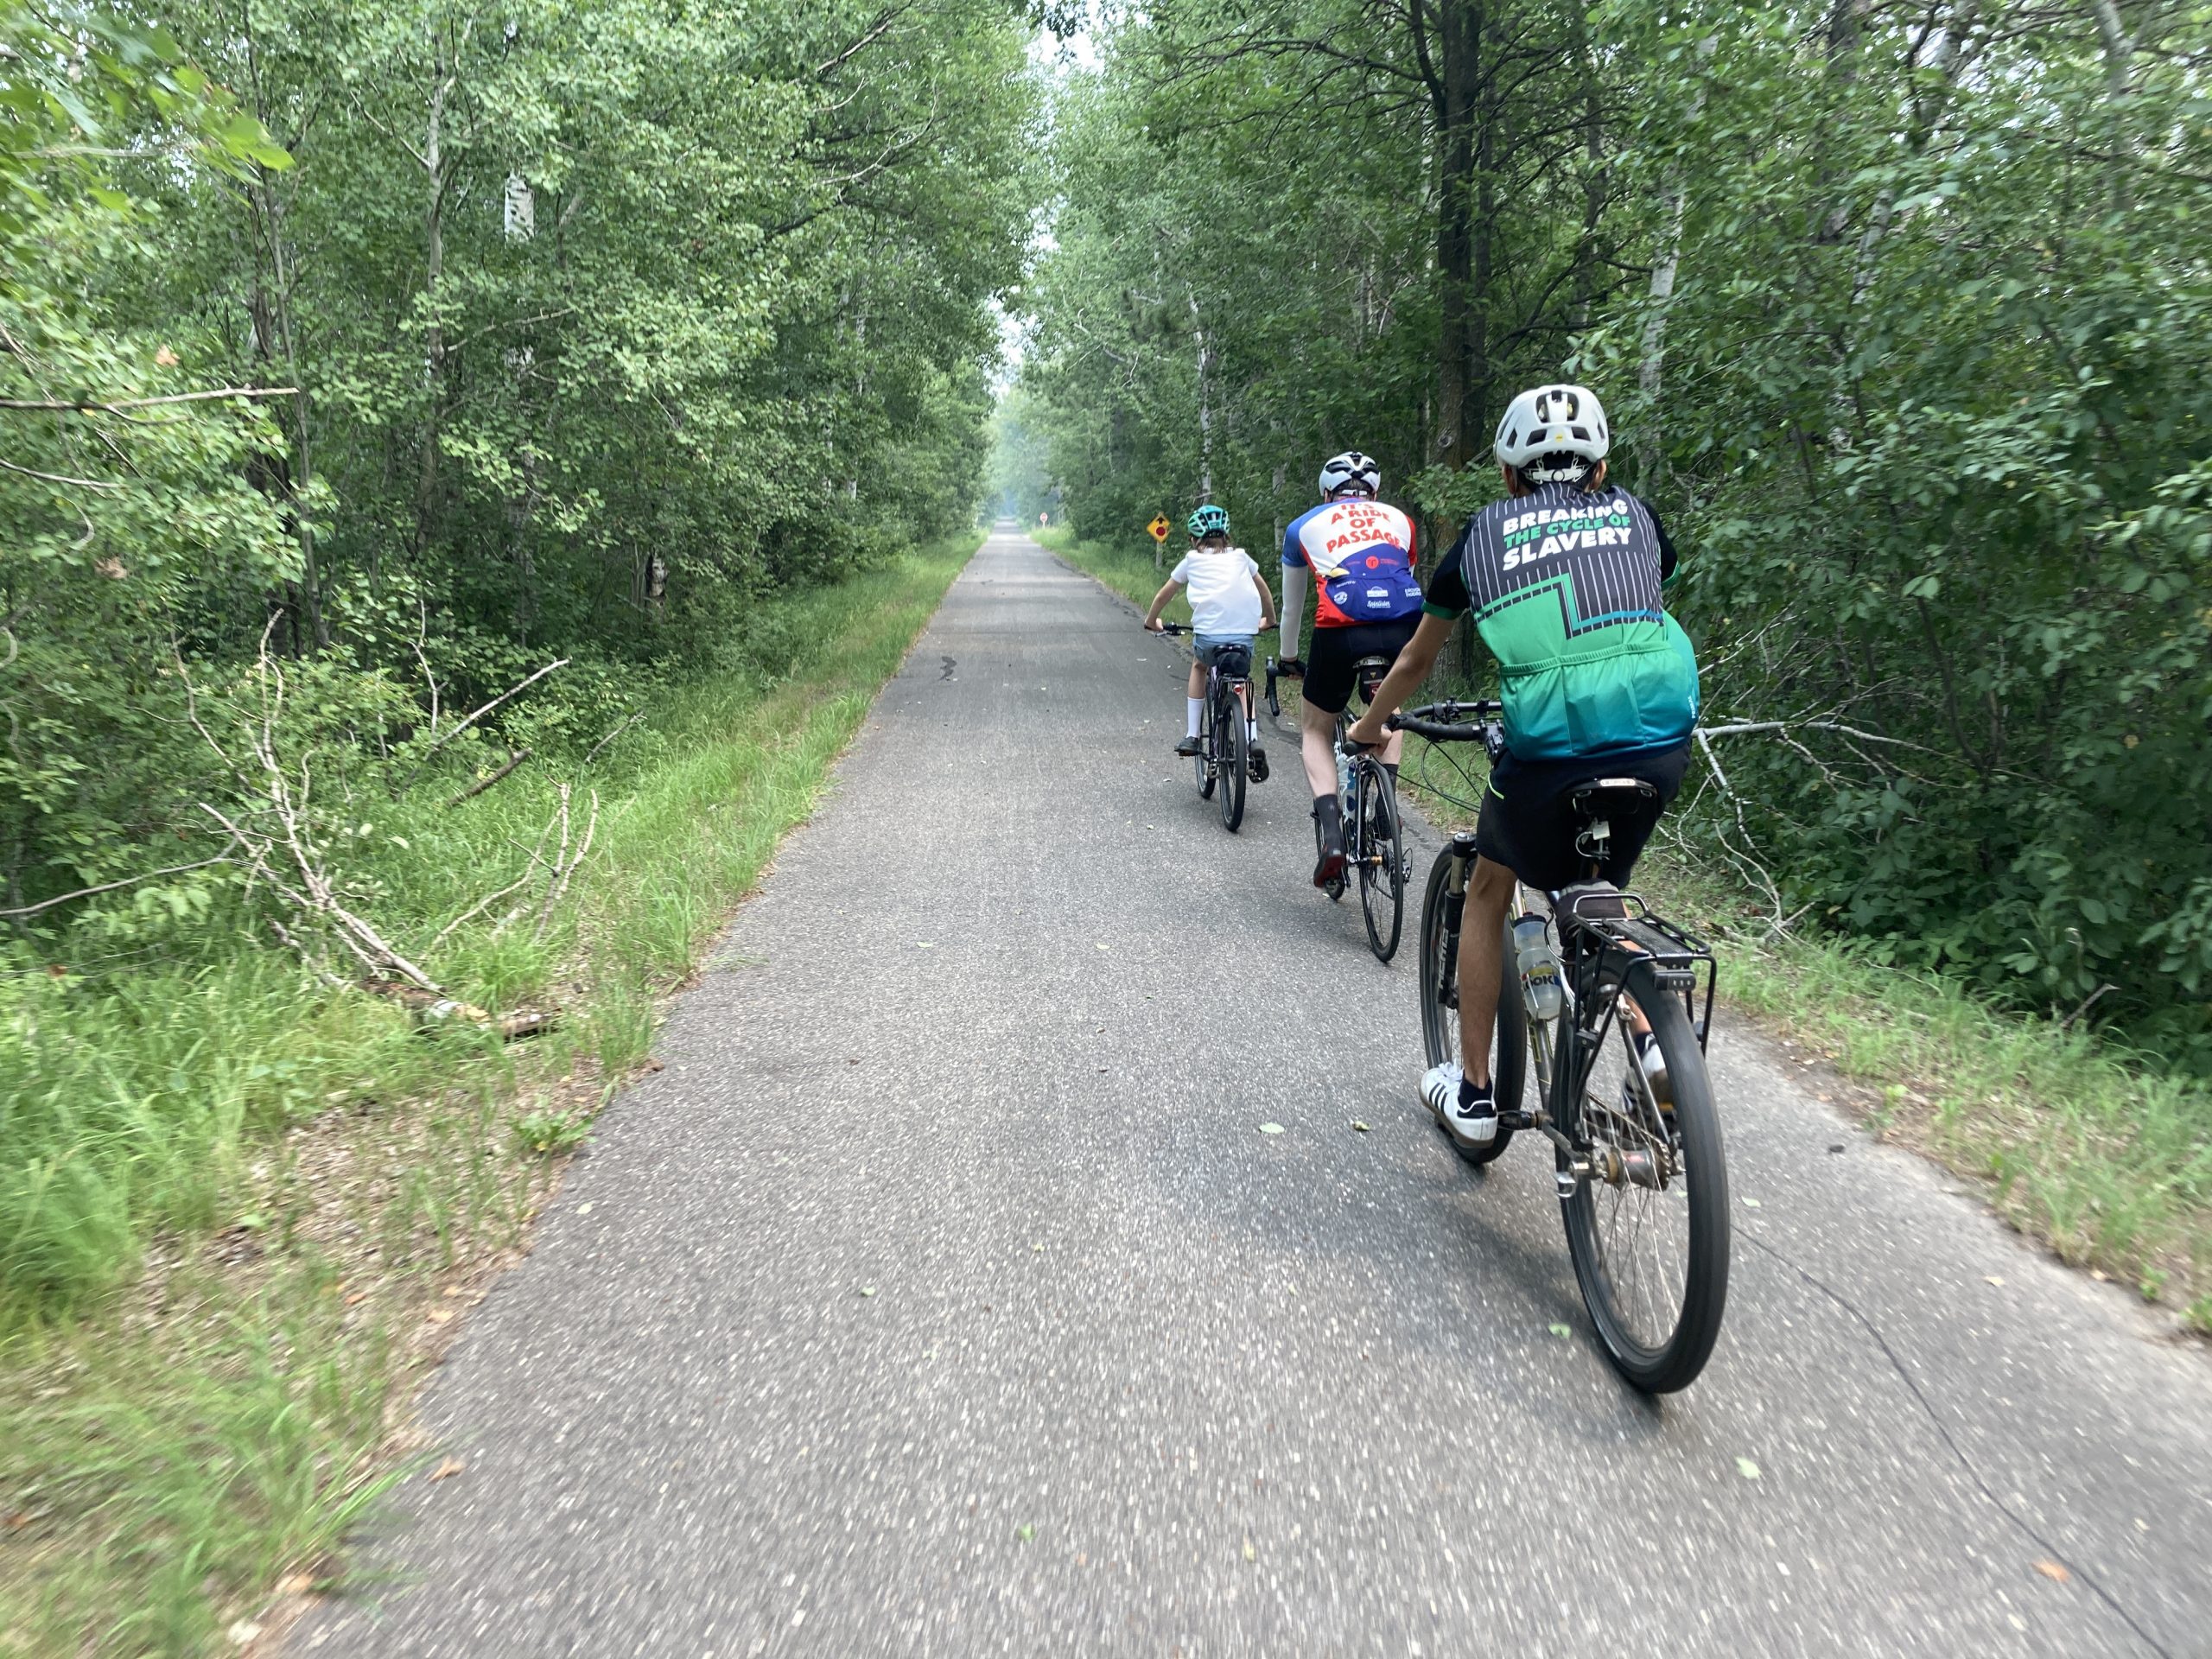
Rode with Jules to a friend's party in EP. He did great on his Haro Flightline now equipped with Schwalbe Big Apples. Also convinced him to raise his seat!
He also was our lead out man for most of a 28 mile ride on the Heartland Trail. They really help him roll fast!
3 out of 4 bikes on this trip used Schwalbe tires 😍
Brand Loyalty
Because of my great experience with Schwalbe, when it came time buy studded tires, I went for the (terribly expensive) Ice Spiker Pros. They cost more per tire than the snow tires on my Subaru. But I wasn’t concerned about quality because I knew from my past experience it was going to be great.
My only gripe is that I wish they were cheaper, especially for the smaller sizes. I want to get a set of Big Apples for my cargo trailer – but they’d cost more than the trailer itself! But I can’t complain – whenever I buy their products it’s money well spent. 💸