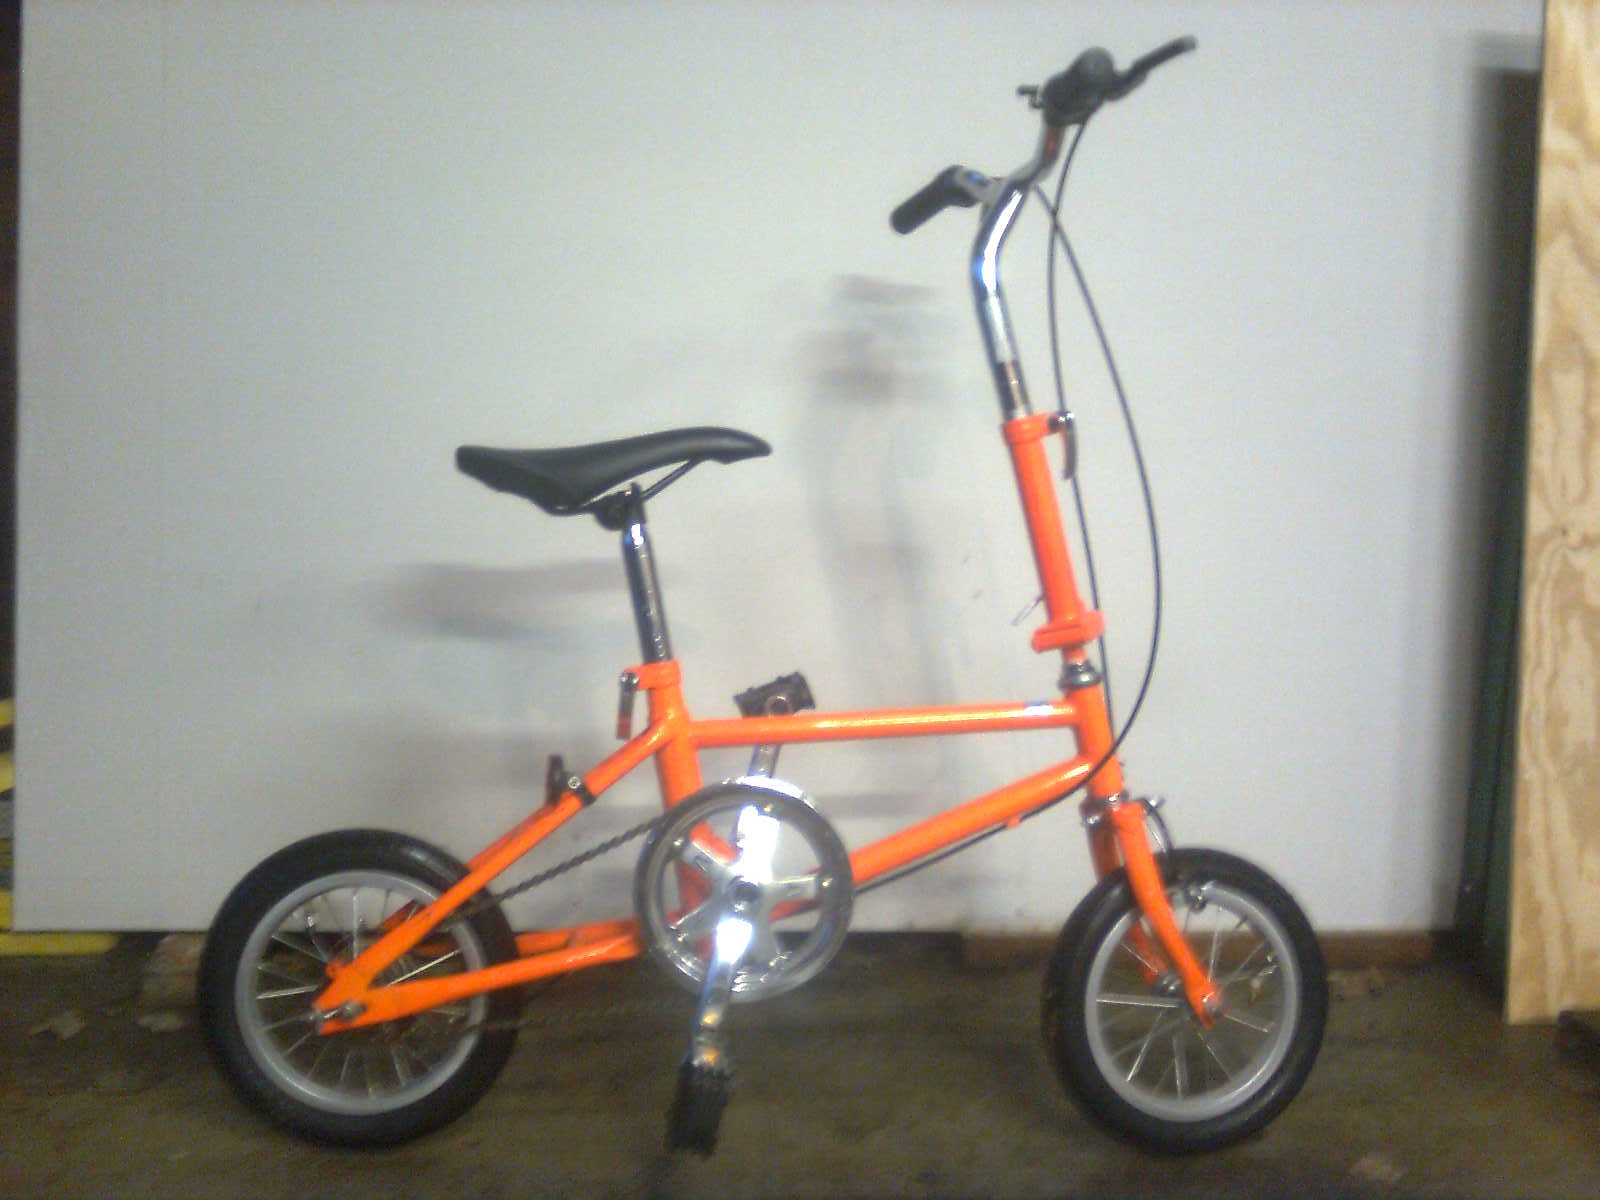
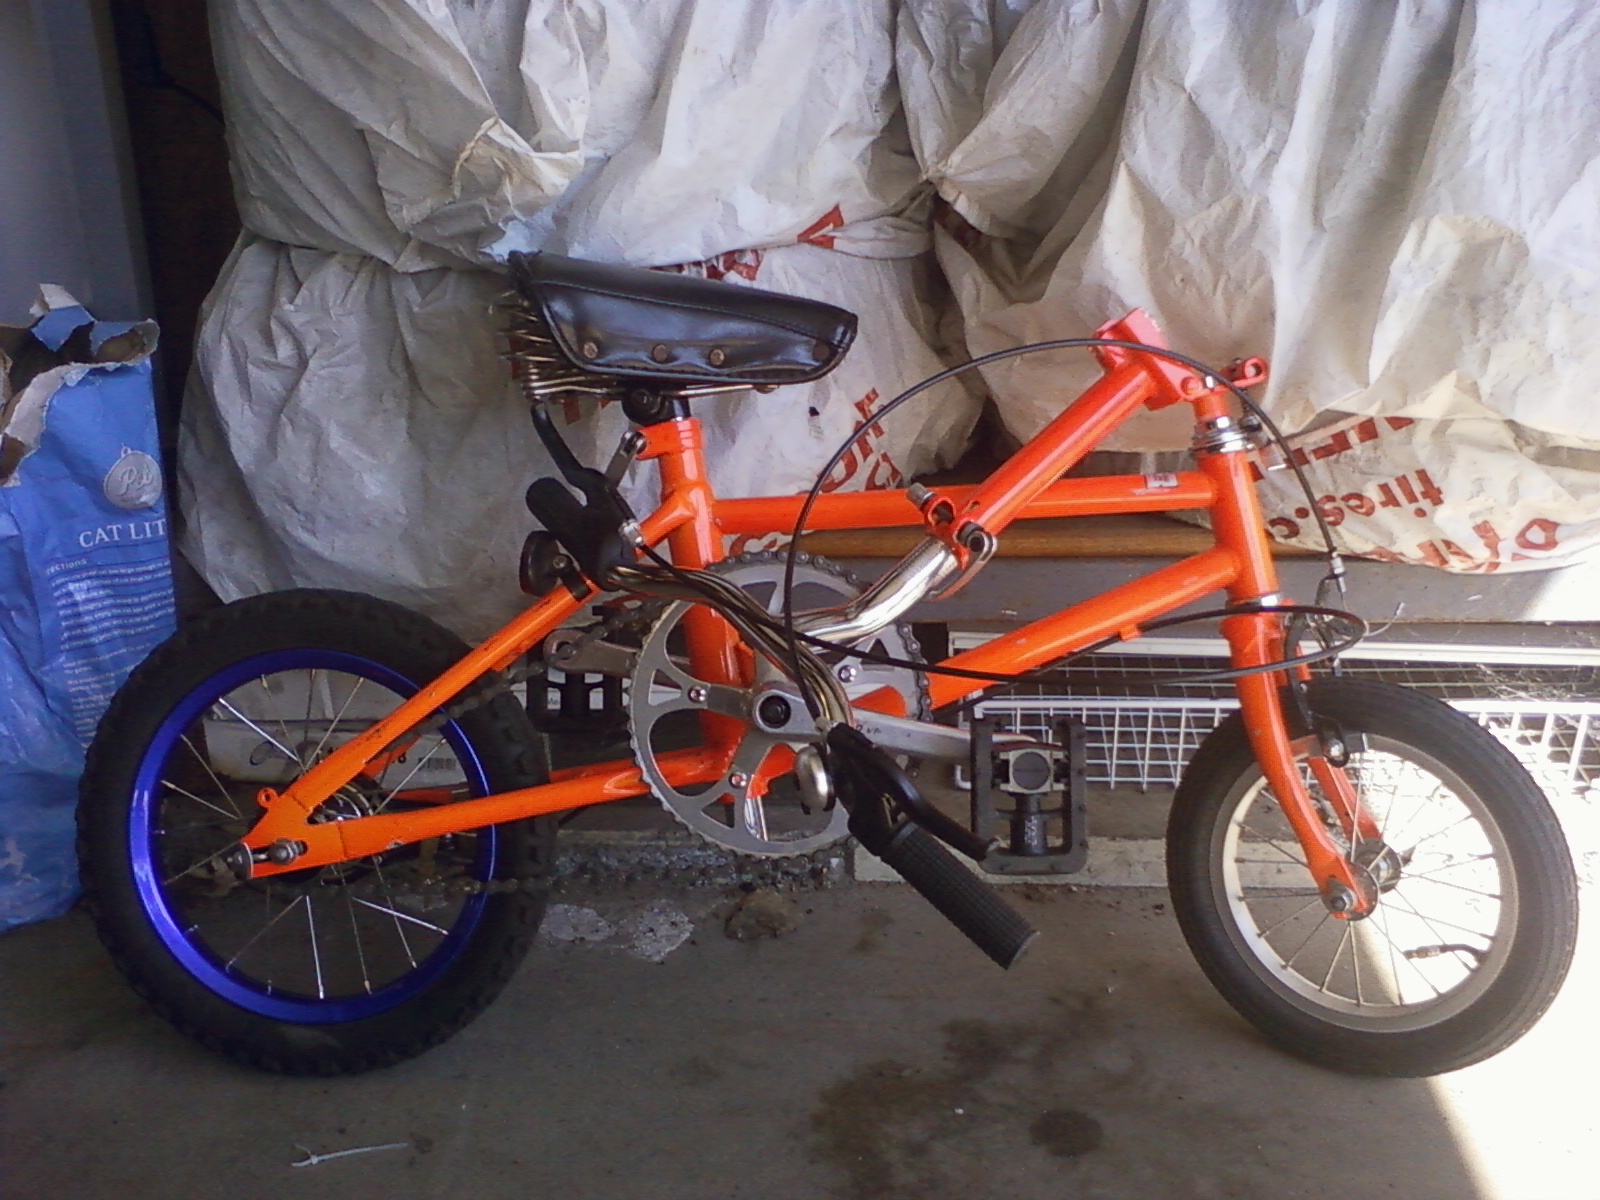
John said he didn’t have a bike, but another one of our yo-yoing compatriots led on that he does in fact have a bike that he bought in Japan. My curiosity was peaked, so I kept pressing John about it. He said it isn’t very useful because it’s a folding bike, and it’s very small. My crazy modder/engineer mind now demanded to see the bike because I knew we could turn it from a novelty into (slightly more) useful transportation. This bike has some neat quirks including a drum-brake that everyone I’ve spoken to claim will last the lifetime of the bicycle (or rider). It also has the front and back brake levers reversed from what I expect… a trait that John insists keeping because it’s part of the bike’s character.
So I helped him to make it rideable again. Below is the only photo I have of it nearest to it’s stock form. John bought it in Japan while visiting for a yo-yo contest (he’s a sponsored yo-yo player). In Japan, they take one pedal off of the bikes so they don’t get stolen. After purchasing the bike, John didn’t receive a matching pedal. So we first set off to a local bike shop (CARS in this case) and got a matching set of folding pedals. Also we replaced the seat with an extra I had lying around.
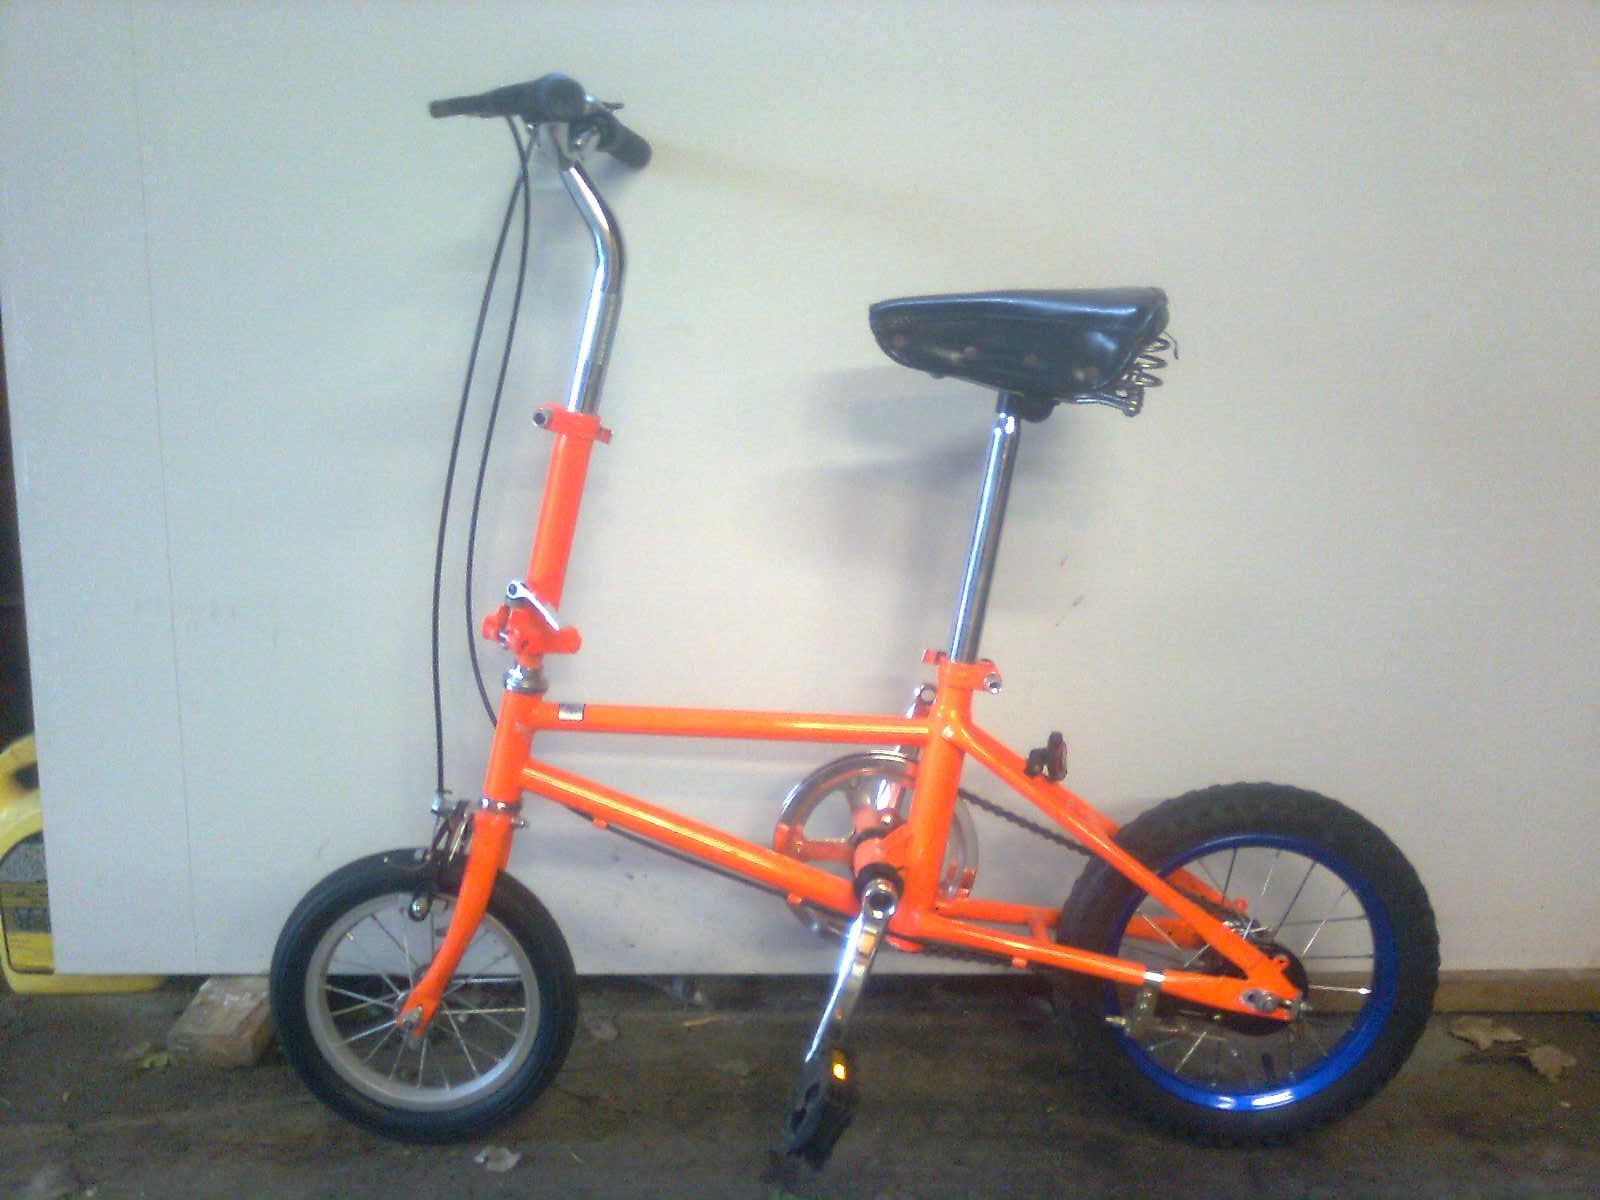
With it now usable, the issue we first wanted to tackle was the gear/gain ratio: how far the bike traveled with a turn of the pedals. There was a lot of wheel space in the back, so we stepped up from a 12″ wheel to a 14″ wheel. This involved me custom building a 14″ wheel using one from a salvaged kids bike. 14″ wheels (and their accompanying tires & tubes) are not common. To go with the 14″ kids bike rim, I disassembled the original 12″ rear wheel to reuse the hub, which included the drum brake.
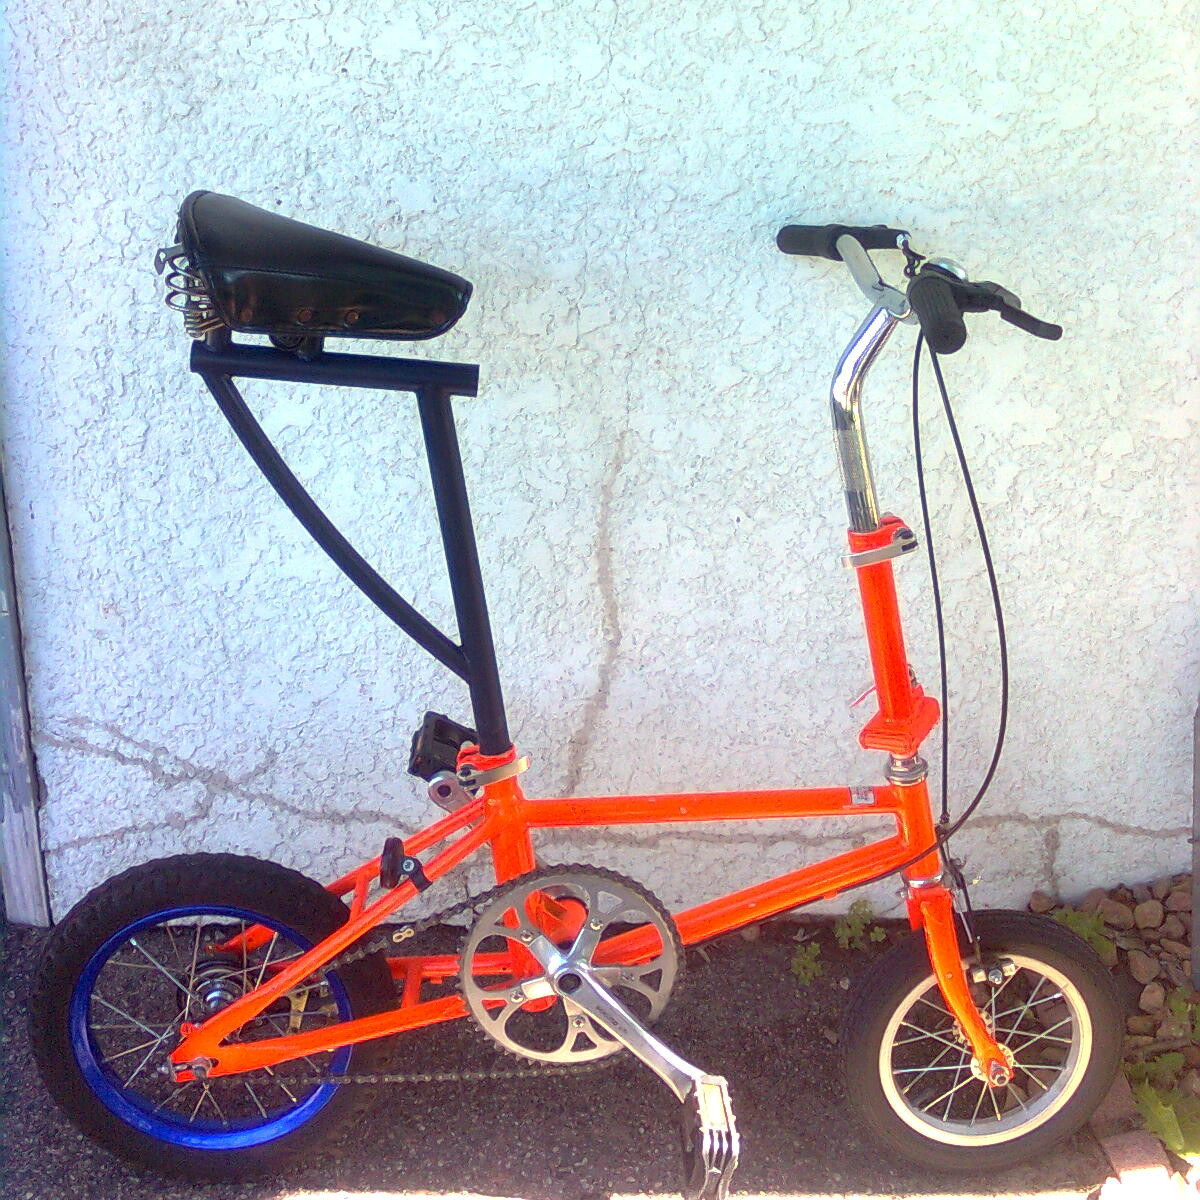
After my first wheel building class at The Hub, John was the proud owner of a new 14″ rear wheel, which helped him achieve the “reverse penny-farthing” look he wanted. He also picked up a used seat at Recovery Bike Shop to replace the stiff & small one I had supplied.
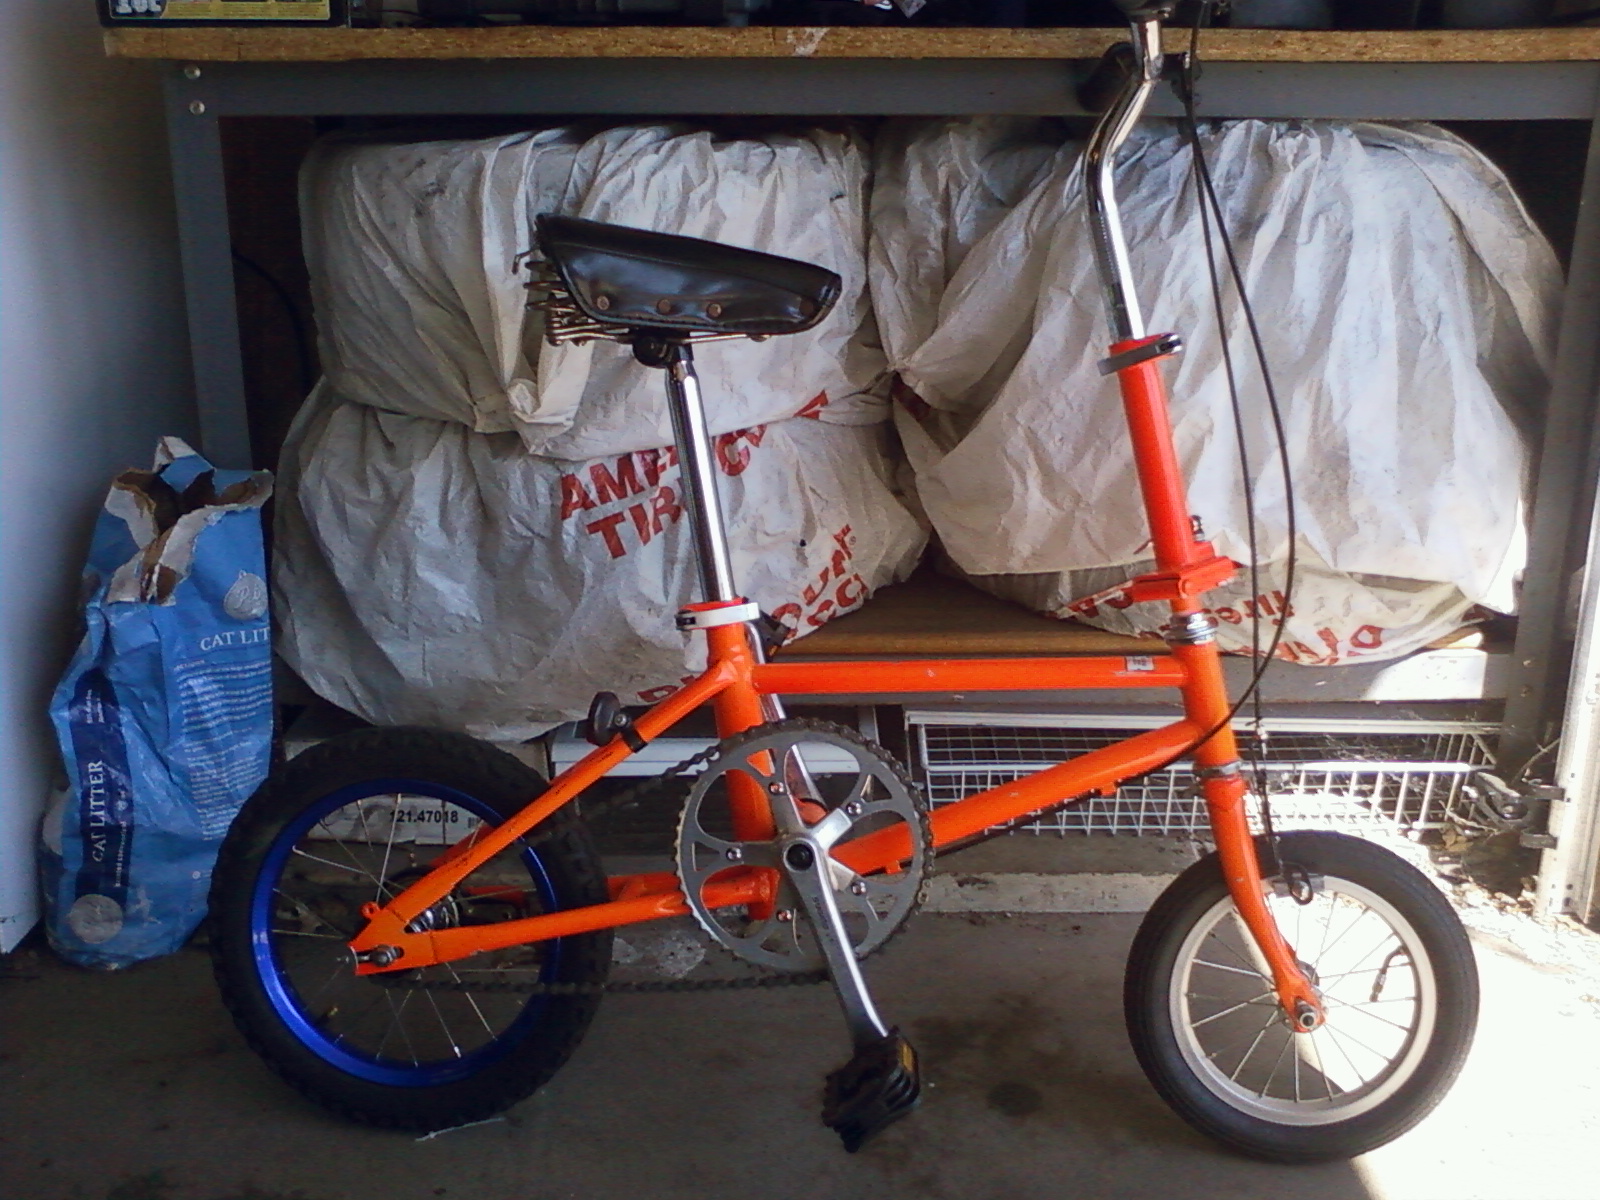
In an effort to further increase gear/gain ratio, we decided to up-size the chain-ring and crank arms. Also at Recovery we found a used 52-tooth chain-ring and 170mm crank arms to go along with it. You can see it installed here as well as the bike folded down.
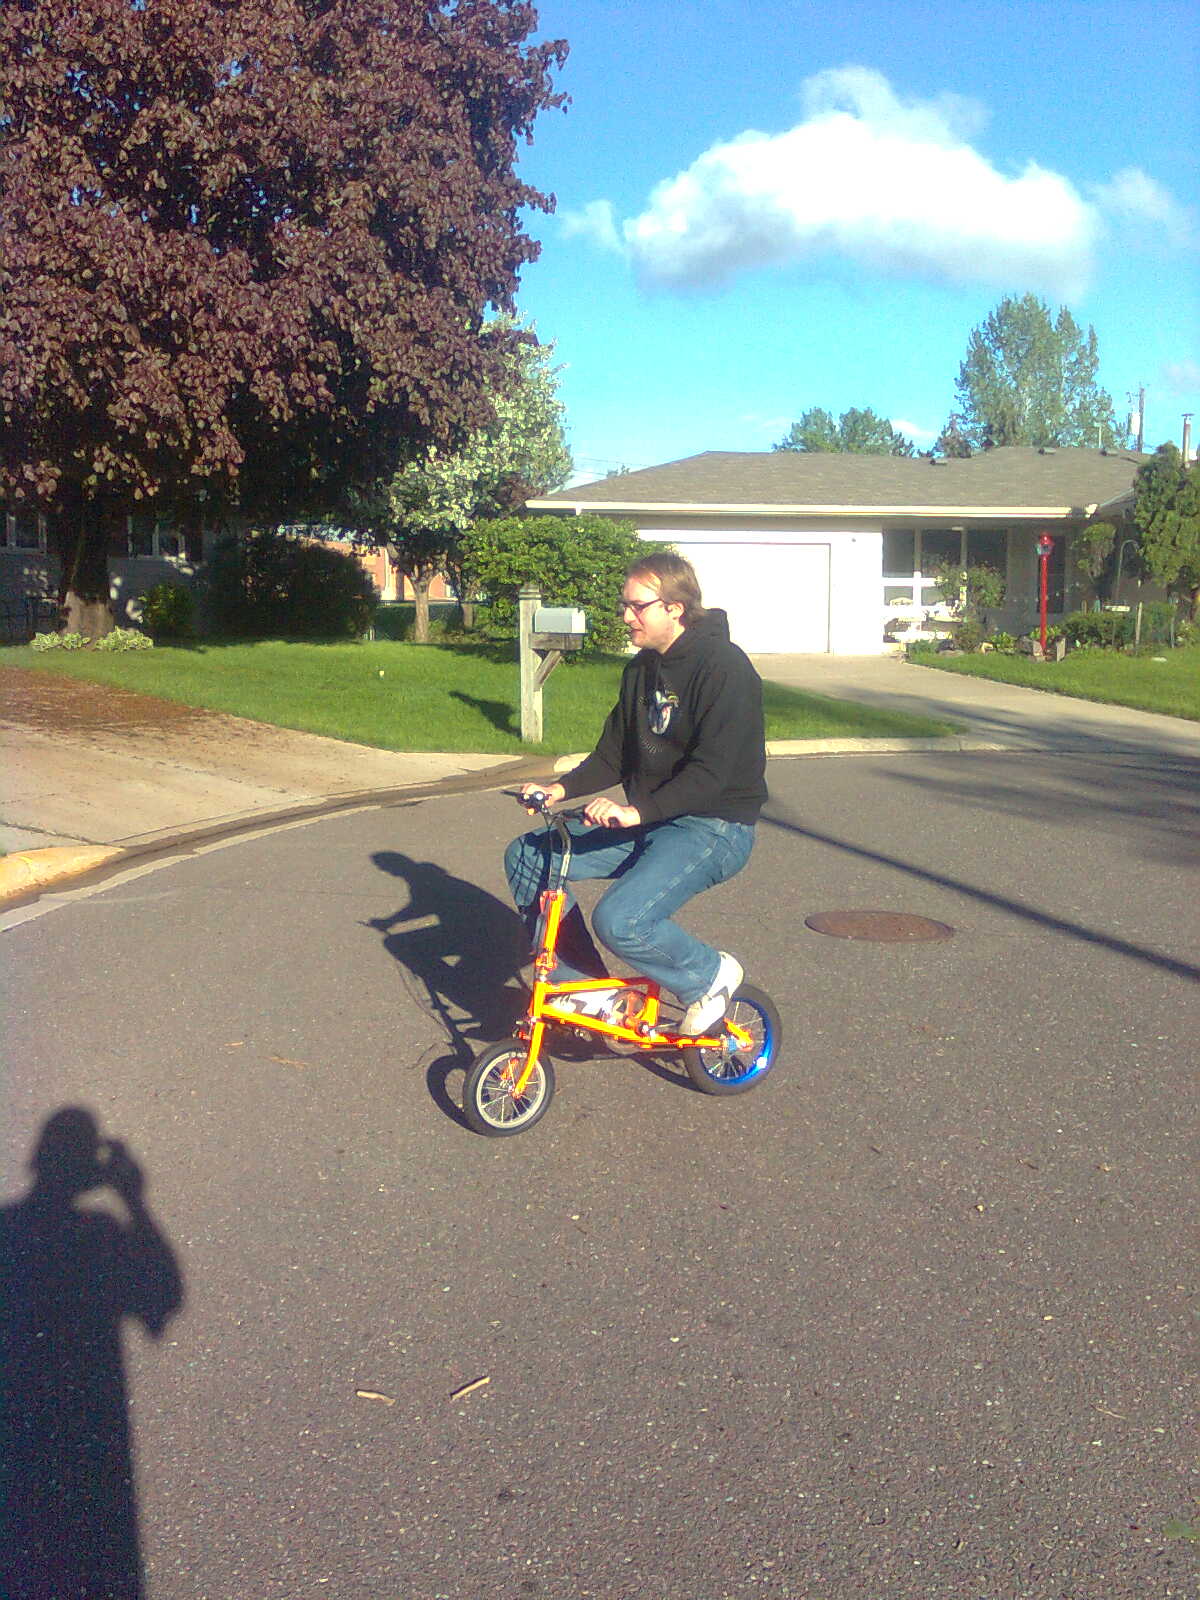
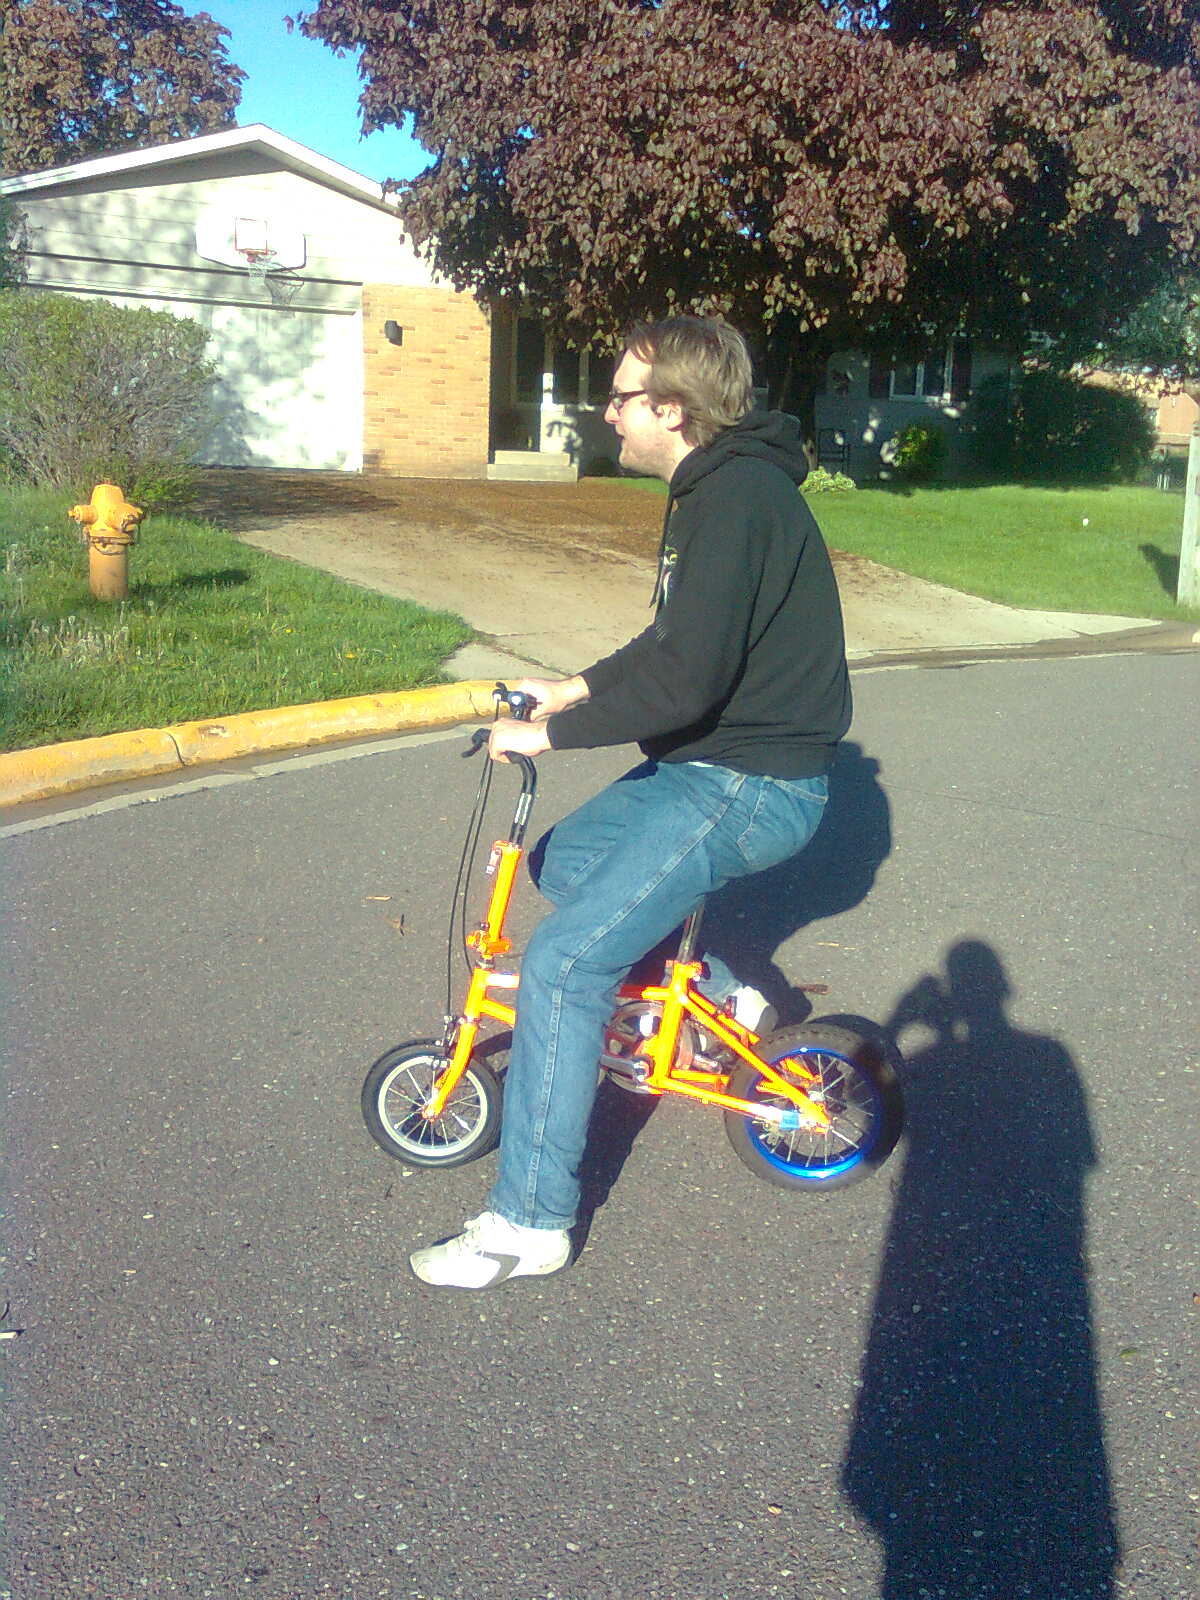
Next we needed to get the rider’s saddle up to make for (more) efficient pedaling. JohnBot is 6 feet tall – and while I gathered this bike was possibly made for a child, I was still determined to help him make it rideable. It looks somewhat like a clown bike when he’s riding it, but that’s what makes it so great. So many comments from passers by just make you want to work on it more…
JohnBot pre-seatpost
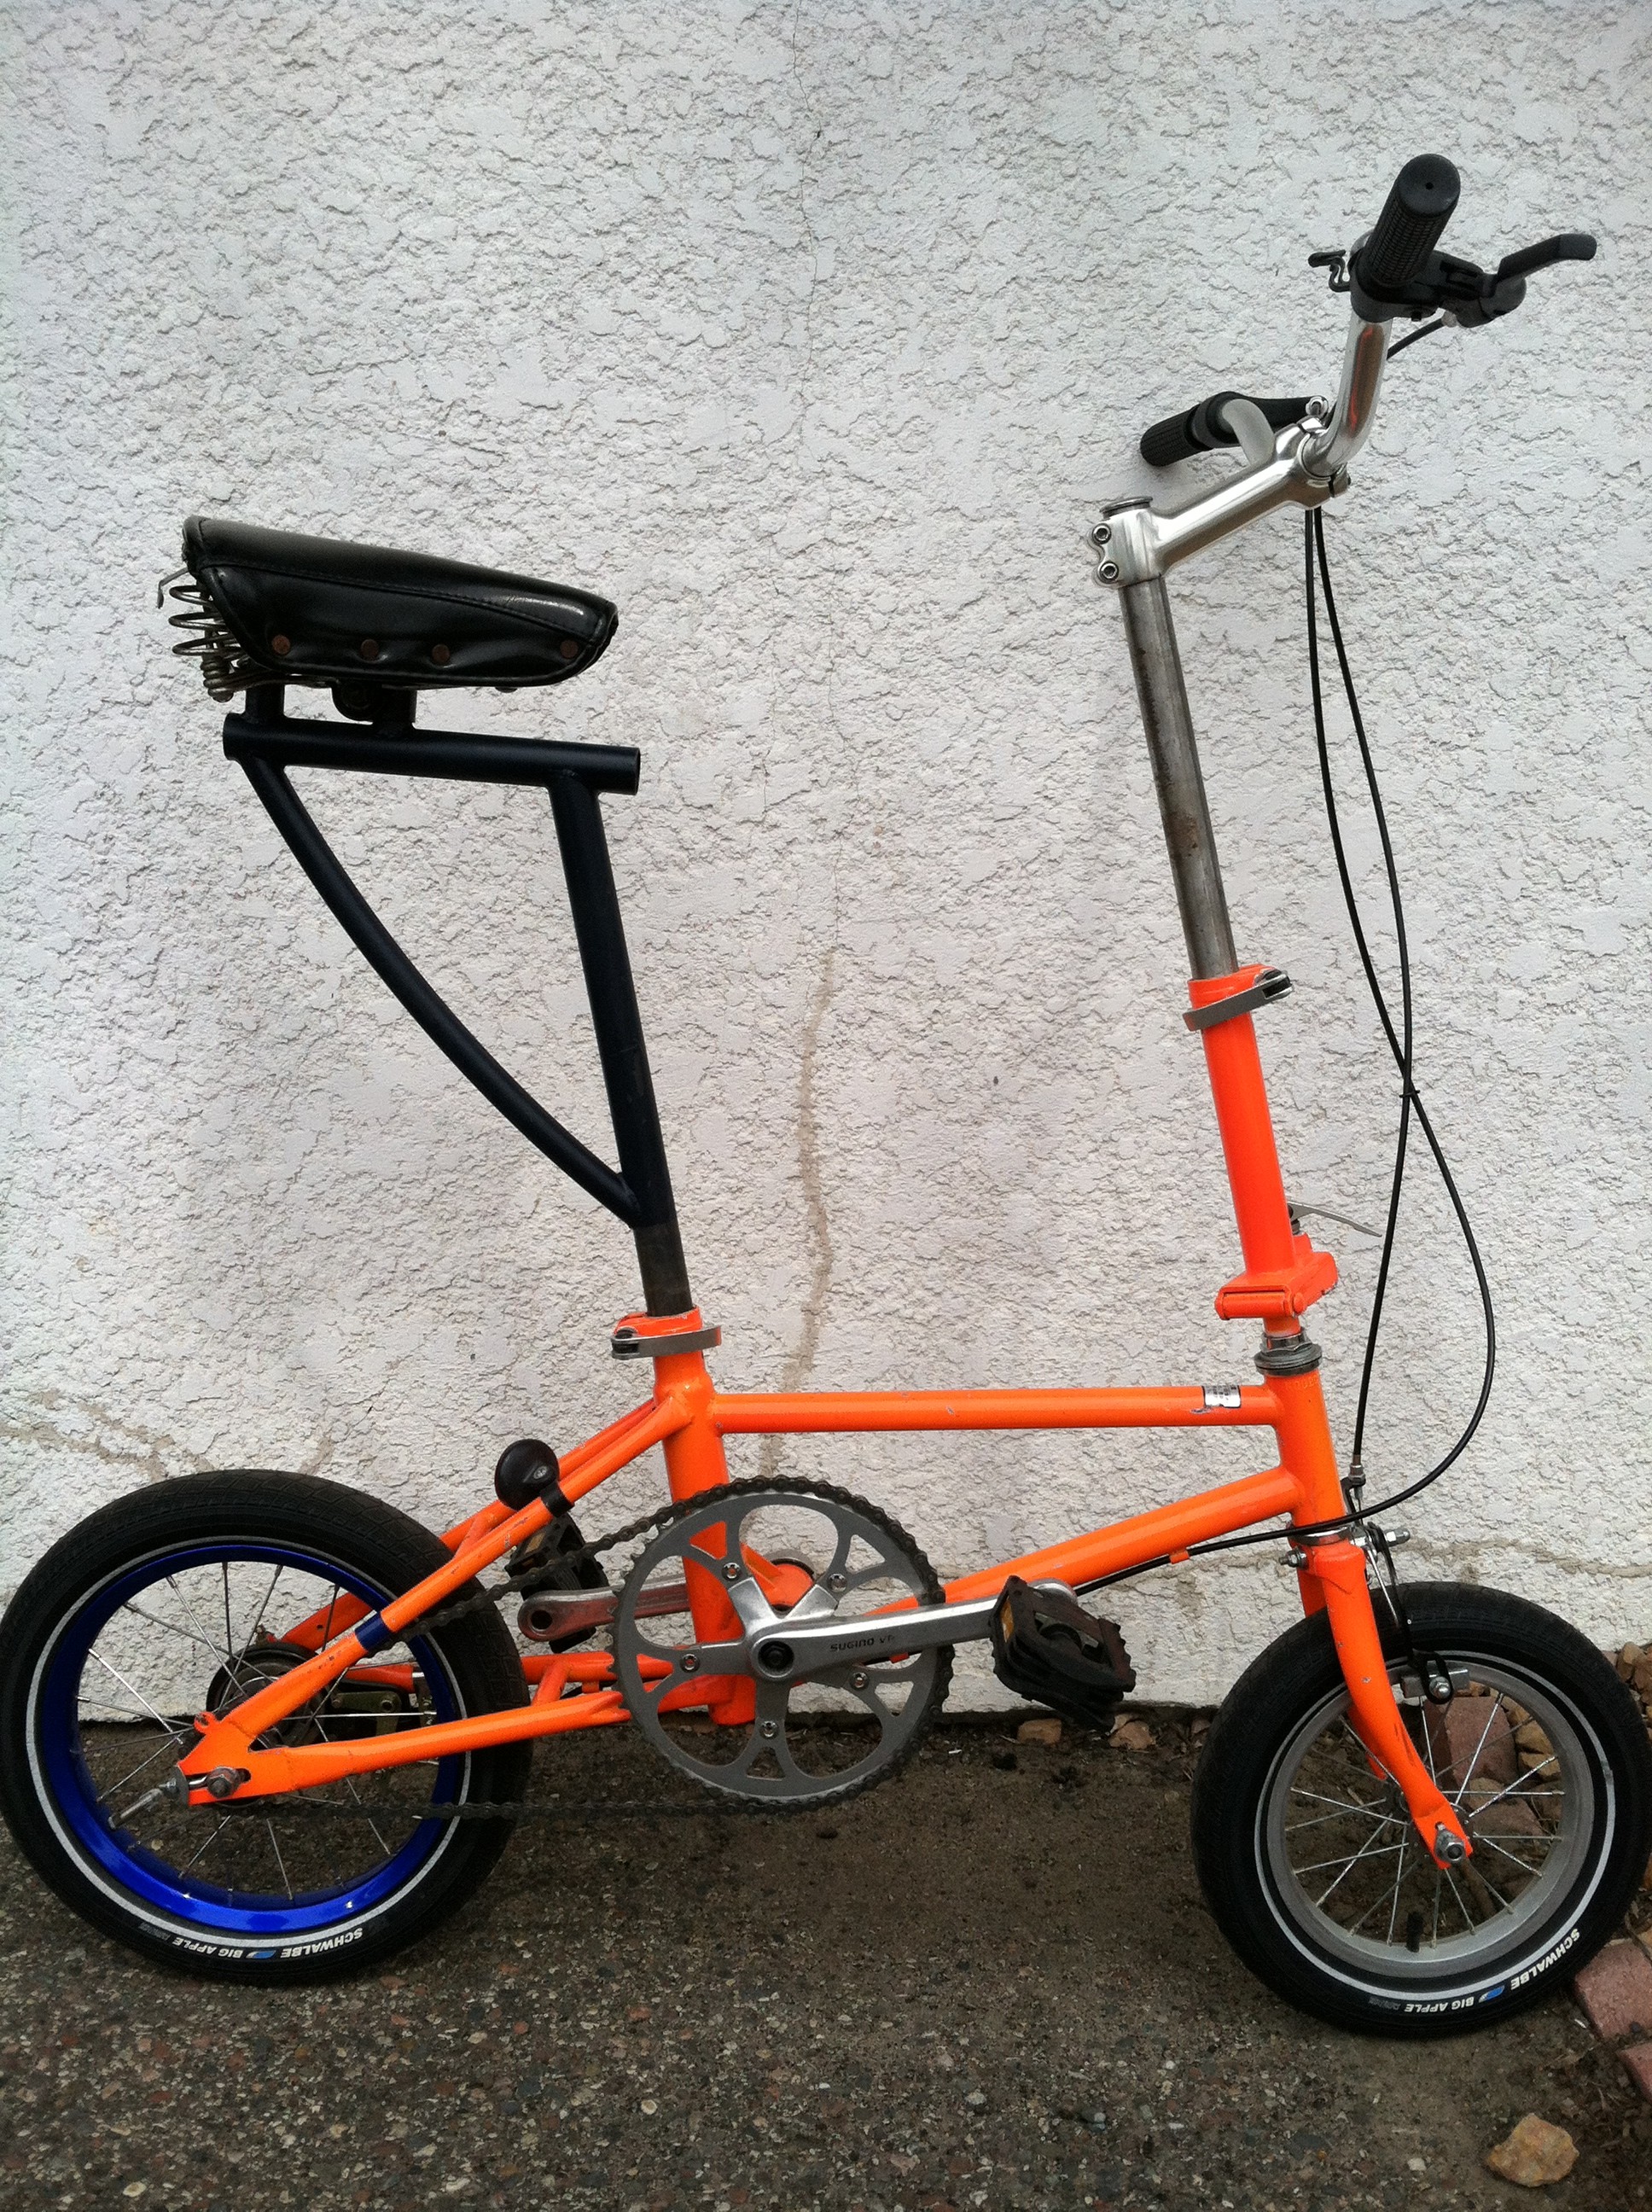
By just raising the seat-post, John’s knees would go right into the handlebars. I reminisced about the 80s “lay-back” BMX seat-posts and wondered if we could use something like that. Apparently, they’re no longer around because once you bend the tube so much, it inevitably is going to bend more at that point and ultimately fail (break). Instead, we enlisted Erik Noren of Peacock Groove to construct a lay-back style post that was also structurally sound.
It took Erik a while to get it done, but it was totally worth it. Usually when we’d stop by Peacock Groove to check the progress, Erik could be found riding the little orange bike around the shop like a circus bear on a tiny bicycle. But finally Erik delivered a seat-post that would not only support a full-sized rider, it could be used as a weapon.
The last part was to get the handlebars up and forward because it was still a close call with knees at any steering angle that wasn’t straight-ahead. It turns out the included handlebar post is 1 1/8″ in diameter – the same as a standard thread-less bicycle fork. So we bought a length of 1 1/8″ fork tubing from Erik at Peacock Groove and reconfigured the handlebars. At Recovery, John found a thread-less stem and handlebars which would push the bars out in-front enough to allow easy pedaling and steering even at slow speeds.
We finished it off with a set of matching 12″ and 14″ Schwalbe Big Apple tires from Hiawatha Cyclery. With the seat far back, it makes wheelies very easy:
People seem to instantly fall in love with this strange contraption. Erik was constantly riding it around the shop. People always give shout-outs to JohnBot when he’s riding it in the streets. My friend Jason said he had dreams of doing wheelies on it. Long live oddball bikes.
At my age, it’s not often that I get to say this anymore:
I’m too young to remember but… Bike shops back in the day had a mechanic who was also versed in welding and brazing. He may not have been a bike builder by trade, but knew how to add accoutrements to an average bicycle such as eyelets for racks, fenders, bottles, etc. Today that person doesn’t exist in the bike shop, but s/he does still exist, in the form of your local bicycle builder.
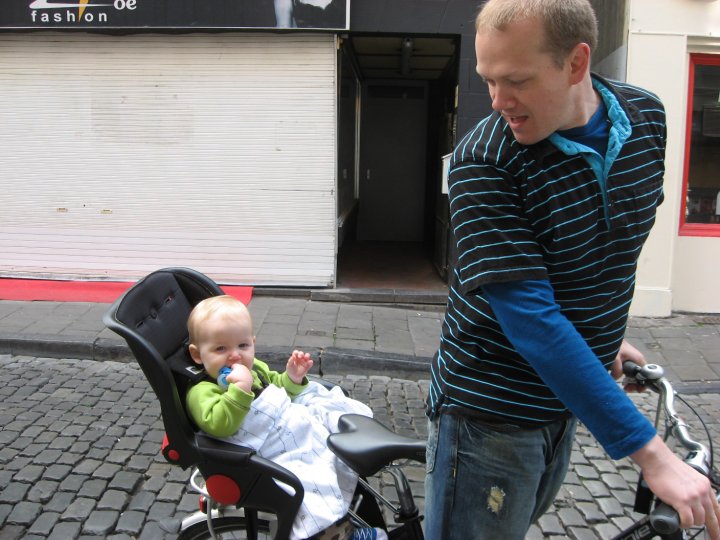
My need was for a bike which could tote a human child. While in Belgium, Jessi and I rode bikes with kid seats mounted over the back wheel, which my son and I had enjoyed:
A friend of mine recommended getting a Chariot Carrier – he said other trailers he tried were cheap (quality wise) – Chariot’s are definitely not cheap. But I quite enjoyed our Belgium ride set up, and I found the Topeak BabySeat which mounted atop a rack that could be used for other things, and it was 25% the cost of a Chariot without any fixin’s.
Unfortunately my bicycle did not have any provisions for a rack. I could have sold my bike or frame and got another with mounts pre-installed. Or I could have just got the Chariot Carrier. Both of those options were going to cost a pretty penny. My favorite local bike shop recommended me to Erik Noren at Peacock Groove, suggesting he could simply add some rack mounts to my frame. Having Erik add mounts was going to still keep it cheaper than the other options, plus I get to keep my bike which I’ve grown attached to. Erik’s bread and butter is building complete bikes, not doing bike mods, but if you can fit your modification needs into his busy schedule, he can surely do it – he can pretty much do anything with a bicycle.
Erik gave me the “star” treatment with these water bottle mounts acting as rack mounts on the seat stays:
Forgive my shoddy paintwork, it’s meant to be cheap and functional, not a show bike.
Then Erik added a super-beefy mount to the dropout for the rack to thread into:
Erik does amazing work and I would trust him with my son’s life.