The foam tape, when used with adhesion promoter, works great for all bumps, jumps and falls. The cheap Ax-Man lights however, left something to be desired. One quit after some moisture got into the housing, the other quit because it was just plain cheap – I’d never paid more than $5 for any of them at Ax-Man.
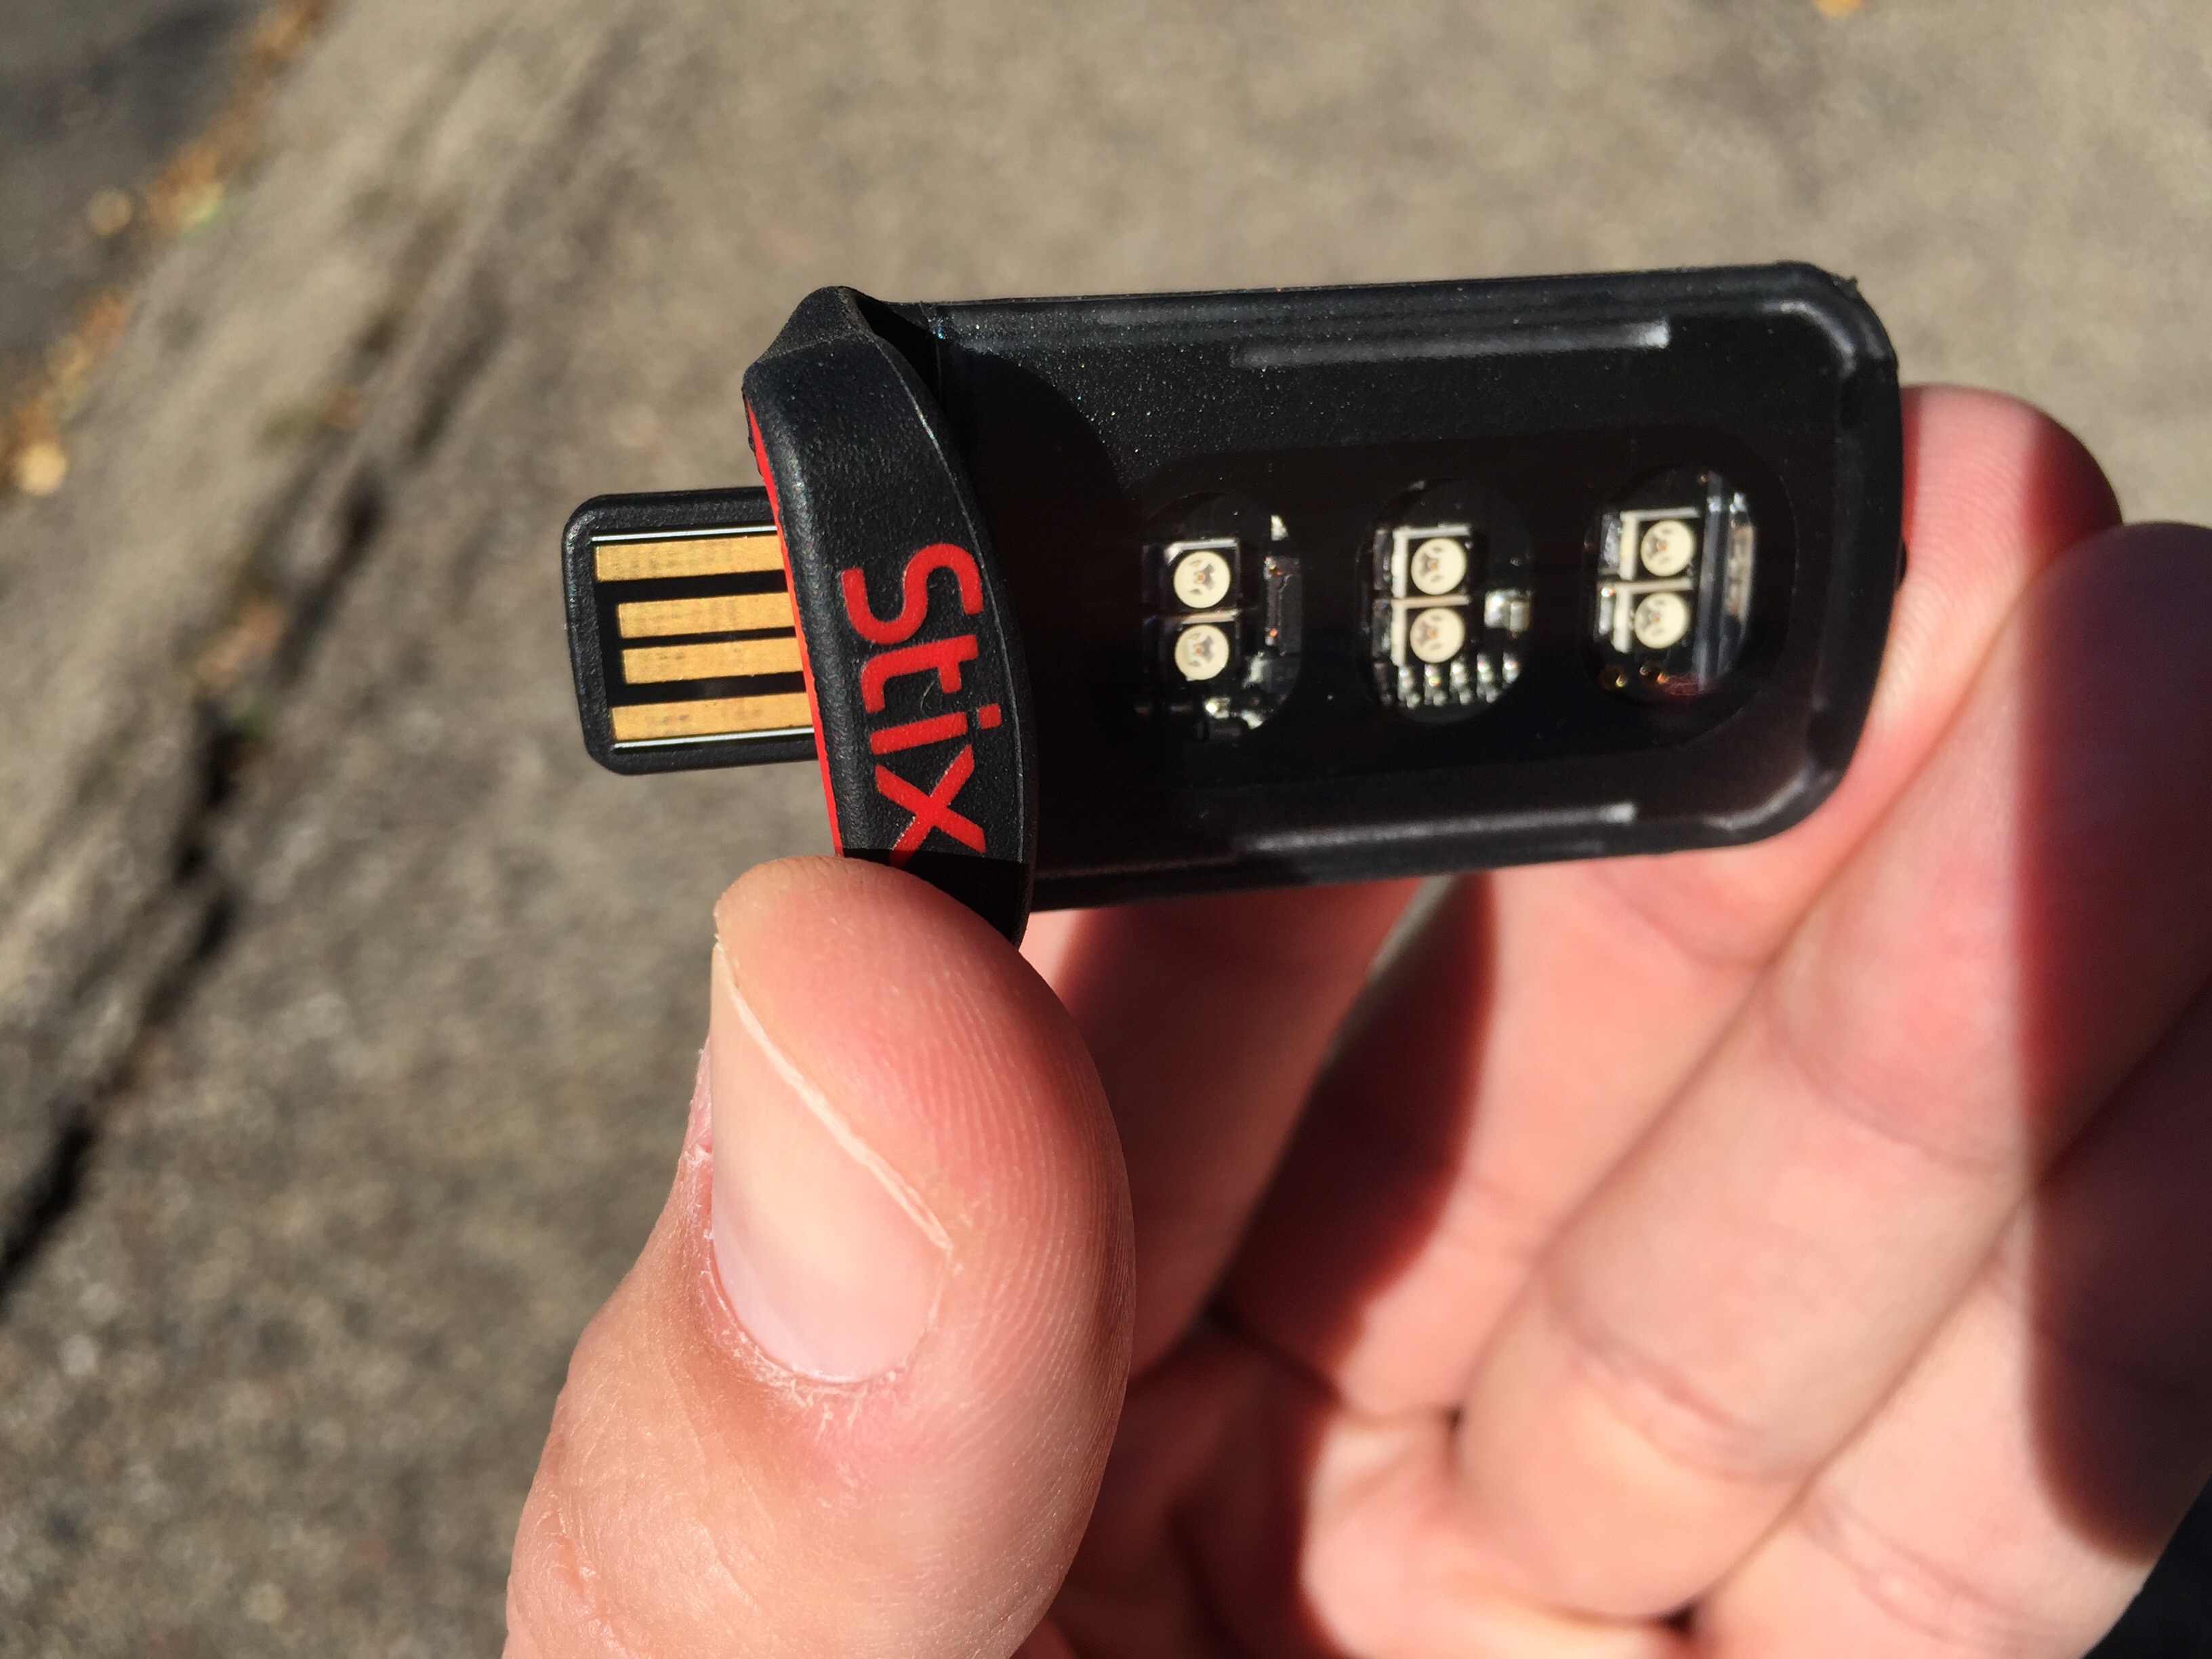
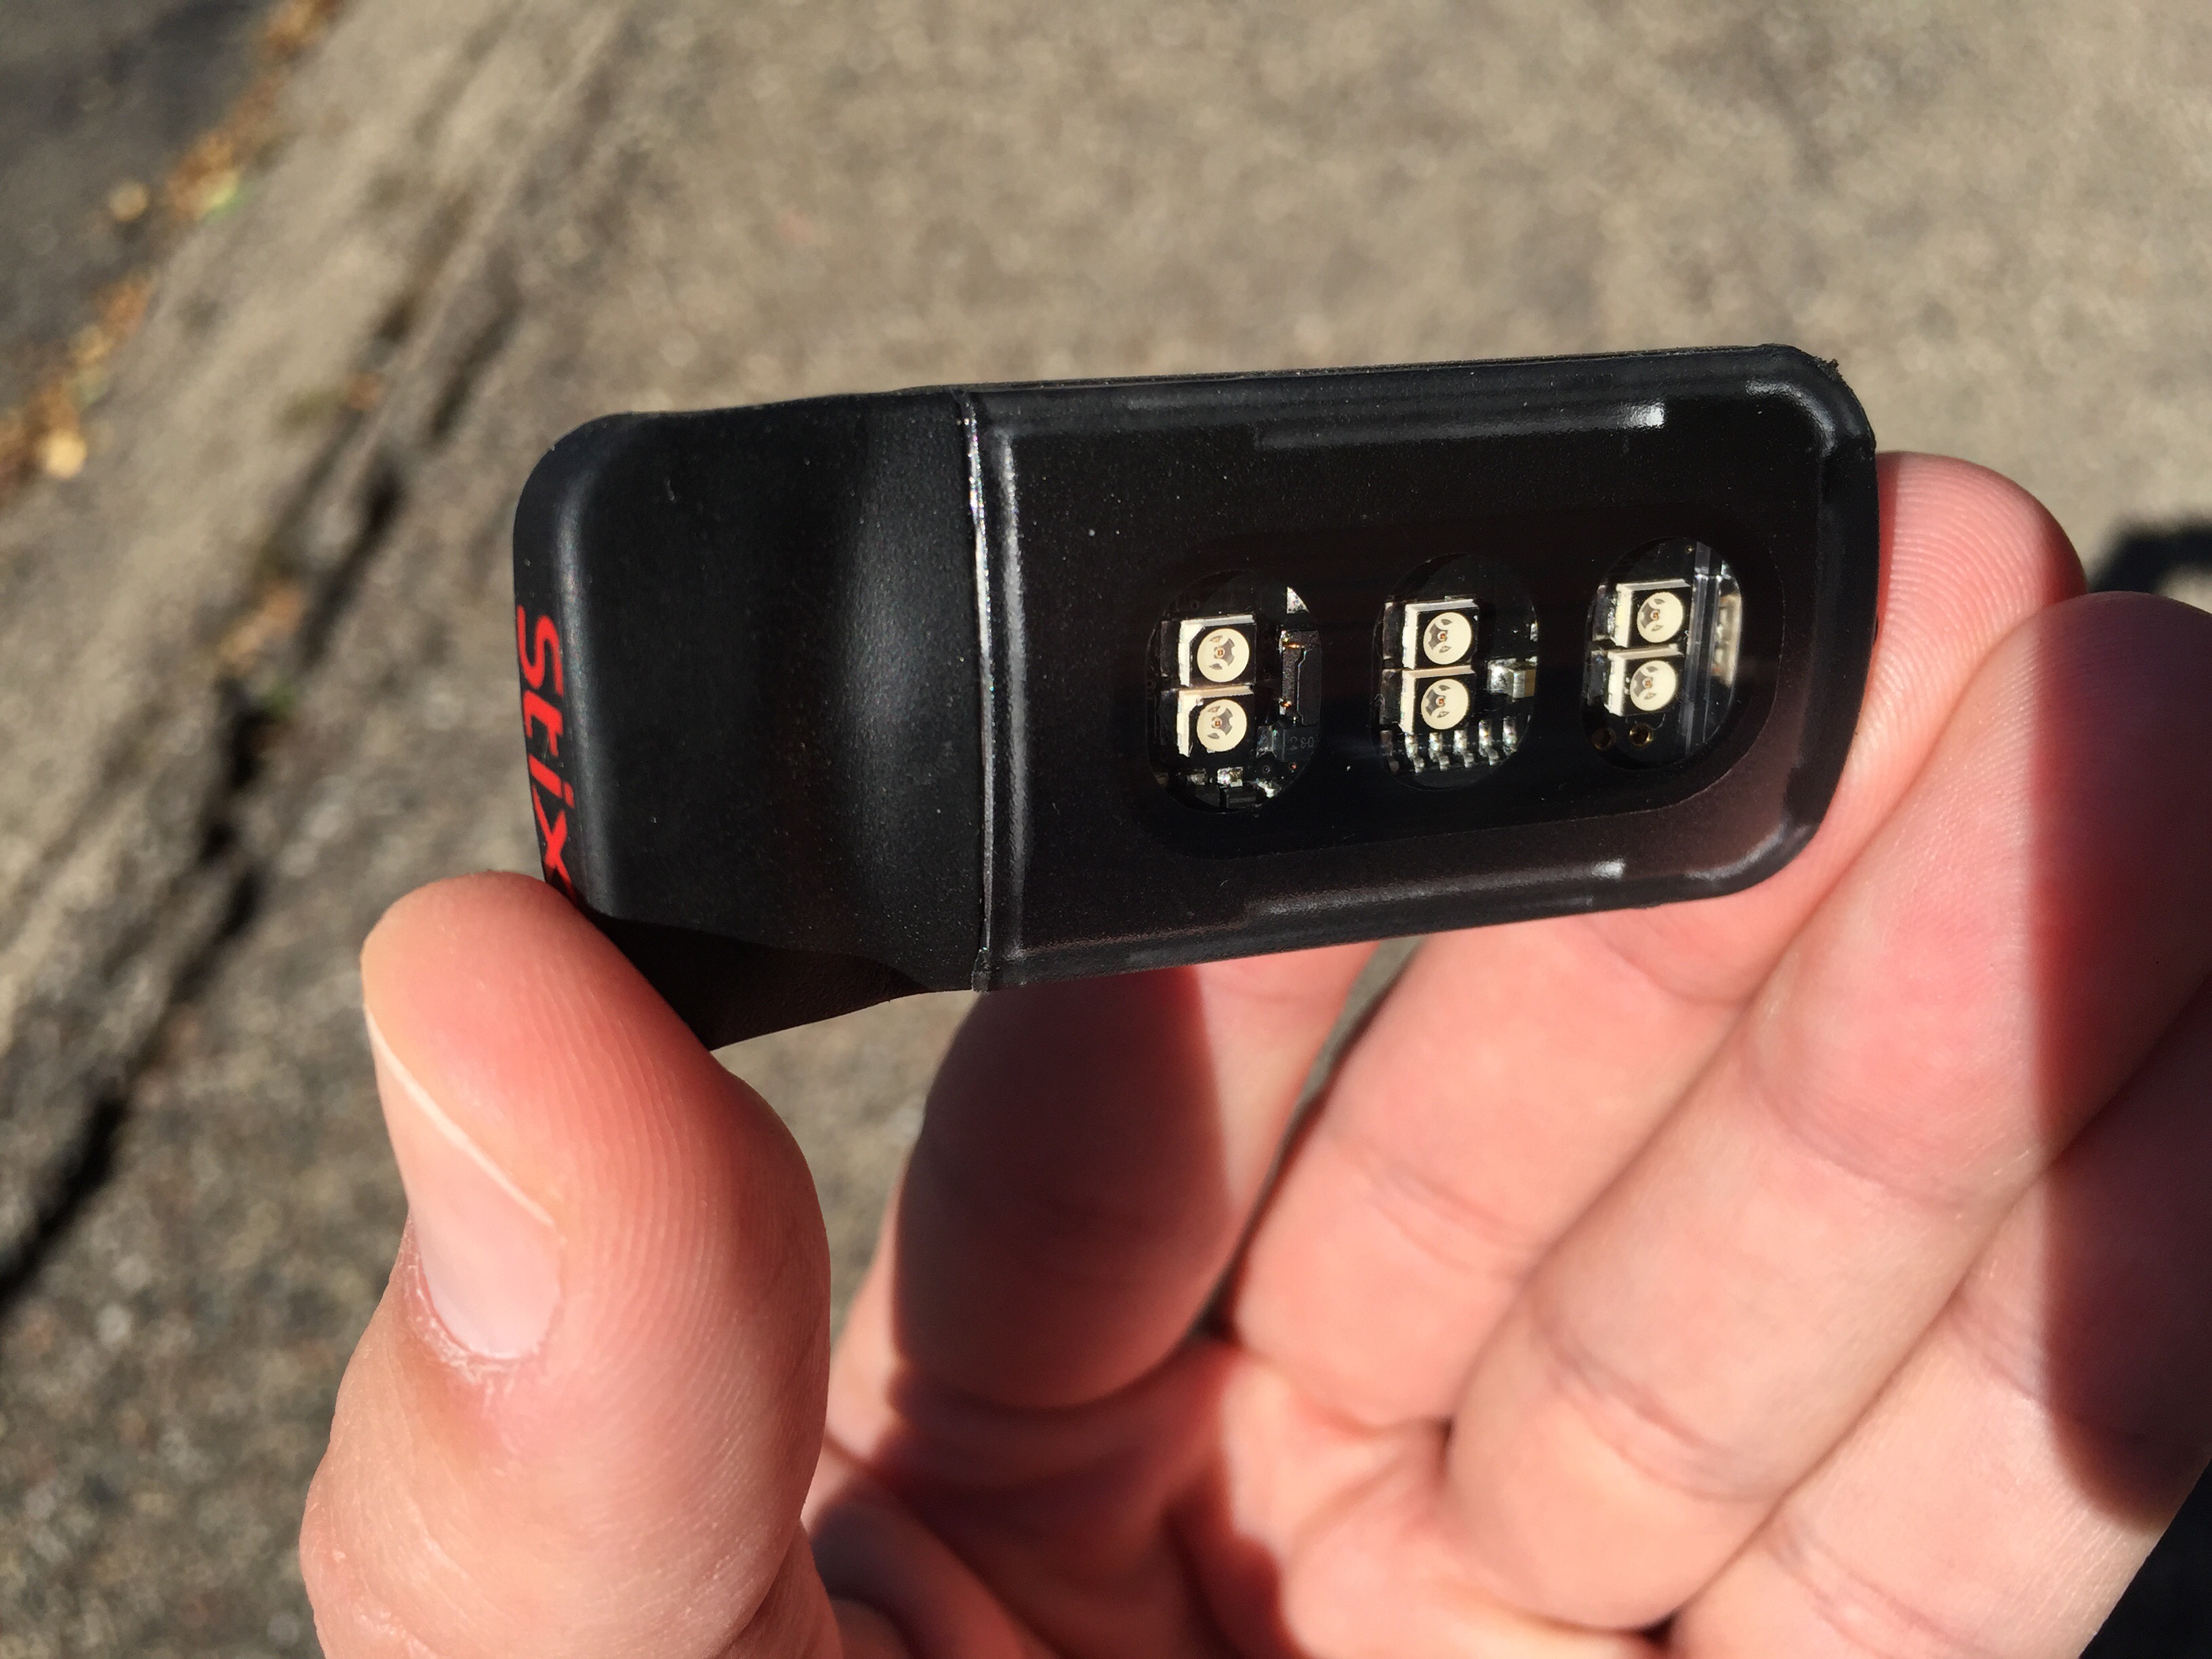
The sales rep at my local bike shop recommended a Specialized Stix light. I’m hesitant to buy anything from “The Big S” but the size and specs were good and they had several mounting options. The model I got is the Stix Comp Tail Light. The only difference that I could tell between it and the Stix Sport Tail Light is the Stix Comp has 3 LEDs instead of 2 and a larger battery for longer runtime. Leave it to Specialized to label them with nonsense marketing names like sport and competition. On sale you can get the Stix Comp Tail Light for around $30.
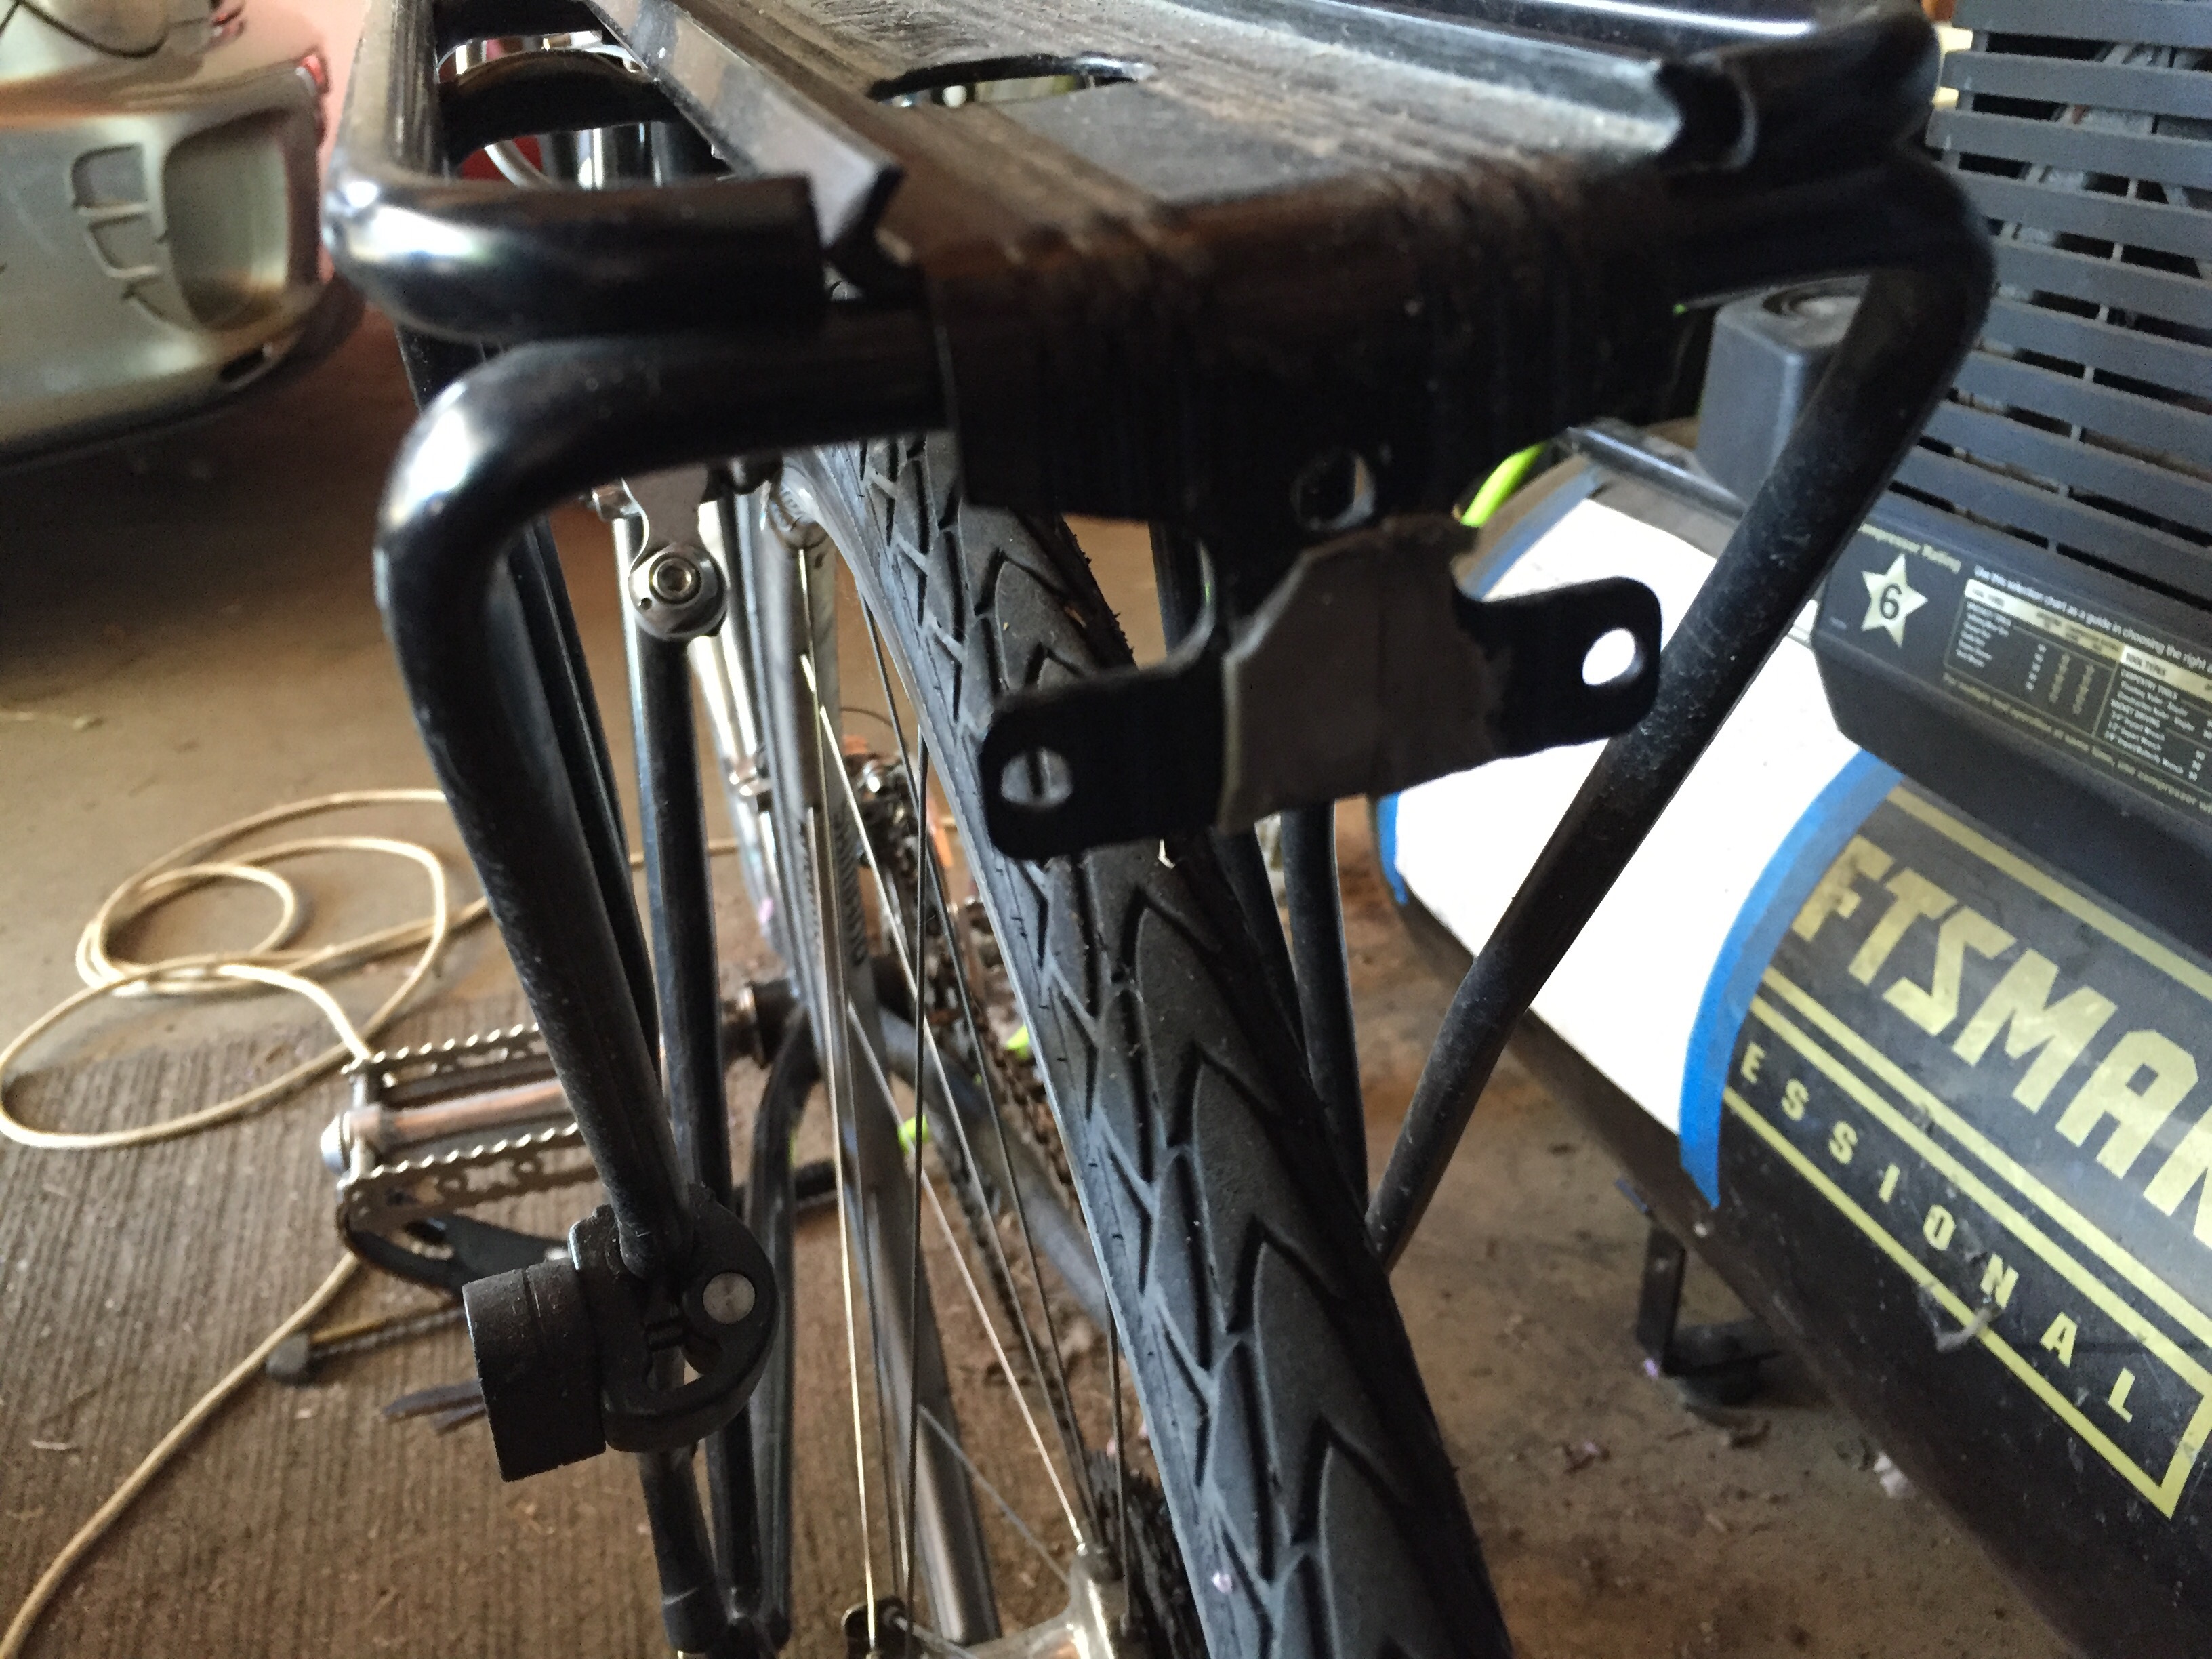
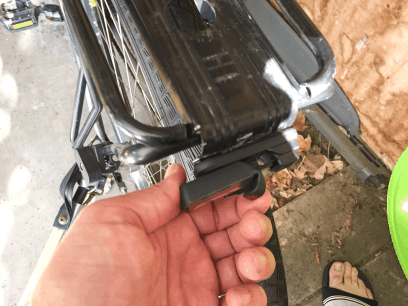
I doubted the rack-mount option would work on my Topeak racks, but I took a chance and bought it anyway since I recalled my rack has a couple of mounting holes:
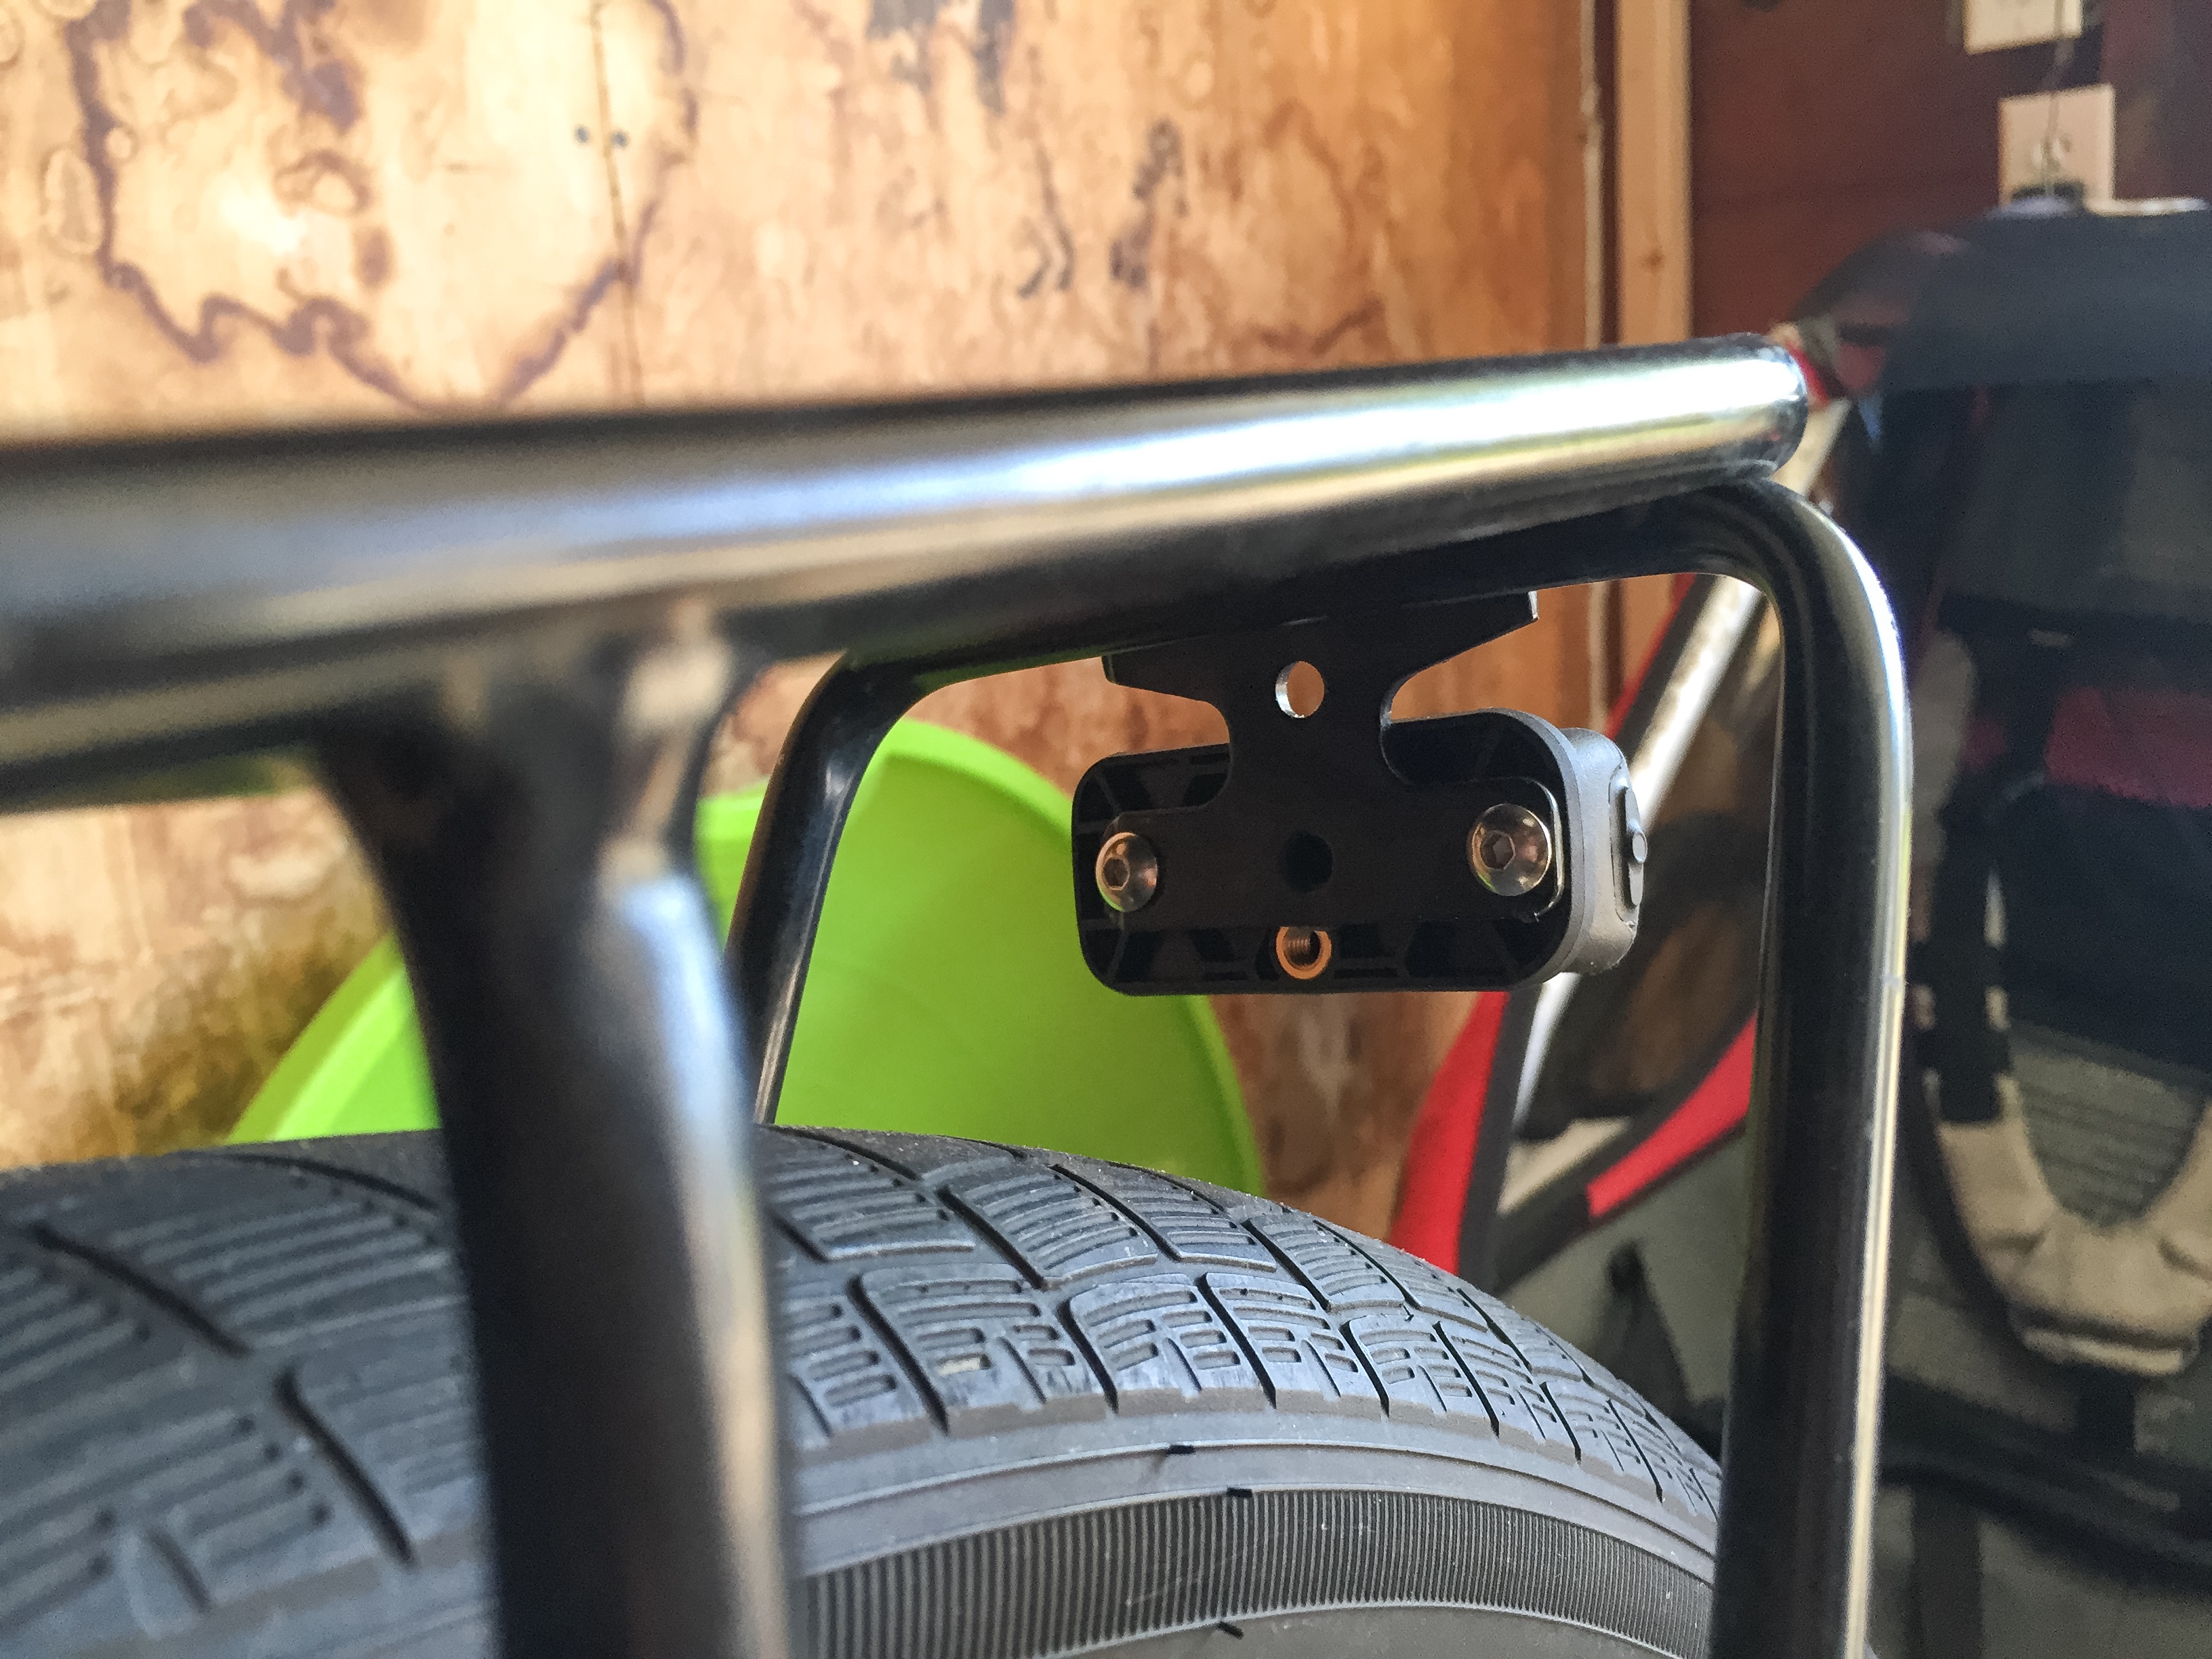
I figured I’d have to drill a new hole to get the spacing right, but the Stix Reflector Mount turned out to be a direct bolt-on fit.
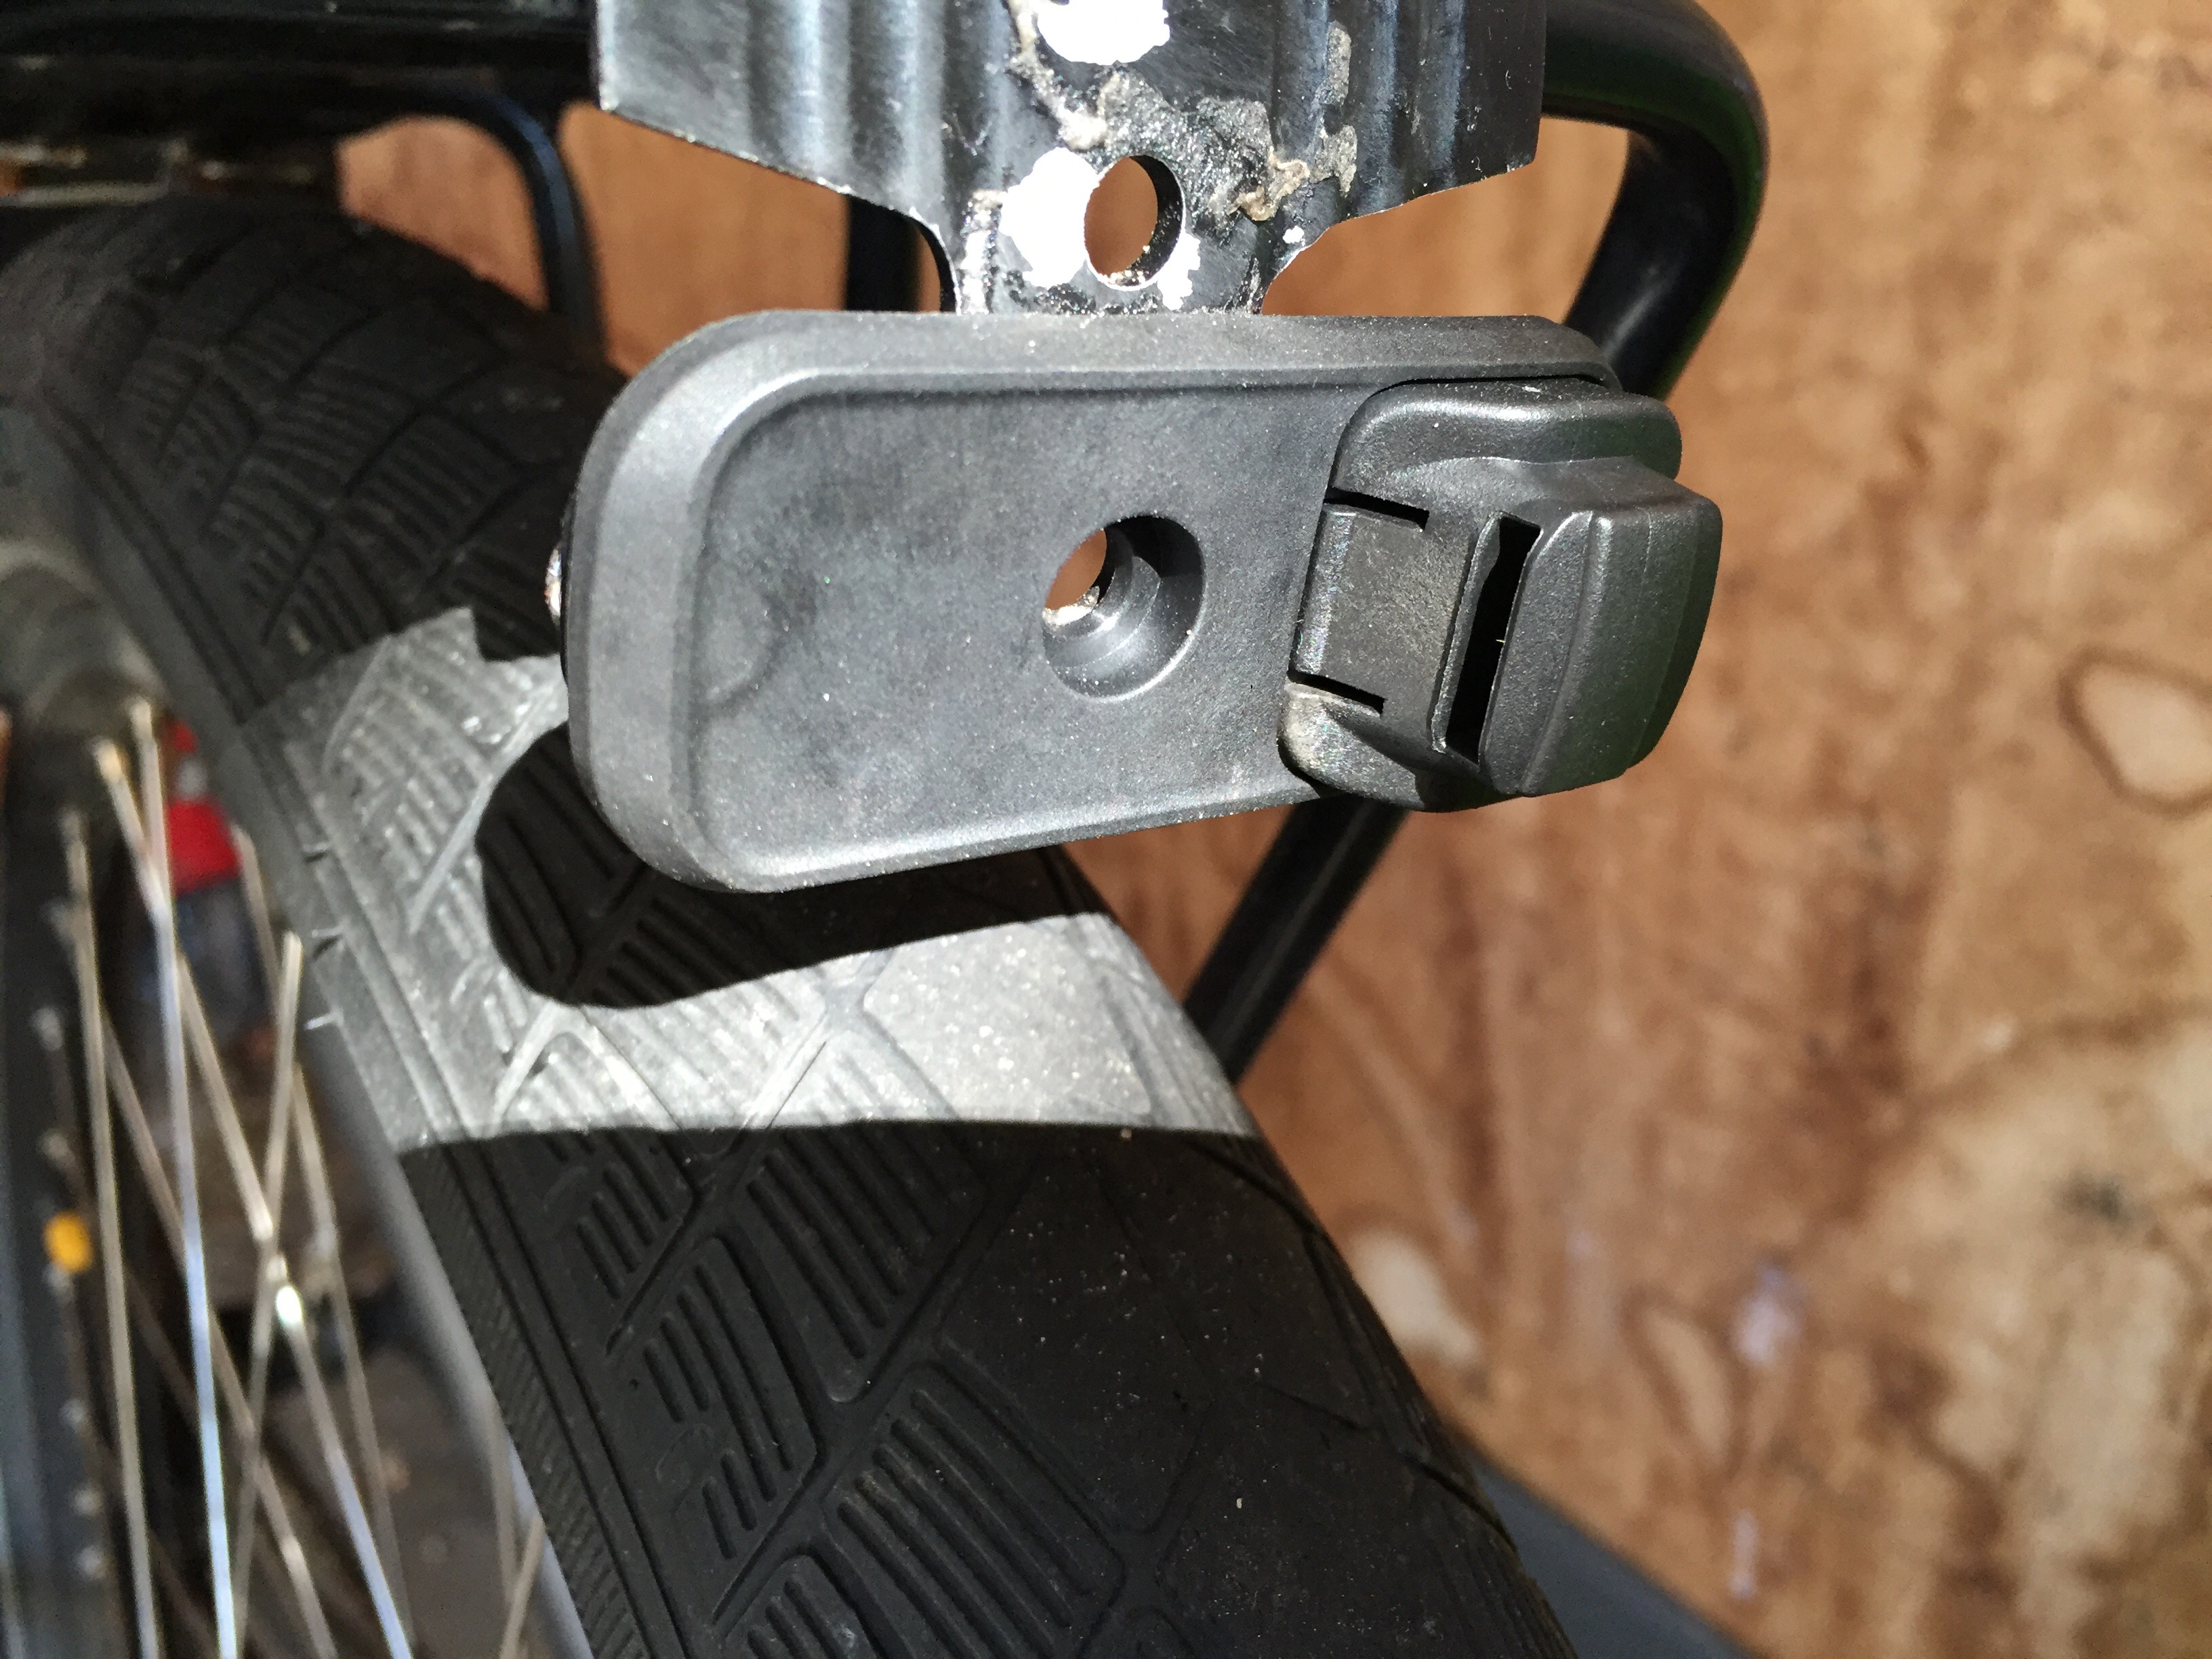
The Stix lights are rechargeable and charge via USB. They conveniently attach to the mount using the USB plug and it’s secured by a rubber hood.
Here’s an animation of how you take install/remove it from the mount:
Also, it has a useful feature where it indicates the charge whenever you shut it off. As you can see in this video, when you do a long press on the button, it shuts down. But before it shuts off, the LEDs will light at half-brightness indicating the charge level. The video shows two LEDs solid with the third blinking, so it’s approximately 83% charged.
This light seems like a great companion to my lithium-ion powered front light. I look forward to putting it through the paces over the winter.
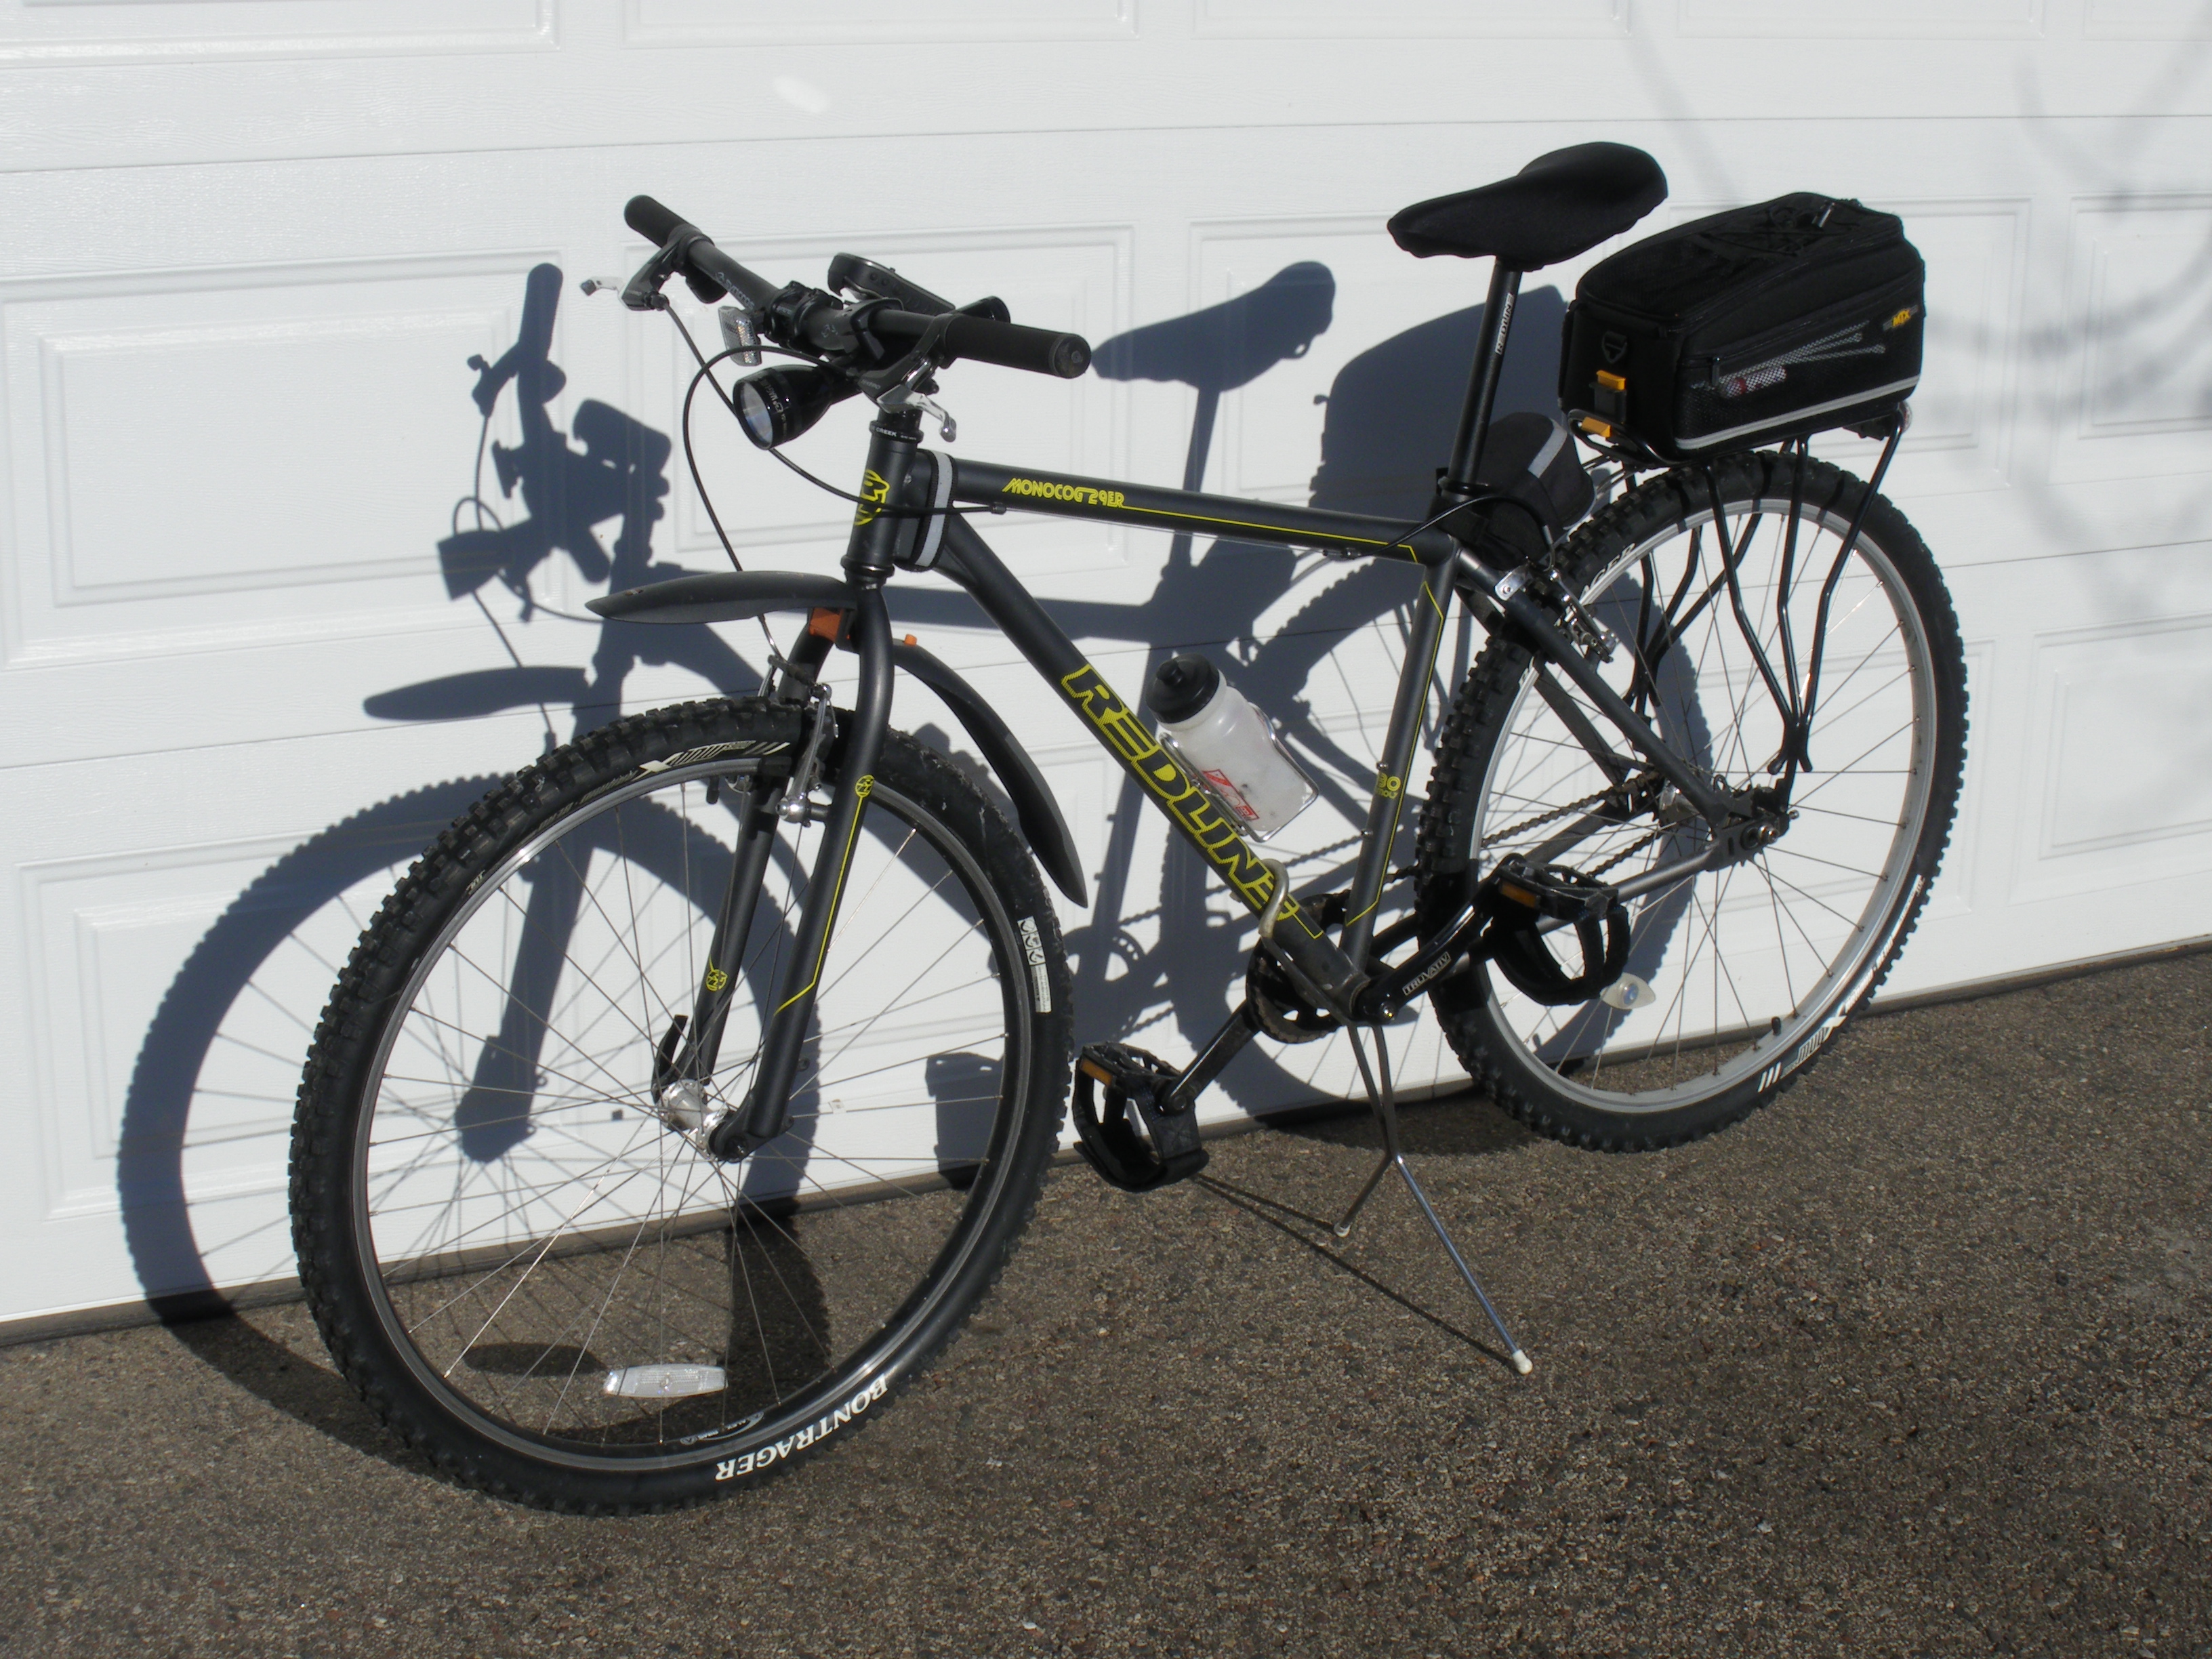
My friend poked fun at my bike saying it looks like a “cop bike.” I took stock and realized he had a point. From the cop bikes I’ve seen, I’d say mine fits most of these criteria, which is to say cop bikes are really just city-going mountain bikes:
Flat handlebars
Rack/trunk bag
Knobby tires sometimes replaced with semi-slick tires
Previously my bike also had a Greenfield rear-mount kickstand which are ubiquitous on cop bikes, but I had to forgo it because my trailer attaches in the same spot 🙁
Light Options
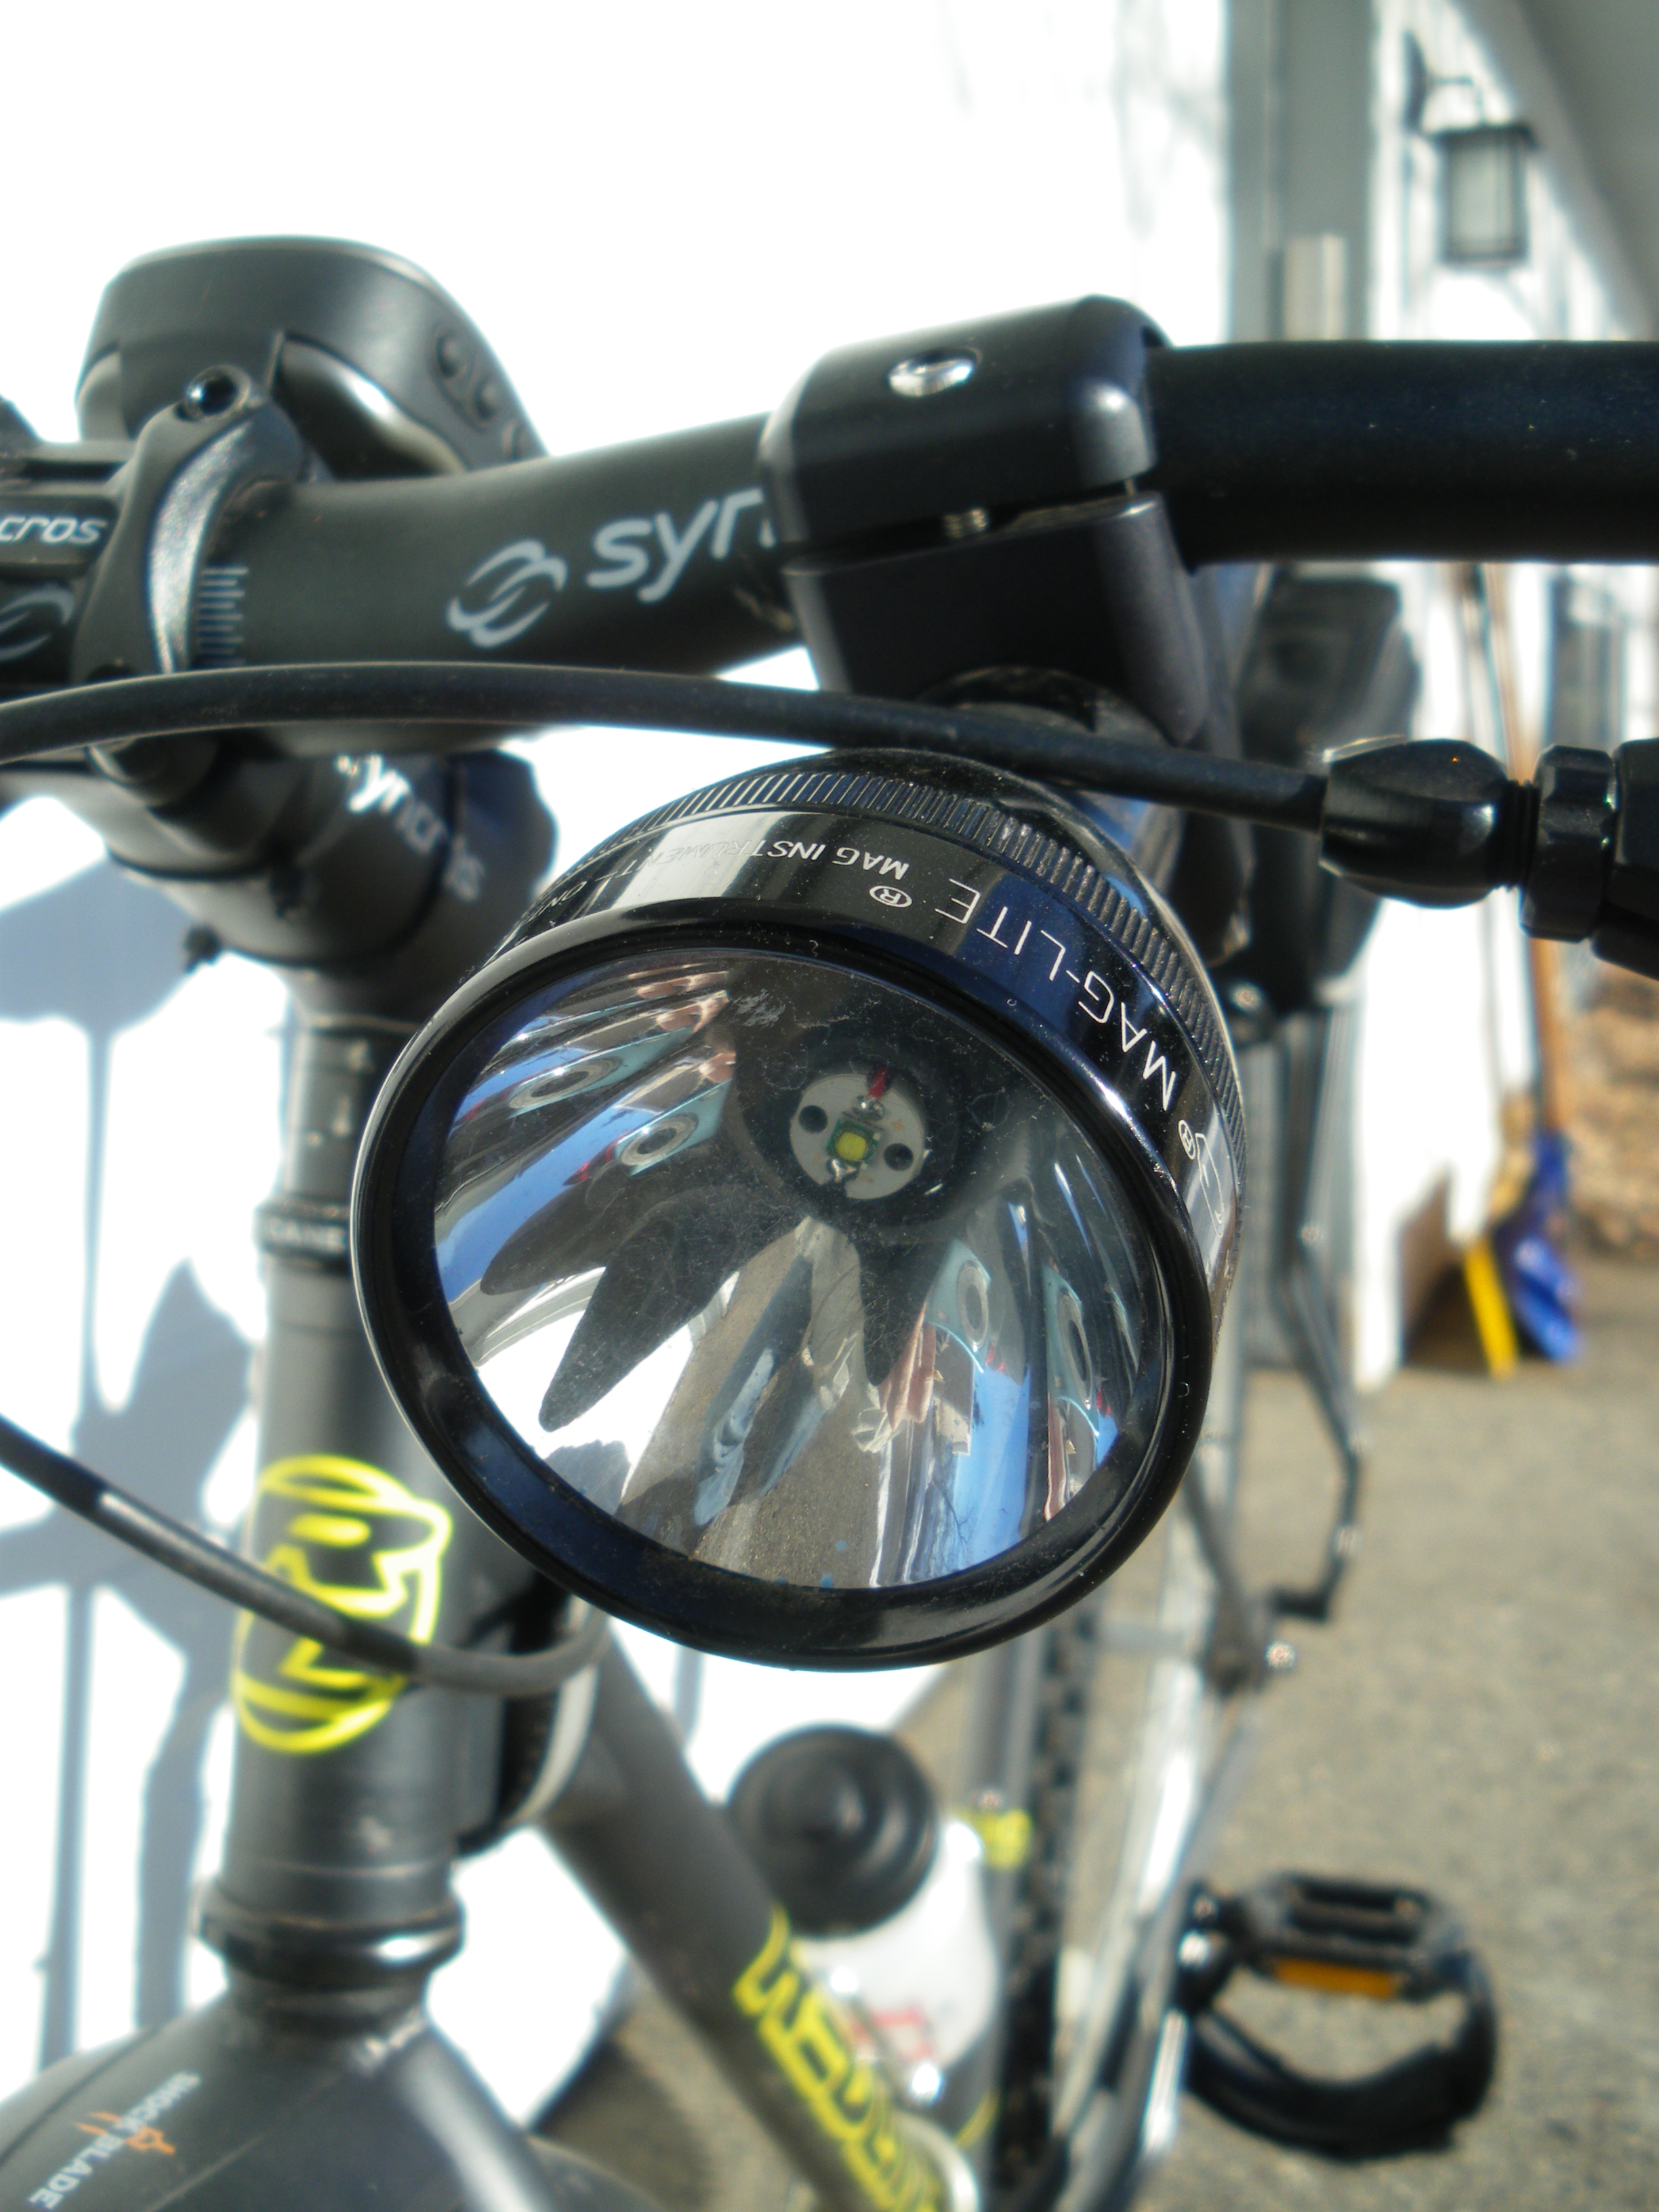
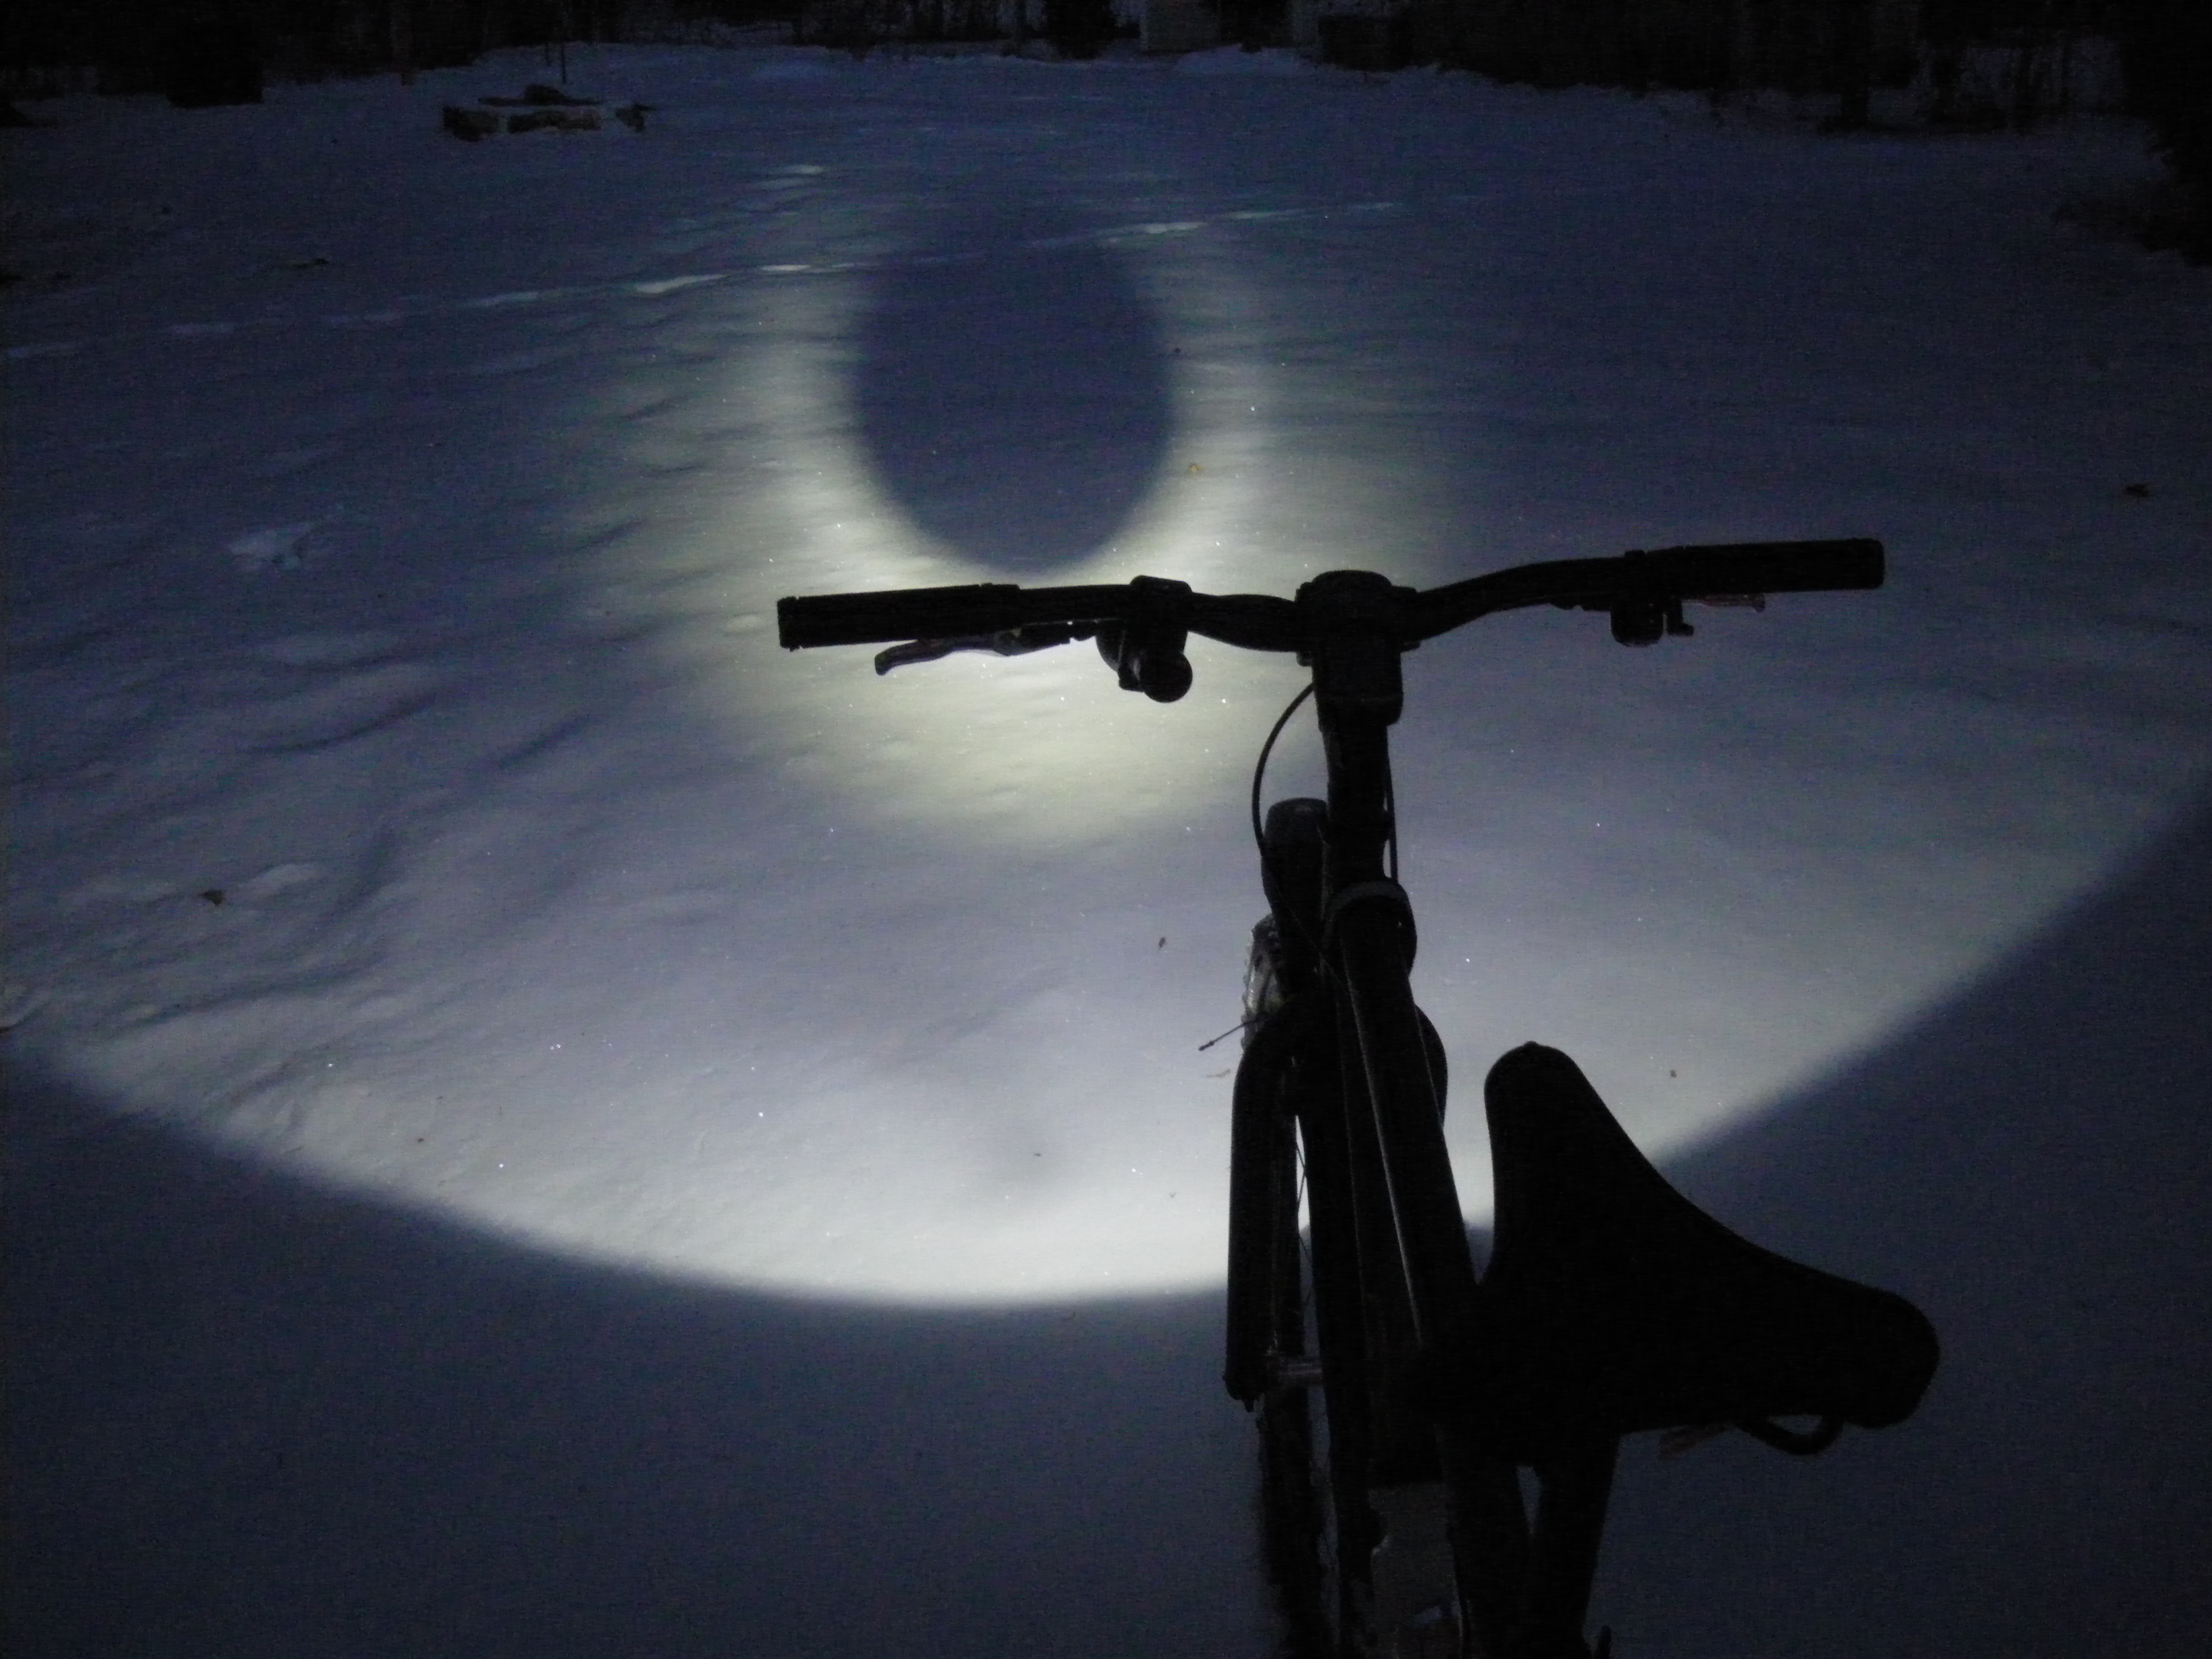
Let’s address the last part: useful lights. I’m going to just talk about the front since any old red LED will do for the back (I got mine at Ax-Man Surplus). There are two types of lights you can put on the front of your bike: to “see” or to “be seen.” If I’m riding at night, I want to see what I could potentially run over. Also, it doesn’t hurt if everyone else on the road can see me coming a mile away. To achieve this I could have gone one of two ways: I could get a NiteRider lithium rechargeable light for about $100 that’s bike-specific, or I could get creative with a “normal” flashlight, get similar light output and recharge-ability – and still have it be useful off the bike. Plus, a flashlight goes right along with the “cop” theme. Enter: the Maglite.
I will say that out of the box, the stock (incandescent) Maglites aren’t that great: light output is abysmal. However their construction is pretty darn good and you can get them just about anywhere. AND (can you believe it?) they’re actually one of the few products you can still buy that’s made in the USA. I bought a 2 C-cell Maglite ($20) at Beisswenger’s Do-it-Best hardware store.
To affix it to the bike, DKG makes a mount called the C-mount ($25). Sounds dirty, but it looks good and works well. Yes, the mount is more than the light at this point, but we’re about to replace all the guts of this flashlight anyway.
Maglite Upgrades
To really bump things up in the light department, I bought a Cree XP-G LED for my C-cell Maglite ($40). The product page carries this message:
WARNING: This light is capable of causing eye damage at close range. Please use the light responsibly!!!
You had me at eye damage. 260 measured lumens to be precise. And, you can still use the Maglite’s reflector to focus (or scatter) the light however you’d like.
Malkoff Maglite close-up
Anyway, some of you may have noticed that I purchased the wrong size(!) LED: 3 cell, but my flashlight is a 2 cell. Not to worry, this was intentional, because I equip the flashlight with two 25500 lithium-ion batteries rated at 3.7v each. Times two they equal 7.4-8.4v (depending on charge) – about that of 3 or 4 regular 1.5v alkaline batteries. The combination provides good light with recharge-ability in a smaller package.
Strange batteries like this are easy to find through electronic cigarette (vape/vapor) online shops such as Kalamazoo Vapor Shop. The cells run about $10-15 each – kind of expensive, but keep in mind they have a protective circuit board contained within.
Protected vs. Unprotected Cells
I used to have two normal (unprotected) cells. The unprotected cells posed two problems:
Second, unlike cell phones and computers, my flashlight doesn’t have a safety device to automagically turn off the light when the batteries are perilously low – the idiot behind the handlebars decides when they turn on/off. Long story short – I think I left the light on all night by accident one time and one of my unprotected cells dropped to 0.1 volts and can no longer be (safely) charged back up. Use protection! Isn’t that what they teach kids in school? Protected cells’ internal circuit boards prevent them from running too low. I also recommend getting an extra pair of batteries so you can swap out easily when the other needs a charge.