I never like the idea of getting a kid summer stuff (bikes, skateboards, etc) for Christmas because in Minnesota you have to wait another 4 months before you can even think about using it. Getting her a stand-up paddle-board (SUP) for her birthday in May would be a better idea.
I didn’t actually make it 6 months, only three. In that time, the price on this thing didn’t budge. As much it looks like a top-quality boat, I was reluctant to drop $500 on something that might not be a hit. So I kept looking 👀
What I found in November is the Retrospec brand, an LA-based outdoor recreation and fitness company. They also have an eight-foot paddle board for kids for $250. I subscribed to their notifications and waited, but I didn’t have to wait long, and was able to snag the board on sale for $200.
It sat in the box for a couple of months waiting for my daughter’s birthday to roll around. She opened it earlier this month, and finally over Memorial day weekend, we were able to take it out.
The board itself is great, it comes with everything all nicely packed in a backpack to carry it around. Inflation was easy and honestly I’ll probably keep it inflated for the summer. We just take the fins off while moving it, and they’re easy to snap on and off.
She did great on it, even on a windy day 🌬️ The only time she had a problem was near the shore when the wake board boat wake came in, creating some big waves! 🌊
My only regret is that we didn’t get a photo of her on the maiden voyage 😓
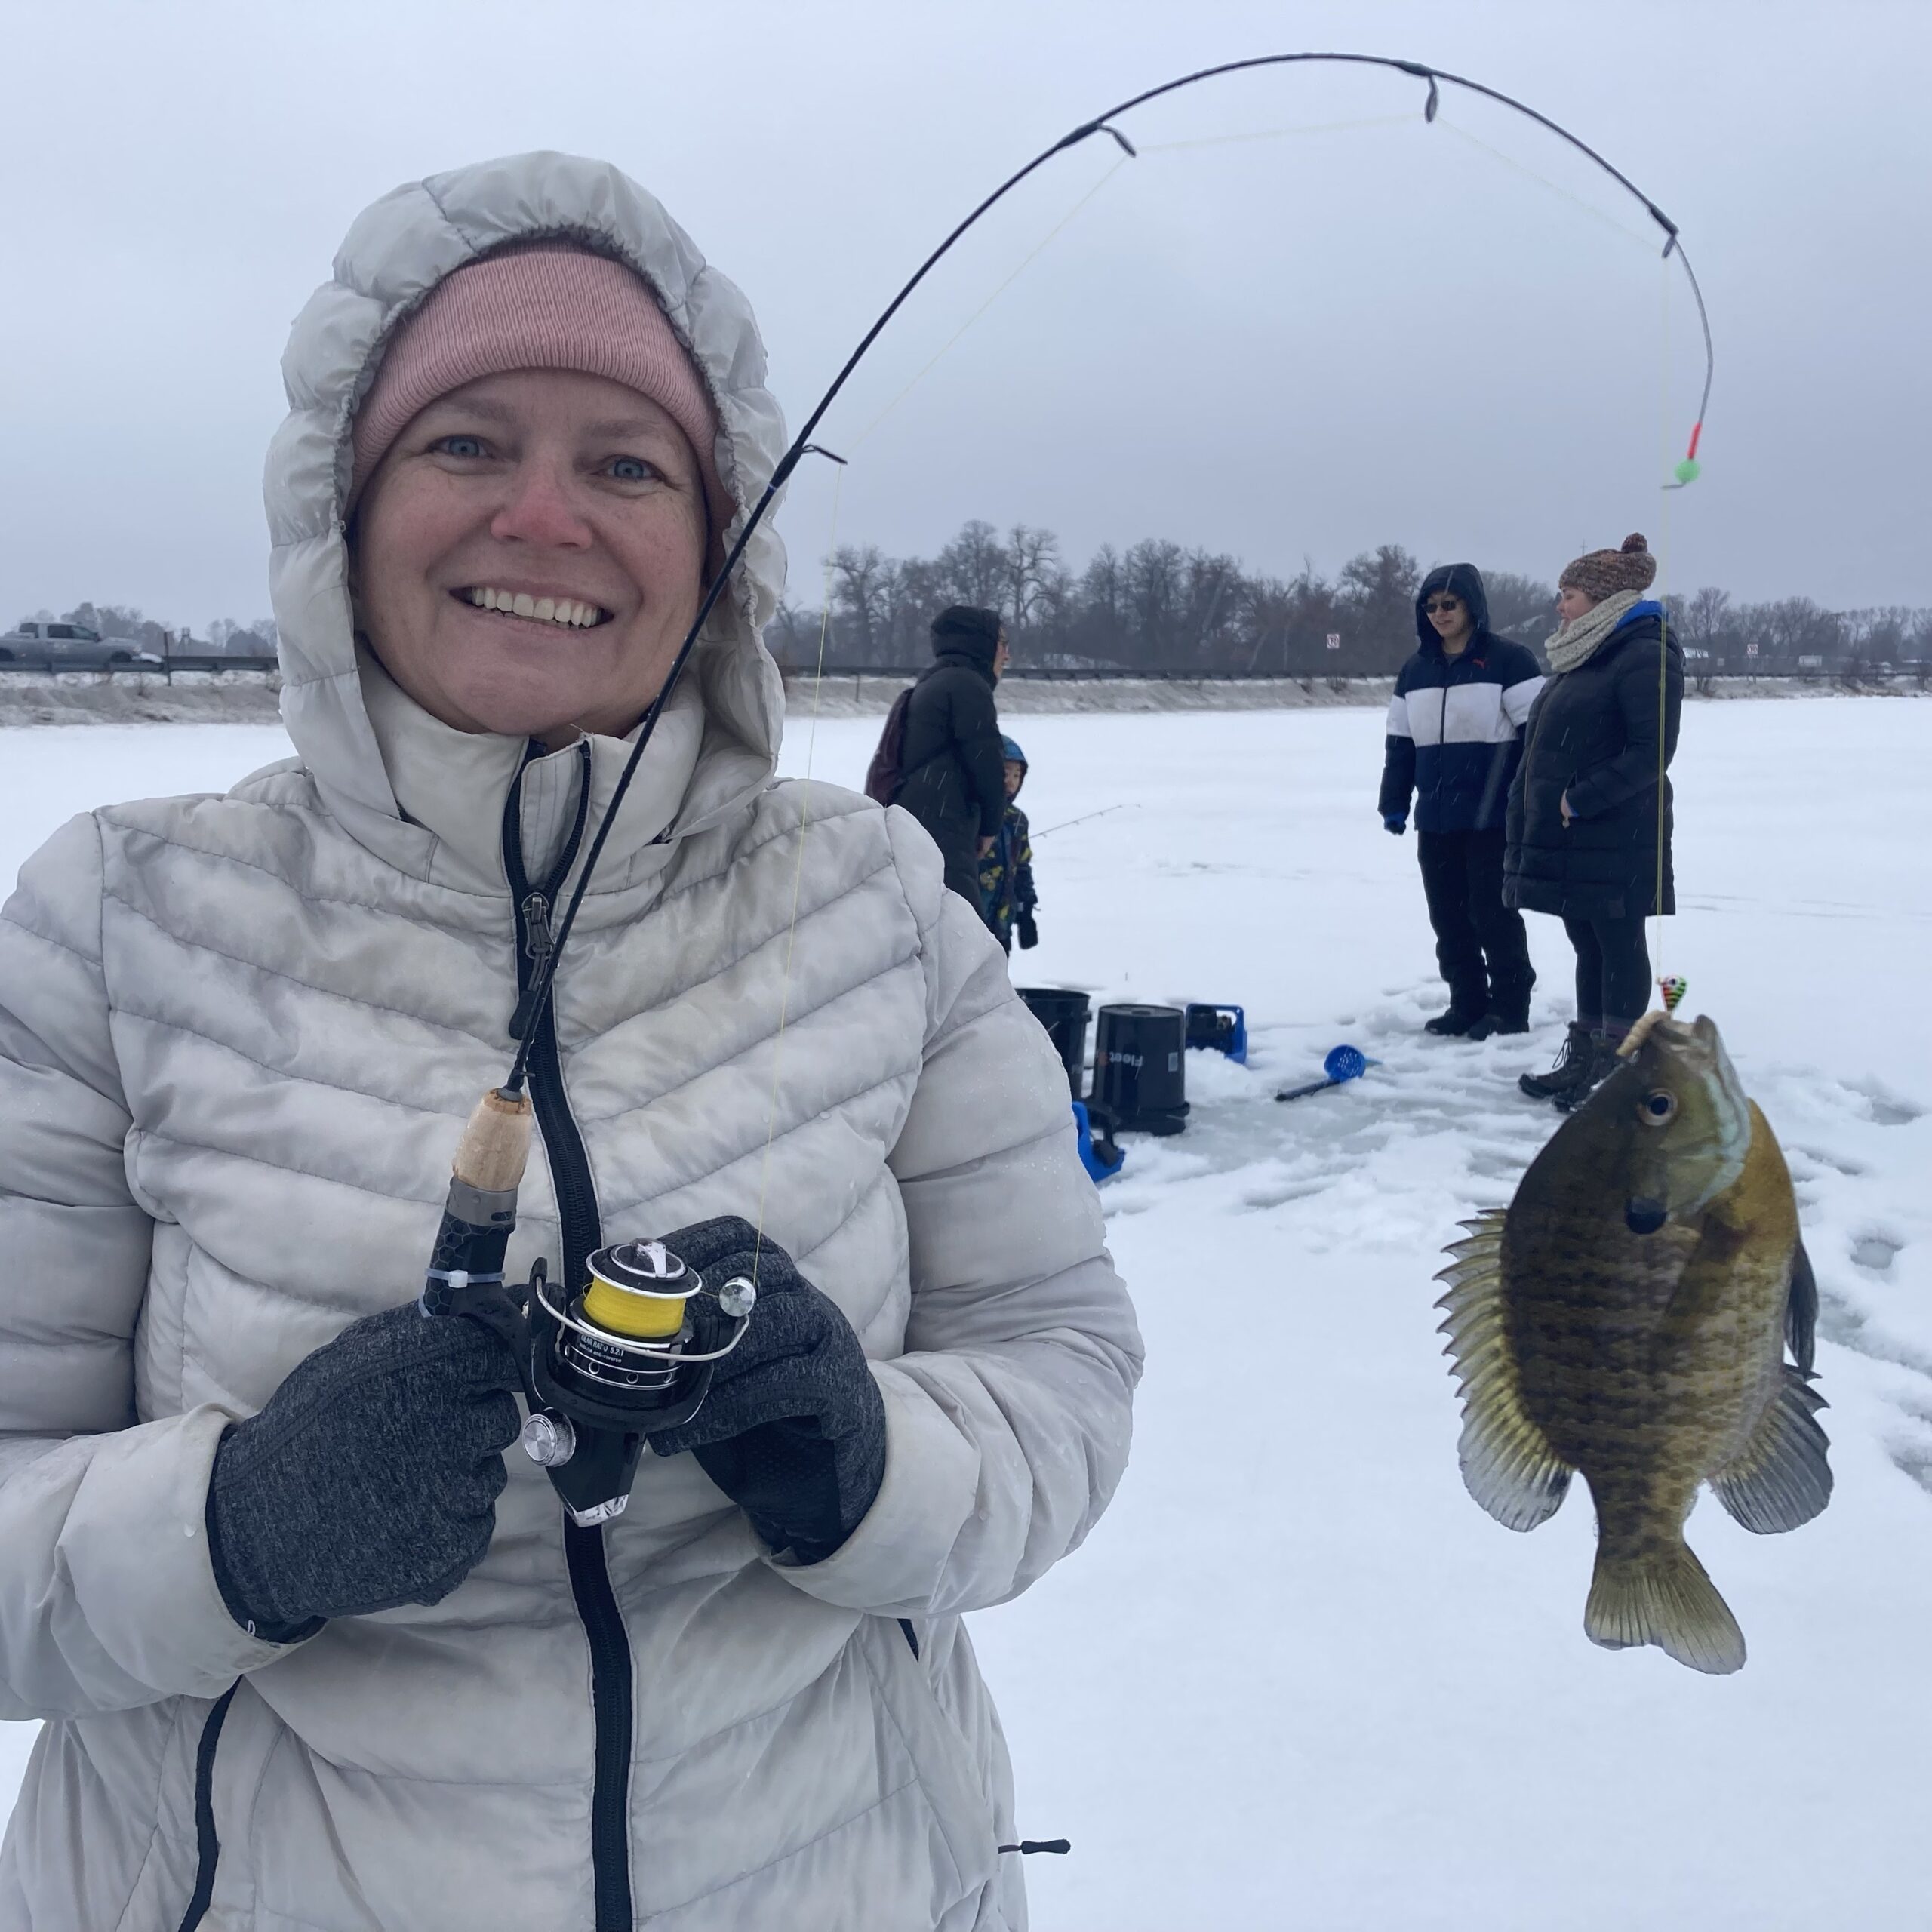
For the 2nd year in a row, I coerced my family to participate in a Parks & Recreation ice fishing event on MLK Day. It coincides with the Minnesota DNR’s annual free family ice fishing weekend. The Fridley Parks & Recreation event was hosted by Fishing for All. For $5 I don’t think you can beat it.
While I do enjoy fishing, ice fishing has never been my jam. But this was so fun and easy that it even made me think twice about getting some ice fishing gear…
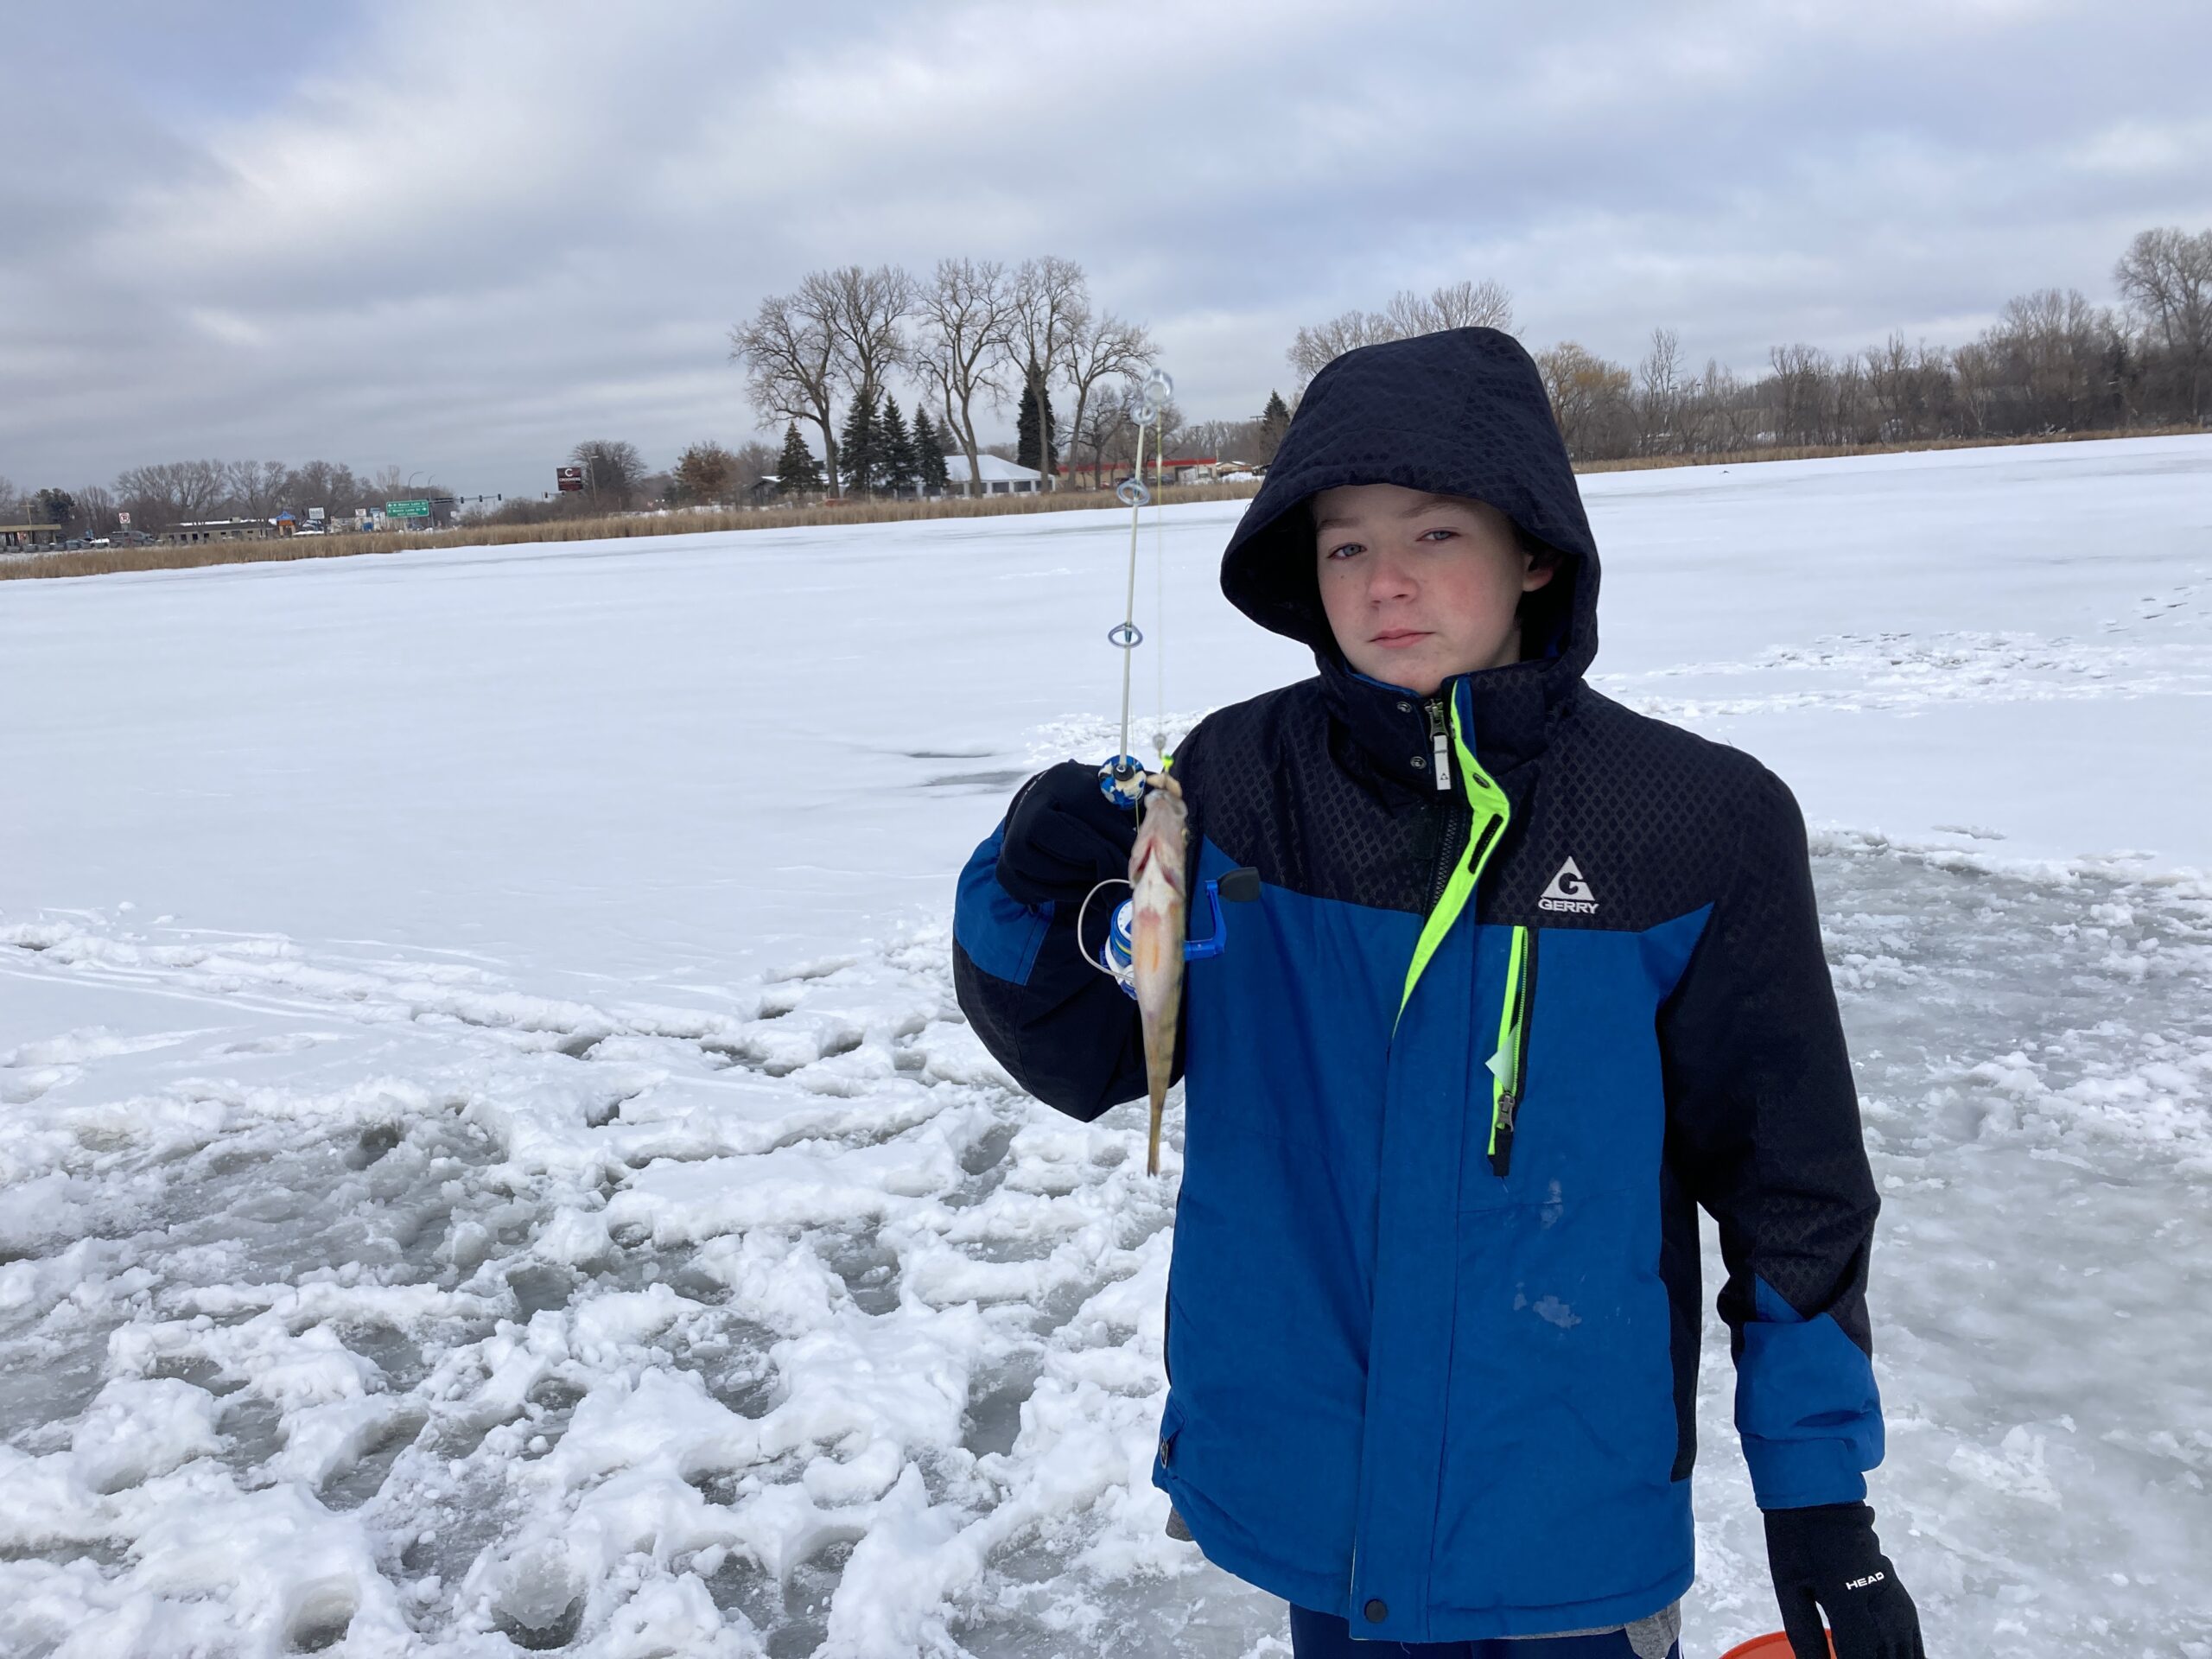
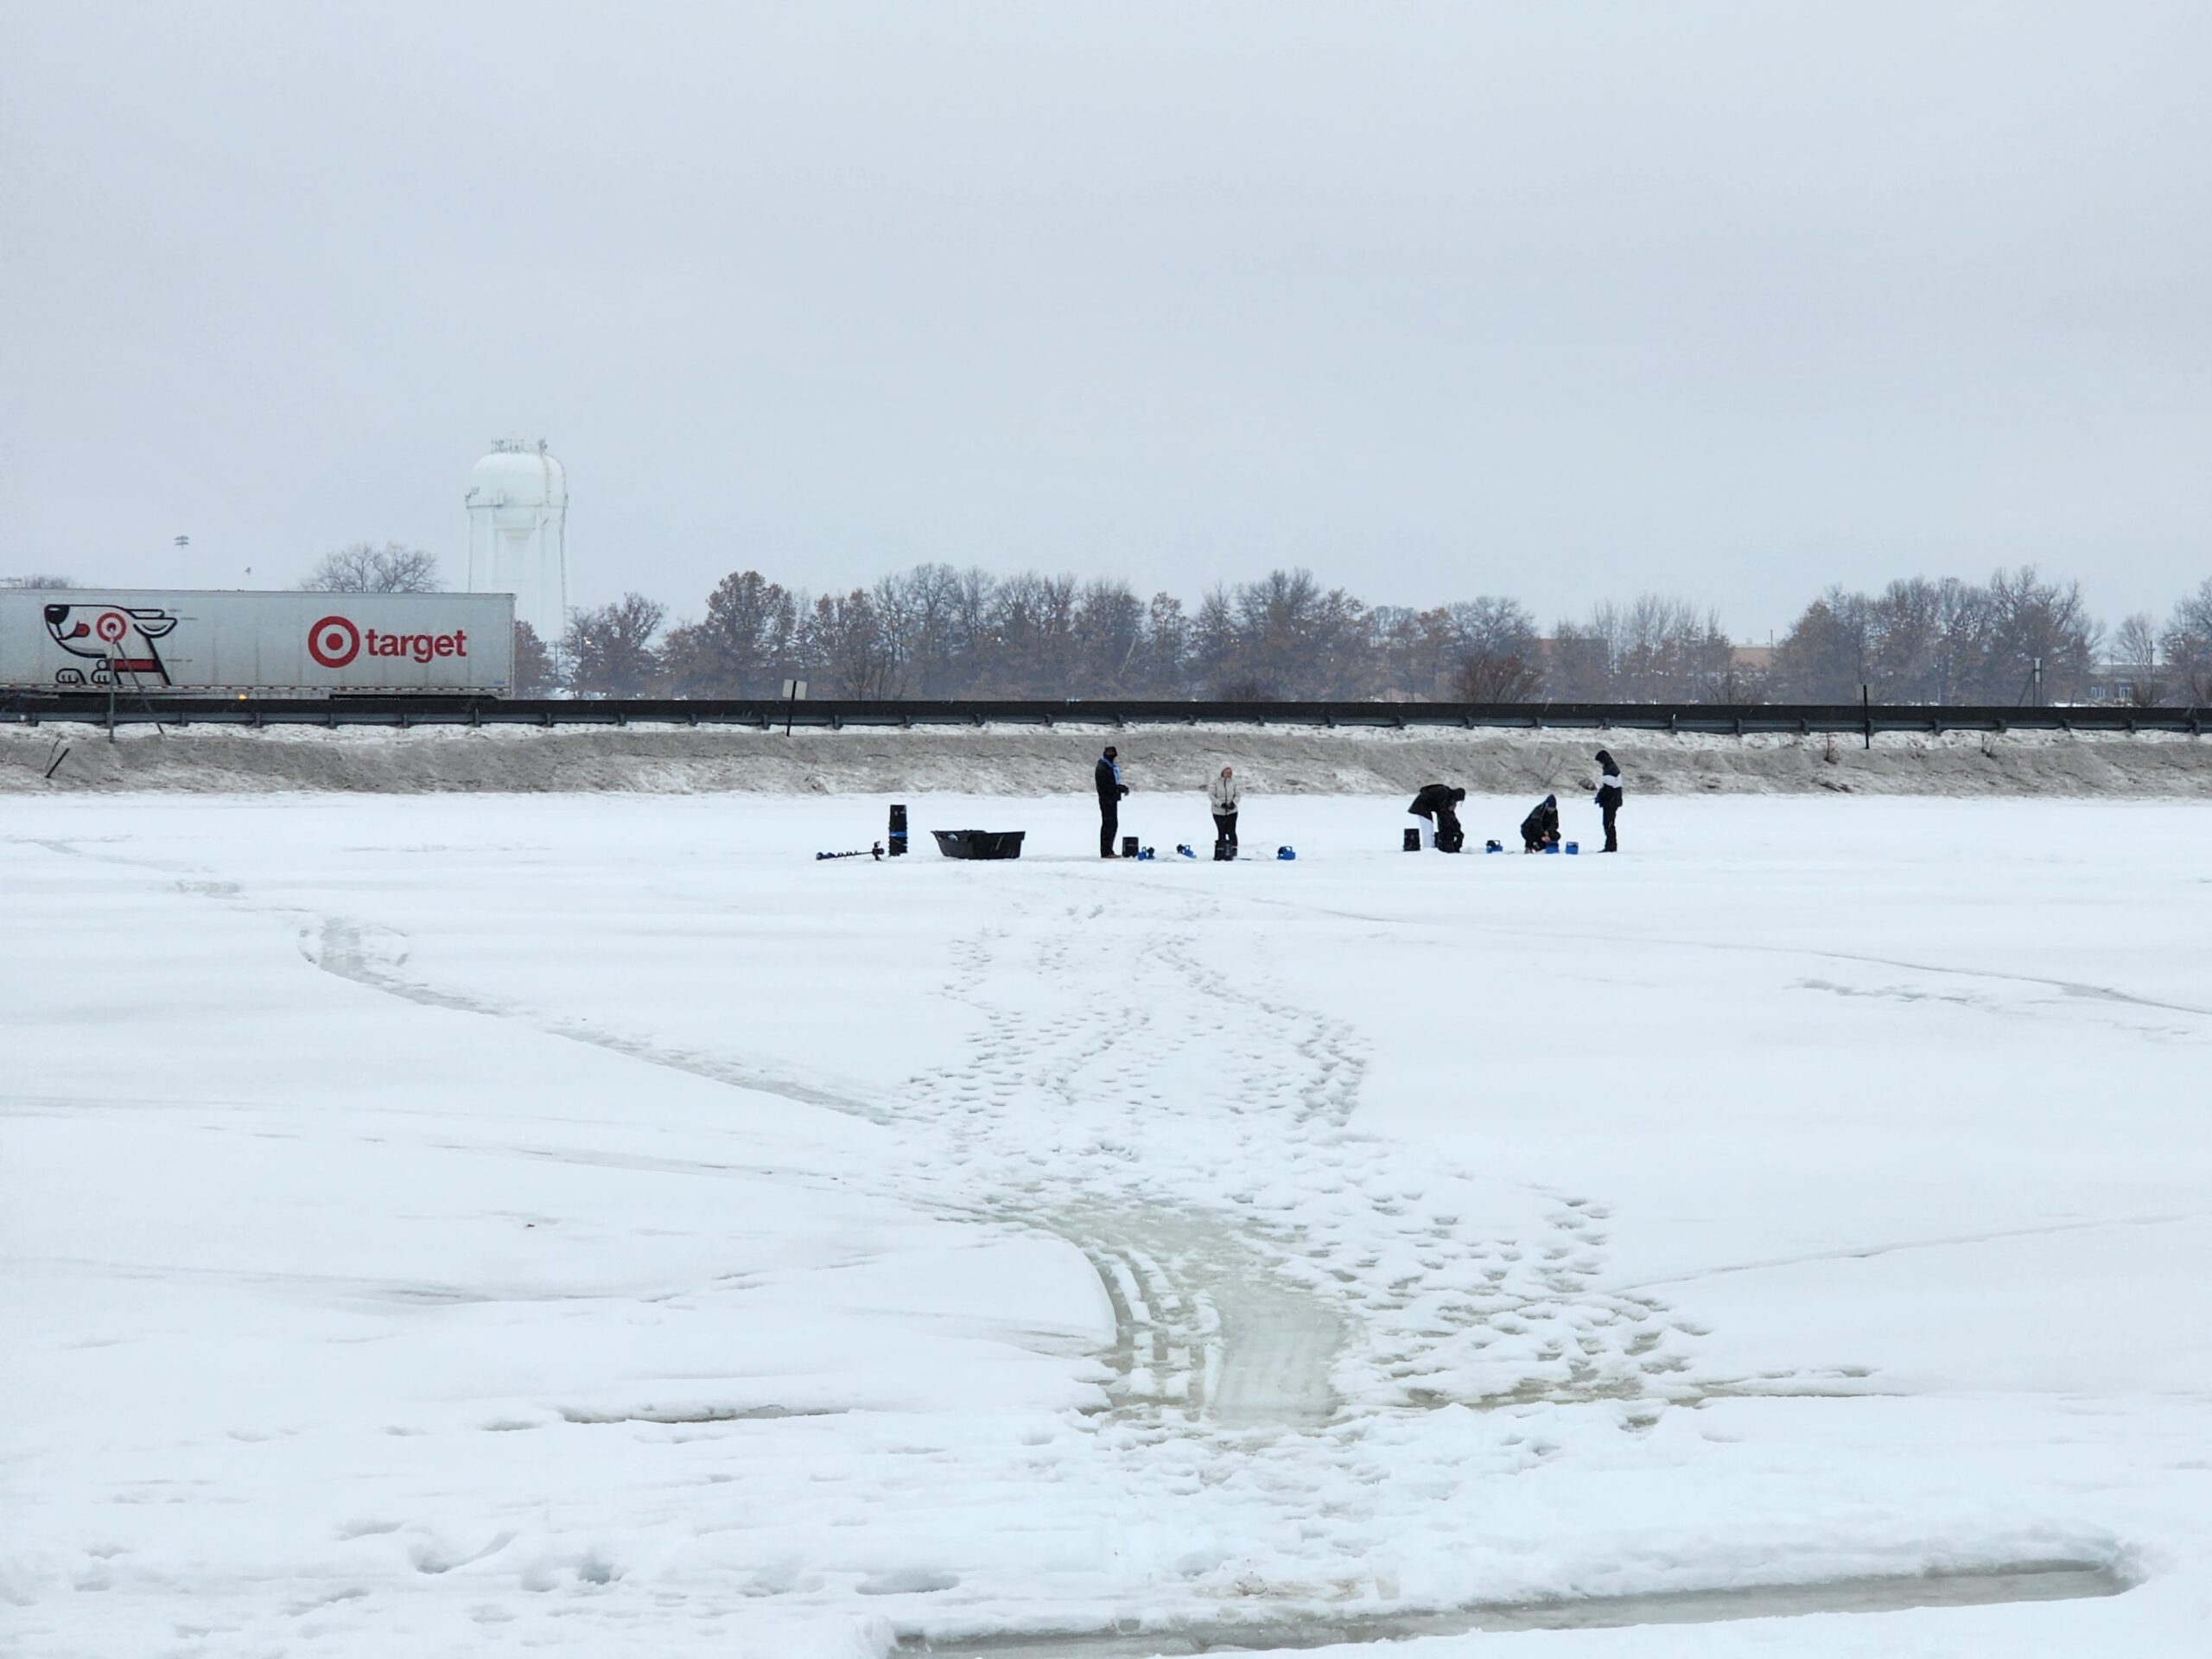
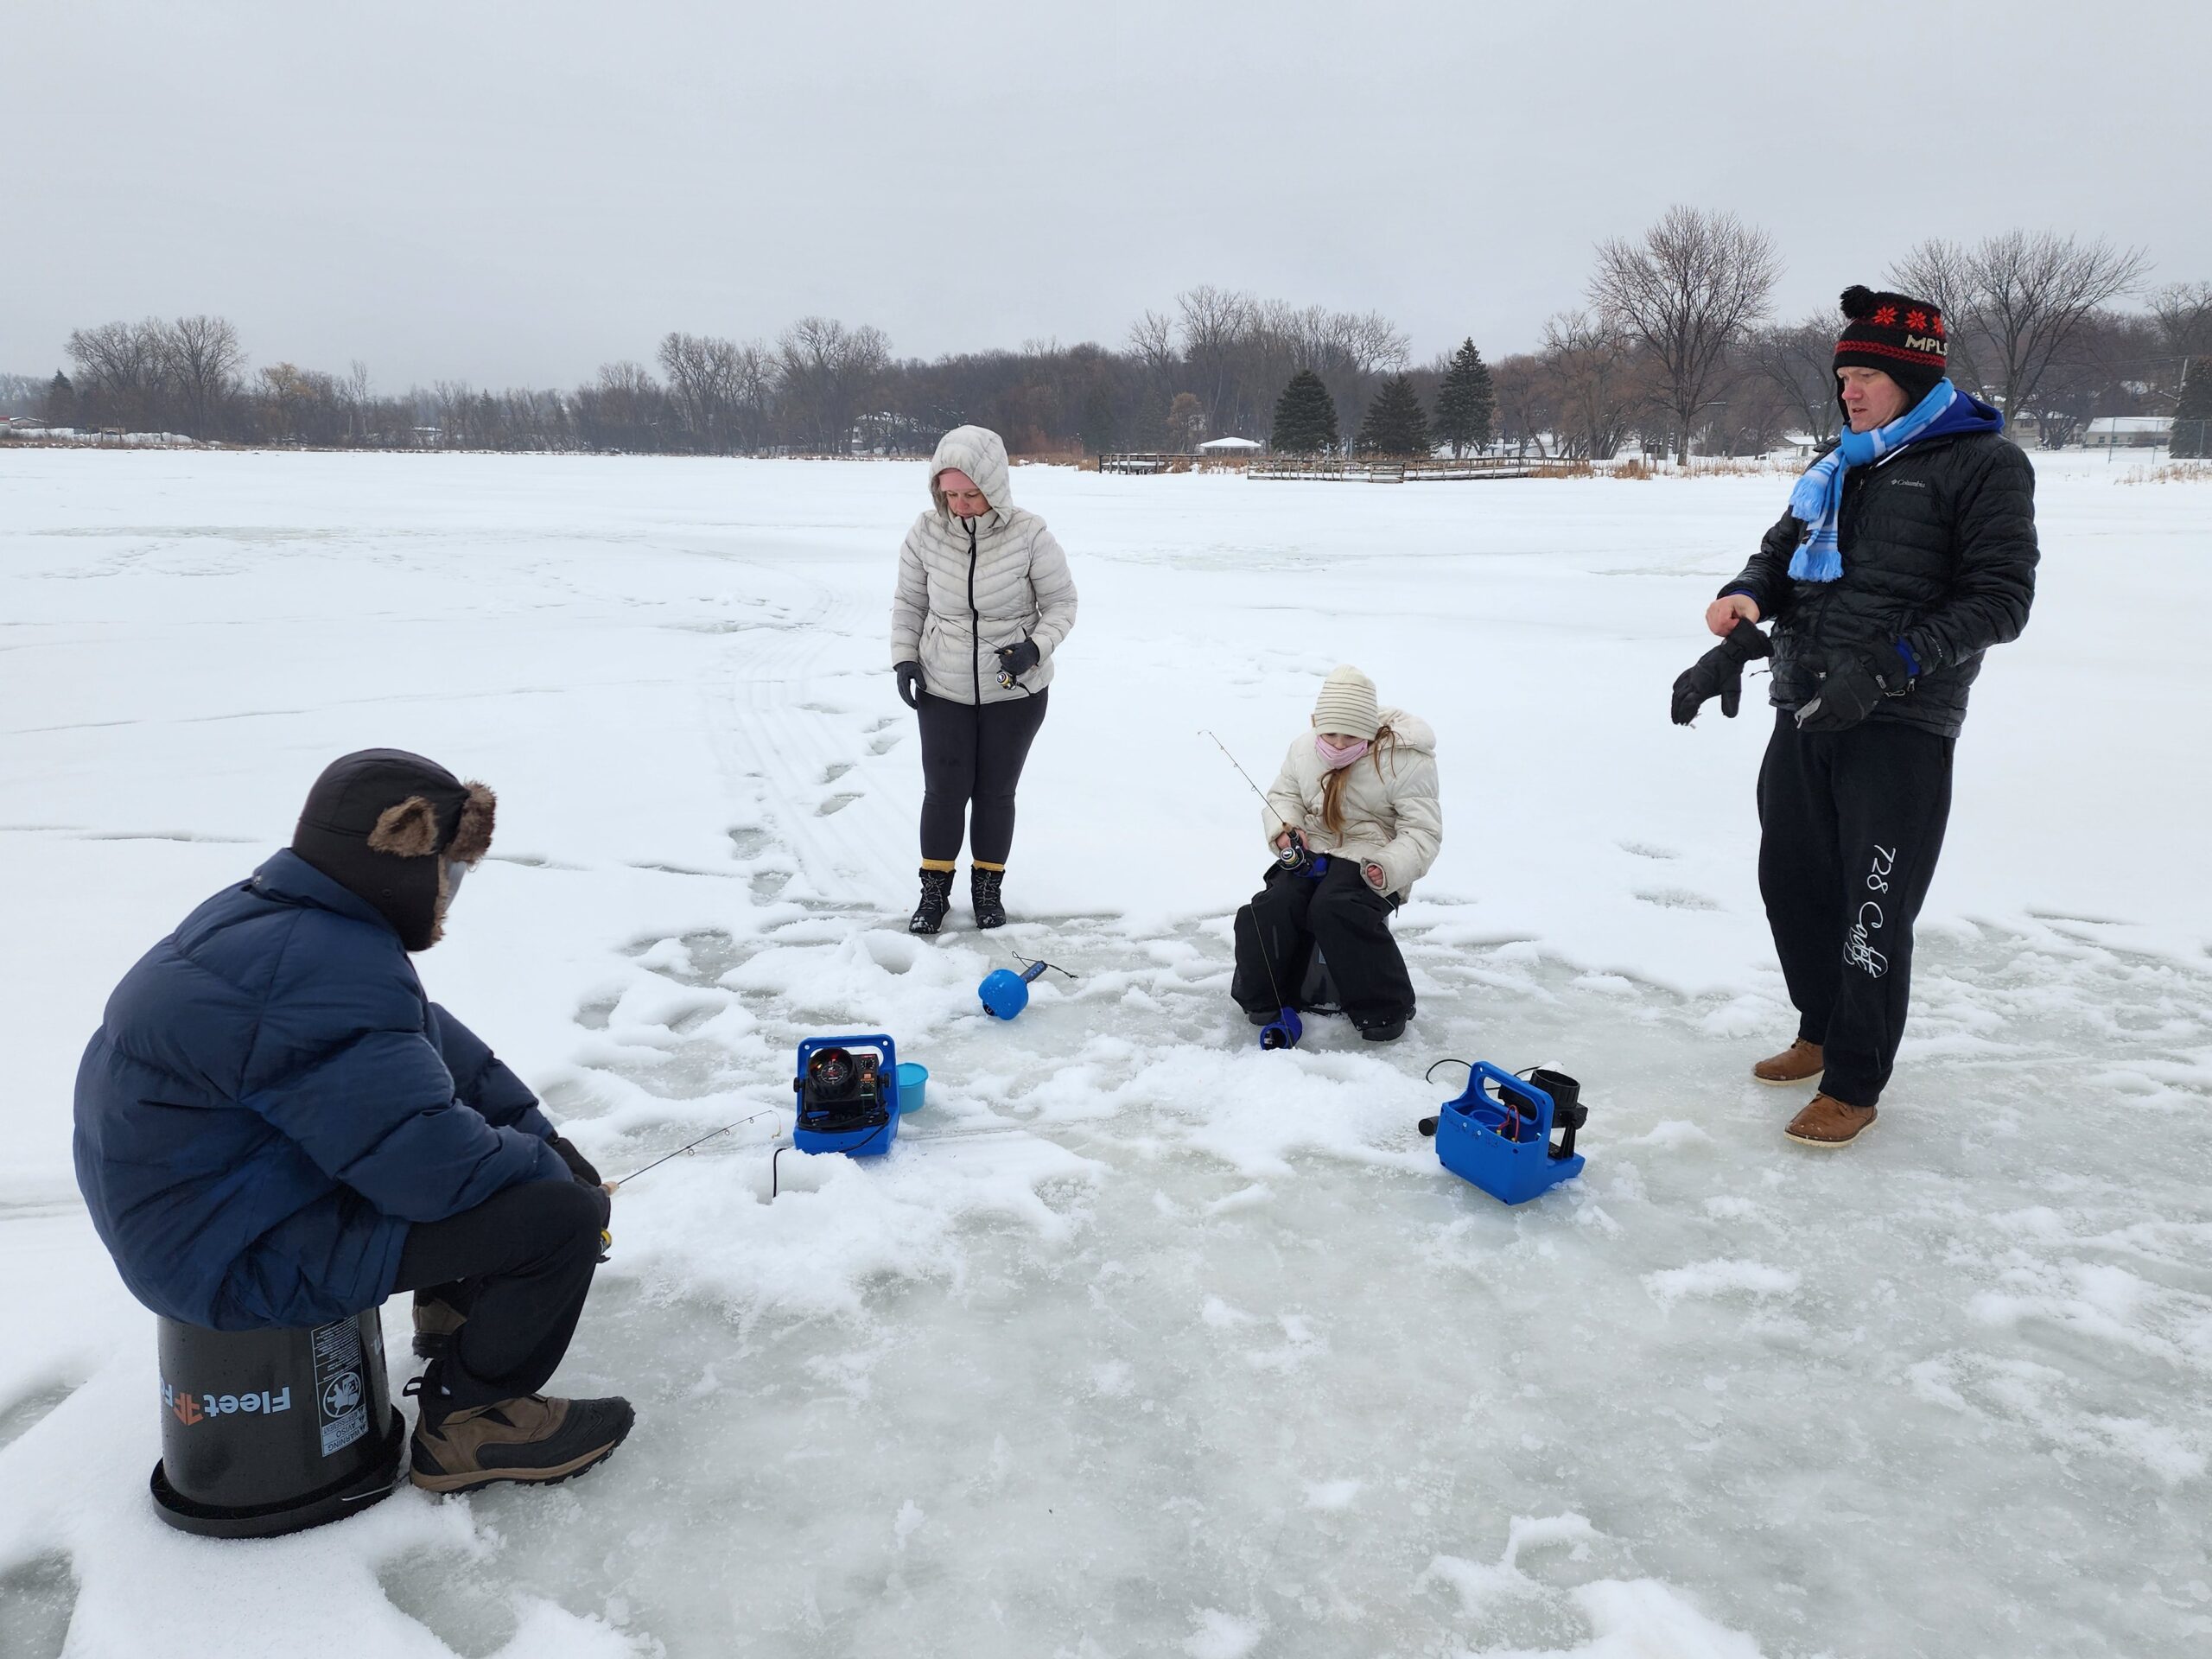
Since the free fishing weekend coincides with MLK day, many people are already off of work. I signed up for the early afternoon session and walked with the family down to Moore Lake during my lunch hour. The guides were super knowledgeable, and they had everything set up and ready to – including bait! 🪱
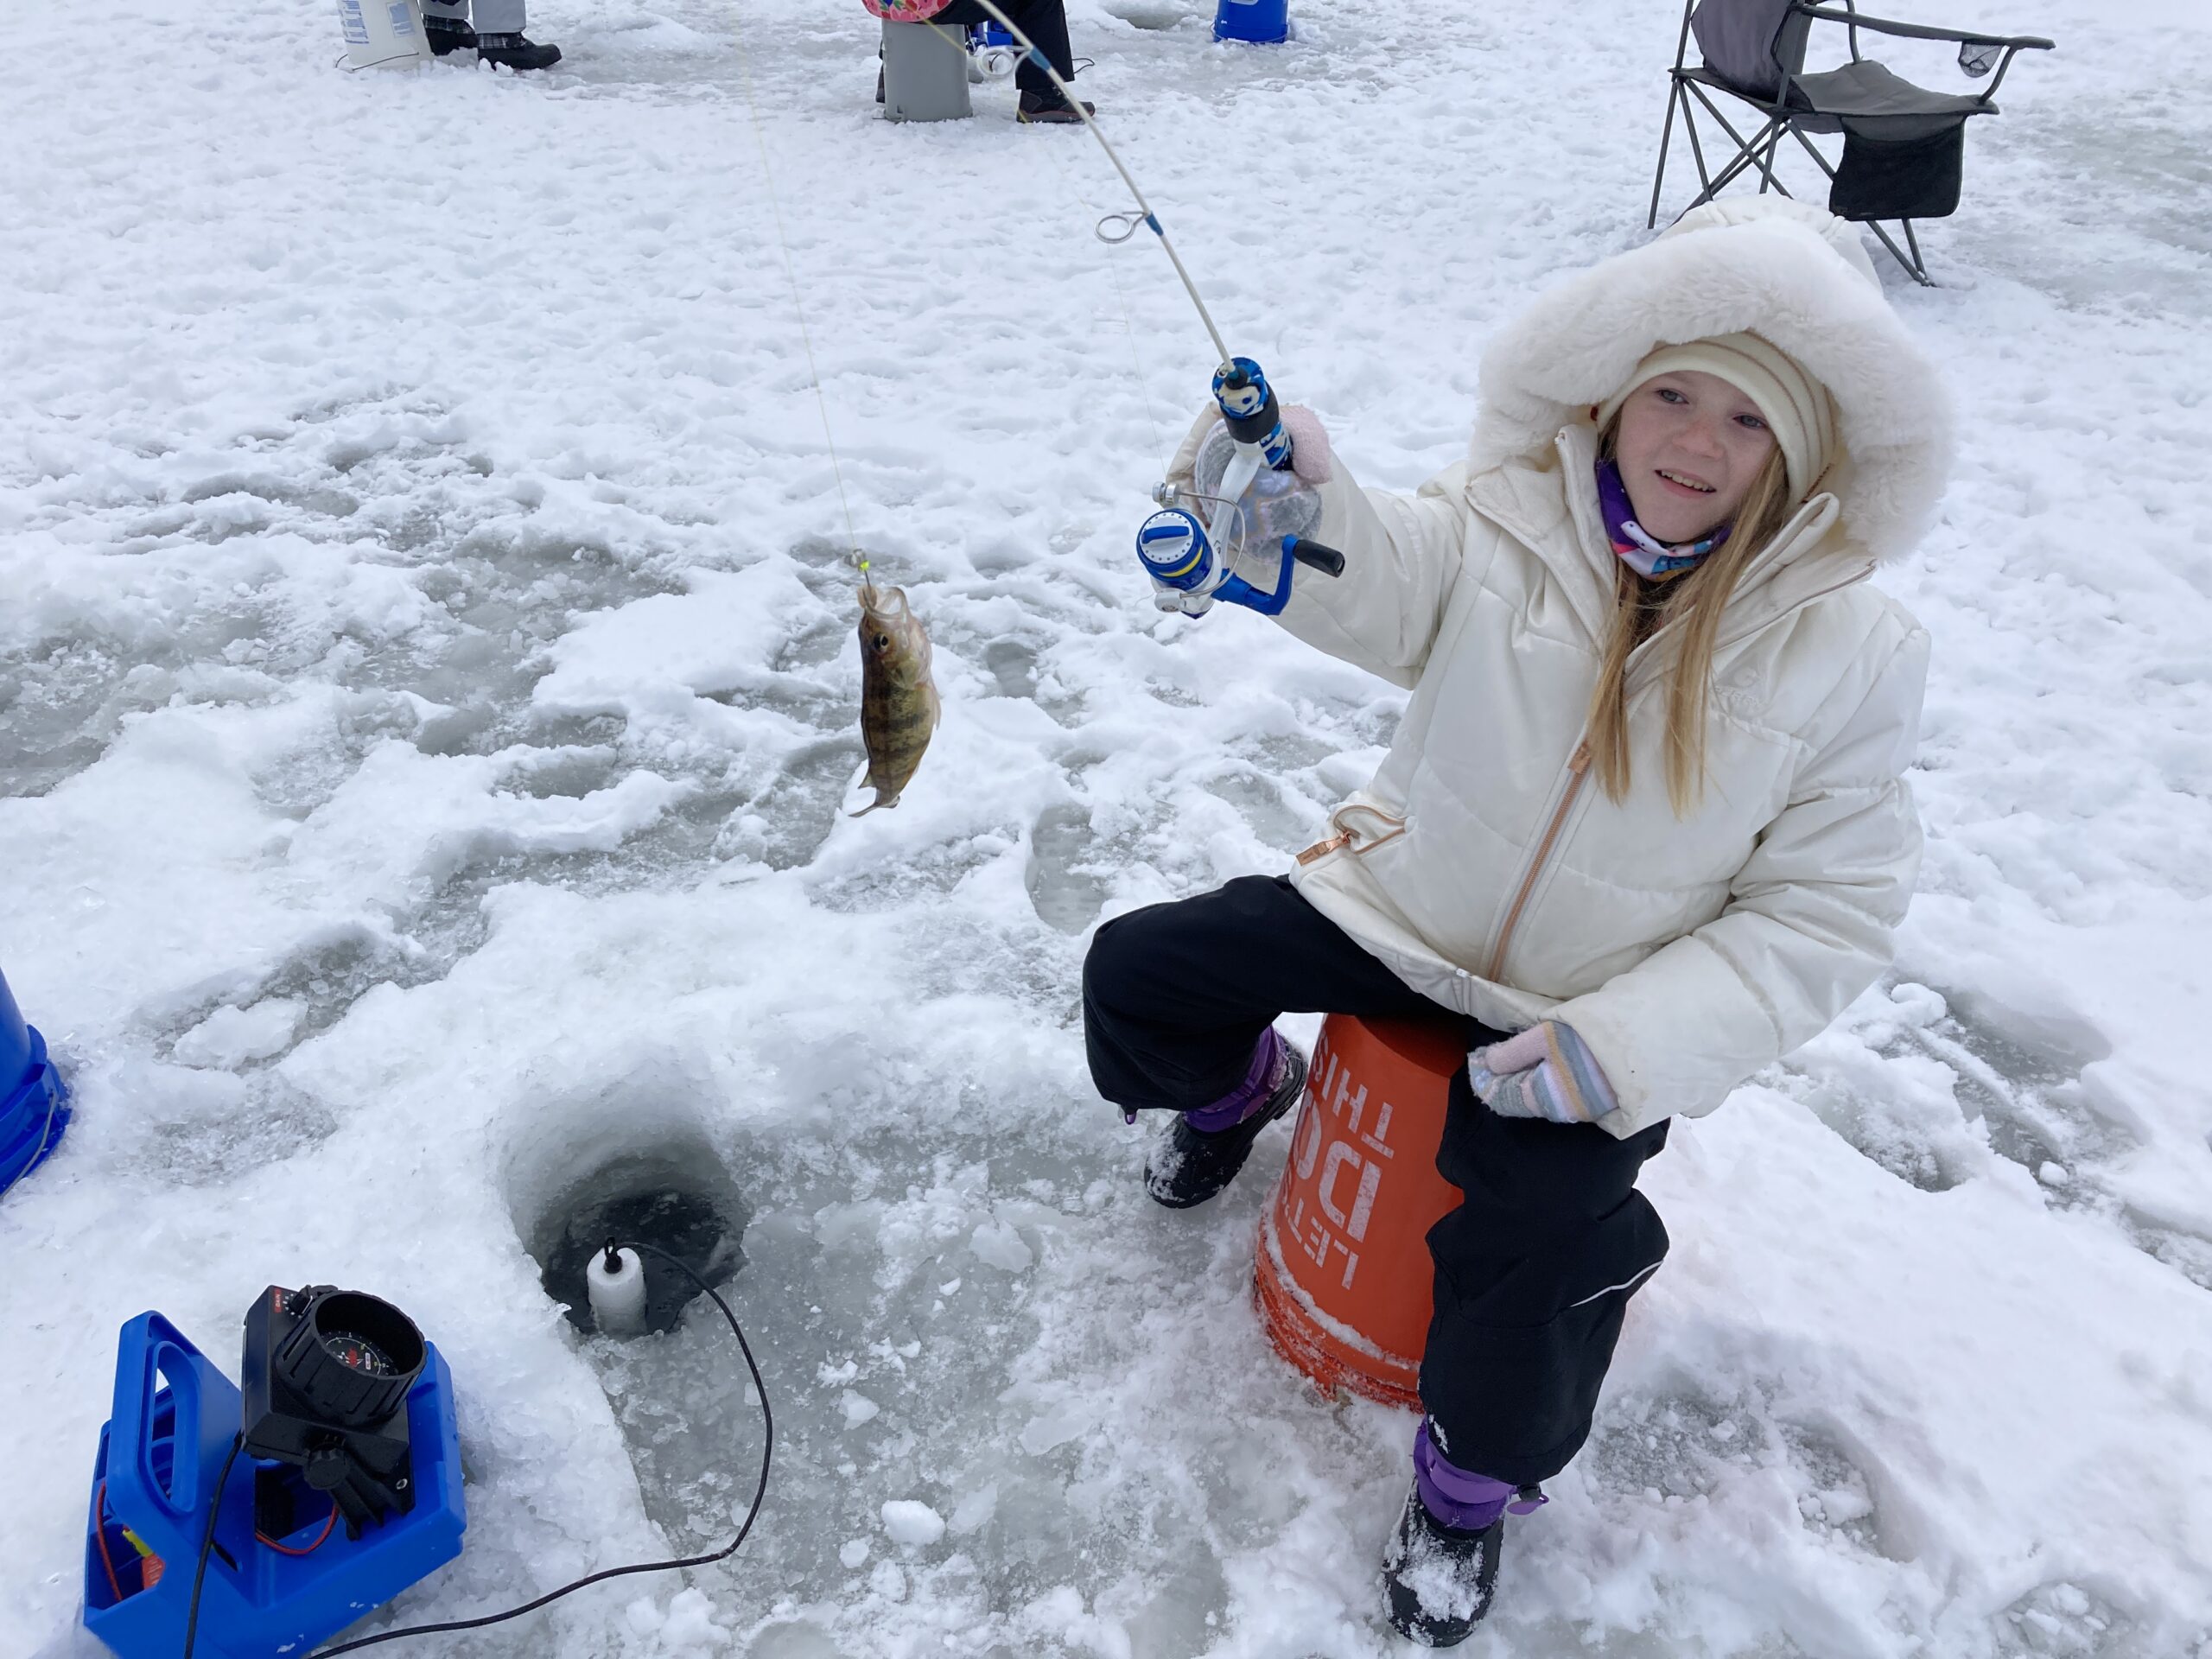
They talked about ice safety and showed the depth of the ice (over 20″ this and last year) – my 9yo daughter was especially concerned about this. The guide had half a dozen holes already augered, with a 5-gallon pail to sit on and Vexilar sonar rigs ready to go. They supplied the ice fishing rods and even had bait ready to drop in. Both times we’ve gone, everyone caught at least one fish.
2022 Catches
In 2022 all of our catches were small perch.
Marlo became the media darling of Fridley as her picture was featured in both the Fridley newsletter and the Parks & Rec catalog.
No aerator for 2023
For this year, there’s sort of an interesting experiment taking place. Moore Lake Park is being renovated in 2023. Part of the renovation includes the removal of a building that houses the aeration pump, so it’s not being run during the 2022-2023 winter season.
While the aeration system was installed to prevent winterkill, the real risk of winter fish kill is on the west side of the lake, where the water is extremely shallow. The aeration, which was intended for good, also has negative consequences. Like leaving a hole in the ice which tempts waterfowl to stay for the winter, rather than migrating south. Whatever the case is, I’m glad it’s being tried, and eager to see what the result is in the spring.
2023 Catches
Since the aerator wasn’t running, we were able to fish the spot that would normally be a hole in the ice.
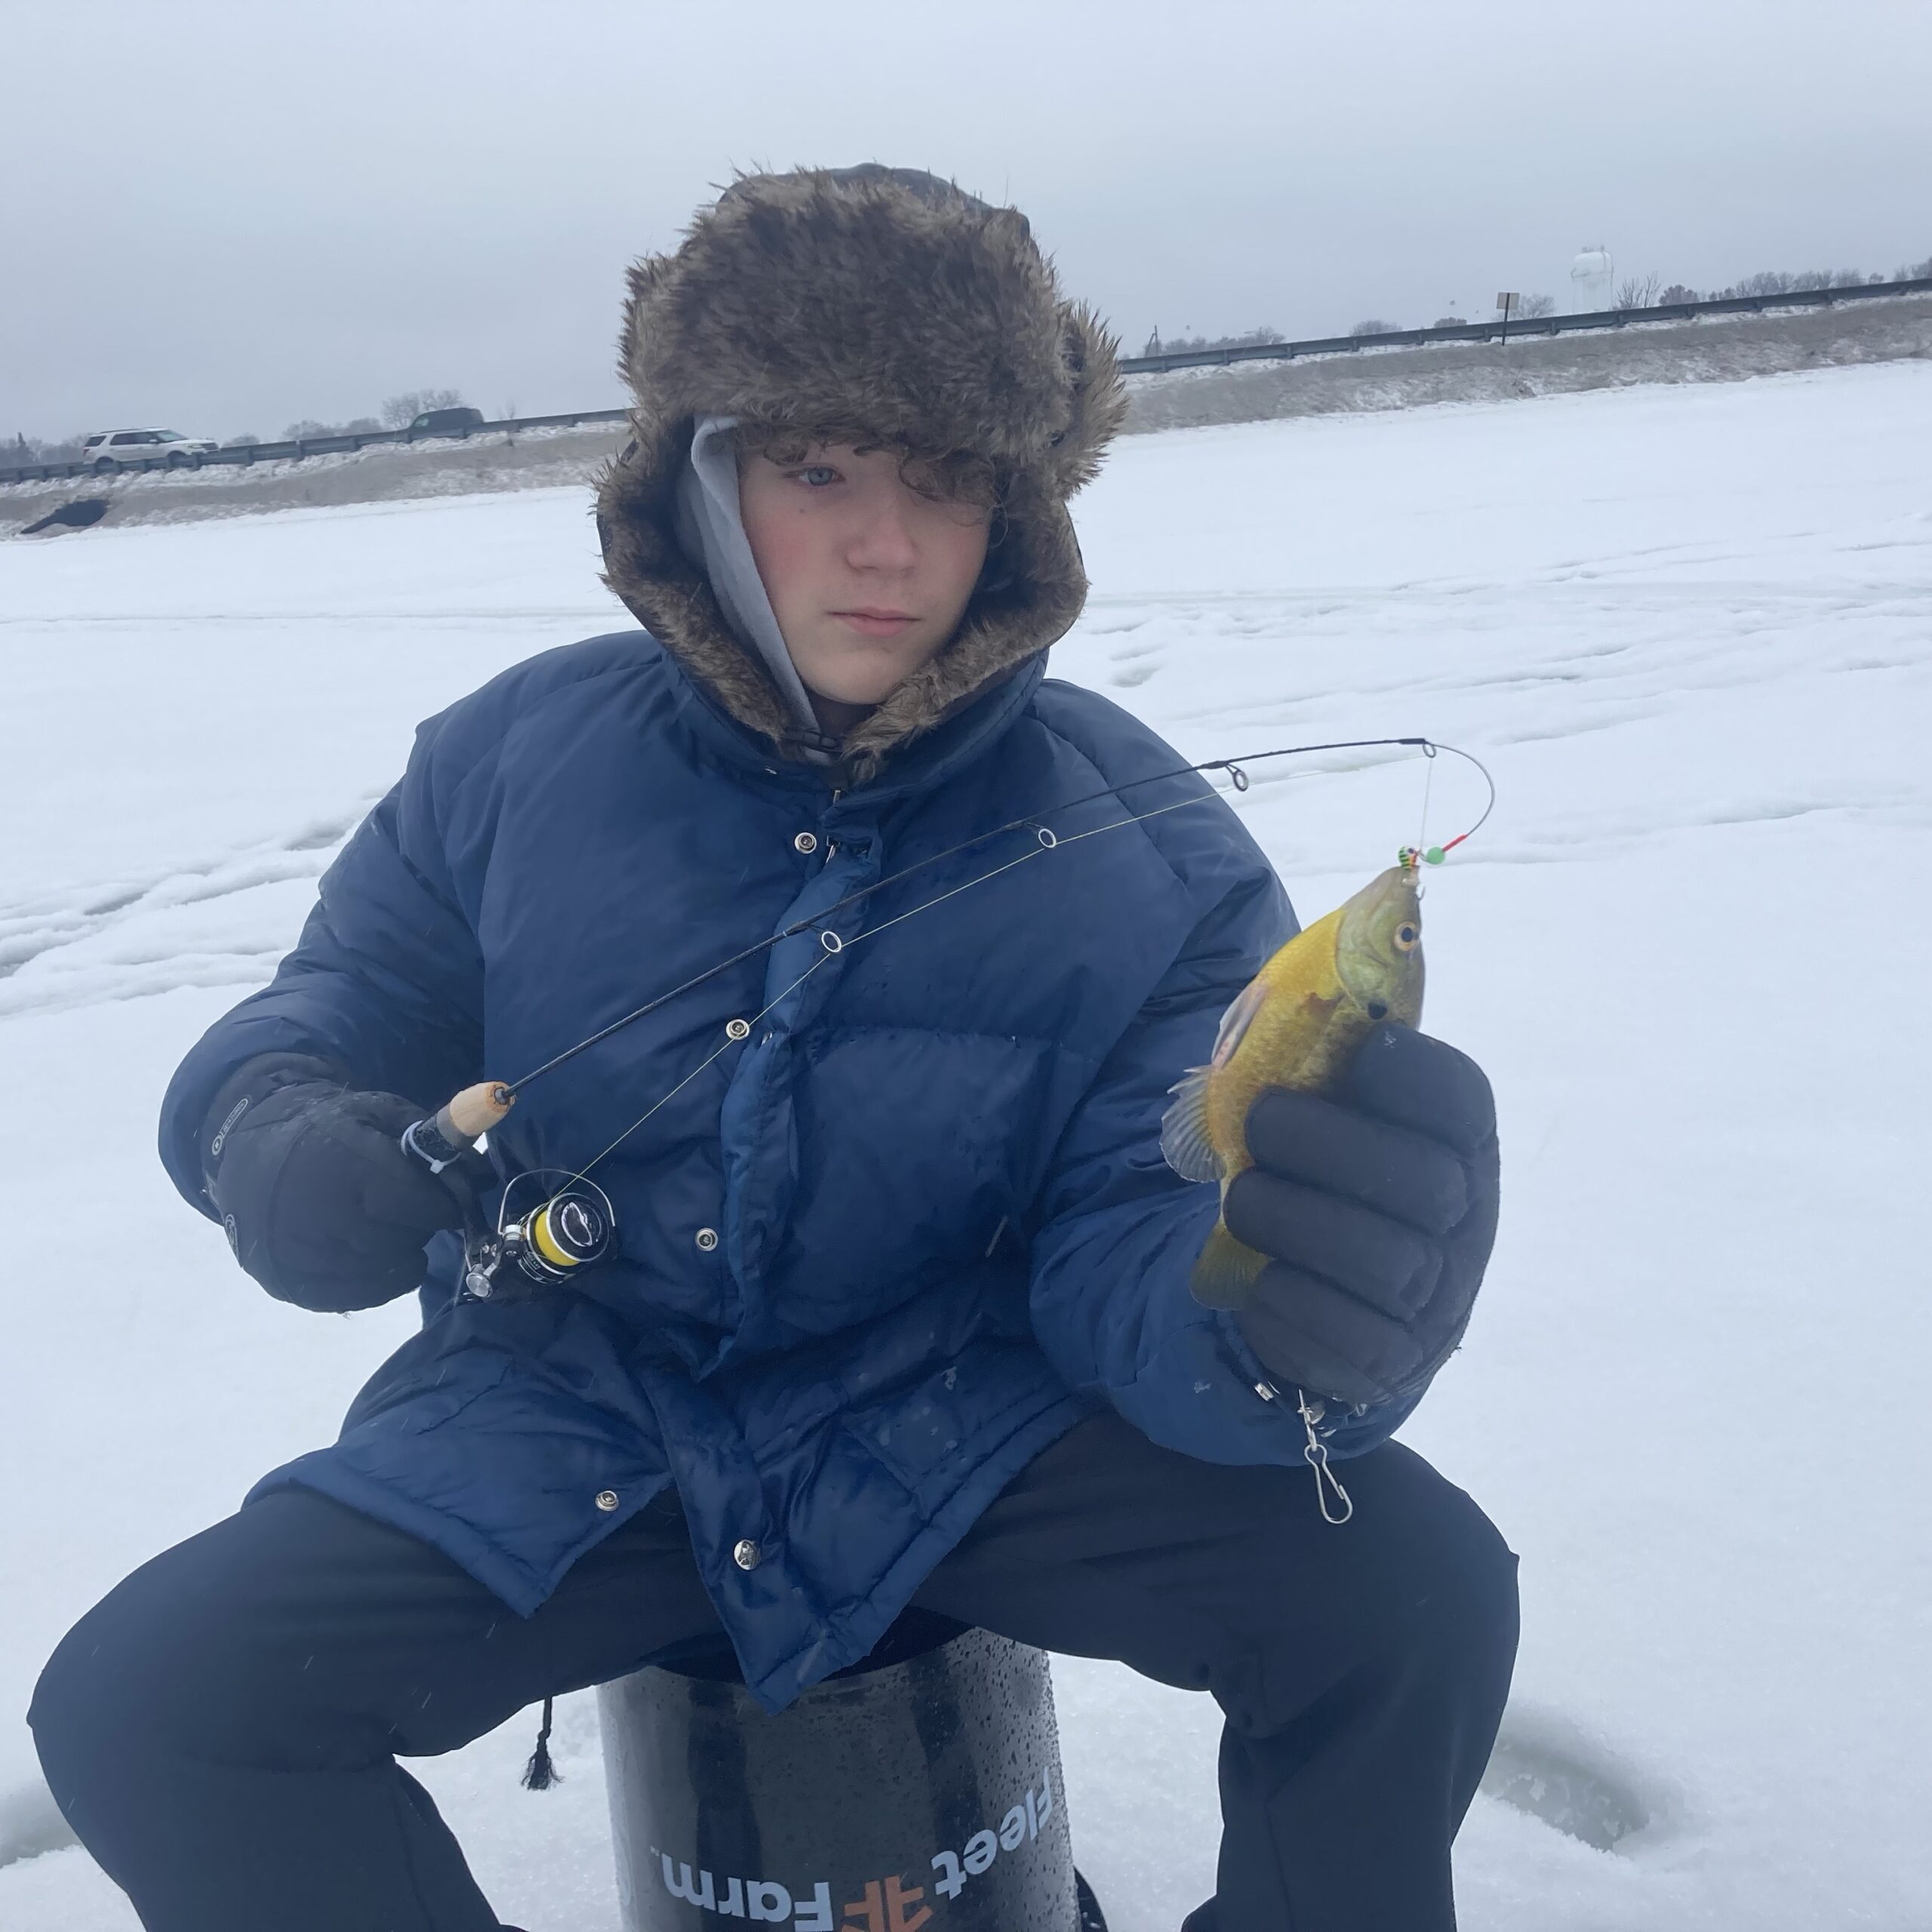
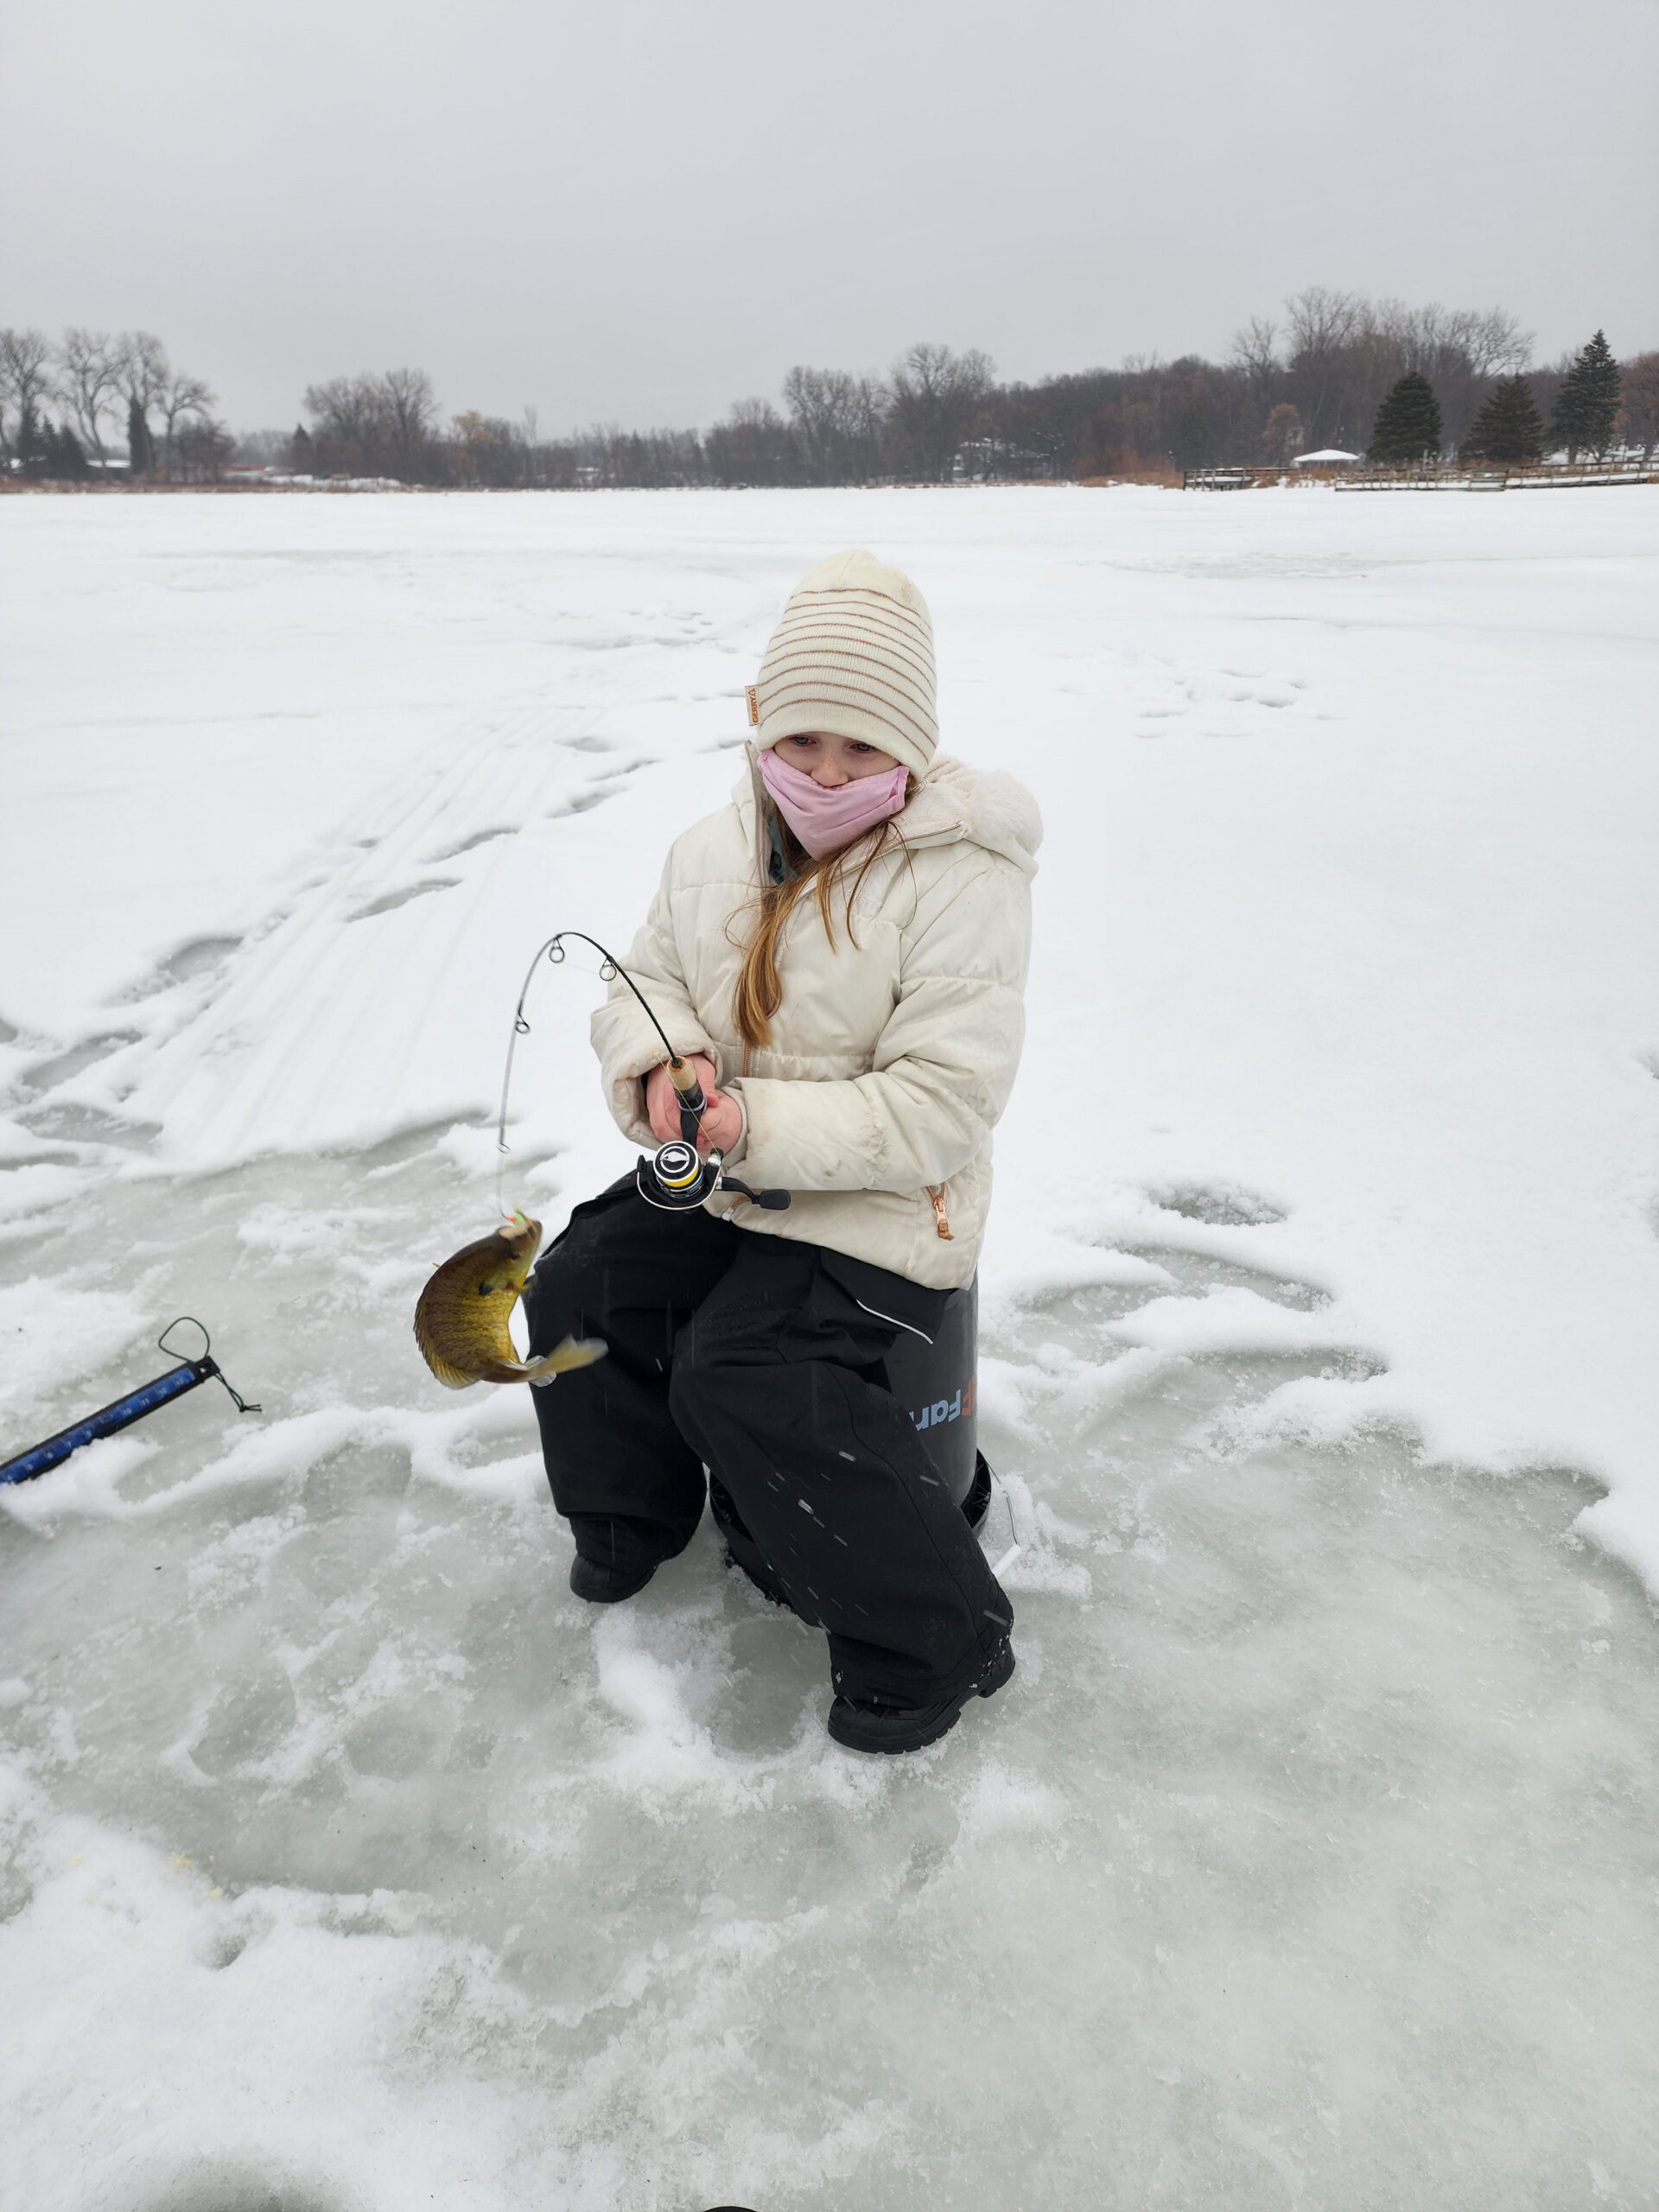
Quickly after the guide refreshed us on using the ice fishing sonar, we started getting bites. He exclaimed “Fish on!” as we were all getting some action. This year it was nothing but fat sunfish, which was fun. Everyone caught at least one fish. Check out Jessi’s Blue Gill Sunfish, what a beauty! 🐟
10/10 Would Fish Again
Like I said, this event makes it so fun and easy that I considered getting ice fishing gear. But for $5, I could bring the entire family a dozen times to this event before I equal the cost of the sonar setup. Not to mention the ice auger, the sled, the ice fishing rod, etc. But it makes me think about it! Next year I might bring my Sonarphone T-Pod and see how it compares to the Vexilar ice-ducer. Or maybe I’ll look at something like the Deeper Sonar Pro+ 2 which has a ice-ducer like display on their app (and can be used in the summer too).
I’m still happy to talk down to the lake with the family once a year on my lunch break. We’re guaranteed a catch 🎣
If your Anki Cozmo battery if it no longer holds a charge, there’s a really good YouTube video on how to replace it.
That was the case with ours, so I watched it and want to add a couple extra pointers for those thinking of doing the same. The video has just about everything you need to do the replacement, including links to tools you may need to buy.
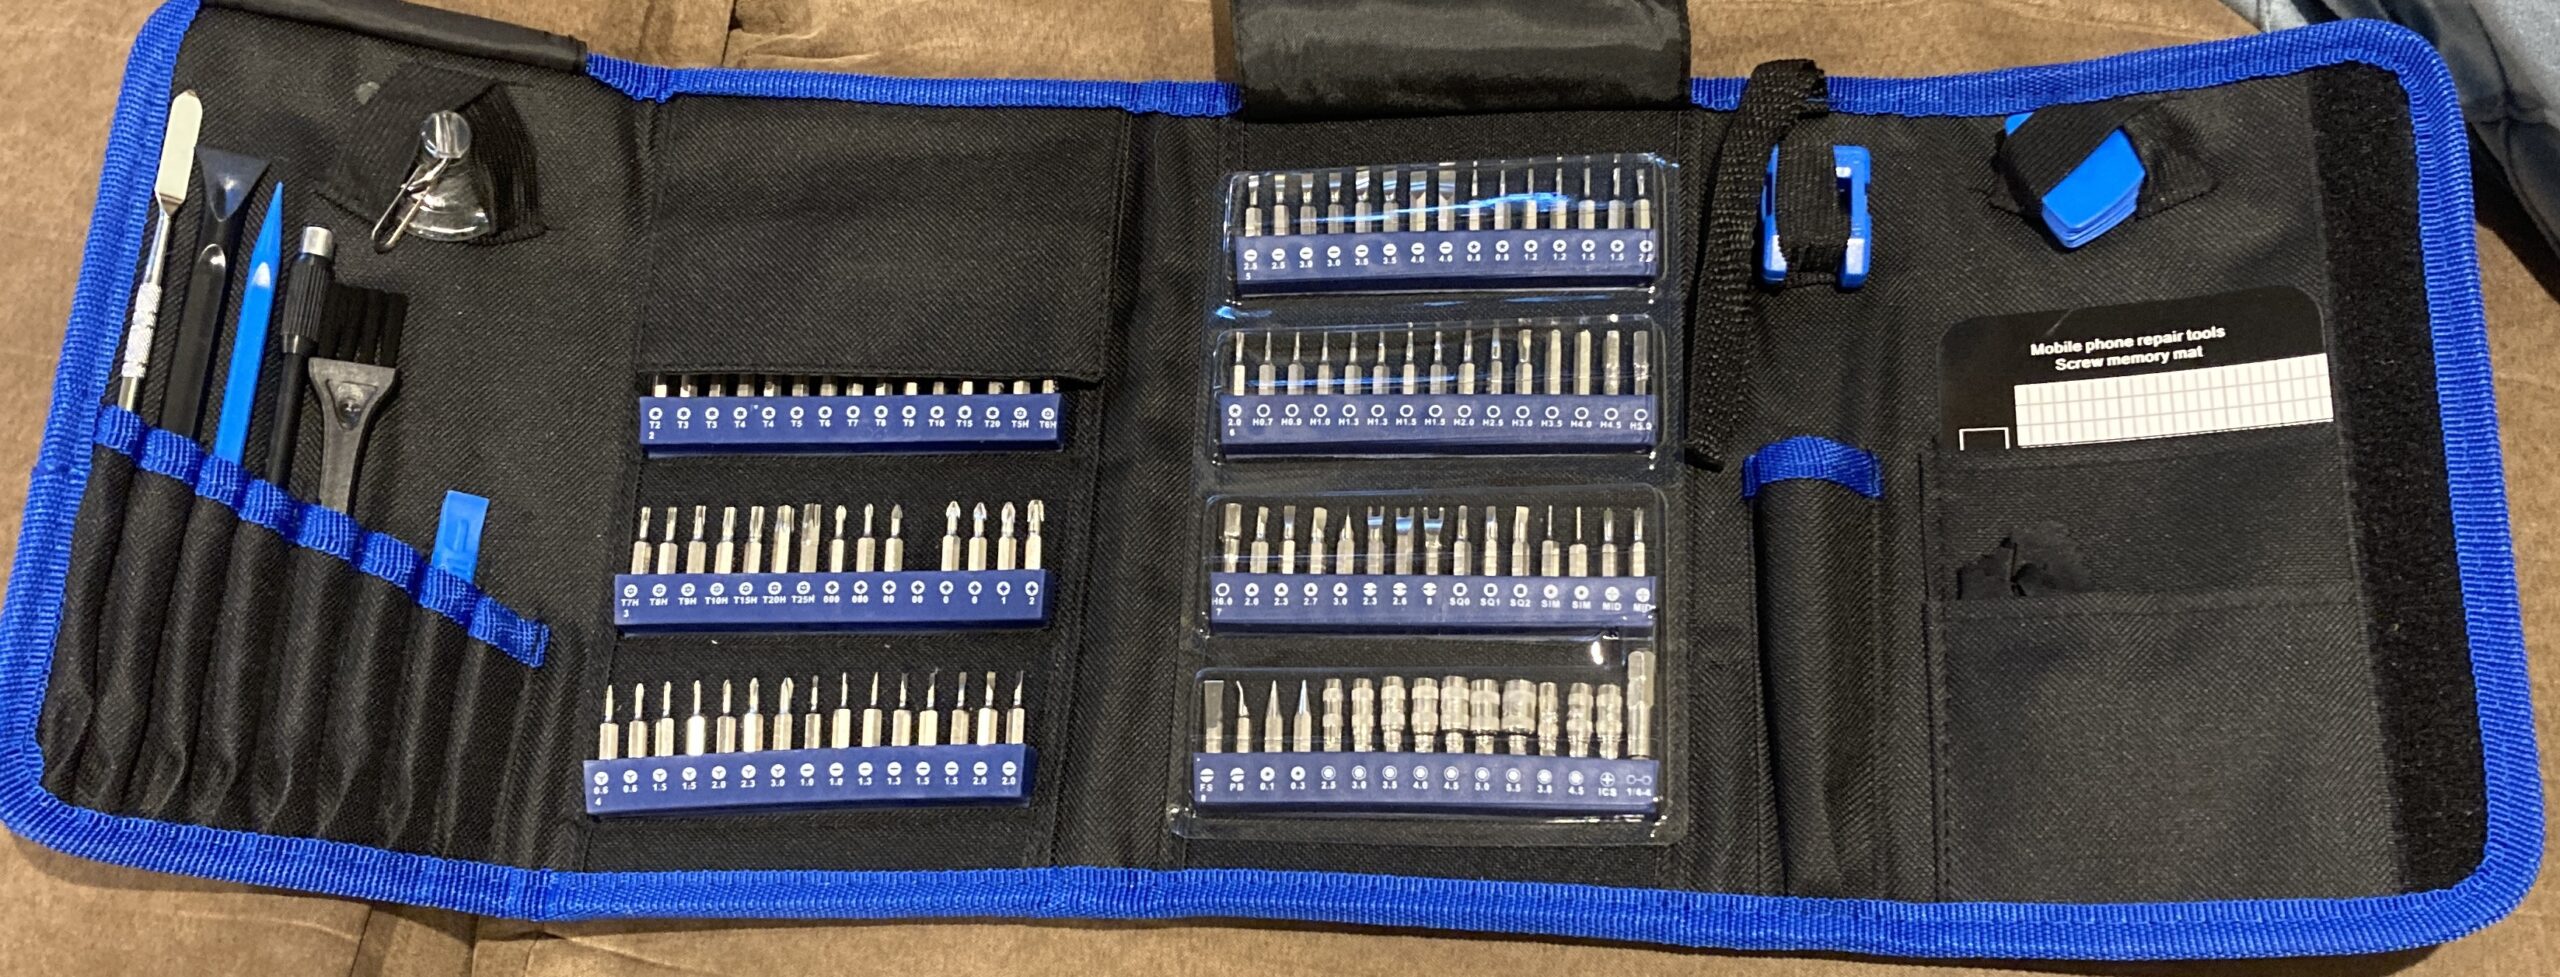
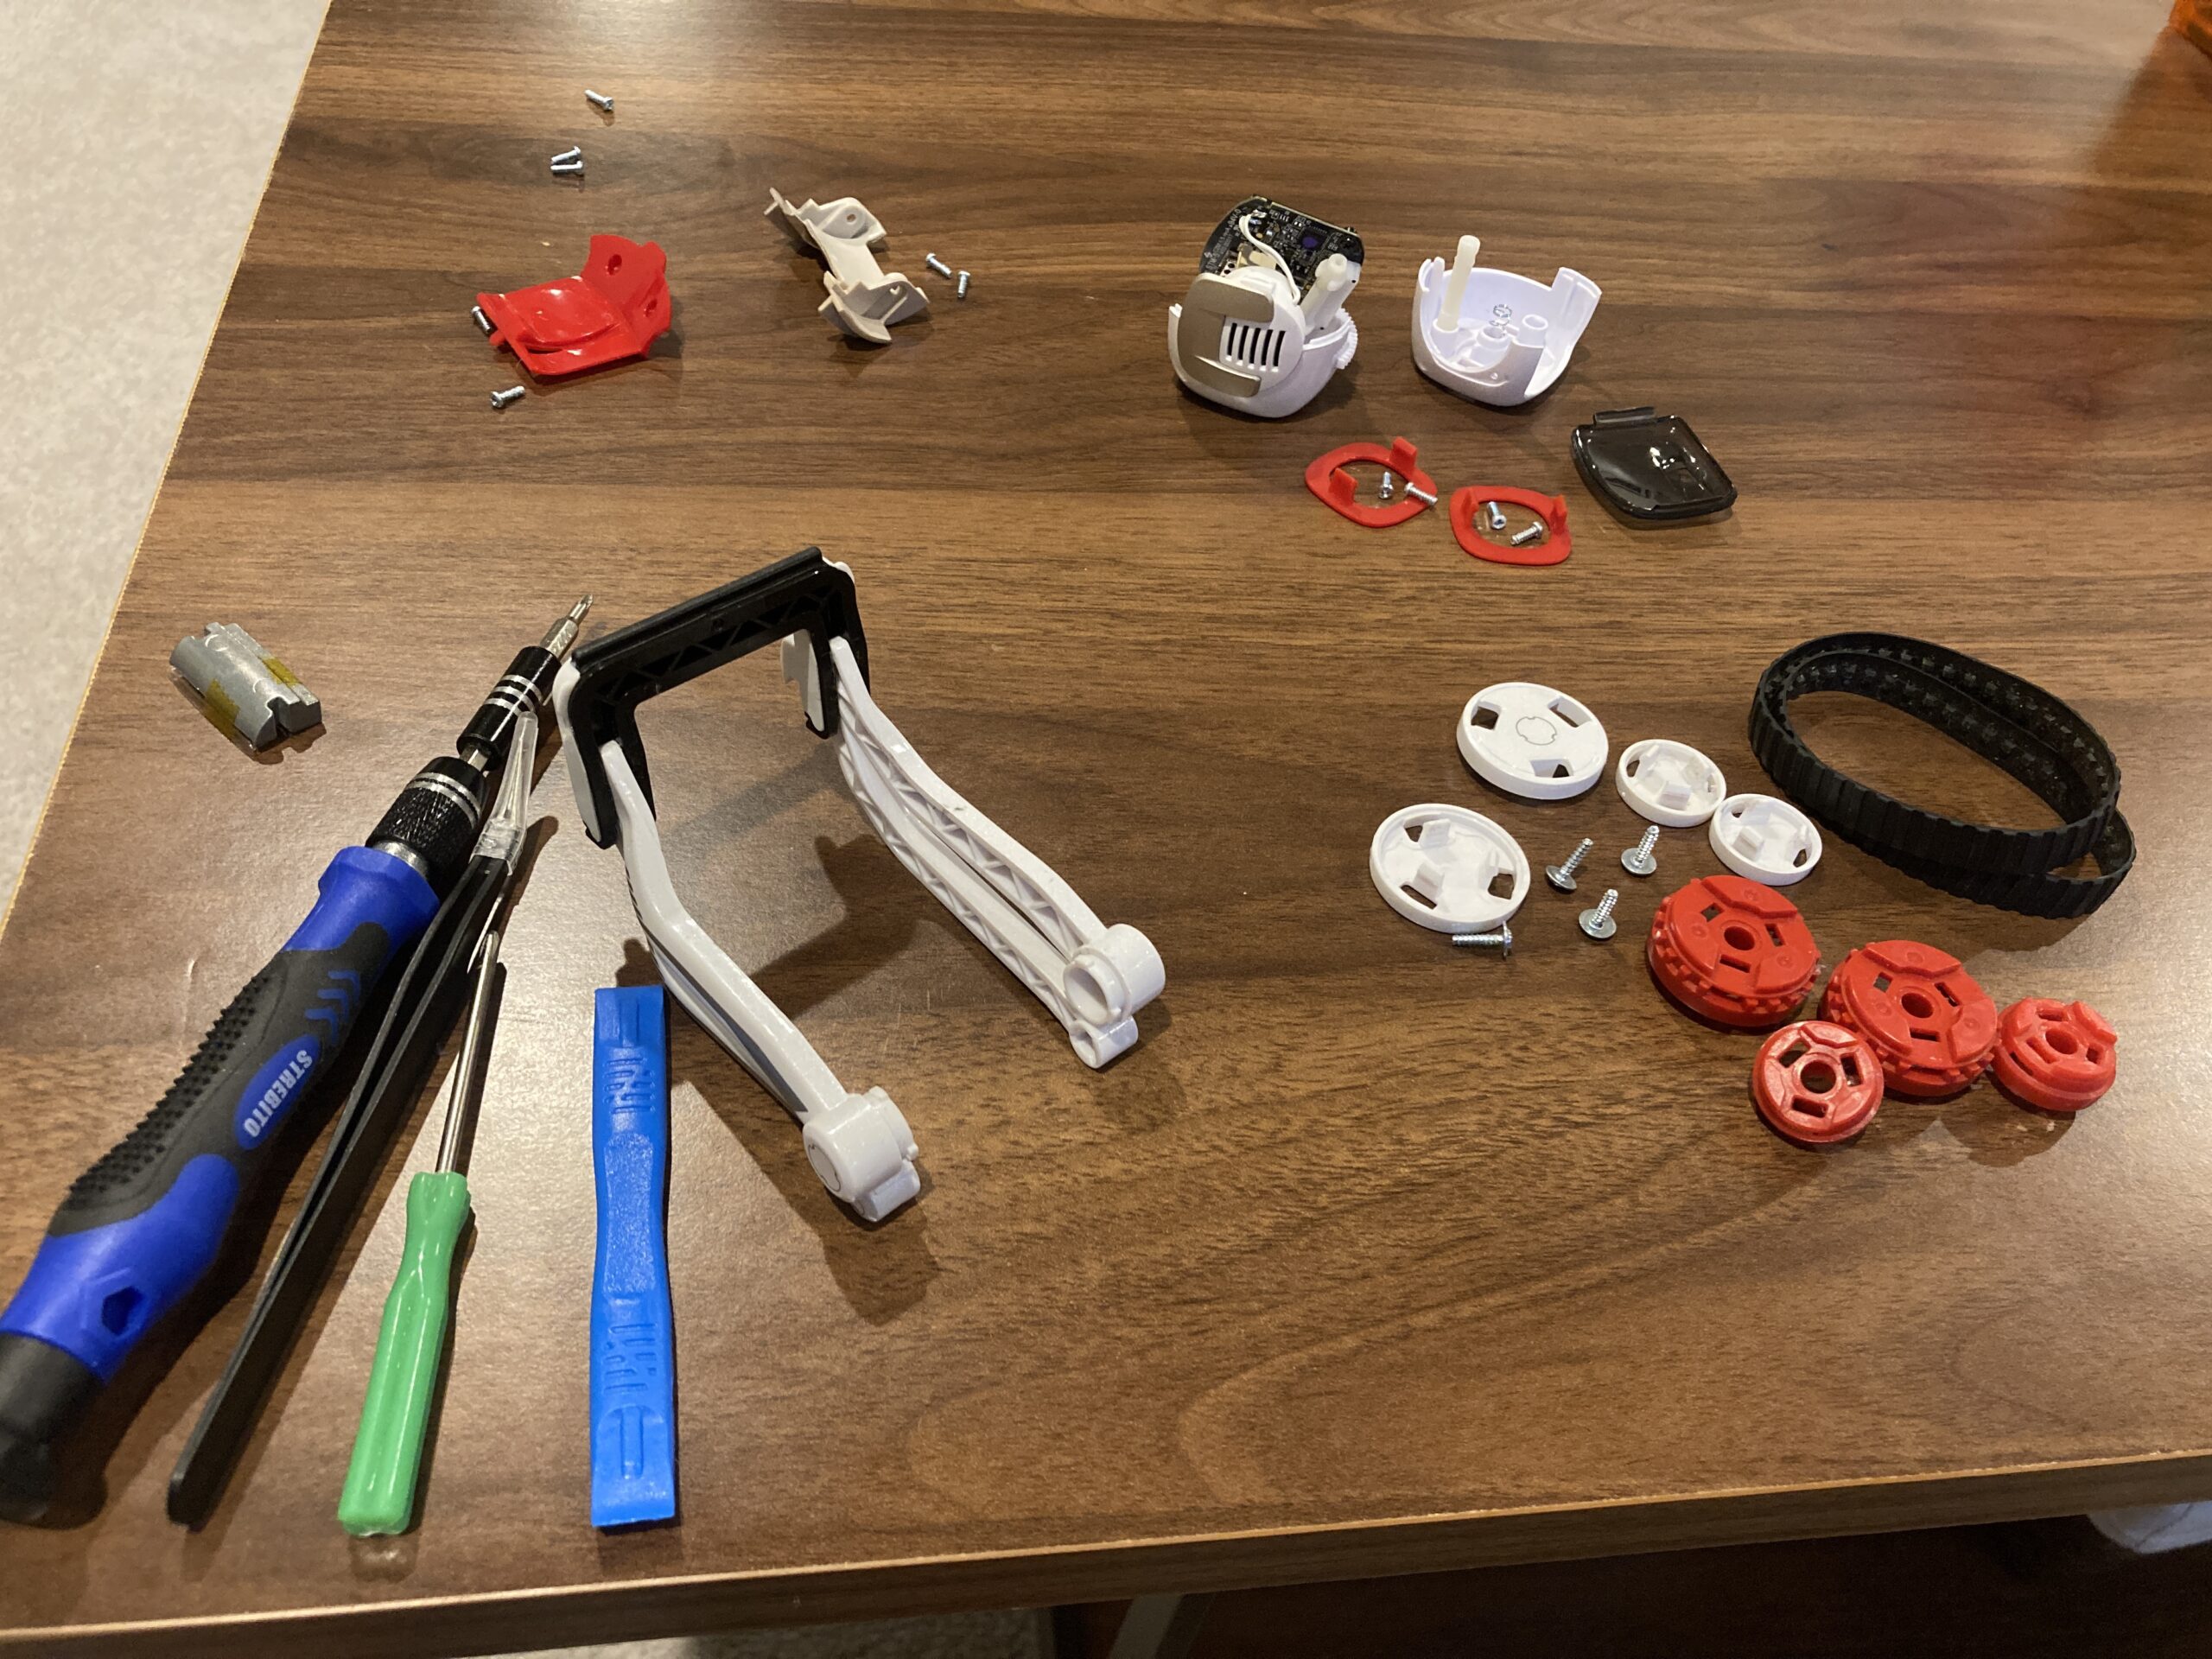
I went ahead and ordered the precision screwdriver kit linked from the video. In retrospect, I didn’t need it because I had all of the things I needed already: spudger, small phillips screwdriver, tweezers. But the prospect of being able to work on anything with a specialty screws was appealing.
Plus the case folds up neatly for storage.
Even with all the supplied bits, I still needed another small phillips screwdriver for one of the screws that is deeply recessed. It holds both of the main halves together. It’s the green one pictured below, along with all of Cozmo’s parts.
I put all the parts I took off in a row to make it easy to go in reverse order when putting him back together.
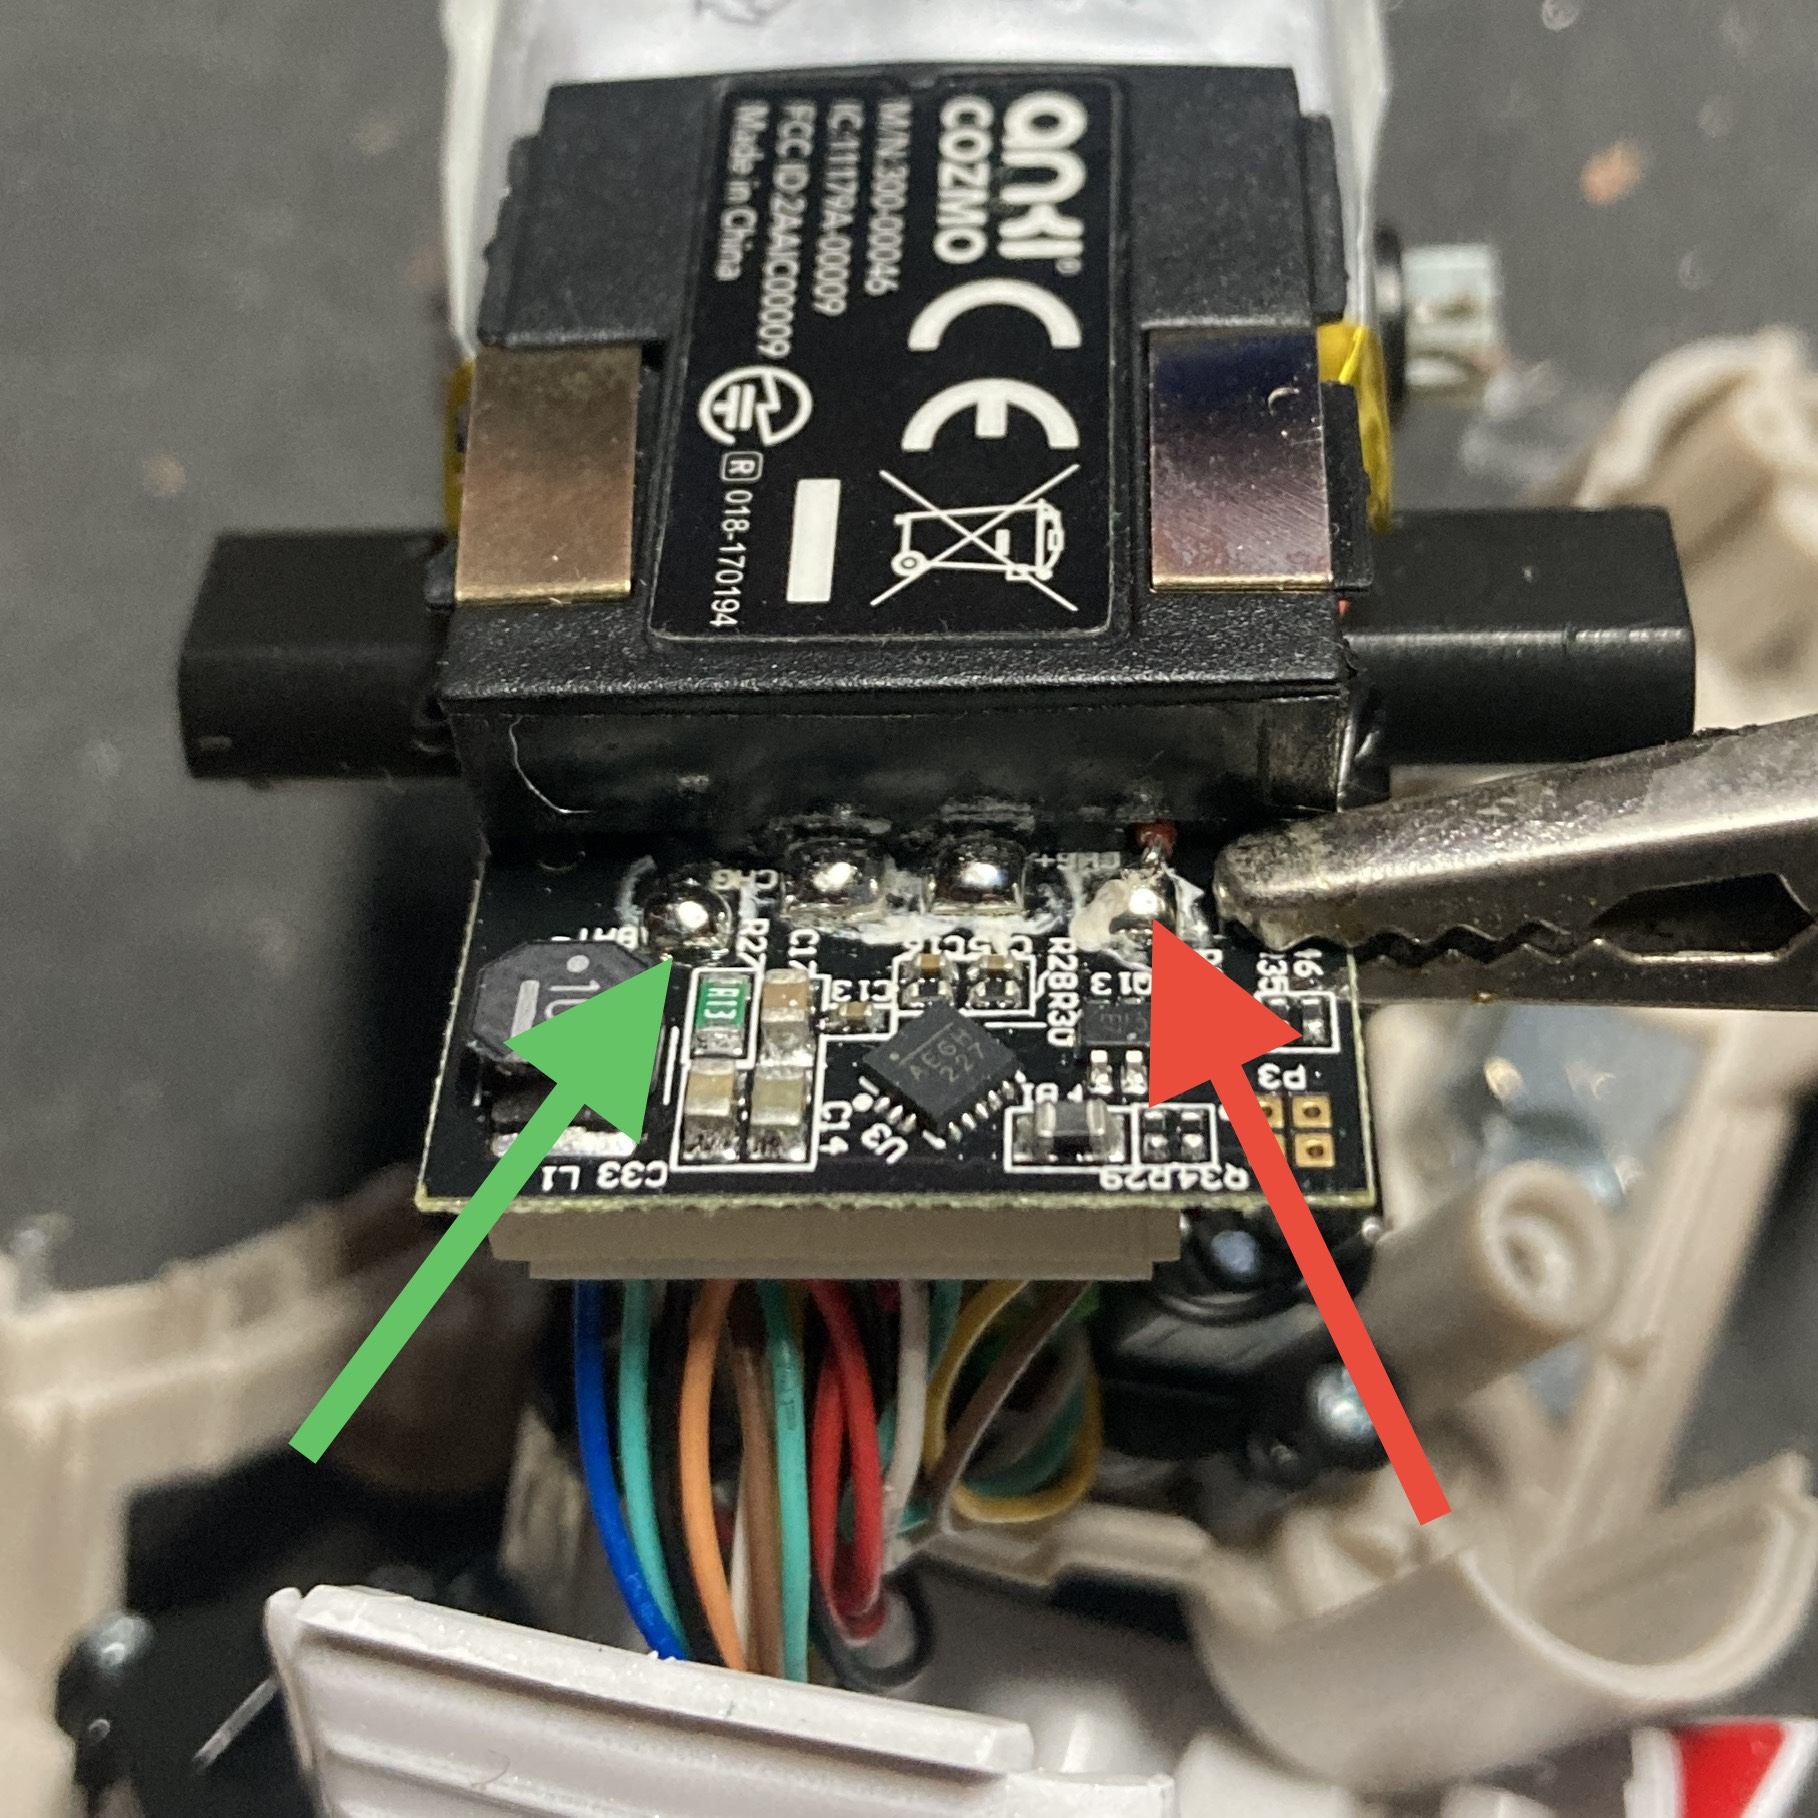
Soldering
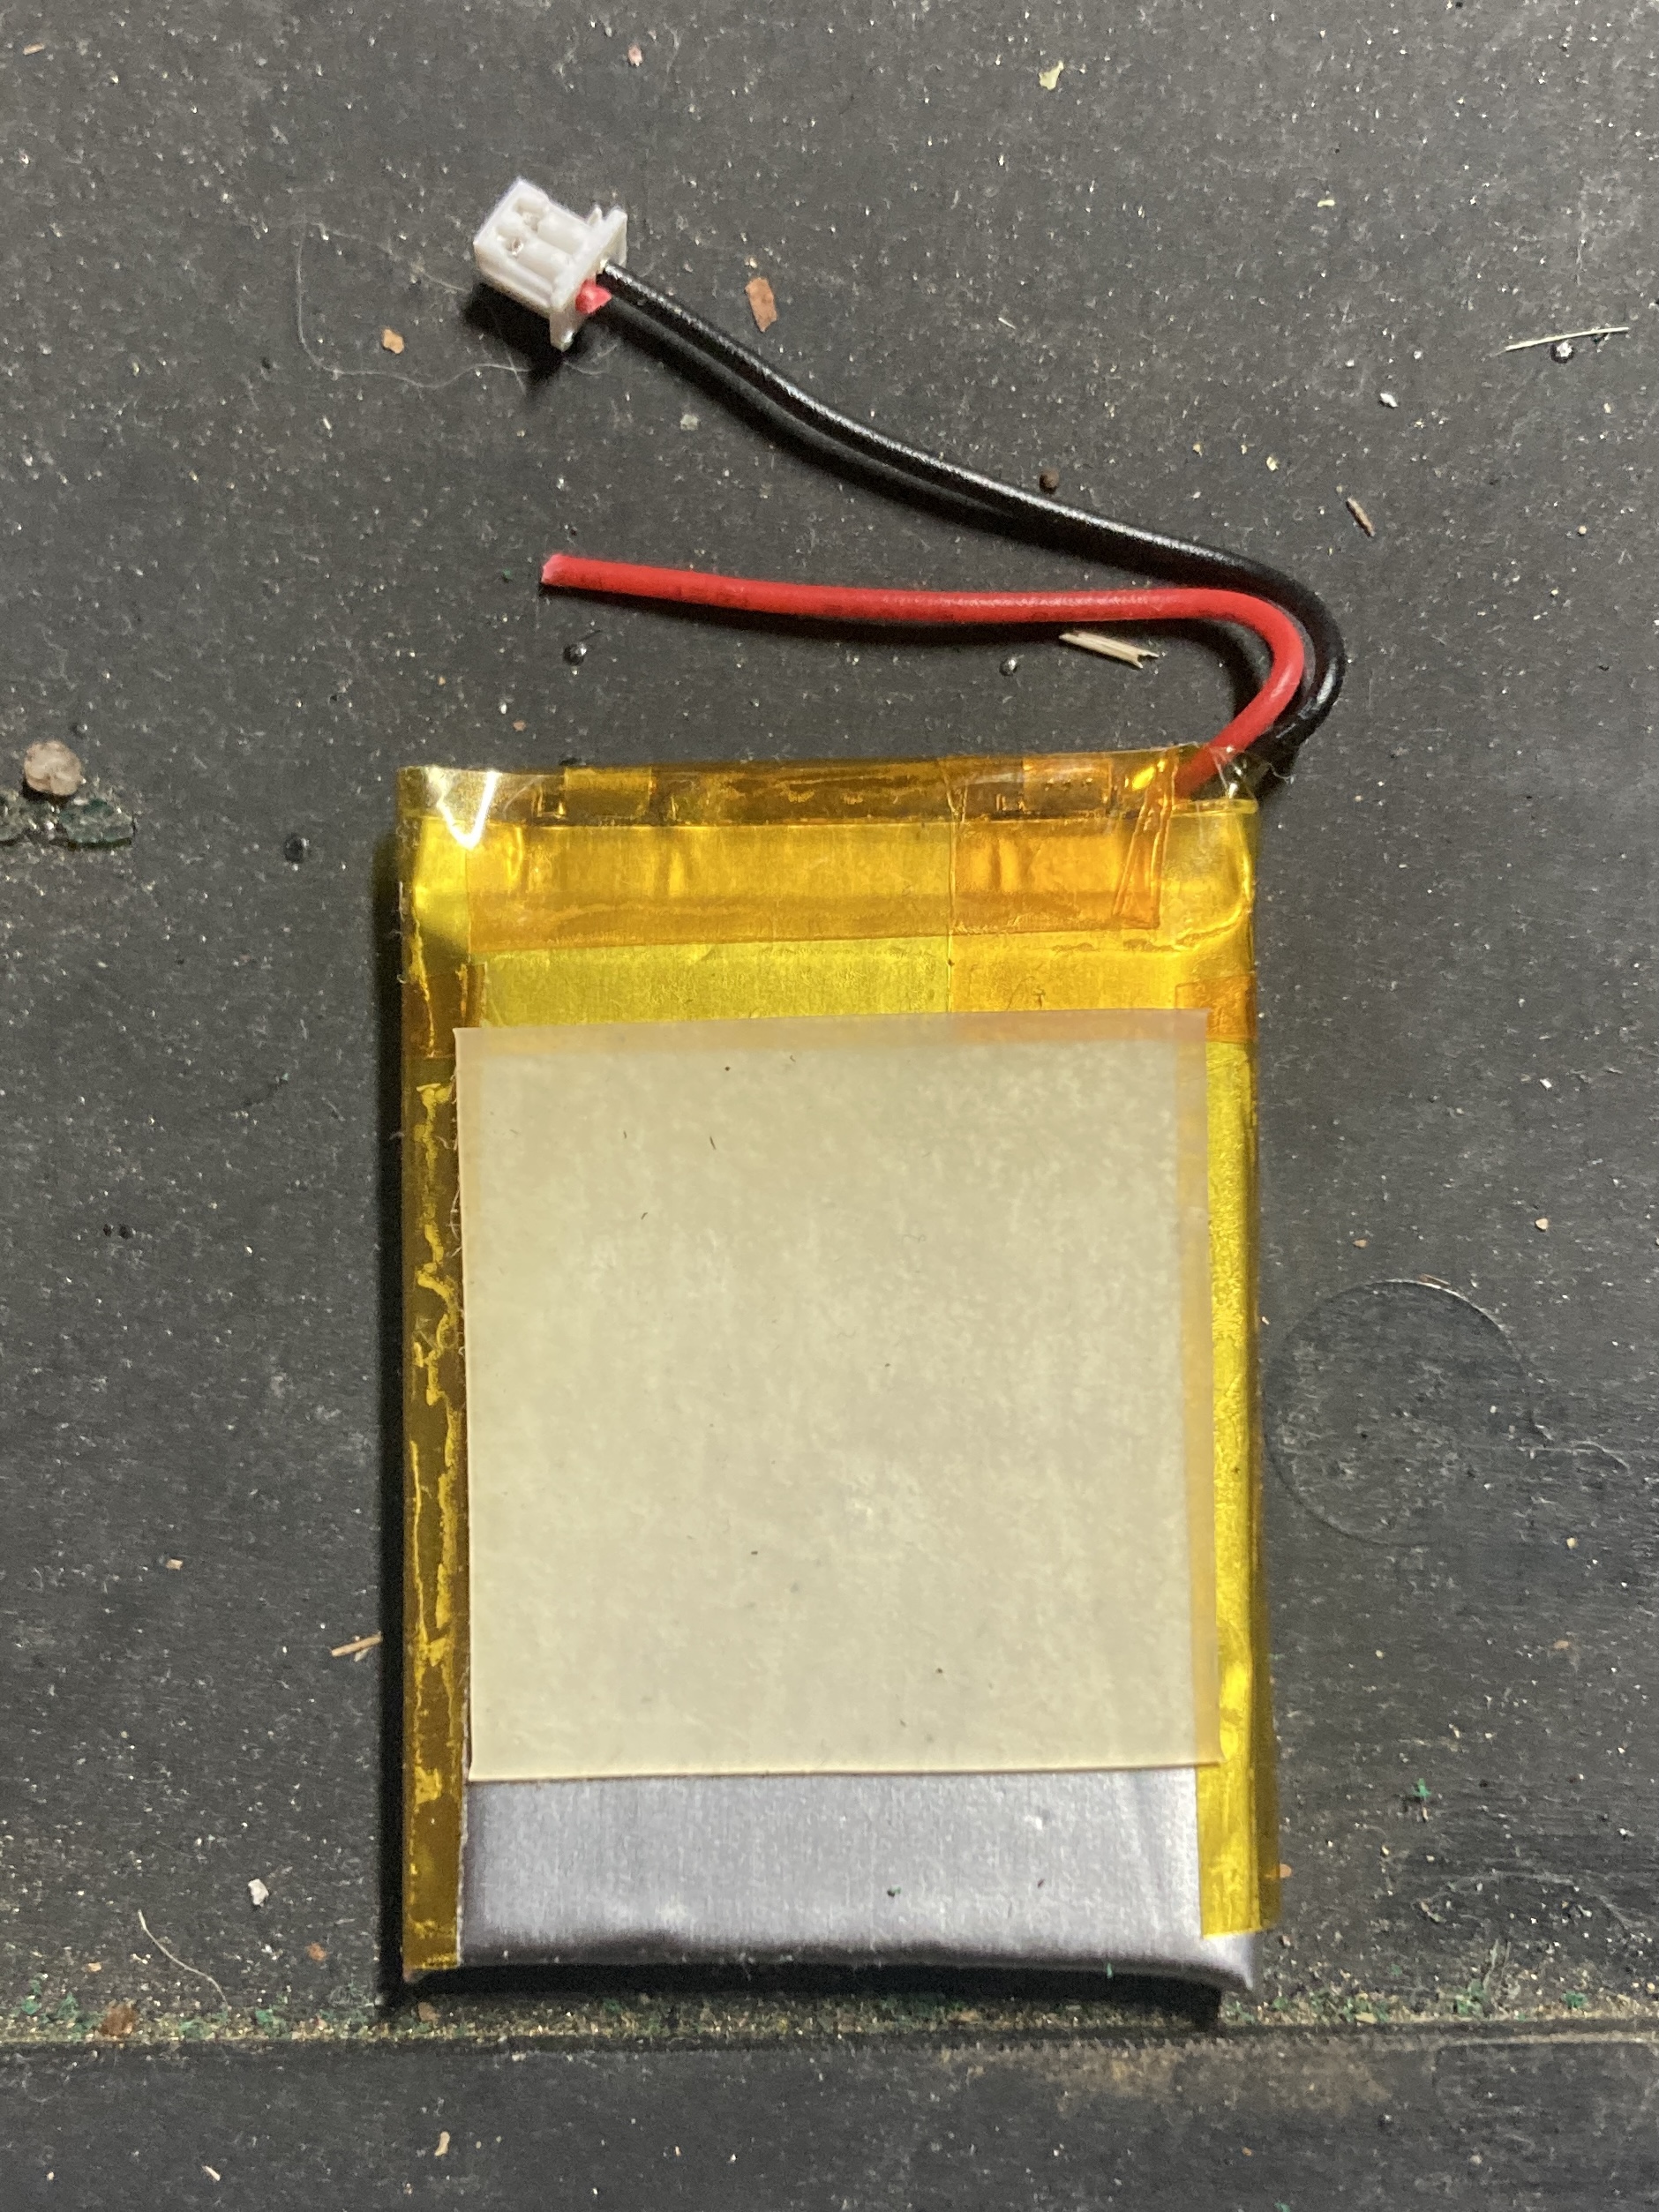
This is the section that is sort of glossed over in the video. He shows you what needs to be de-soldered and soldered – the positive and negative battery leads shown in red and green (respectively) below.
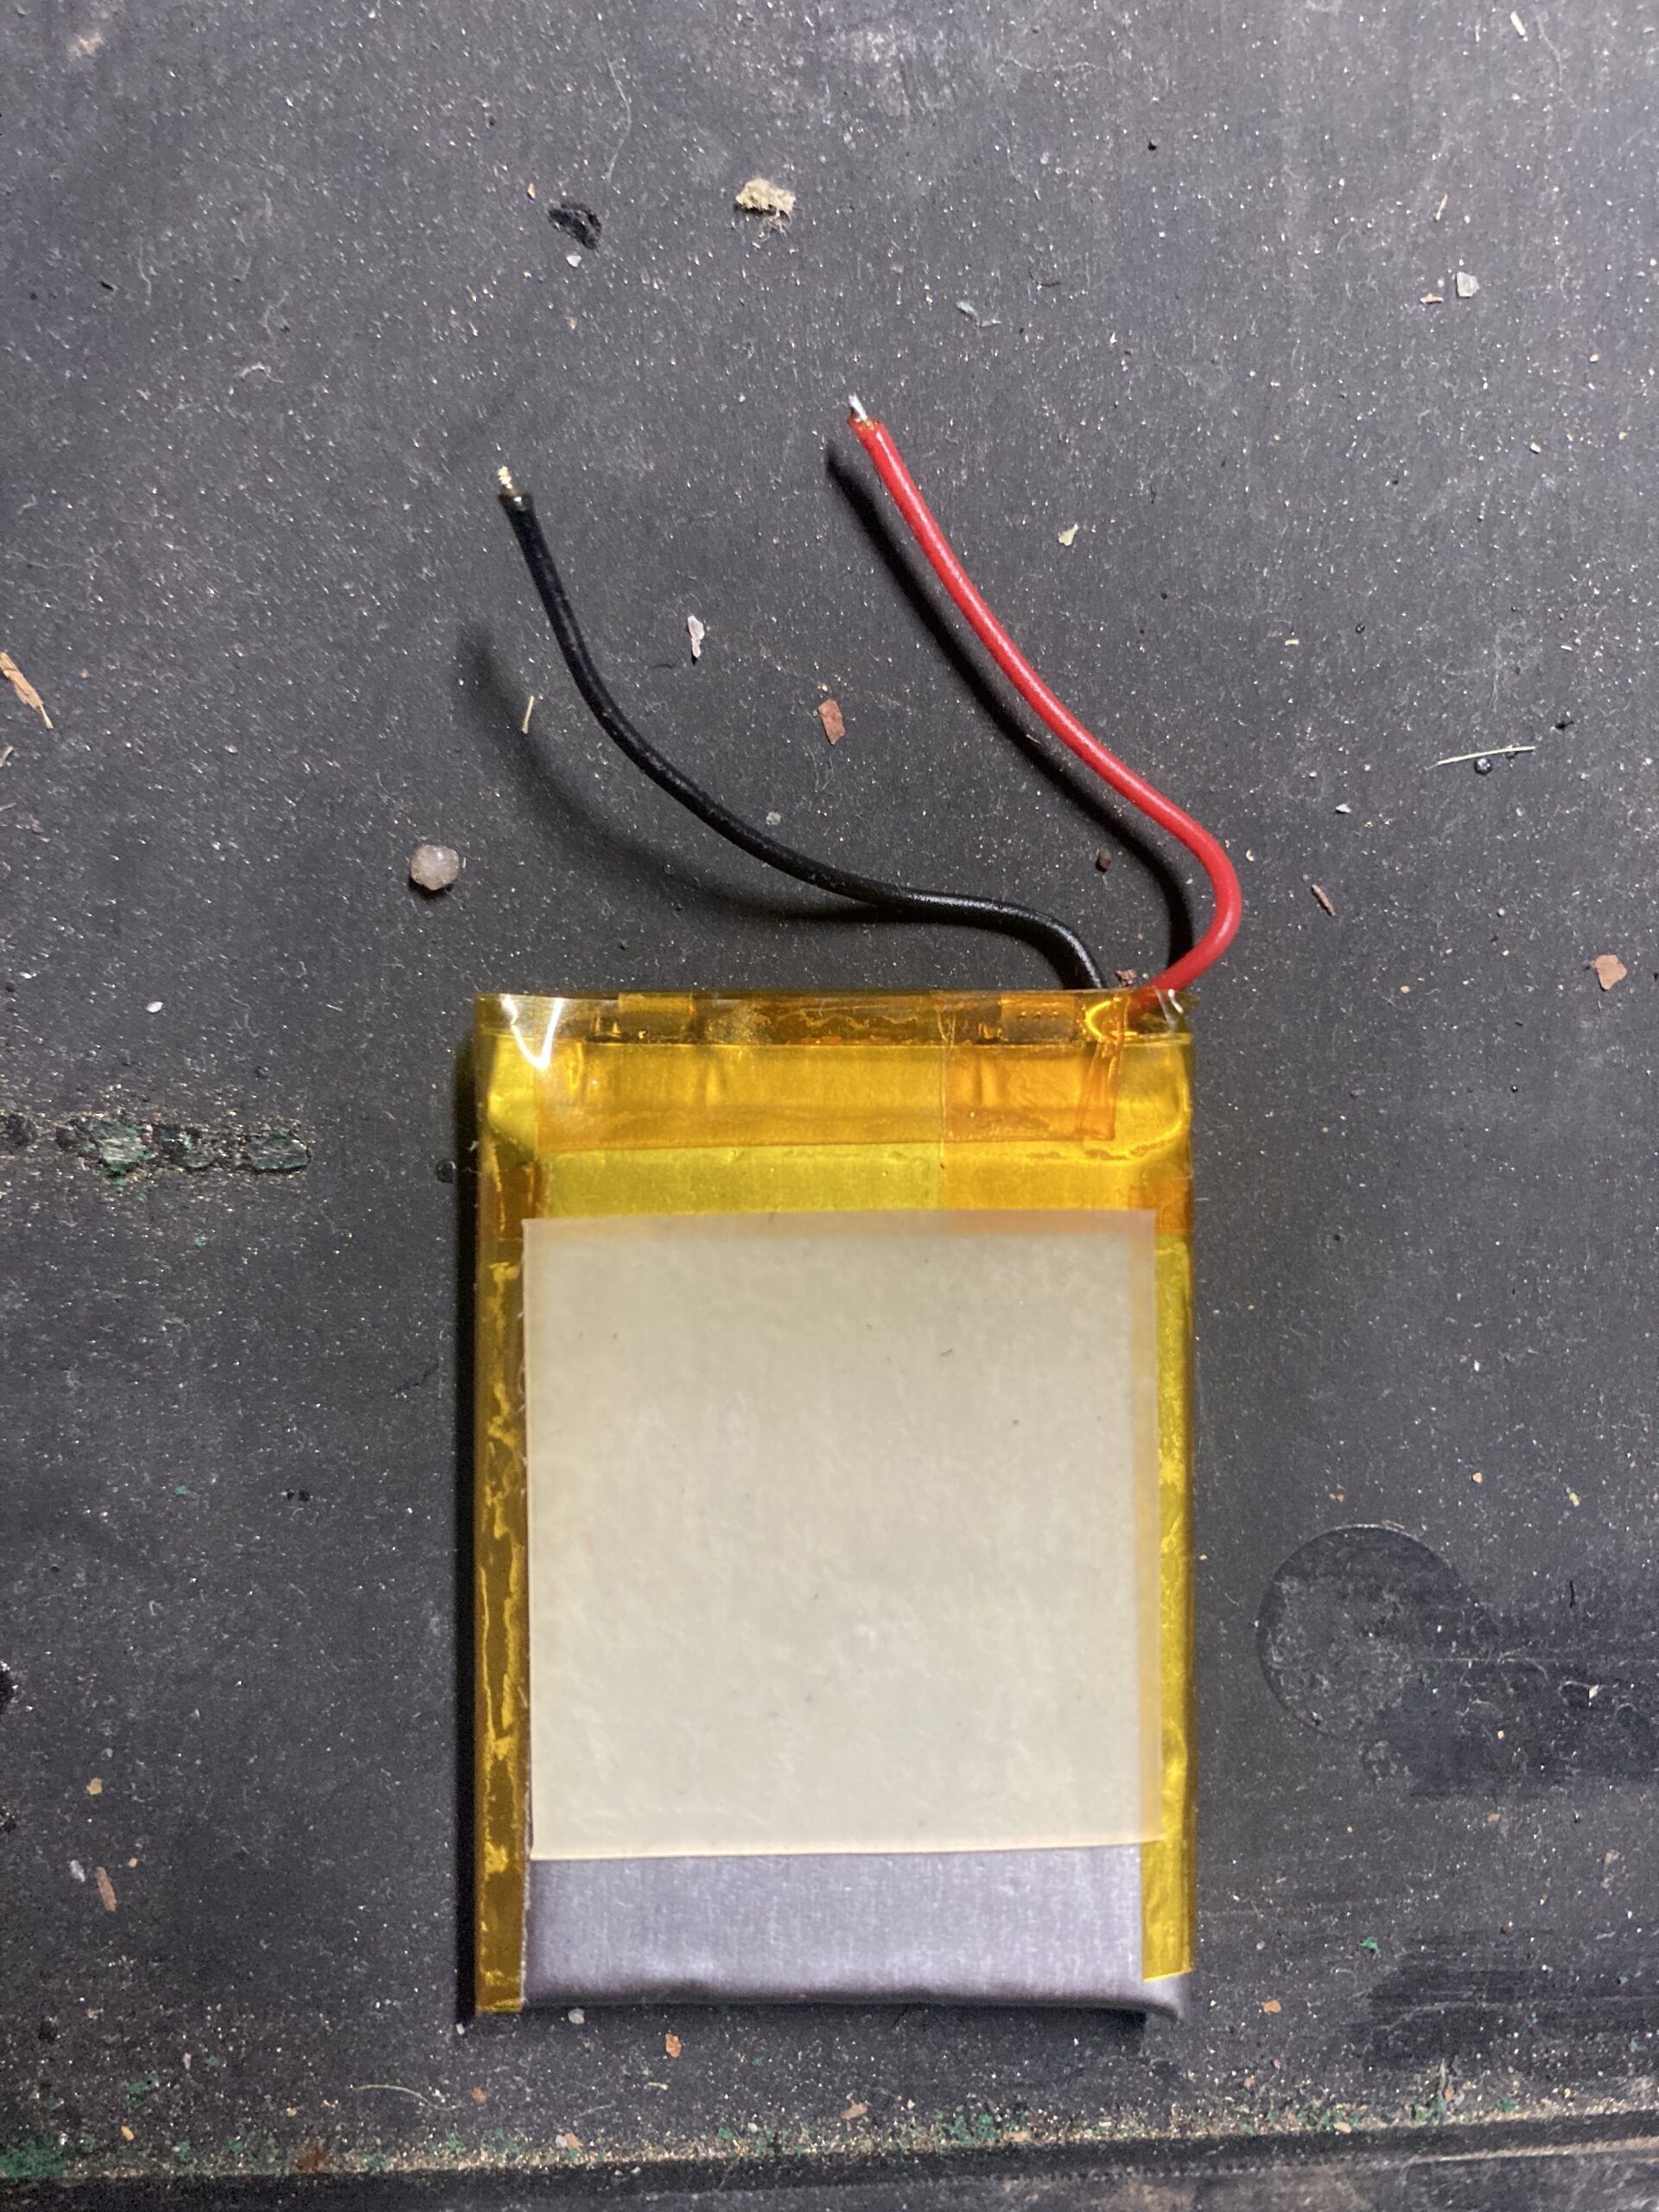
I’m not going to go over all the things you need to know about soldering, but there are some important safety details we should cover before starting this replacement. The replacement battery will come with a connector on it, which needs to be removed.
So you don’t short the leads out, you need to clip the wires one-at-a-time. We’re not the FBI diffusing a bomb, but it could light on fire if you short both wires while clipping them at the same time. 🔥
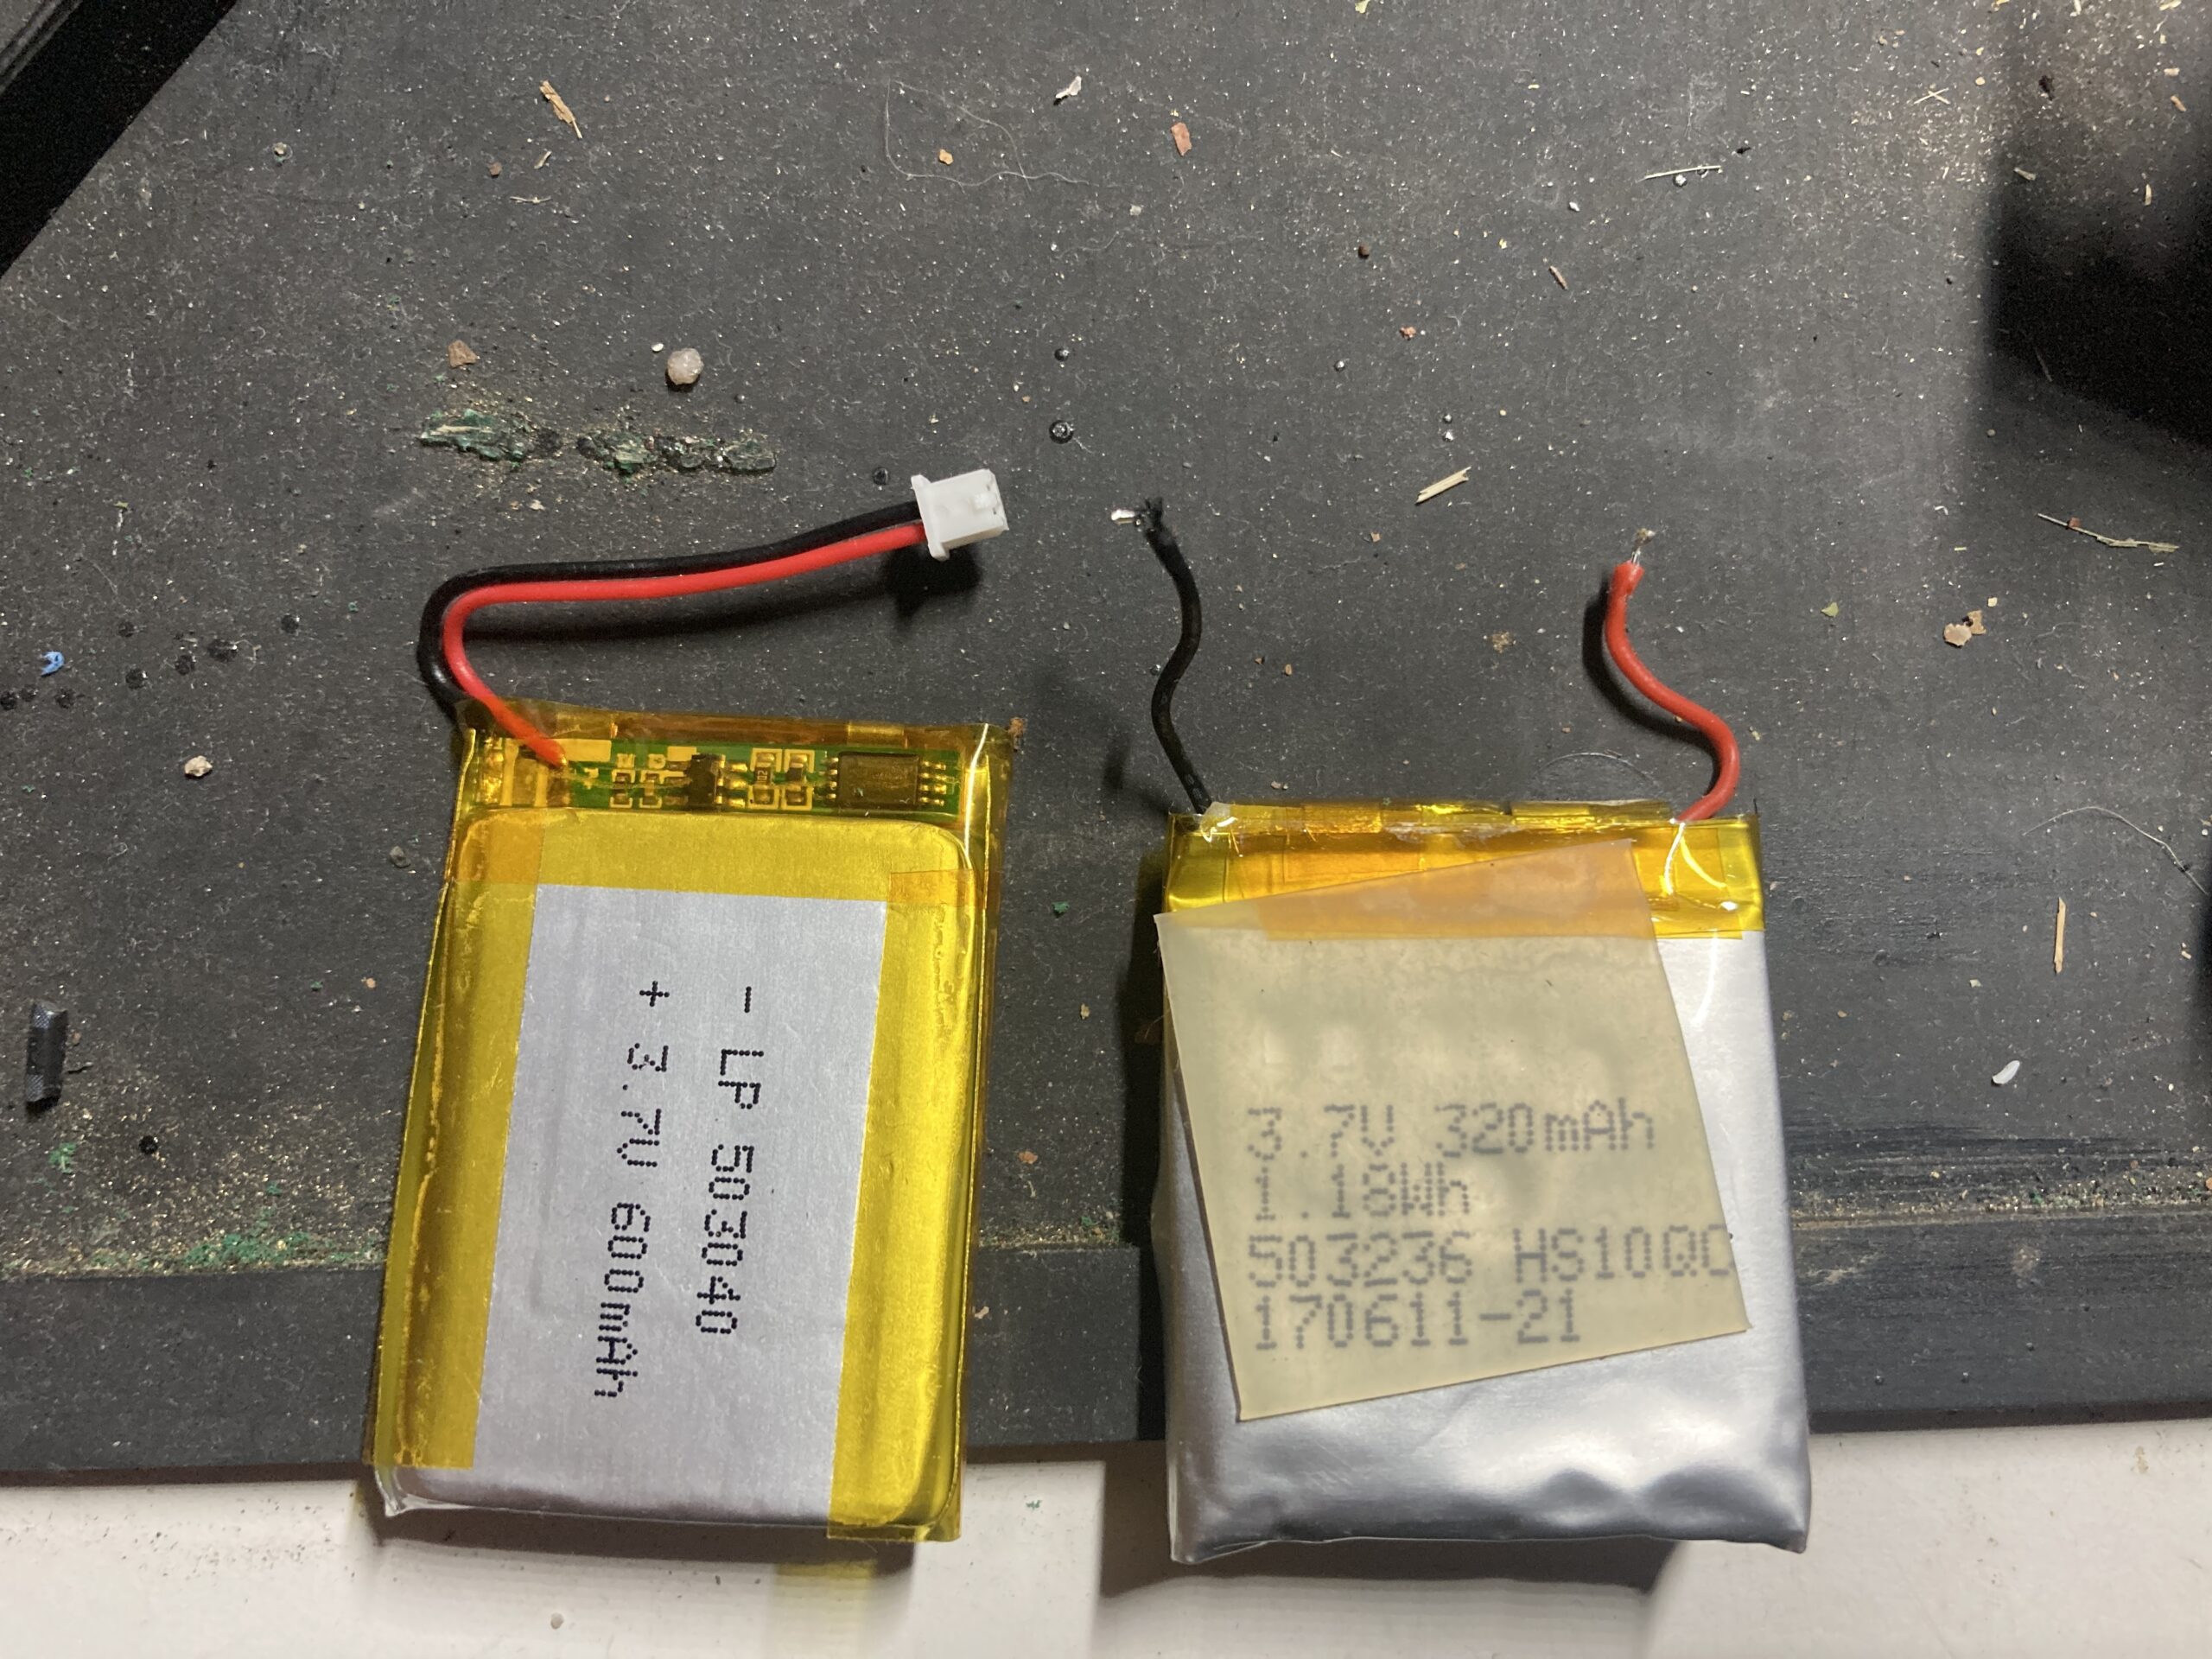
Remember to grab the rubber sticker off the original battery and add it to the new one.
Strip and pre-tin the ends of the wires before snaking the wires through the charging plate to the soldering points. That will keep the wires from fraying, and they’ll be ready to solder to the board.
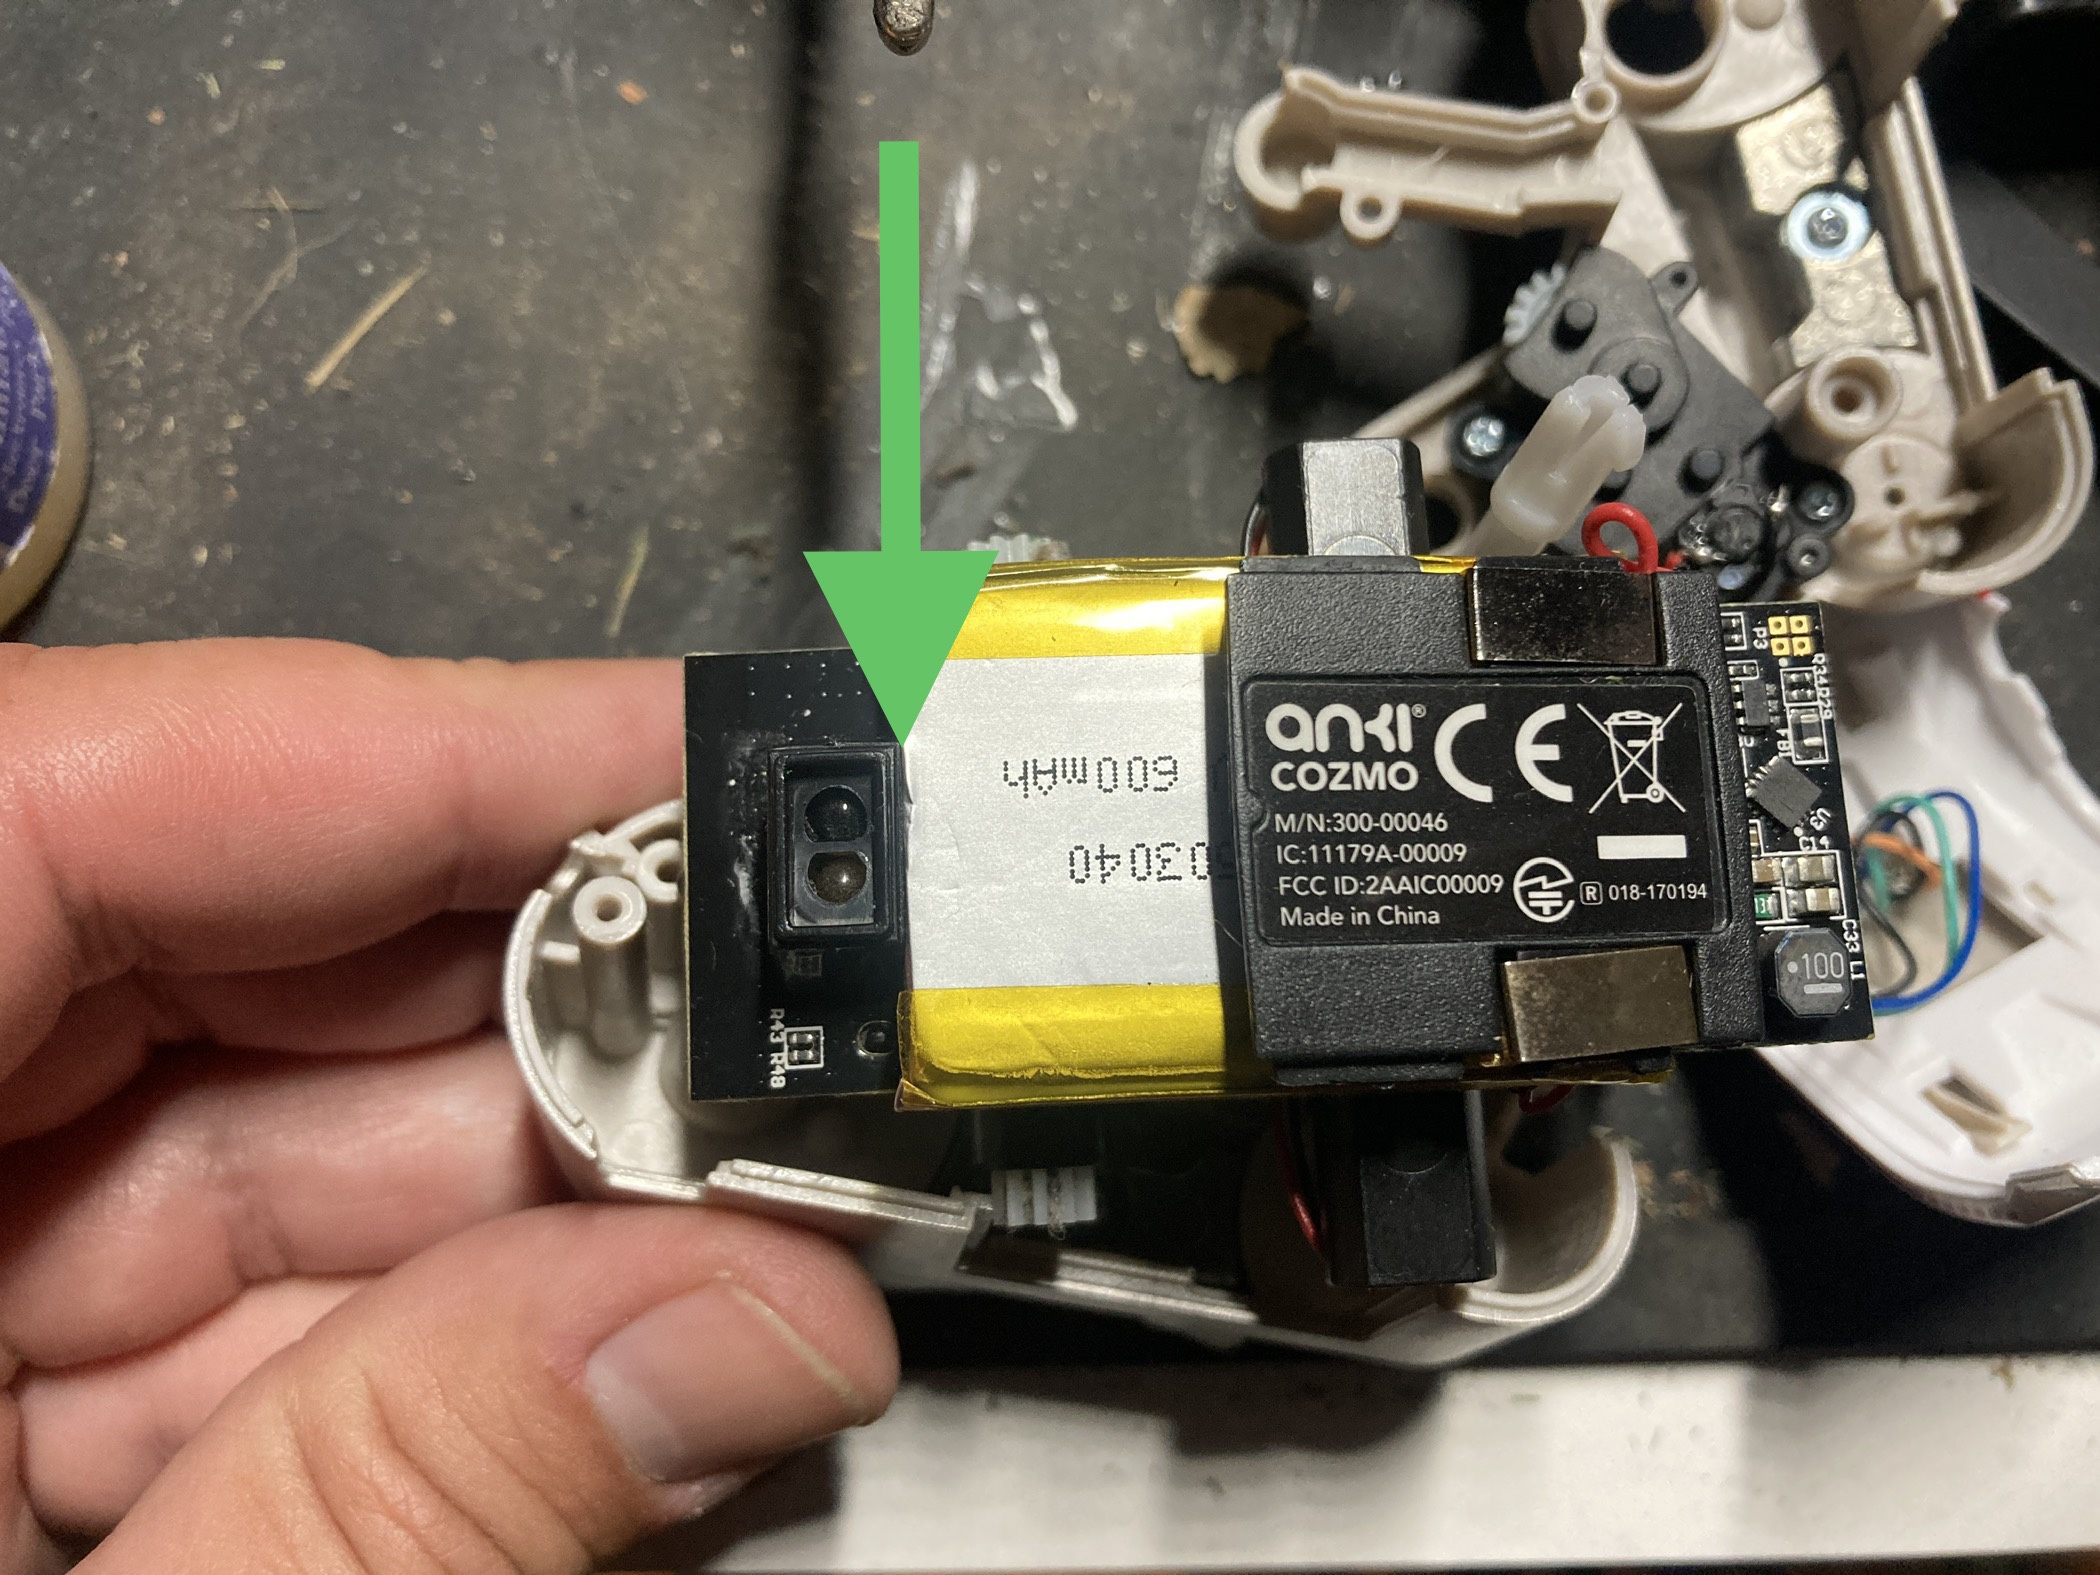
In addition to having more capacity than the original battery, it is also physically larger. I had to massage the end of the cell (shown at the green arrow below), to get it past Cozmo’s edge detection sensor. Not great considering all of the lipo fires that start due to bad folds, etc.
Fingers crossed that it will be OK 🤞 After that I put everything back in reverse order. The whole thing took me around an hour from start to finish.
Cozmo works great and lasts even longer than he did brand new. A worthwhile replacement/upgrade if you know how to solder.
I got my daughter a FItbit Ace 2 from Best Buy for her birthday in 2021. You can get the older model Ace 2 there frequently on sale for less than $50. I honestly didn’t think she’s wear it, but I quickly learned she loved completing the challenges that it offered. She’s the type of kid that never sits still, so it seemed like a good fit.
She stopped wearing it later in the year. I thought getting her a new band for Christmas would get her excited about wearing it again, but my wife thought it was a lost cause. After Christmas came and went I asked her why she didn’t wear it, and it was because she didn’t like the band! 💡So I decided to revisit a new band for her birthday.
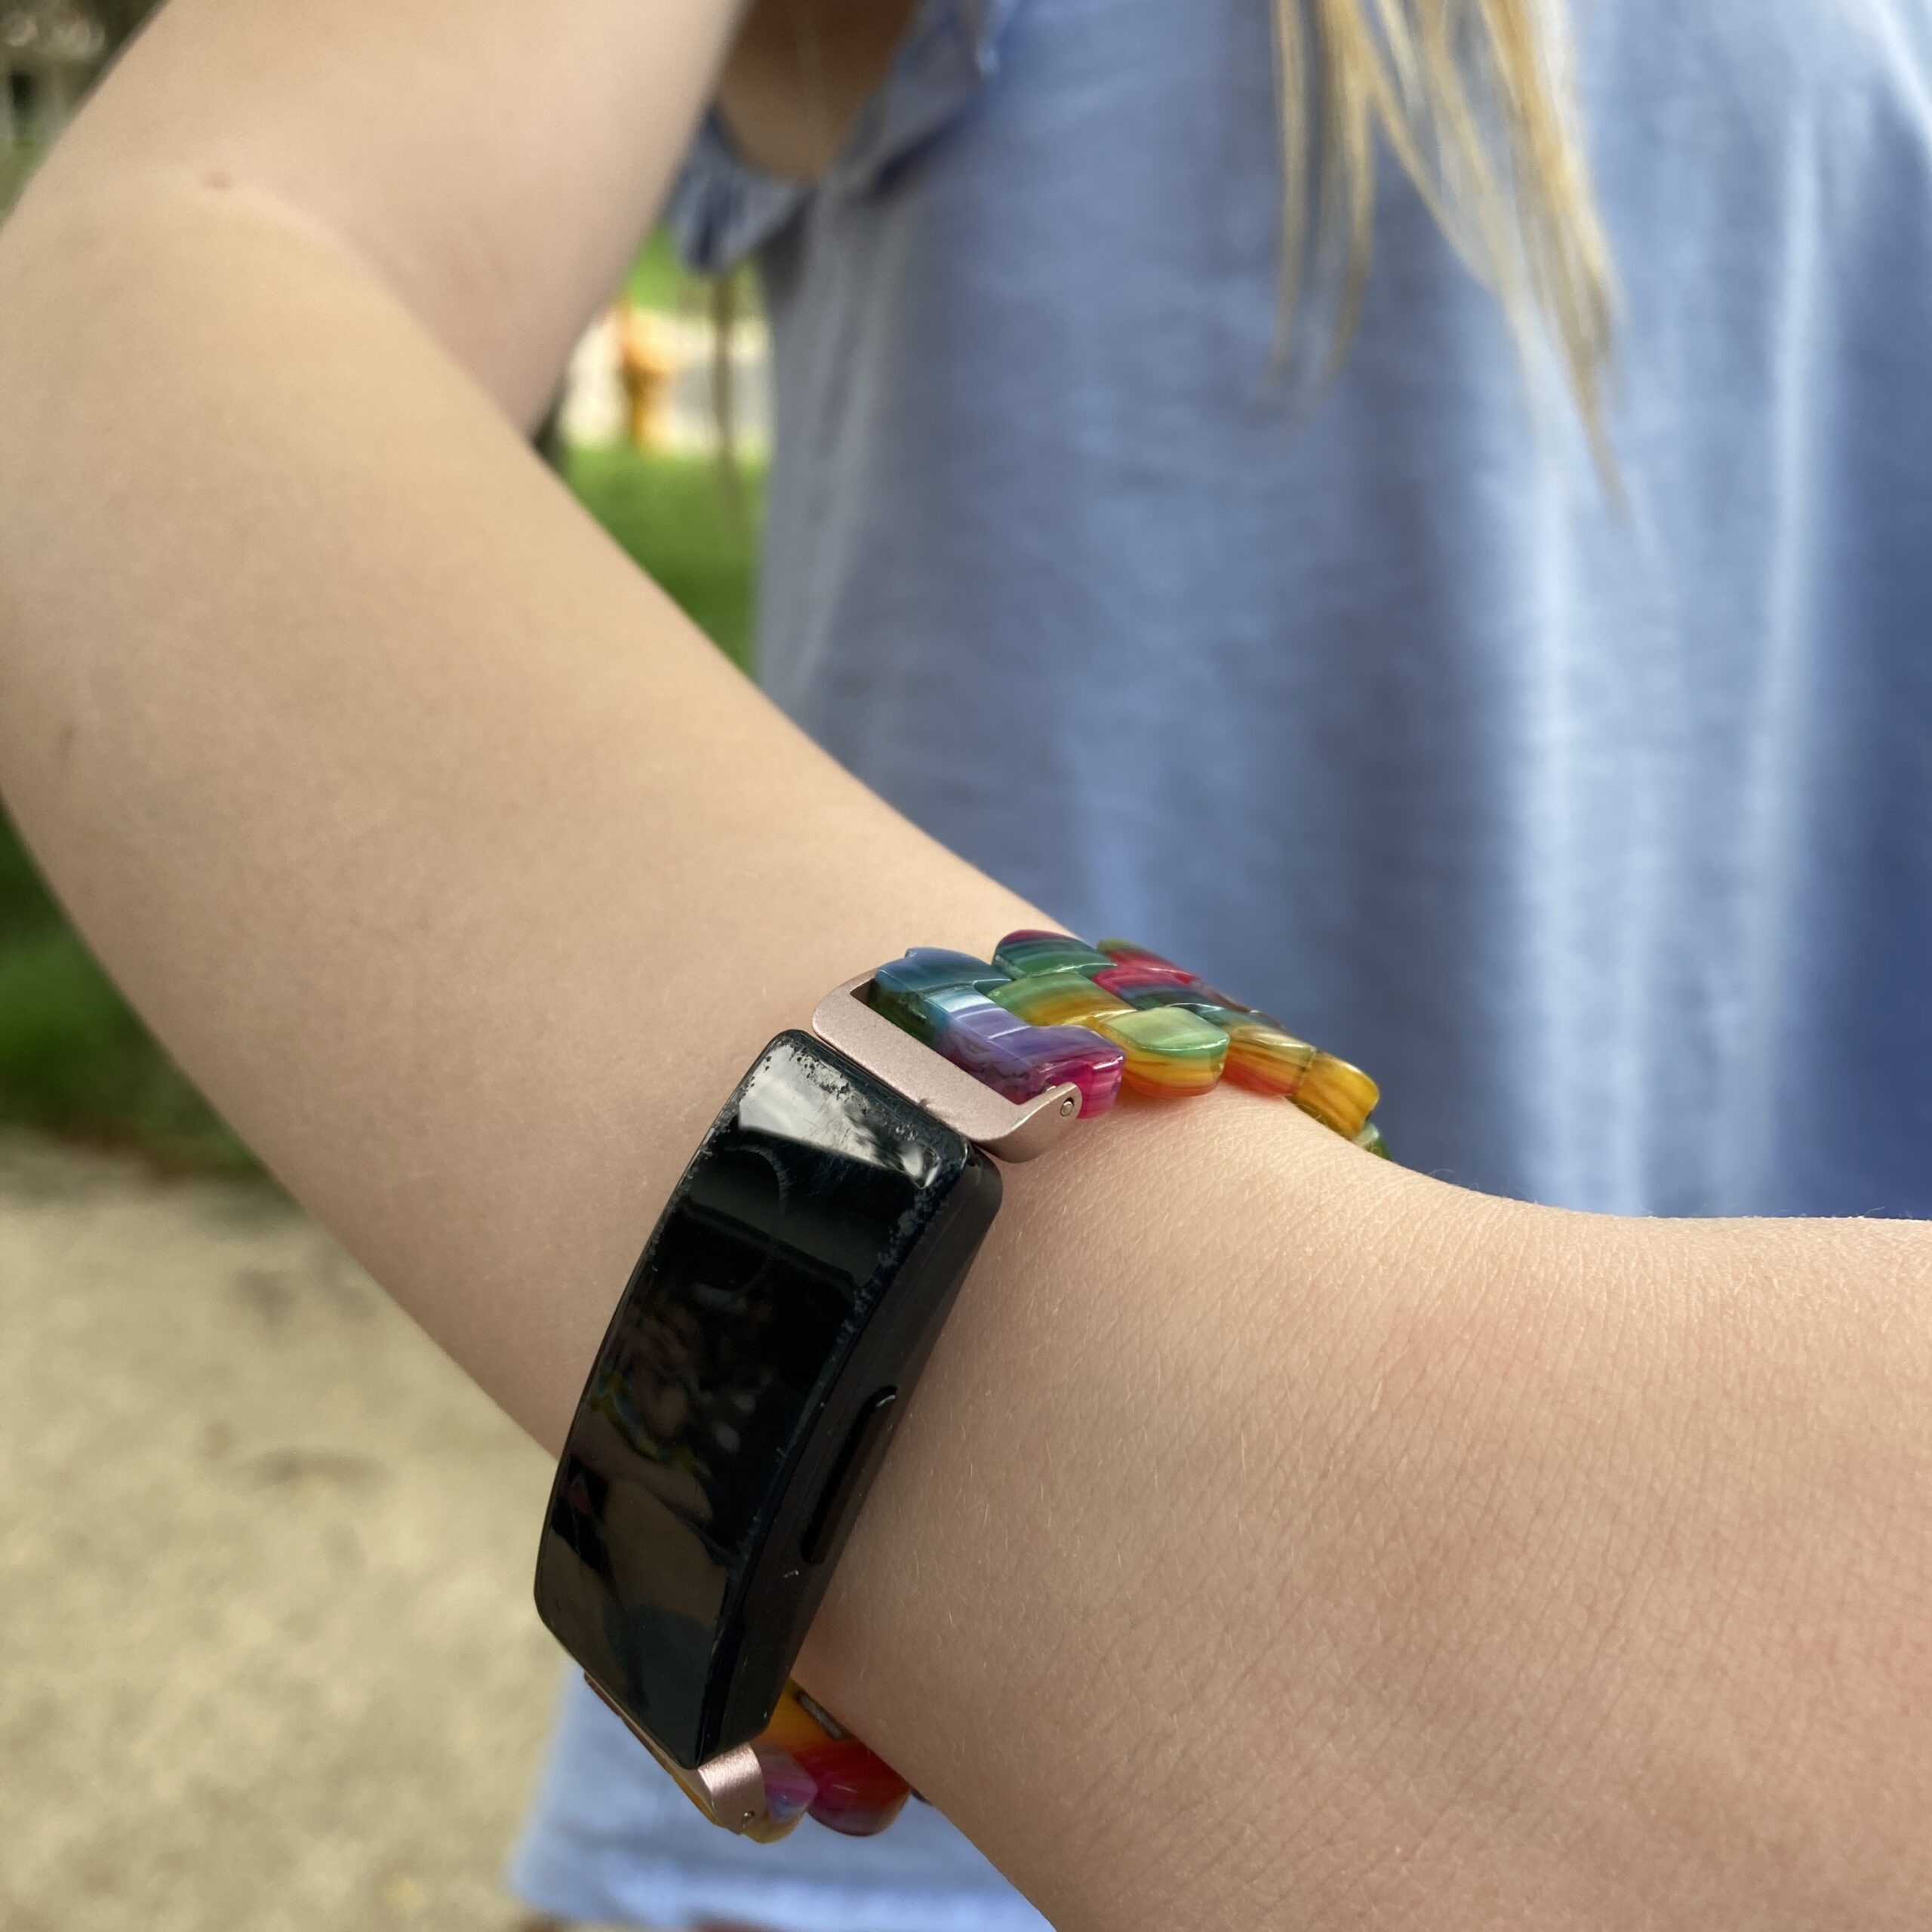
There are several big band stores out there like StrapsCo and Axios that sell several different styles of Fitbit bands. I really thought she’d like this rainbow one (which cost as much as I spent on the watch) 😅
Inspire 2 / Ace 2 bands – interchangeable?
So I ordered it because it claimed the Inspire 2 bands also work on the the Ace 2… sort of…
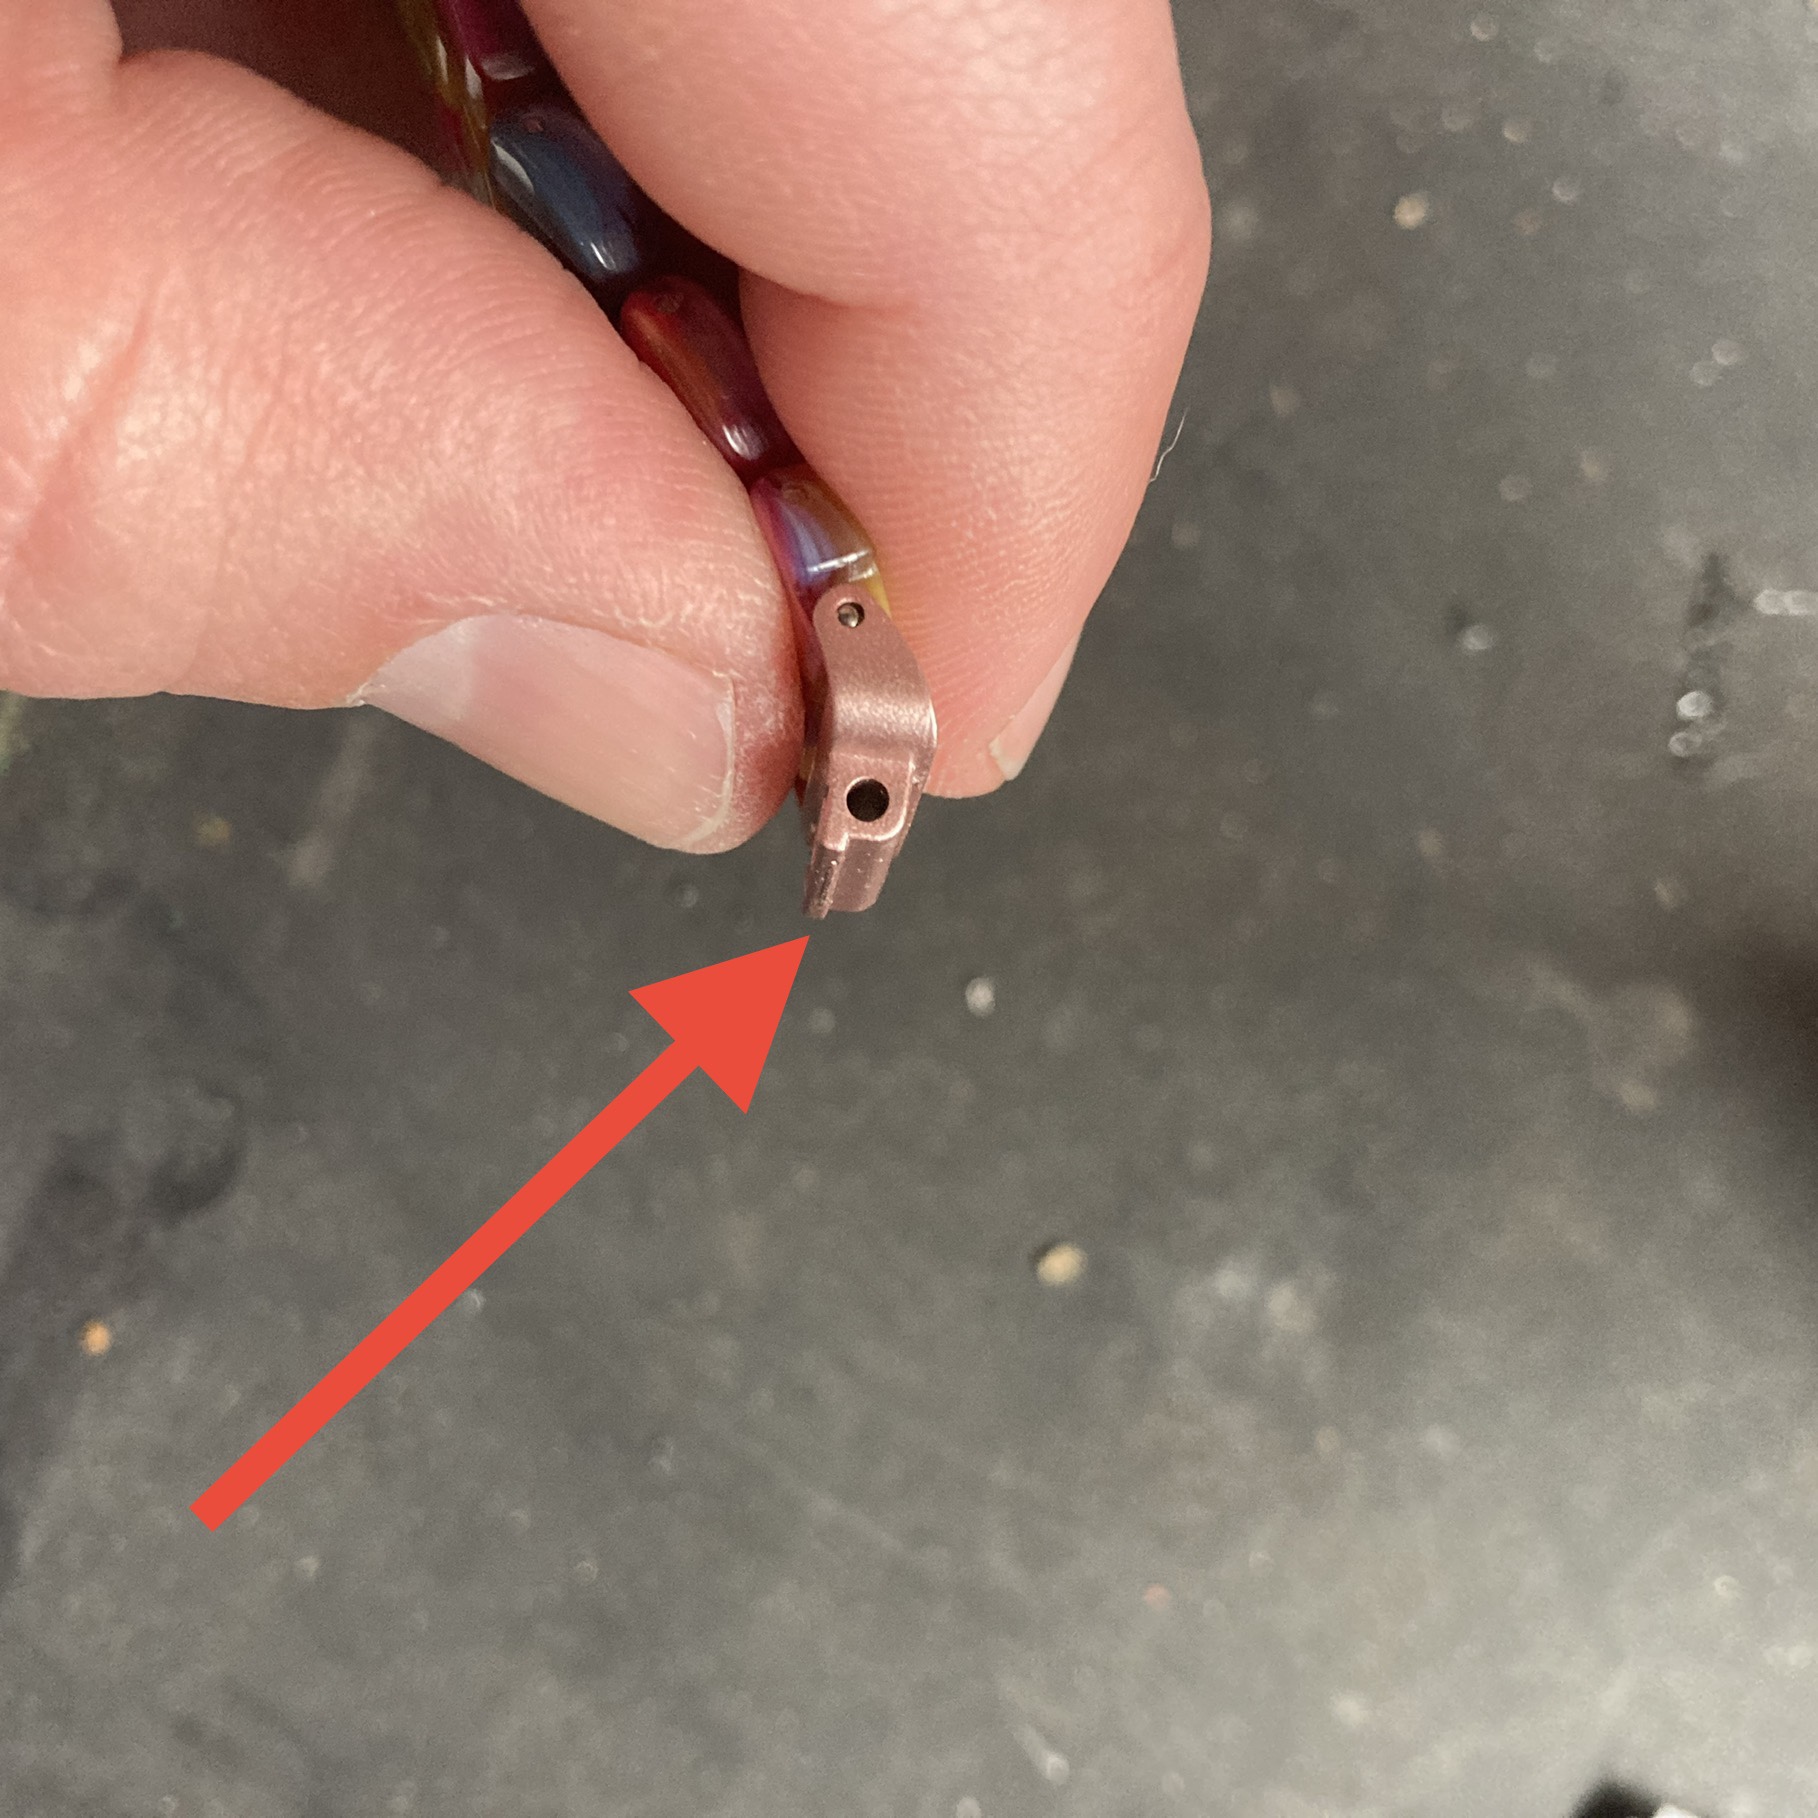
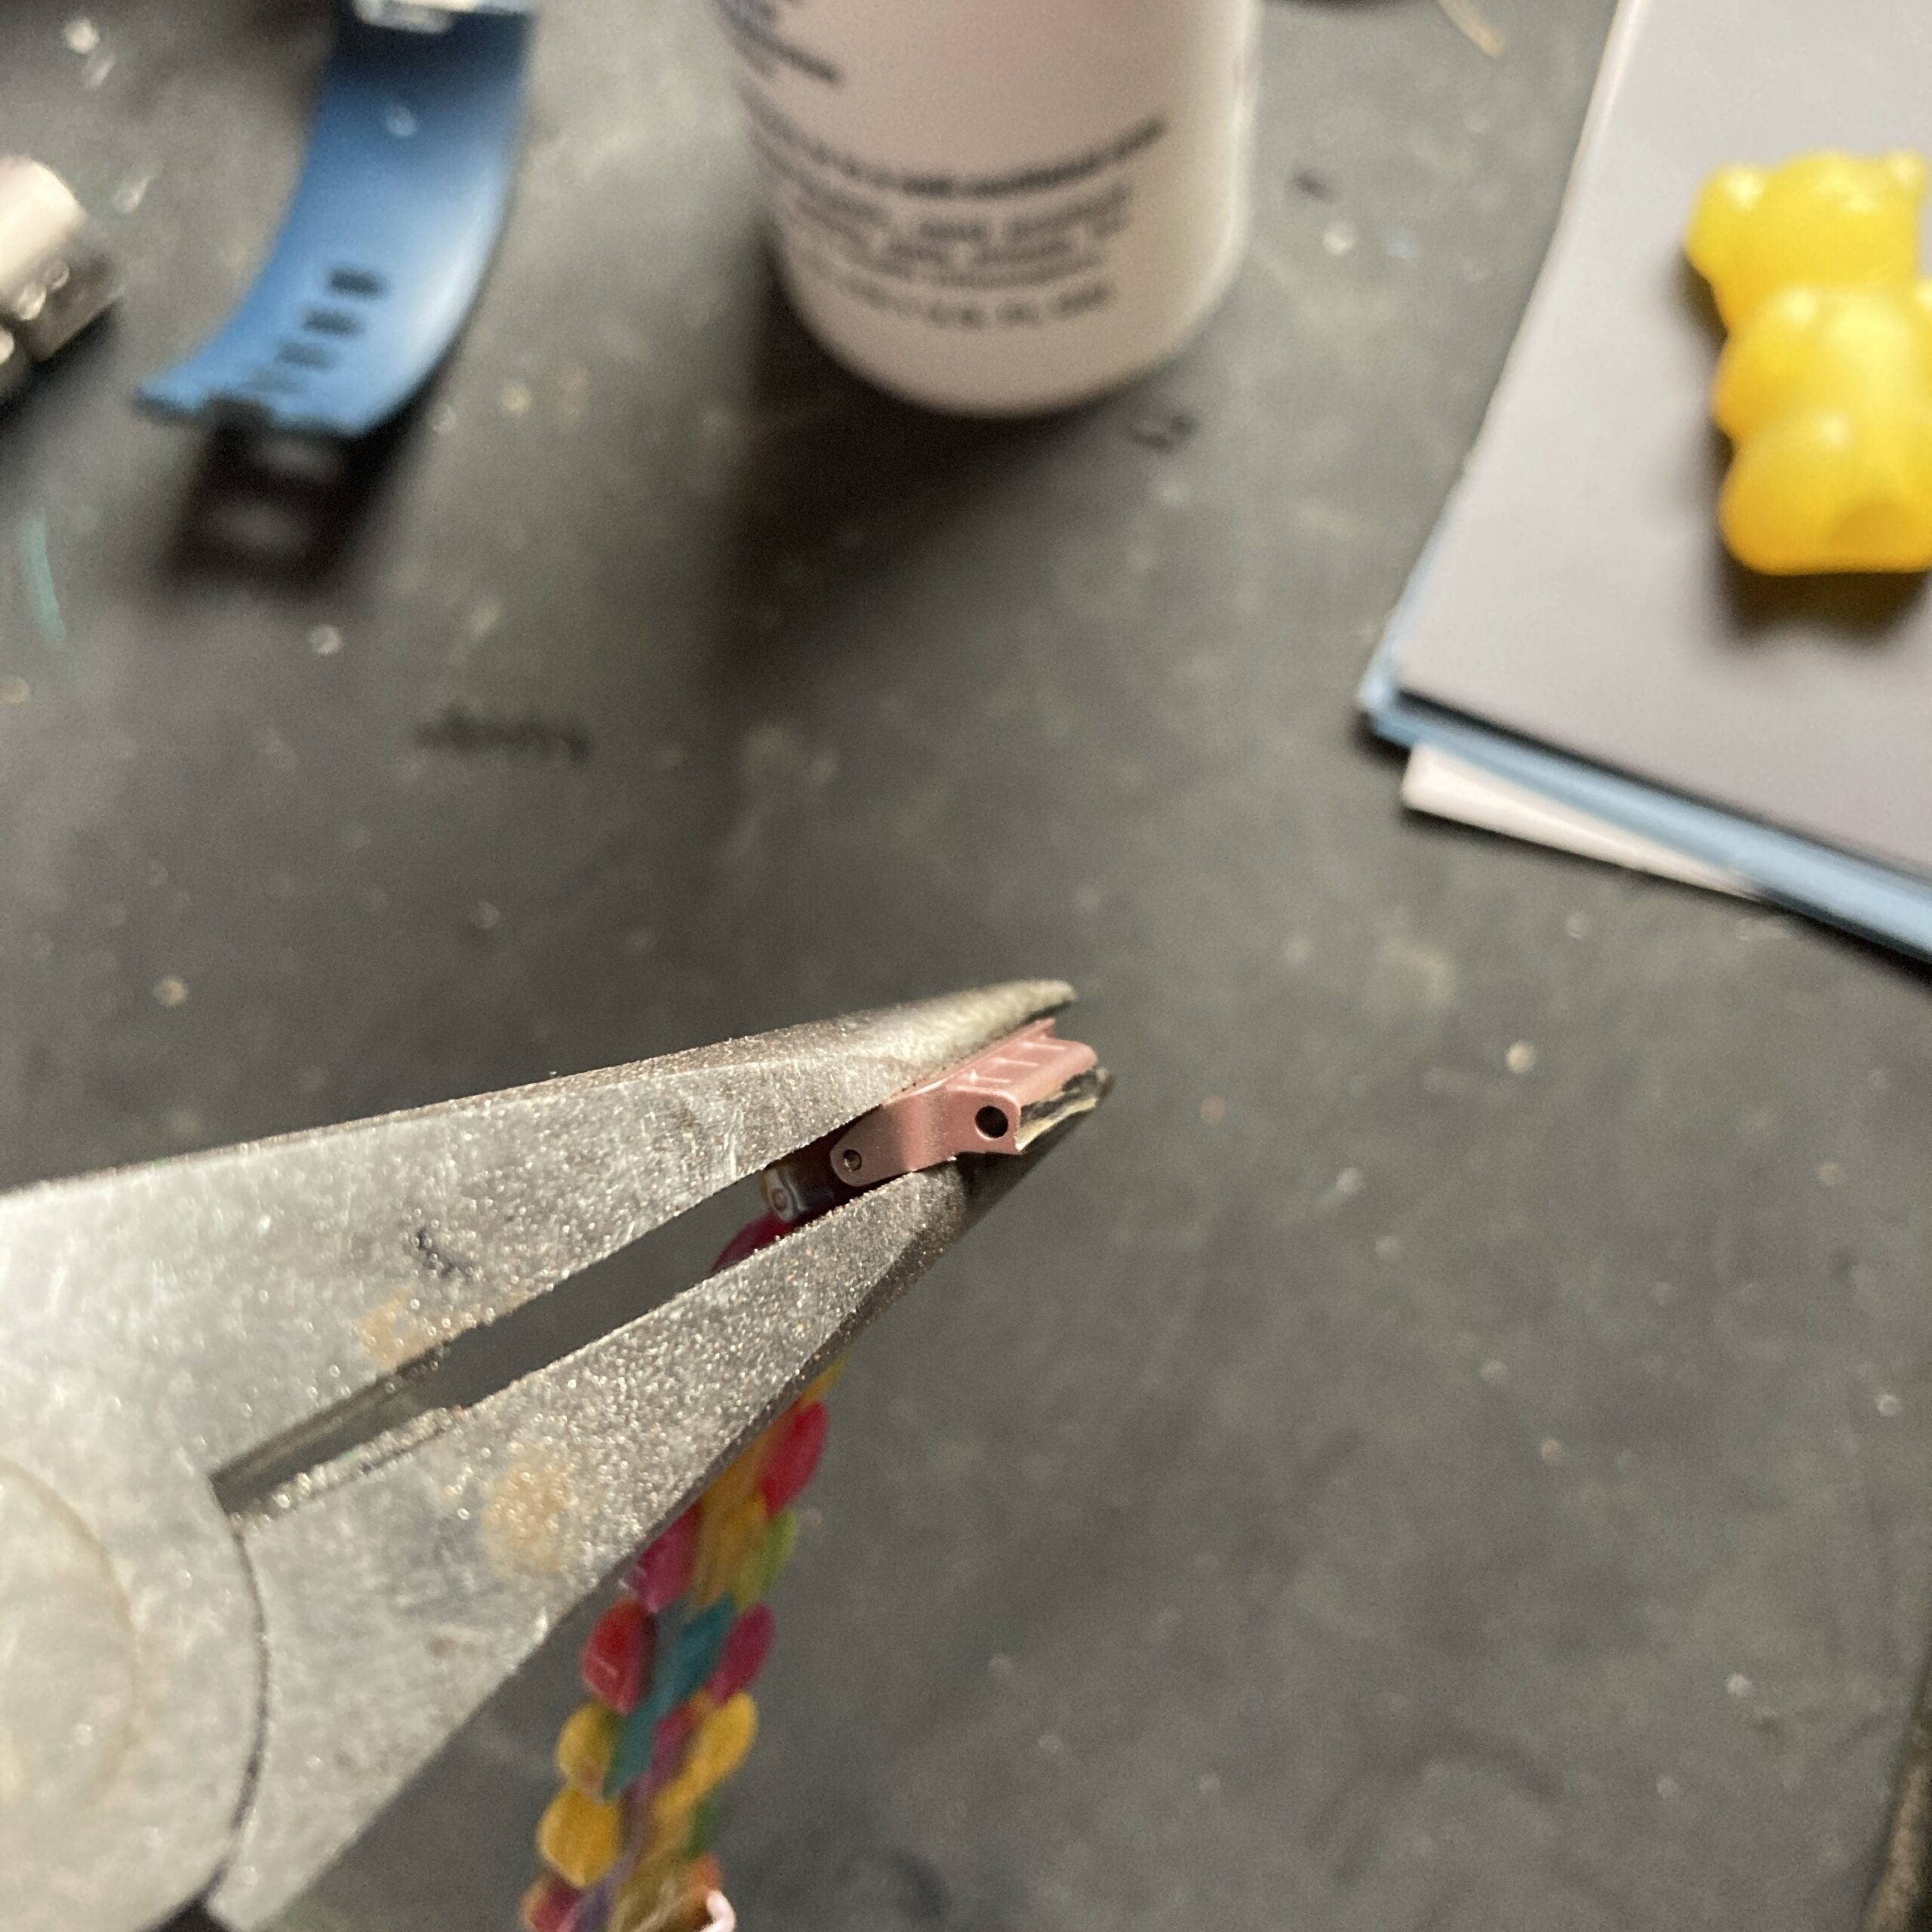
When I got the band, there was one problem. There’s an extra ridge on the band that must work on the Inspire but the Ace doesn’t accommodate it.
That ridge won’t let you insert the band to snap it into place on the Ace 2. So I got to work with my trusty Dremel rotary tool using a 409 cut-off wheel. Here’s what it looks like in-progress:
Once that ridge is gone, it’s now actually compatible with the Ace 2. My daughter loves it and it’s given her renewed interest in wearing it again!
WordCamp US 2020 was canceled, citing online event fatigue. But the organizers of WordCamp Minneapolis / St. Paul did not. Would we just be another notch in the bedpost of 2020 online event fatigue?
To be honest, the organizing team did contemplate canceling WordCamp Minneapolis / St. Paul as the Coronavirus pandemic continued to linger. But everyone agreed that pivoting to a single-day virtual event was a better idea – and we stayed the course.
When we had a real-life venue selected, there was an excellent computer lab available with over twenty computers. Going virtual meant re-thinking the game-plan. With WordCamp US canceled, it looks like WordCamp MSP’s KidsCamp might wind up being the only virtual KidsCamp of 2020.
Since it was uncharted territory, we cut the attendance in half, to 10 available spots. We reserved them for locals only, as our regular in-person conference is truly supposed to highlight pillars of our local community. With 80% local speakers at the conference, I think our organizers nailed it.
Swag
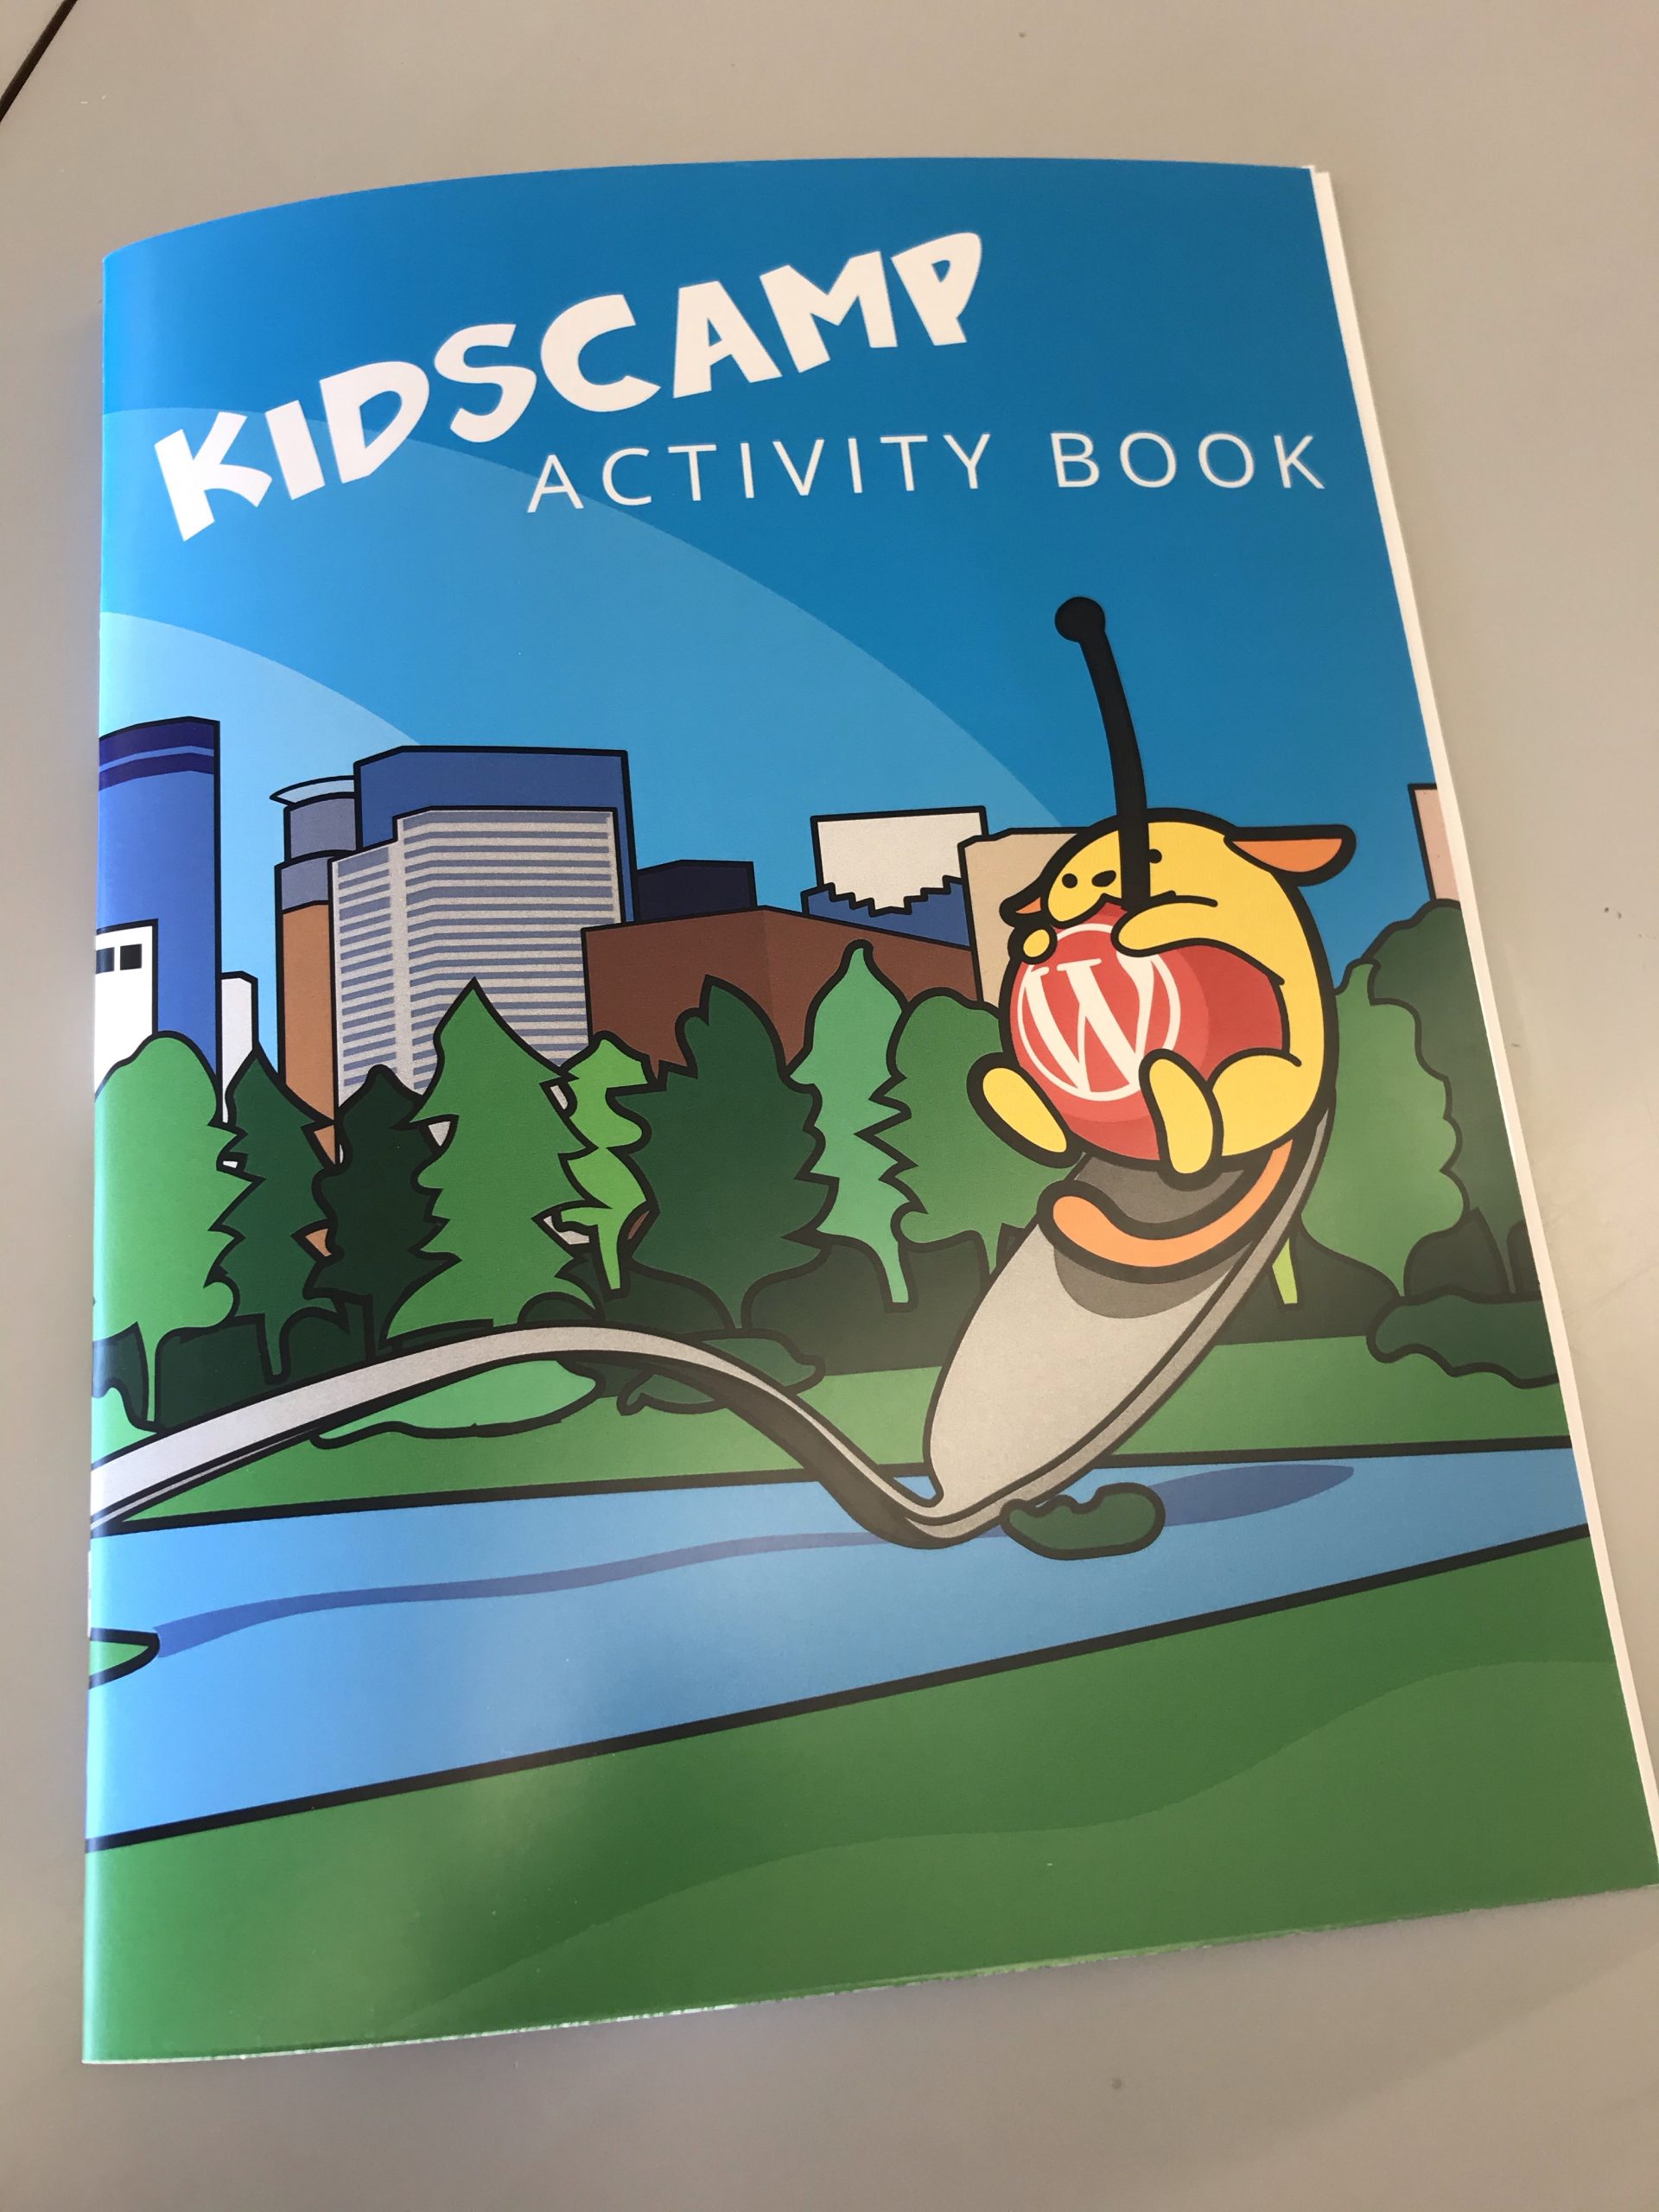
SWAG – Stuff We All Get. Virtual swag? 🤔 That sound silly – kids like real stuff. So we mailed the attendees some stickers and a KidsCamp Activity Book. Michelle from Marktime Media made amazing coloring books as attendee swag for WordCamp Minneapolis 2015. She repurposed that book into an evergreen KidsCamp Activity Book:
Check out the inside pages – including the first page which has a place to write down all of your new hosting and WordPress site details.
Dry-Run
To make sure things would run smoothly, I went through the entire curriculum with my 11 year old son. We did it the same day the rest of the team was doing their streaming dry-run, two days before the live event. I even had my son go to his grandma’s and log in there via Zoom so we could simulate teaching remotely.
What did I learn from that experience? While I can power through a 3-hour zoom call with no issues, kids need to take a break. When my son asked to take a break I realized that I also was hungry, thirsty, or needed to use the restroom. So I added TAKE A BREAK in all-caps to my schedule notes in various places.
The Live Event
The day of the event went off without a hitch. We had 8 registrants and only 6 showed up. A 25% no-show rate is typical for WordCamp, so I didn’t sweat it.
Safety
We talked about online safety – I cited a lot of information from NetSmartzKids – which is what the Cub Scouts Cyber-Chip merit is based on (also it’s a WordPress site 😎).
Brainstorming
We did some self-reflection and brainstorming. We talked about people we follow on YouTube and social media and what we like about them. My son cited DanTDM who plays a variety of games, not just Minecraft. When it came to self-reflection, I was pleasantly surprised that my son listed gaming as one of his interests, not just Fortnite. He wound up setting up a site with the central ideal of helping people with their gaming strategies. I likened it to Chris Lema’s mantra of Be Helpful – it warmed my heart 😍
Other kids chose different central ideas based on their interests: Animals, Music, Gaming – it was good to see a variety from the group.
WP Setup
We went with GoDaddy as our KidsCamp hosting sponsor, and they provided slick managed WordPress sites that didn’t require us to FTP any zip files to get started. This was one of the most important pieces of doing the camp virtually. We literally had zero technical issues to troubleshoot. 💪
One of the first things we did once we were into the WordPress dashboard was to reset our account password (GoDaddy generates a random one). We talked about password security and choosing something long-ish to make it hard to guess. This is my favorite reference for increasing password strength with length.
Then we were off, publishing an about page and our first post. Then customizing our themes to reflect our tastes.
Lessons Learned
Besides taking breaks, doing the event virtually was challenging because I wanted all of the kids to stay in sync. When you’re in a lab, it’s easy to see what screen someone is on and help them move forward.
My approach to doing it virtually was to share my screen and have everyone let me know when they’re on the same screen so we can all move forward together. It was challenging at times because some kids would give a thumbs-up on their camera, some would type “done” in chat, some would confirm aloud, and others wouldn’t respond. I left plenty of breathing room and we managed to stay together.
I’m glad we were able to put this event on, and I’m hoping dearly that we can do KidsCamp again in person at Metro State in 2021 🤞