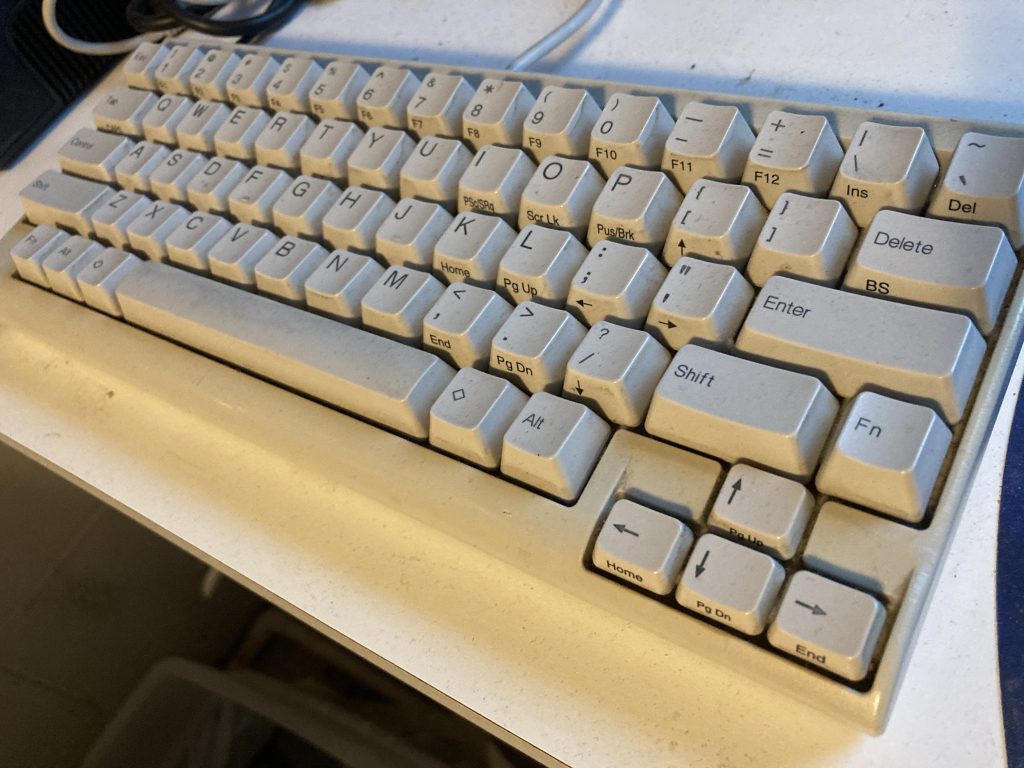
A coworker gave a lunch and learn about mechanical keyboards. I should have known it would be an entrance to a black hole… it all started 25 years ago with my beloved Zeos Keyboard with Alps keygates – which I consequently wrecked after spilling a beer into it 🍺 Then onto my HHKB Lite2 which I still have but need a host of adapters to connect its PS/2 connector.

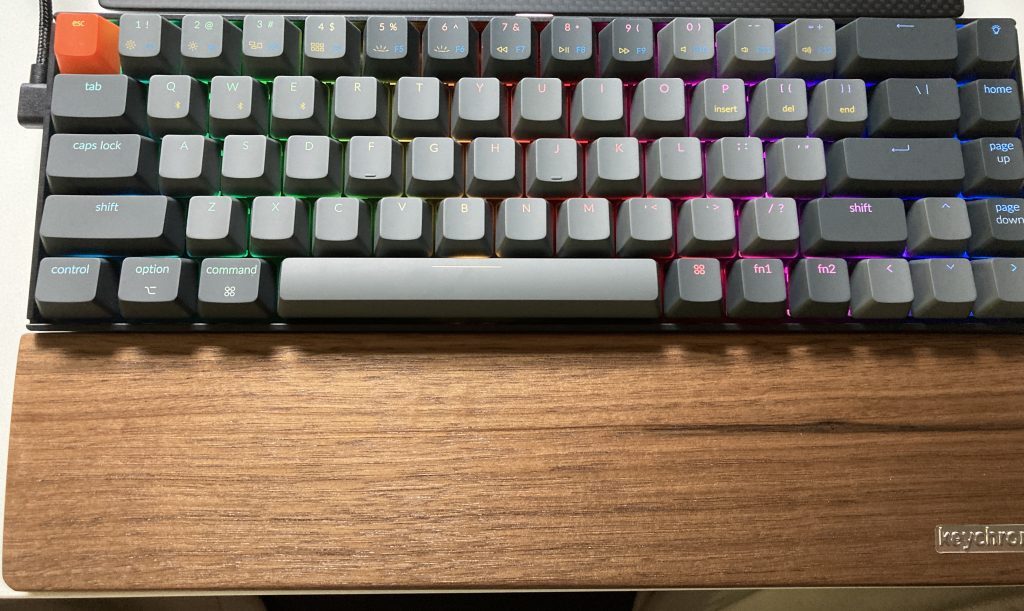
Now I’m entering the modern mechanical era with a Keychron K6 – a 65% keyboard that closely resembles my HHKB layout. It has Gateron Blue (light and clicky) switches that remind me of my famed Zeos board. Here’s the original layout:

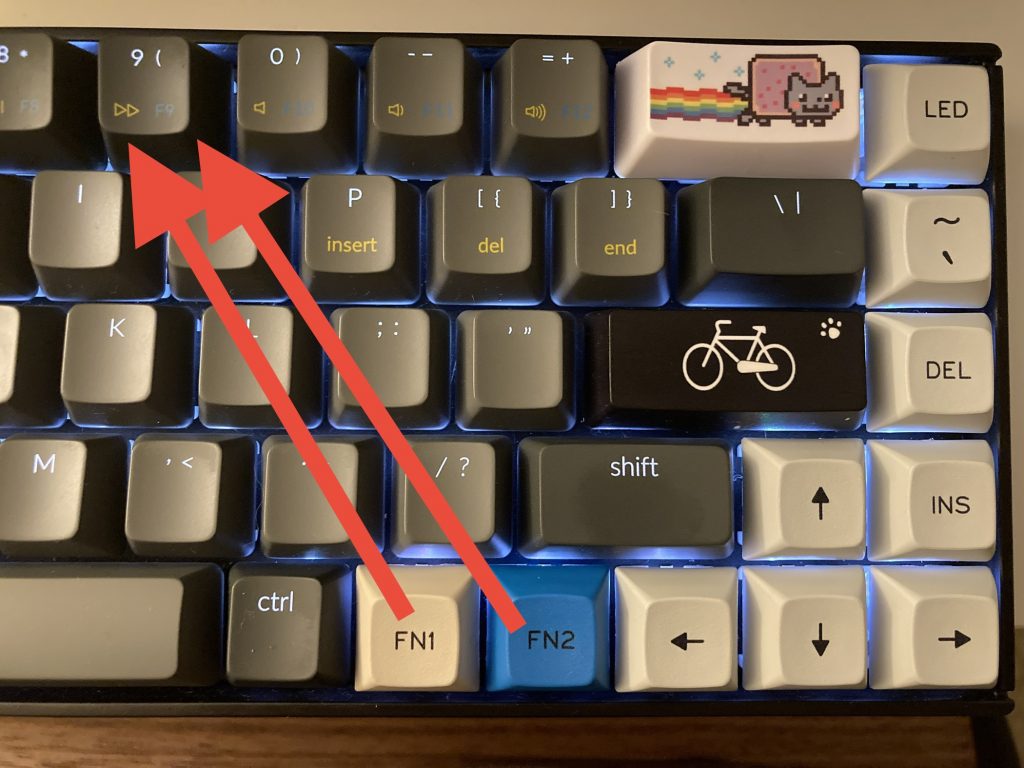
My first issue is I have a bit of OCD when it comes to pairing. I expect insert/del, home/end, and page up/down to be at least near each other, if not next to each other. So I changed the keycaps in the far right row, around the corner to the FN1/2 keys. I used low(ish) profile DSA keys on this edge to mimic the lower arrow keys from the HHKB. Also I got custom colored beige/blue FN1/FN2 keys to quickly remind me that FN1 is for the gold functions and FN2 is for blue.

Now I needed to change what the swapped keys did when I pressed them…
When it comes to customizing keyboards in Linux, there are at least 10 ways to skin this cat 😼 but for a one-to-one replacement, evdev is the answer. Why? Because it’s low-level enough to work with everything, whether you use Xorg or Wayland. It even works in the console.
Getting information about your keyboard
For our research you’ll probably need to install a couple of things:
sudo apt install evtest evemu-toolsYou can use evemu-describe to get information about your keyboard. If you run evemu-describe without any arguments, you’ll be prompted to select the input device. I’ve highlighted my input in bold.
$ sudo evemu-describe
Available devices:
/dev/input/event0:	Lid Switch
...
/dev/input/event19:	Generic USB Audio
/dev/input/event20:	Keychron K6 Keyboard
/dev/input/event21:	Keychron K6 Consumer Control
/dev/input/event22:	Keychron K6 System Control
/dev/input/event23:	BluetoothMouse3600 Mouse
/dev/input/event24:	BluetoothMouse3600 Consumer Control
Select the device event number [0-24]: 20
# EVEMU 1.3
# Kernel: 5.11.0-27-generic
# DMI: dmi:bvnDellInc.:bvr1.7.0:bd10/22/2020:br1.7:svnDellInc.:pnXPS137390:pvr:rvnDellInc.:rn0G2D0W:rvrA00:cvnDellInc.:ct10:cvr:
# Input device name: "Keychron K6 Keyboard"
# Input device ID: bus 0x05 vendor 0x5ac product 0x24f version 0x11b
# Supported events:
#   Event type 0 (EV_SYN)
#     Event code 0 (SYN_REPORT)
...
#     Event code 15 (SYN_MAX)
#   Event type 1 (EV_KEY)
#     Event code 1 (KEY_ESC)
...
# Properties:
N: Keychron K6 Keyboard
I: 0005 05ac 024f 011b
...
Take note of the properties line towards the bottom:I: 0005 05ac 024f 011b
It is the Bus/Product/Vendor/Version identifier that we’ll use that to identify the keyboard in our hardware DB file.
Gather Keycode & Scancode Information
Along with the Bus/Product/Vendor/Version identifier, you’ll need scancodes and keycodes for our configuration file.
The keys I wanted to replace on the far right are:
- Home -> Grave/Tilde
- Page Up -> Insert
- Page Down -> Delete
To get scancodes, run sudo evtest and select the input device you want to test (same as above), and then press the keys you want to switch out.
$ sudo evtest
No device specified, trying to scan all of /dev/input/event*
Available devices:
/dev/input/event0:	Lid Switch
...
/dev/input/event19:	Generic USB Audio
/dev/input/event20:	Keychron K6 Keyboard
/dev/input/event21:	Keychron K6 Consumer Control
/dev/input/event22:	Keychron K6 System Control
/dev/input/event23:	BluetoothMouse3600 Mouse
/dev/input/event24:	BluetoothMouse3600 Consumer Control
Select the device event number [0-24]: 20
Input driver version is 1.0.1
Input device ID: bus 0x5 vendor 0x5ac product 0x24f version 0x11b
Input device name: "Keychron K6 Keyboard"
Supported events:
  Event type 0 (EV_SYN)
  Event type 1 (EV_KEY)
    Event code 1 (KEY_ESC)
...
Testing ... (interrupt to exit)
Event: time 1629497486.881450, type 4 (EV_MSC), code 4 (MSC_SCAN), value 70028
Event: time 1629497486.881450, type 1 (EV_KEY), code 28 (KEY_ENTER), value 0
Event: time 1629497486.881450, -------------- SYN_REPORT ------------
Event: time 1629497489.406440, type 4 (EV_MSC), code 4 (MSC_SCAN), value 7004a
Event: time 1629497489.406440, type 1 (EV_KEY), code 102 (KEY_HOME), value 1
Event: time 1629497489.406440, -------------- SYN_REPORT ------------
For example, the scancode for the HOME key is 7004a. The keycodes are printed in all caps, such as KEY_HOME. You can also look up keycodes here, or if you’re trying to add a new key that isn’t on your keyboard, you can find all keycodes in /usr/include/linux/input-event-codes.h
We’re going to put this all into a hardware DB file. The filename is arbitrary, as long as it has a .hwdb extension. I put a number at the beginning because config files like this are loaded in filename order. If something should load before or after, it can use a lower/higher number (respectively).
sudo vi /etc/udev/hwdb.d/50-k6keyboard-bt.hwdb
# Input device ID: bus 0x5 vendor 0x5ac product 0x24f version 0x11b
# evdev:input:b<bus_id>v<vendor_id>p<product_id>e<version_id>-<modalias>
evdev:input:b0005v05ACp024F*
 KEYBOARD_KEY_7004a=grave
 KEYBOARD_KEY_7004b=delete
 KEYBOARD_KEY_7004e=insert
It took several attempts to get this right. I didn’t realize that the format is very particular and it should look something like: b0000v0000p0000e0000*. Don’t include the hex prefix of 0x. Also hex values must be capitalized in udev version 220 and above. Lastly, put a * at the end to capture all the versions. You can verify your version of udev by running:
$ udevadm --version
245
The keycode remapping lines must look like this:KEYBOARD_KEY_<scancode>=<keycode>
The keycodes must be lowercase on the right side of the .hwdb file.
Build & Test
Once your hardware DB file is saved, you can test out the setup, by running these commands:
$ sudo systemd-hwdb update
$ sudo udevadm trigger
$ udevadm info /dev/input/event20
P: /devices/pci0000:00/0000:00:14.0/usb1/1-7/1-7:1.0/bluetooth/hci0/hci0:256/0005:05AC:024F.0007/input/input41/event20
N: input/event20
L: 0
E: DEVPATH=/devices/pci0000:00/0000:00:14.0/usb1/1-7/1-7:1.0/bluetooth/hci0/hci0:256/0005:05AC:024F.0007/input/input41/event20
E: DEVNAME=/dev/input/event20
E: MAJOR=13
E: MINOR=84
E: SUBSYSTEM=input
E: USEC_INITIALIZED=4366743414
E: KEYBOARD_KEY_7004a=grave
E: KEYBOARD_KEY_7004b=delete
E: KEYBOARD_KEY_7004e=insert
E: ID_INPUT=1
E: ID_INPUT_KEY=1
E: ID_INPUT_KEYBOARD=1
E: ID_BUS=bluetooth
E: XKBMODEL=pc105
E: XKBLAYOUT=us
E: BACKSPACE=guess
E: LIBINPUT_DEVICE_GROUP=5/5ac/24f:90:78:41:ca:1e:02
E: TAGS=:power-switch:
The first command (systemd-hwdb update) reads the hwdb files and rebuilds the binary hardware database from the text files. The second (udevadm trigger) tells udev to (re)scan hardware for matches. The last (udevadm info) helps verify that the configuration – remember to replace event20 with your device ID.
You can see in the output that my KEYBOARD_KEY entries are there and they do indeed work 💪 It will also be there after you reboot.
My next step will be adding home/end and page up/down modifiers to my arrow keys…
Leave a Reply