From touring Miller & Budweiser breweries, I noticed both sites have caves – which have steady year-round temperatures. I assume the caves were used to lager, which means “storage” in German. Lager yeasts, unlike ale yeast which ferment at room temperature, do their primary fermentation in the mid-50 degree range. During secondary fermentation the temperature is dropped steadily to slowly deactivate the yeasts. Back in the day, the barrels could be moved deeper into the cave day-by-day to slowly lower the temperature from the mid-50s down to almost freezing (35°F).
Yogurt Maker?
I had an idea to automate this process using an Arduino, especially after reading Chris Reilly’s Arduino yogurt maker from Make Magazine volume 25. Everything I’ve done here was based on that, so I’ll assume you’ve read it.
Lagering is essentially the same process except instead of using a heat source (crock-pot), we use a cooler (refrigerator). Getting the refrigerator to maintain temps above 40°F can be tricky, so normally an external temperature regulator is used. But this requires me going out to the fridge every day to lower the temperature by one degree. So why not automate it? Laziness FTW!
The parts list for this project are almost exactly the same as the yogurt maker, so I won’t reprint them, but here are some changes/additions:
- The cited relay board was discontinued by SparkFun and is now called the Beefcake Relay Control Kit
- 1x 10kΩ resistor & 1x 330Ω resistor (optional – for reference voltage calculation)
The Hardware
A friend of mine once said:
You software guys wouldn’t know a piece of hardware if it bit you in the ass.
I’m a software guy, so this is mostly true. Programming for Arduino is probably the closest thing I’ll ever get to real-time programming, and yes hardware and its real-world properties did present some issues. For my project, I tried to use both a cheap thermistor and a TMP36 temperature sensor. They each presented different problems:
TMP36
While this initially seemed to be the most accurate, there were problems. First there is apparently an issue when the Arduino making readings on analog pins without waiting long enough in-between, some residual voltage may remain – and skew the next reading (see graph here). Even if that’s fixed by moving to a better 3.3v reference voltage (or by simply waiting long enough between reads), there was still another issue…
As soon as any other circuits were added to the Arduino (like the relay controller) the readings of the TMP36 would be skewed – see Gunther’s comment. I don’t know enough about electronics to know if I should fix this with some pull up (down?) resistors or what. If someone knows better, I’m interested in not only the fix, but how/why the fix works.
NTC Thermistor
The only issue I have with thermistors is… MATH! To calculate temperature using one of these you can do a couple of things:
- Generalize the temperature based on the table given in the datasheet
- Calculate the temperature using the Steinhart-Hart equation
- Calculate the temperature using the Beta-parameter equation
The datasheet for my thermistor gave a Beta value, but not the A, B, & C constants needed to do the Steinhart-Hart calculations – but those can determined by plugging in 3 known temperature/resistance values from the datasheet here: http://www.capgo.com/Resources/Temperature/Thermistor/ThermistorCalc.html.
Since the datasheet indicates the Beta constant, I went that route, except to determine temperature, you need to solve this equation:
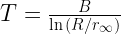
I have the Beta (B) parameter, and I’ll know the resistance (R) at the time of measurement, but WTF is 

In pseudocode solving looks like:
r_sub_inf = resistance / (pow(e,(b / temperature)))
I solved this for a few temperatures & resistances from the datasheet and took an average. Or you can experiment with various
Also, there’s heat created when voltage is sent through the thermistor, and the datasheet gives a “Thermal Dissipation Constant.” To account for this I subtracted a few degrees from the measurement based on this constant.
Even after all this was said and done, my temperature readings were low compared to a trusted reference thermometer. So I simply created an offset constant to bring things more in line. I can’t (and won’t) guarantee this offset will be the same over the entire range of the thermistor, but it works for me 🙁 Again if anyone can provide insight on a better way to remedy this, I’m all ears.
Software
I made a datatype called a stage which contains a start temperature, end temperature and duration. You can add as many stages as you’d like. For lagering there’s typically two (or three) stages:
- Primary Fermentation (~two weeks)
- Secondary Fermentation (~2-3 weeks)
- Conditioning (~3-4 weeks)
Times indicated above were for the most recent kit I brewed: American Lager from Northern Brewer.
I set my stages up like this:
const int stageNum = 5;
stage stages[stageNum] = {
  //primary fermentation
  { 56, 56, 2 * week1 },
  //split secondary fermentation into 3 stages
  { 56, 49, week1 },
  { 49, 42, week1 },
  { 42, 35, week1 },
  //conditioning (ready to drink)
  { 35, 35, 3 * week1 }
};
The reason I split secondary fermentation into 3 is so I can have “checkpoints.” Just incase the power goes out or something, I can re-start closest to where I left off.
The button & speaker act to switch stages and report the current stage & temperature. If you press the button quickly, the speaker will beep n-times in a mid-tone to indicate the stage number, then in a low tone: x long tones for the first digit of the current temperature, and y short tones for the second digit of the current temperature. Then in a high tone the same process will repeat for the current target temperature.
Holding the button down for more than 3 seconds will cause the Arduino to advance to the next stage. It will then report the new stage number, current temperature and target temperature as described above.
Otherwise the Arduino will just run through all of the stages as indicated until it reaches the end. At which time the device (refrigerator) will shut off, so it might be good to leave an extra long conditioning stage just in case you forget 🙂
Leave a Reply