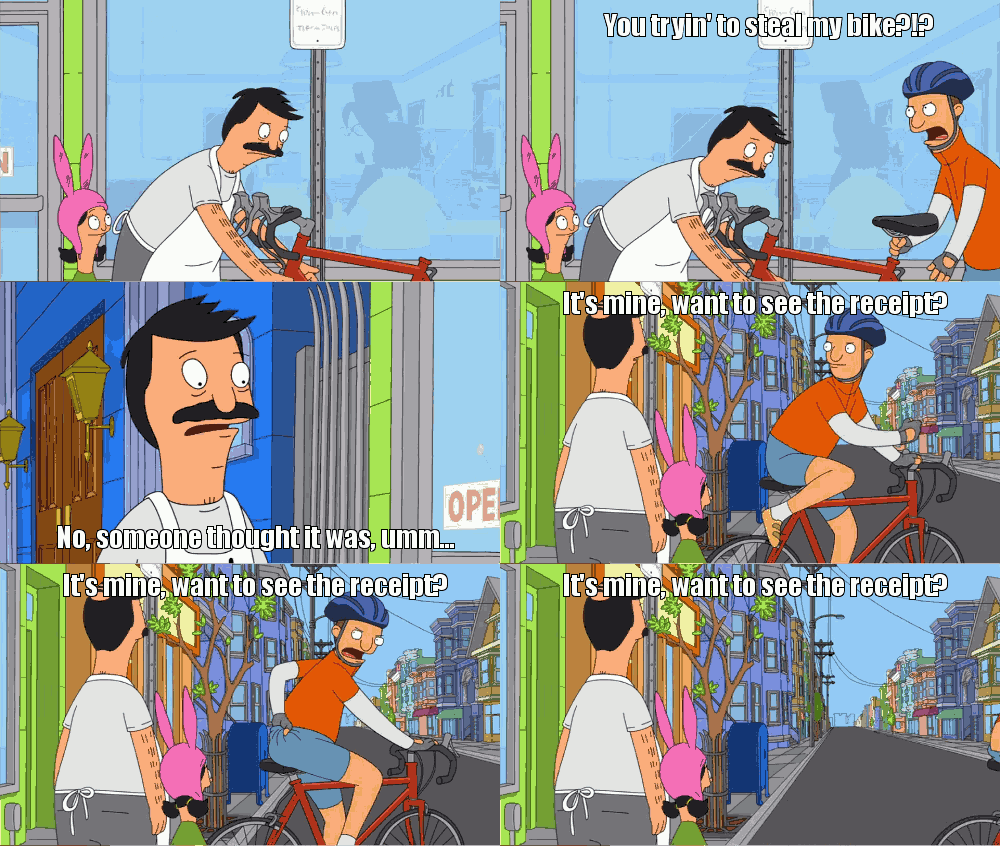
Here’s a write-up for how to create an animated gif from a video on Ubuntu 14.10. I know 15.04 is almost in beta, but hopefully this process won’t change too much. Submit a comment if things change and I’ll revisit it and update.
This is an easy way to create those animated gifs you see on your favorite tumblr blogs. Now that Netflix works in Linux, you can do it easily with your favorite shows.
You’ll need the following installed:
google-chrome, vlc, gimp, gimp-gap (gimp animation package), avconv
Capture
Open up chrome and load up your favorite show from Netflix. Let Netflix run in the window (not full-screen). No need to maximize your chrome window, it only needs to be bigger than your desired output resolution.
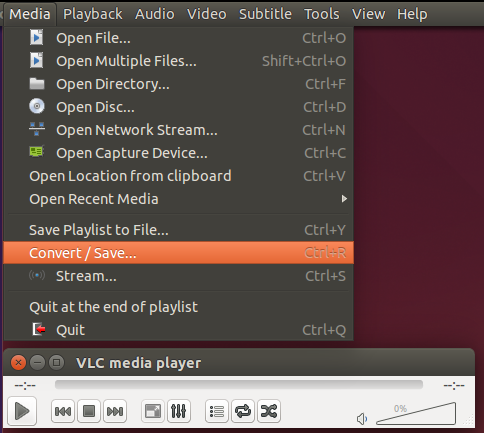
Fire up VLC and choose Media → Convert / Save…
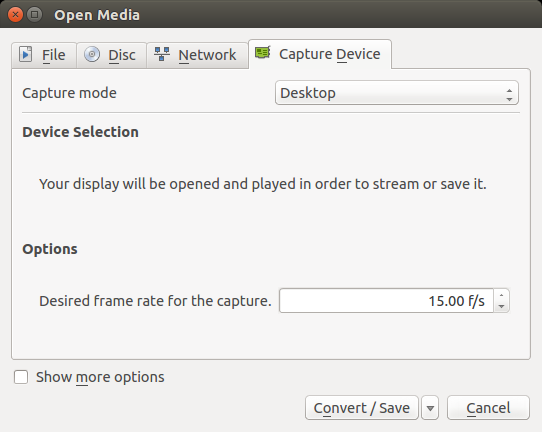
Go to the Capture Device tab and select Desktop for the Capture mode.
Also, set the frame rate you’d like to use. TV shows normally use 30 f/s and movies 24 f/s. For gif-ing purposes, 15 f/s is usually good enough to convey the idea.
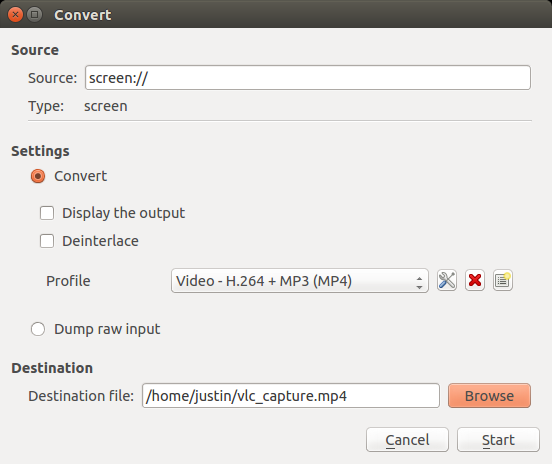
Press Convert / Save and you’ll be taken to the next screen. Select Convert, and the profile for Video MP4 (H.264 + MP3) is fine. Then put in a destination for your output file.
Queue up your show because when you press Start it’s going to start recording right then. When the clip you want to capture is over, press the stop button on the VLC player. You should have a MP4 of your entire desktop including your video.
Split into frames
My go-to program for splitting videos into frames would be ffmpeg, but it’s missing in action. There was apparently a rift in the ffmpeg development team. Luckily, avconv is an almost syntactically identical replacement.
From the command line convert your video into individual frames. Set the rate (-r) argument to the same frame rate as your capture to make things easy.
avconv -i vlc_capture.mp4 -r 15 image-%3d.png
At this point you can preview your images and delete any “extras” you may have at the beginning and the end of the sequence.
Edit in Gimp
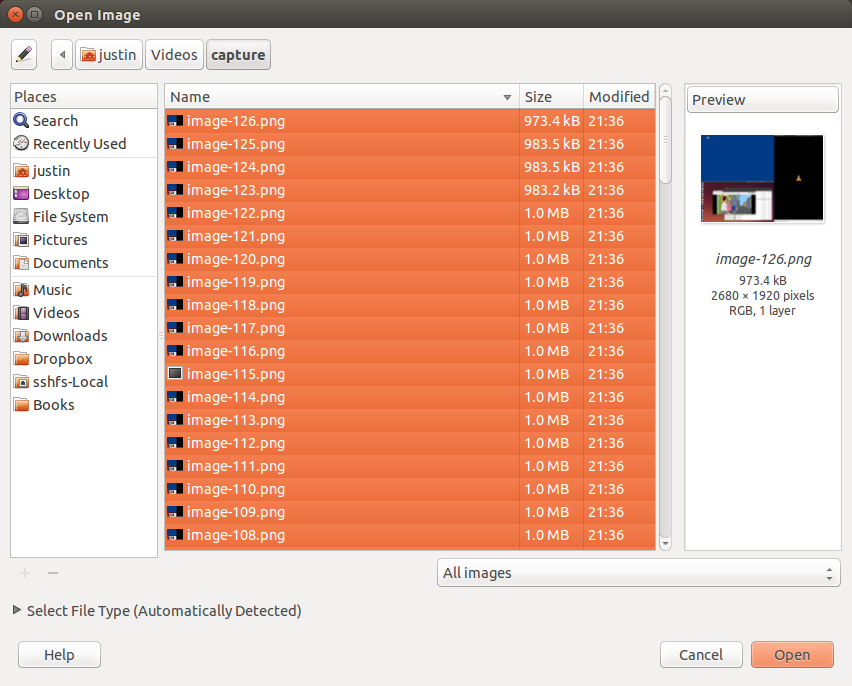
Now open all of the frames in Gimp. Use File → Open as Layers…
This tutorial assumes images are brought in as layers with the first frame (lowest number) on top due to the relative ease of “merging down” layers. To do this, make sure the images are ordered in the chooser in reverse order. Before we export, we’ll reverse this process.
Once it’s in Gimp and the frames are in the right order, first on top for this tutorial, crop your image to cut out everything but the video. Then Image → Scale Image… to set the final output size, something reasonable like 500 pixels wide.
Add Captions (words)
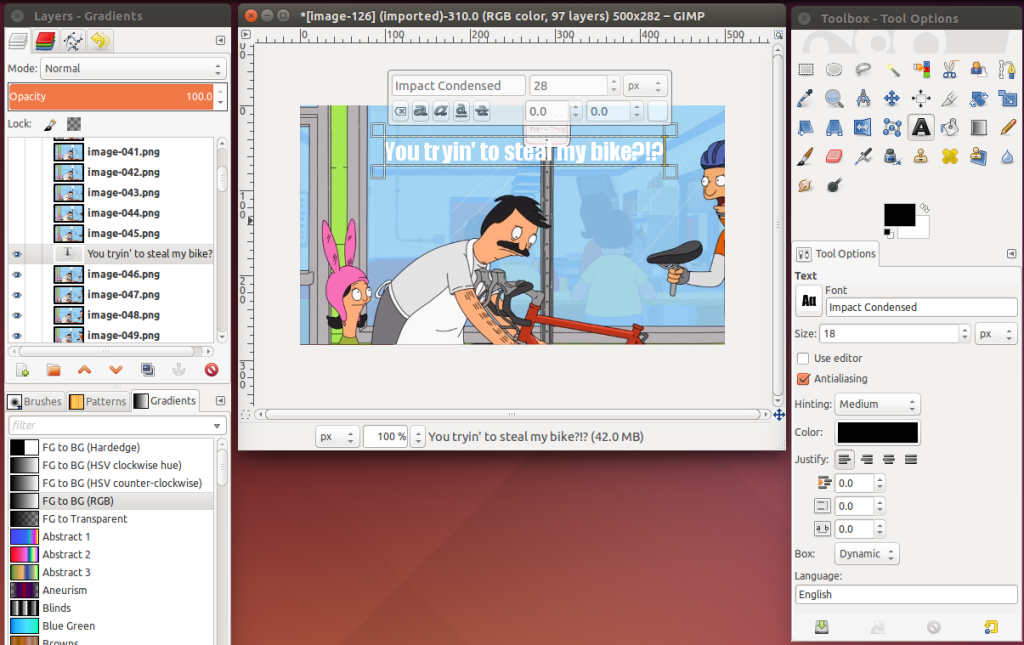
Find the first frame you want to add text to, and set all the other frames above it invisible by clicking the eye icon in the layers window. Then on the first frame you want to add text to, use the text tool.
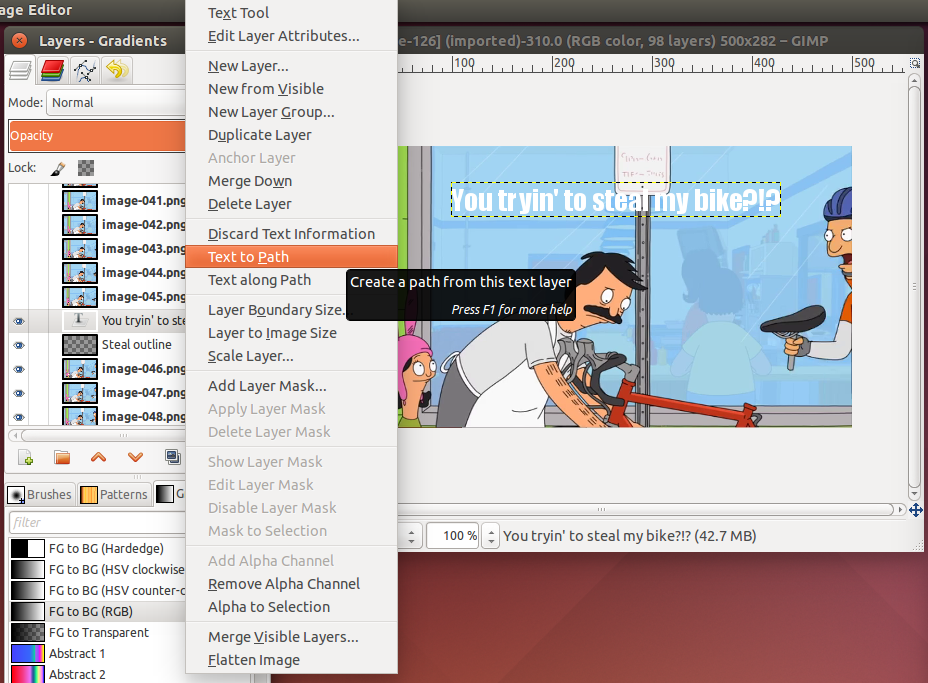
The Impact font seems to be popular for memes. I like to add a one pixel outline to make sure the white text stands out. To do this, create a transparent layer under your text layer. Select the text layer, right click and select Text to Path.
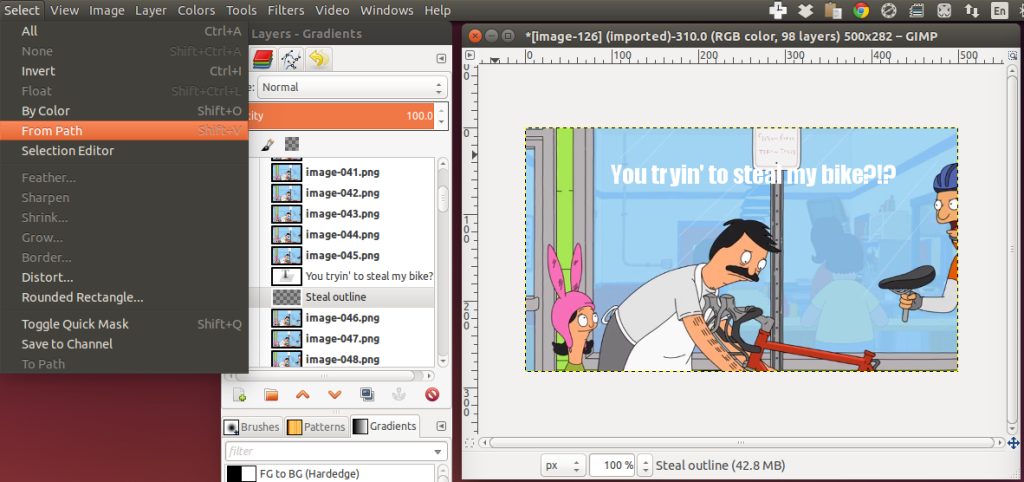
Select the new transparent layer, then choose Select → From Path.
Now you’ve got the text selection on a different layer. Use Select → Grow… to grow the selection by one pixel. Then use the bucket tool to fill it with black. Merge the text and outline layer when you’re satisfied.
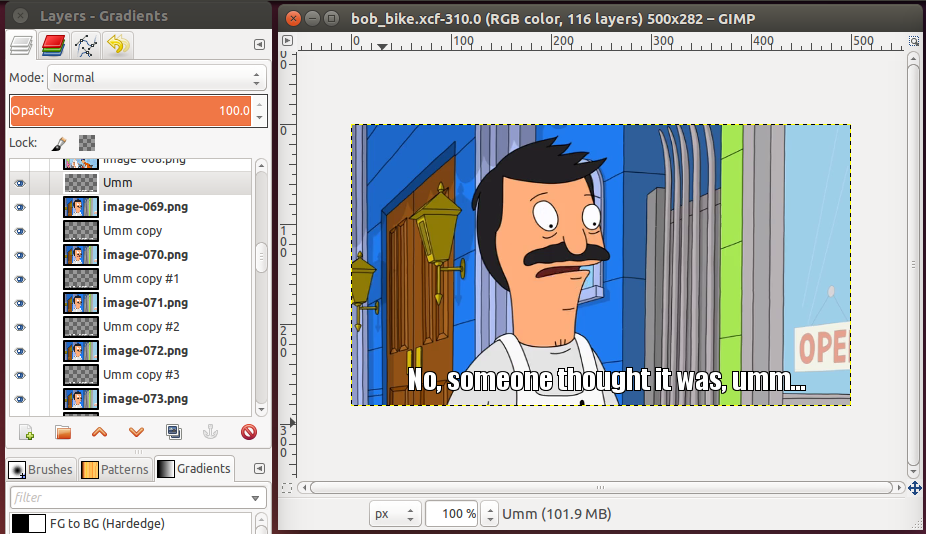
When you like the look and placement of your text, it’s time to copy it onto all the frames. This can be tedious, so I recommend using keyboard shortcuts. Layer → Duplicate Layer is Shift+Ctrl+D. Duplicate your text and space it in between the next frame, repeat.
Once all the frames that should have text have a text layer above them, it’s time to merge. There’s no default keyboard shortcut for Layer → Merge Down so I recommend creating one, I used Shift+Ctrl+M. Merge each text layer down to the frame below, making sure everything is set to visible or merging will just throw away the invisible layer(s).
Once all your frames have the appropriate text, it’s time to experiment…
Convert & Export
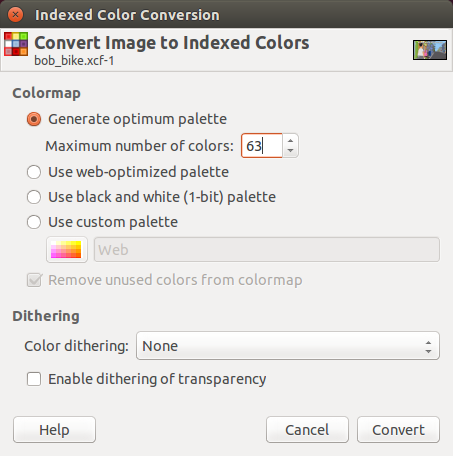
Change the Image → Mode from RBG to Indexed… Select a low palette count like 127, or 63 for animations. This is where you can really help reduce the final image size in bytes. The lower you find acceptable, the smaller the image. If you can get the final size under 1MB and you’re doing good, under 500KB and you’re getting better, but you won’t know until the last step, so you may have “undo” your way back to the RGB image and re-adjust.
If your image layers go from low to high, top to bottom (respectively), now is the time to do Layer → Stack → Reverse Layer Order otherwise your gif will run in reverse!
The Gimp Animation Package will allow you to now choose Filters → Animation → Optimize (for GIF). This will remove everything except for the “moving parts” to make the export small(ish). It will save changes as a new image.
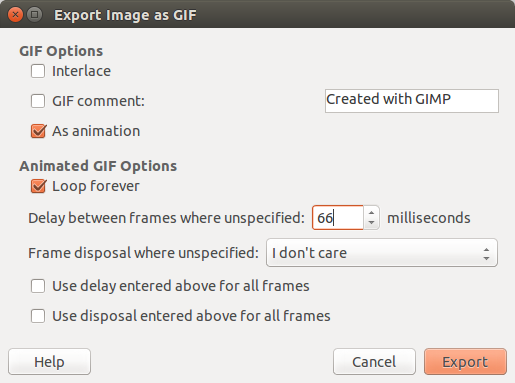
Last Export As… and give the export file a .gif extension.
Check:
- As animation
- Loop forever
Set Delay between frames to 1000 / n where n = number of frames per second you selected when using avconv.
Press Export. Enjoy!
