I started my voice over IP (VOIP) installation with the pre-configured for raspberry pi – “Incredible PBX” software – care of the Nerd Vittles crew.
For phones I have a Linksys RTP300 analog telephone adapter (ATA) that I purchased at a local thrift store. It’s a discontinued product, but they’re easy to find for cheap on eBay.
The one I purchased had firmware that was coded to only work with Vonage. Years ago I was able to hack it and unlock it. https://thegeekoftheworld.com/unlock-rtp300/
I hacked mine the old-fashioned way (circa 2012) by editing the bin file using emacs ‘hexl-mode’ http://www.dslreports.com/forum/r21133882-
Since I did this years ago, some of the instructions and firmware files are getting hard to find, but if you need instructions – let me know in the comments and I’ll try to help as best I can.
Getting into the RTP-300 admin panel
It had been at least a year since I’ve logged into the admin interface on my RTP-300. Luckily, there are some fun things you can do to help figure out how to get in. If you have a phone hooked up to it and it’s powered on, you can use the Interactive Voice Response (IVR) to get information. This article from Cisco (who purchased Linksys) has many of the available codes.
Pick up the phone and dial #### to get into the IVR menu. Then press 110# and the nice lady will read back to you the IP of your ATA.
Good info, but it wasn’t running the web interface on port 80, so I had to figure that out. The IVR option for port wasn’t working, so I did an nmap scan of all ports 1-65535 from the command line – you could use the raspberry pi or any other computer on the same network as your RTP-300:
$ nmap 172.16.0.11 -Pn
Starting Nmap 7.60 ( https://nmap.org ) at 2020-04-04 18:02 CDT
Nmap scan report for voip.lan (172.16.0.11)
Host is up (0.0048s latency).
Not shown: 999 filtered ports
PORT STATE SERVICE
8080/tcp open http-proxy
There it is, port 8080. I made sure to add the address (with port) in my password manager. Then I had to use Firefox to finally connect to the ATA admin because Chrome wouldn’t complete the connection – likely because the RTP300 doesn’t have support for HTTPS. ¯_(ツ)_/¯
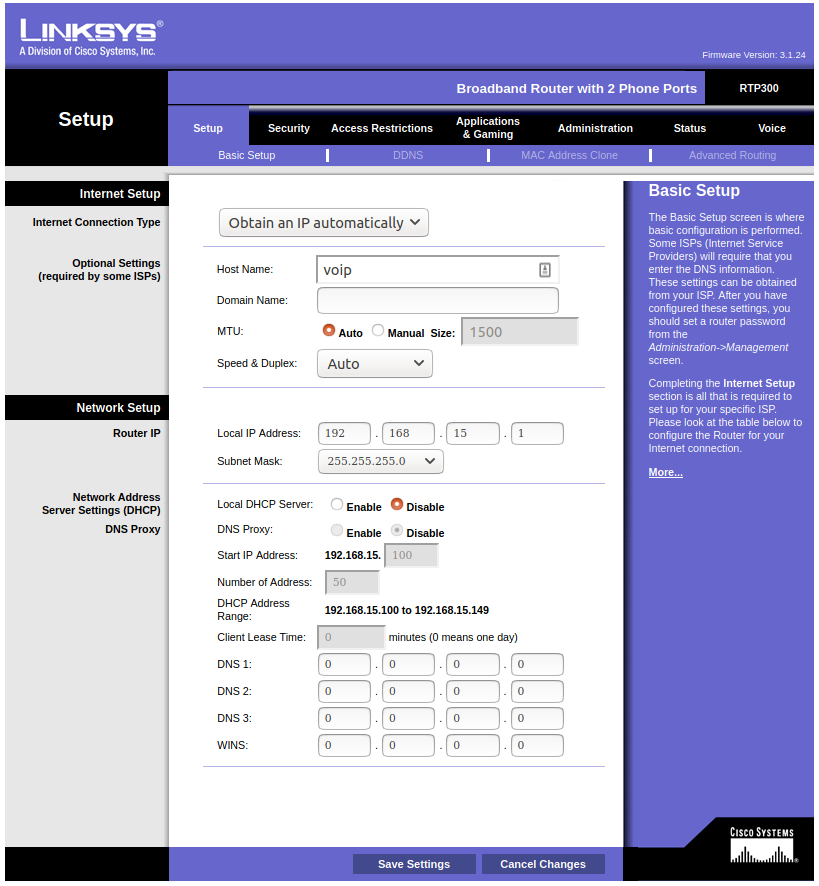
But we’re in! We’ll first do some configuration in Asterisk and then come back to the RTP300 configuration.
Connecting the RTP-300 to IncrediblePBX
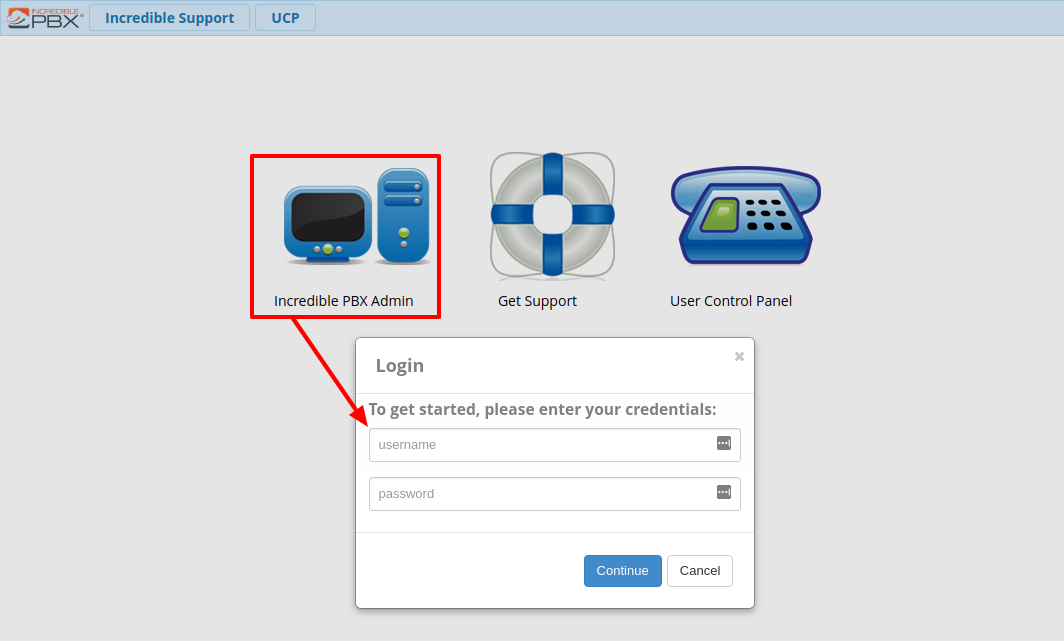
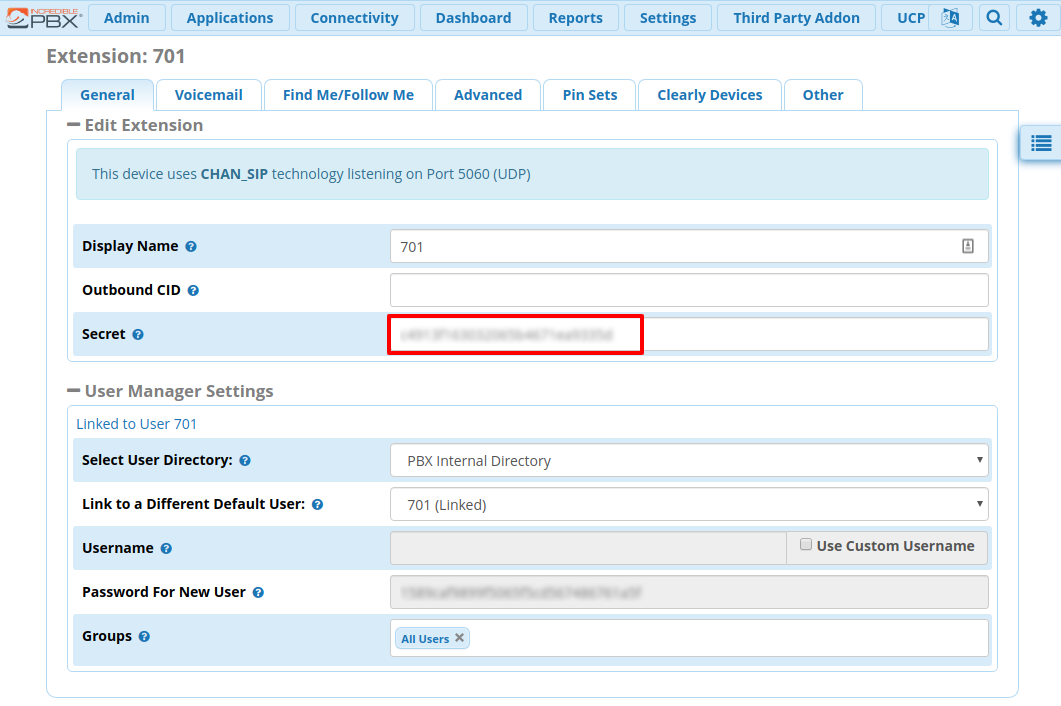
IncrediblePBX comes with some SIP extensions pre-configured, so I roll with the defaults. I use extensions 701 and 702 for the two lines on my RTP-300. To navigate to them in IncrediblePBX, visit your IncredbilePBX address in your browser. Then use the “Incredible PBX Admin” credentials you set up when you initially installed IncrediblPBX.
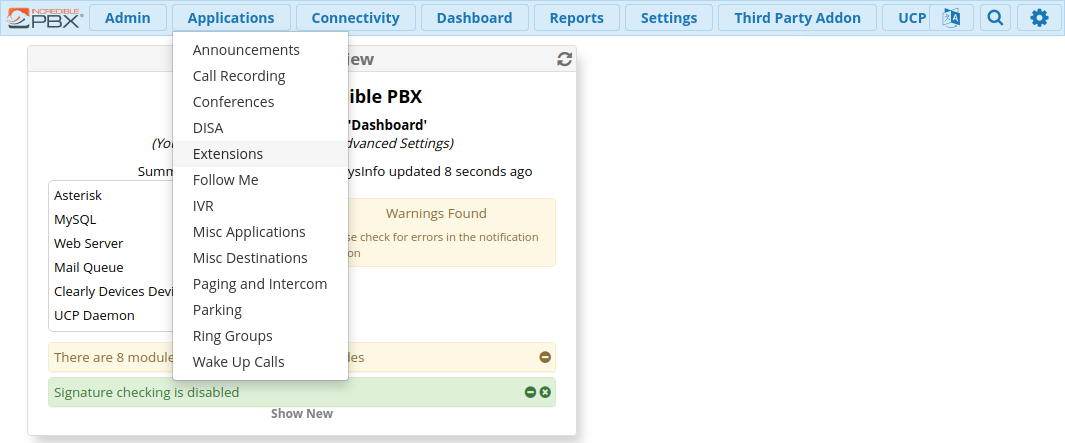
Once you’re logged in to the IncrediblePBX/Asterisk web admin, navigate to Extensions (under Applications).
There you can see there are a few extensions pre-configured for you, including 701 & 702, which will work great with the RTP-300.
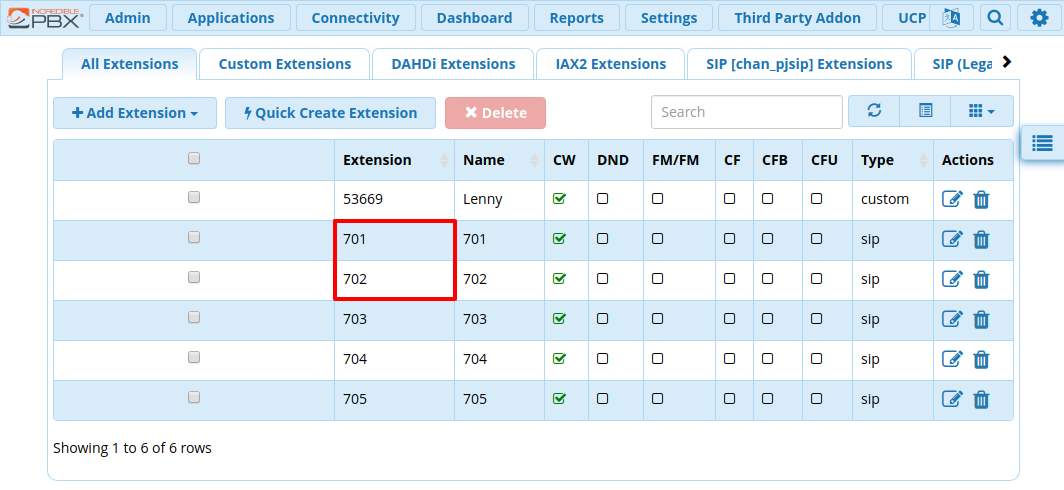
Click the Edit button to the right (paper/pencil icon) to edit and view more information about that extension. You’ll need to do two things in here. First, copy the “Secret” key for each extension.
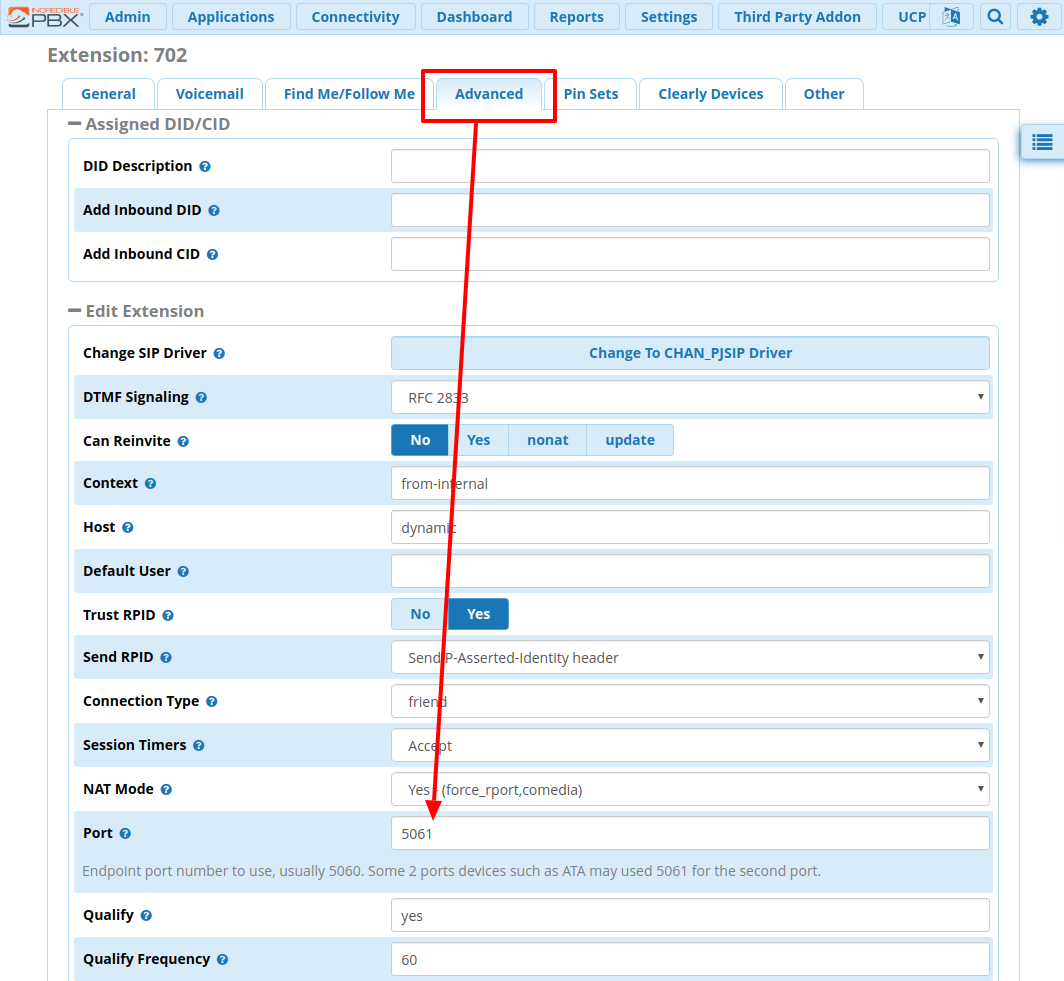
Second, for extension 702, also change the SIP port to 5061. There’s a note in there about how 5061 is sometimes used for “Line 2” on ATAs – and that’s exactly the case for the RTP-300.
RTP-300 Admin Navigation
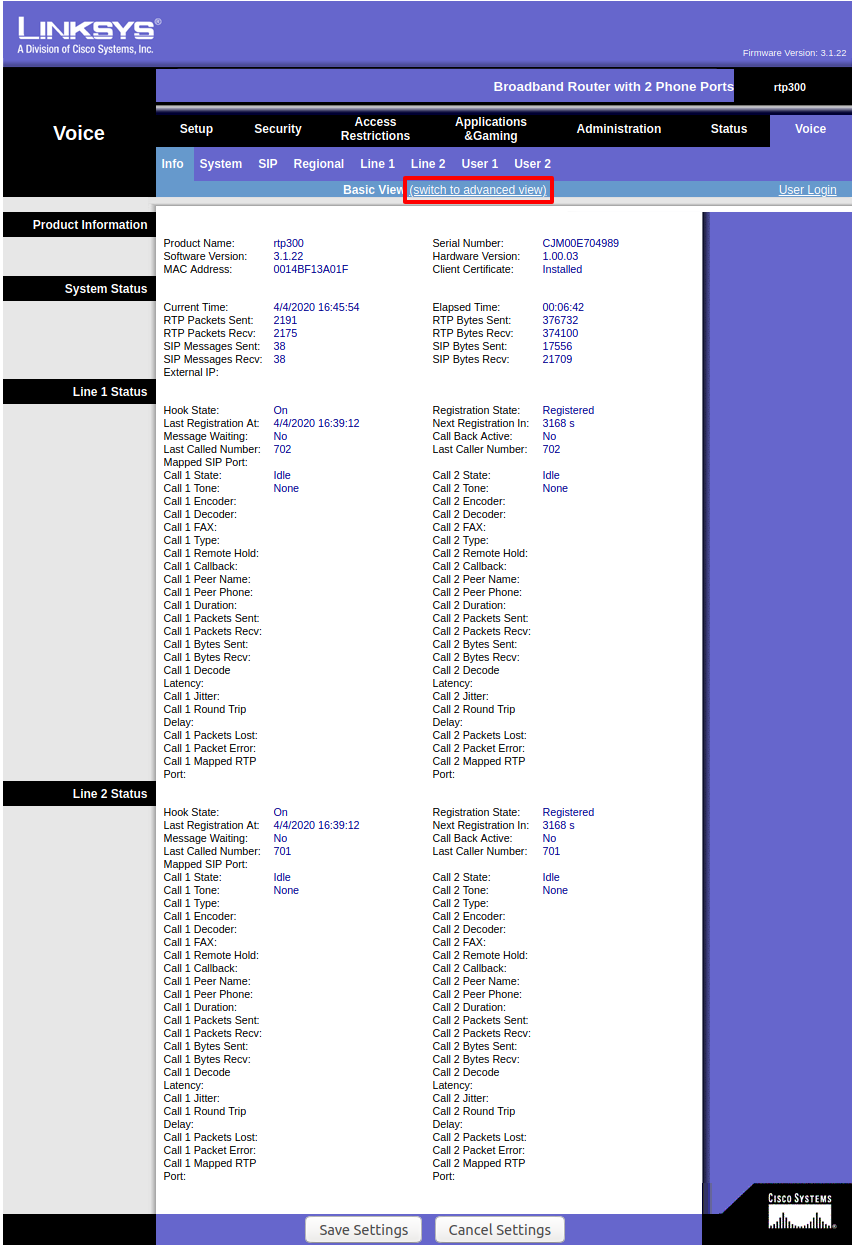
The RTP-300 admin interface is little weird. Once you’re logged in you’ll want to navigate to the voice menu item on the far right.

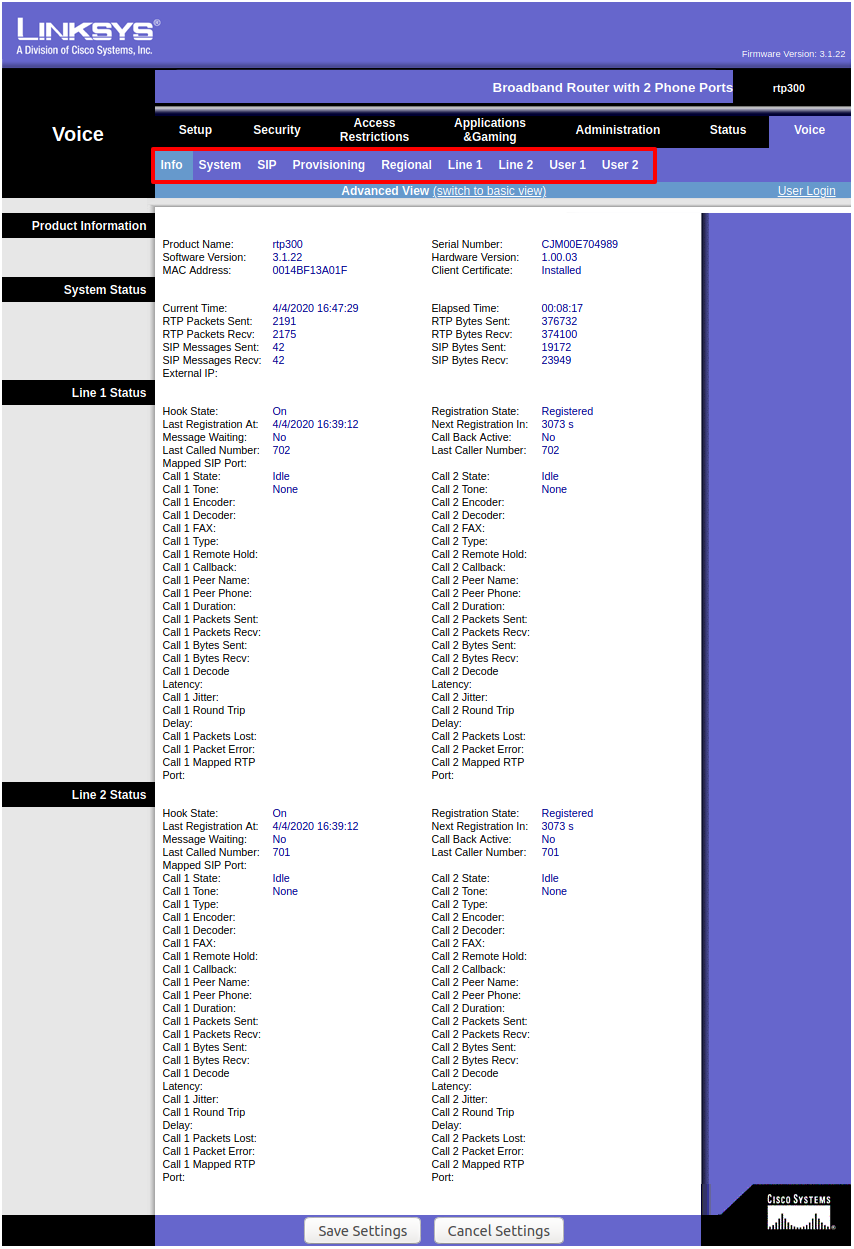
Click the “Admin Login” link to switch from an informational view to one where we can actually make changes. Then click “switch to advanced view”.
Advanced view will show all of the extensions and settings.
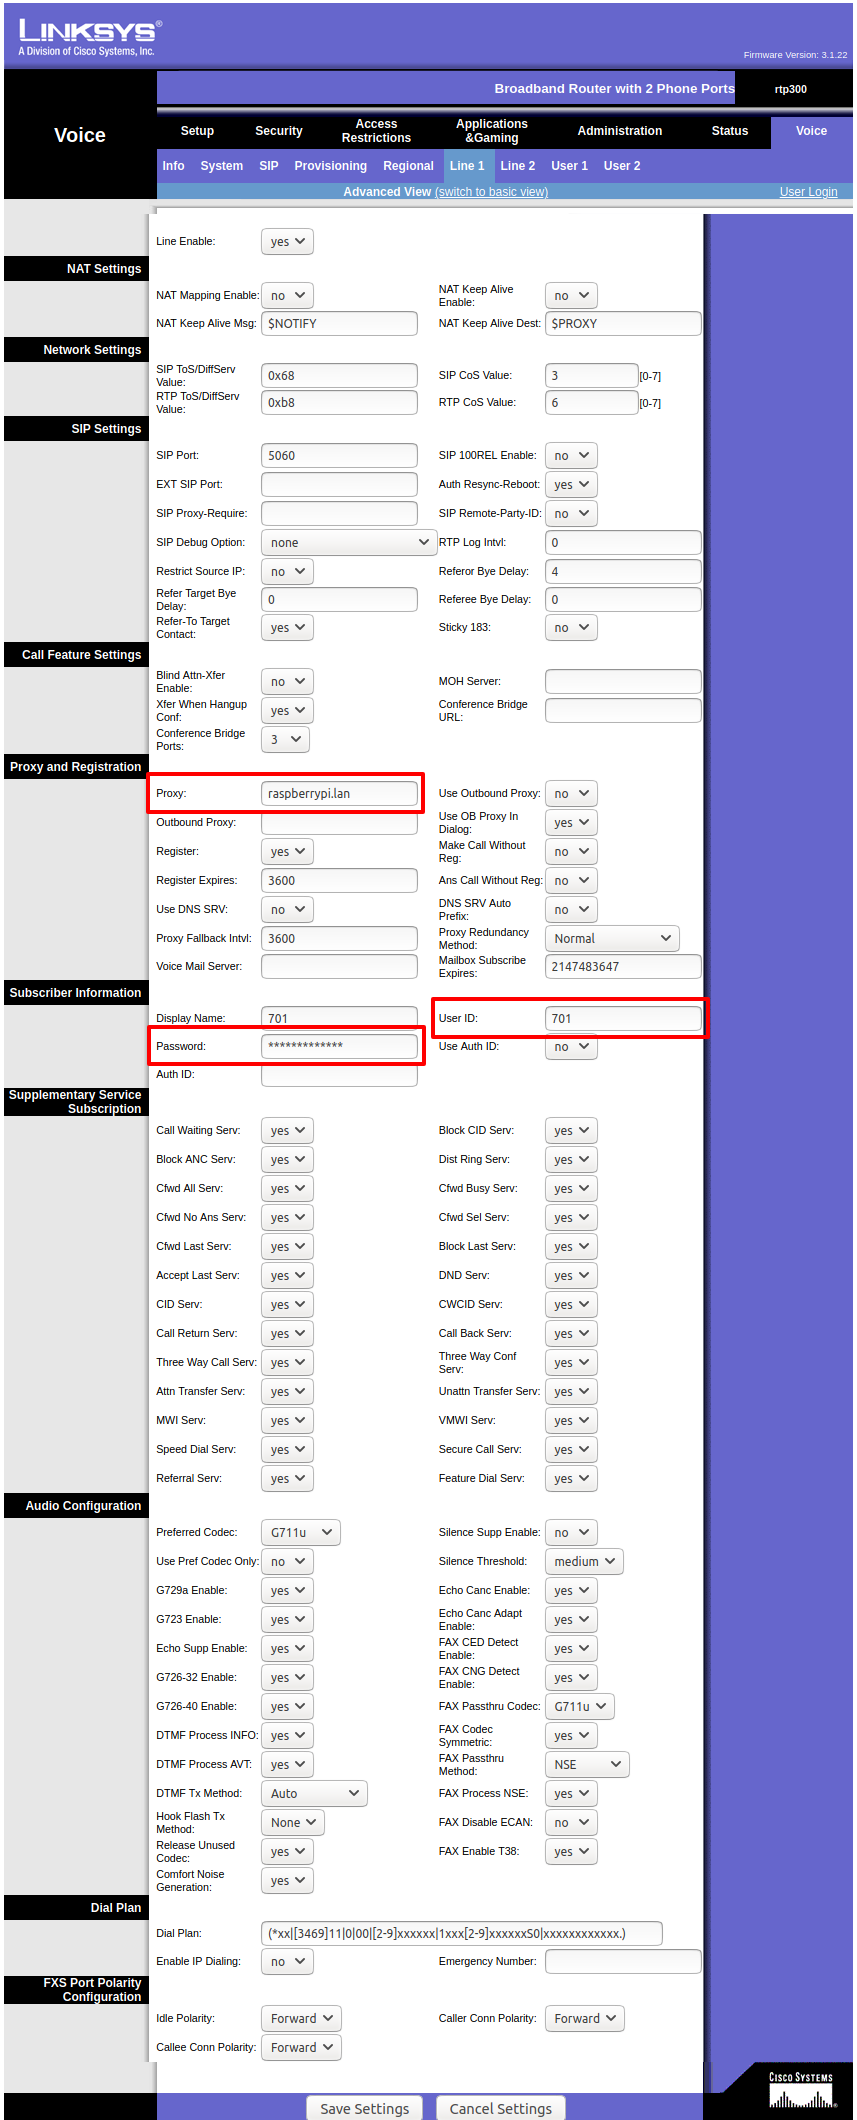
RTP-300 Extension Configuration for IncrediblePBX
Configuring phone lines 1 & 2 is fairly simple despite the overwhelming number of settings fields on the admin. We just need to enter three values:
- The IP address or domain name of our IncrediblePBX server as the SIP “Proxy”
This is the SIP server the ATA is going to register this line with. - The Incredible PBX extension number as the “User ID”
- The extension secret as the “Password”
Test!
Once you have these settings saved, the ATA should now register itself with Asterisk on your IncrediblePBX system. The best way to know if it worked is to pick up the receiver one of your lines – you should hear a dial tone 📞
If you’ve got a dial-tone and a phone on each port, you should be able to dial each extension with 701# or 702#. The # isn’t strictly necessary, it just instructs the ATA that you’re done dialing so it can stop waiting for further input. If you’re feeling fancy you could add a 70X entry to the dialplan on the line configuration of the ATA.
If that’s working, try one of the pre-configured Nerdvittles custom extensions. You can see them in the IncrediblePBX/Asterisk web admin by going to “Admin” and “Custom Extensions.”
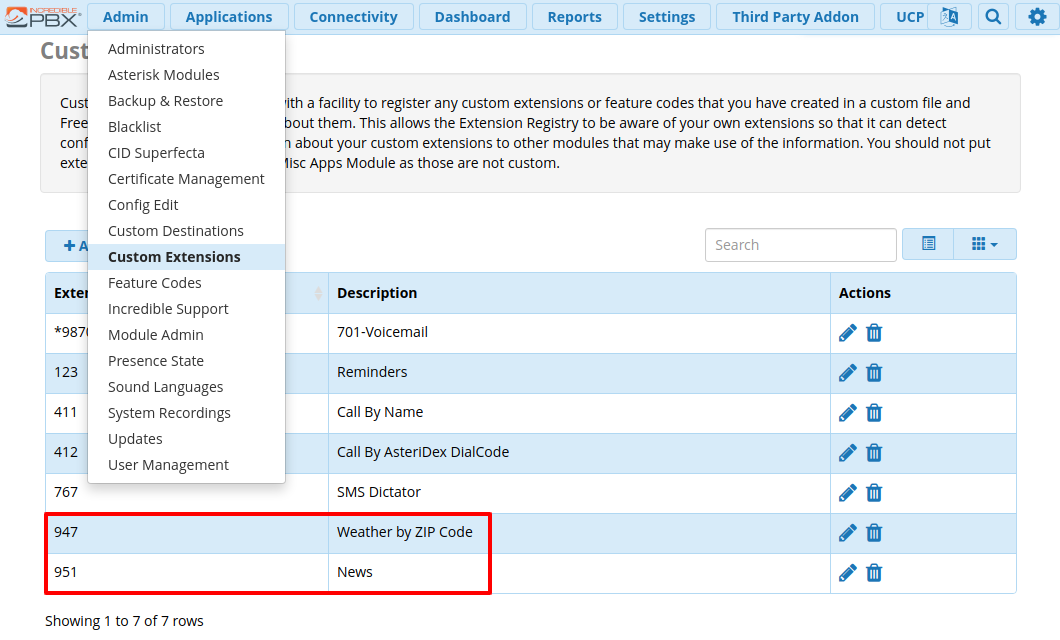
Try 947# for weather by zip code ⛈️ or 951# for the latest news 📰
Pingback: Skyetel Local Number VOIP Setup - Justin Foell